Using a Master page in a Pinegrow project makes building quicker and keeps your design unified.
In this tutorial we will be looking at how the Pinegrow web editor can make multi-page projects a little easier. In a past tutorial we looked at how Components could be used to insure that specific elements, such as headers and footers, maintained a specific design and were easily updatable across multiple pages. This is a powerful tool, so you may be asking, “Why do we need Master pages?”
Like Components, Master pages allow you to have selectively editable areas across multiple pages in your project. Further, like Components, editing the Master page will cause all of the pages using that Master in your project to update. Unlike components, however, this means any changes, including adding new stylesheets, or linking in a new Google font will update across multiple pages. Not only does it reduce the amount of effort needed to make project-wide changes, it also reduces the workload for creating new pages. Pinegrow does all the work of adding all the header information and other script links for you!
Let’s get started!
Download the project
Download the project used in this tutorial and follow along. Unzip the archive and open the folder in Pinegrow Web Editor with Open project.
Watch the video
Prefer to read? Scroll past the video.
This tutorial is available in video and textual form. Watch the video, or continue reading if you prefer. Of course, you can also do both!
Planning your pages
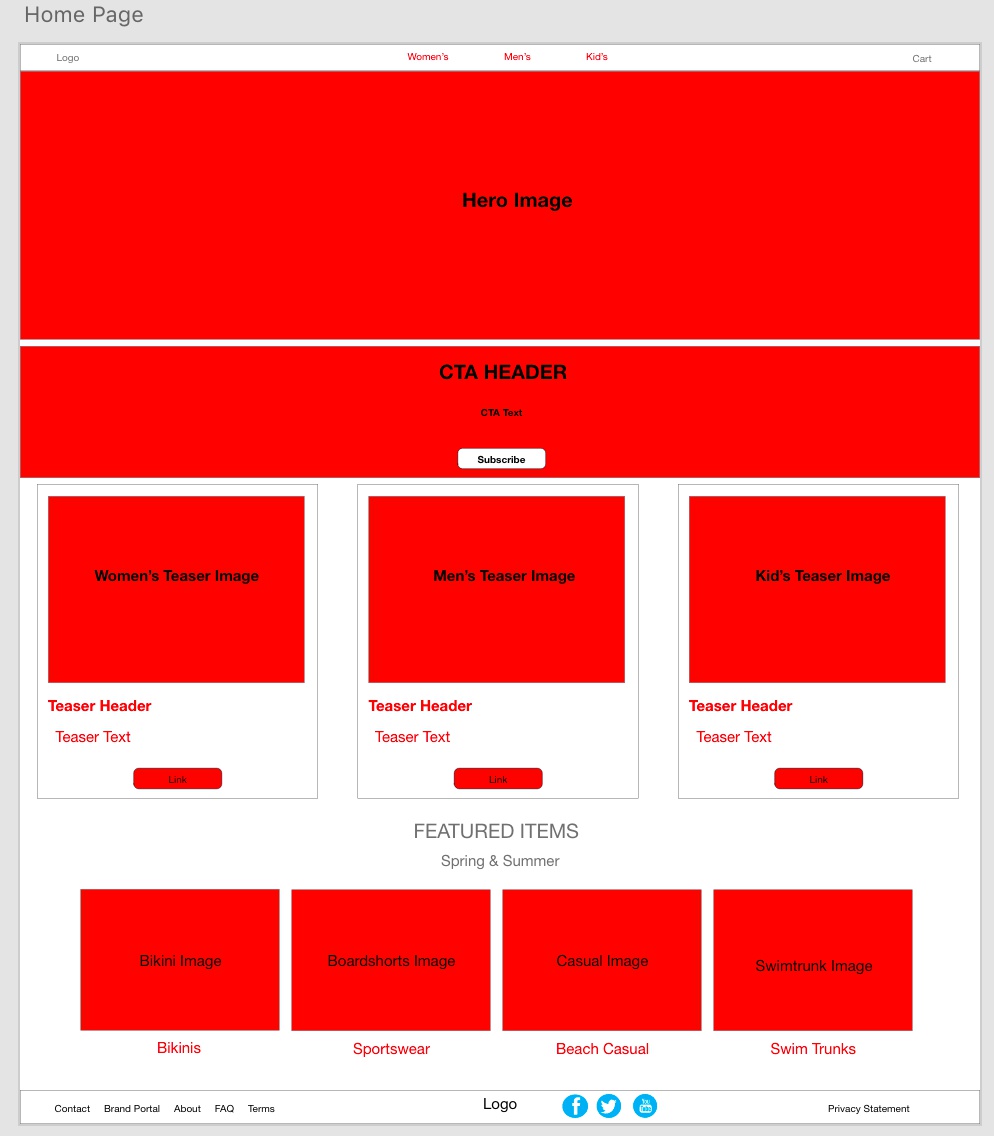
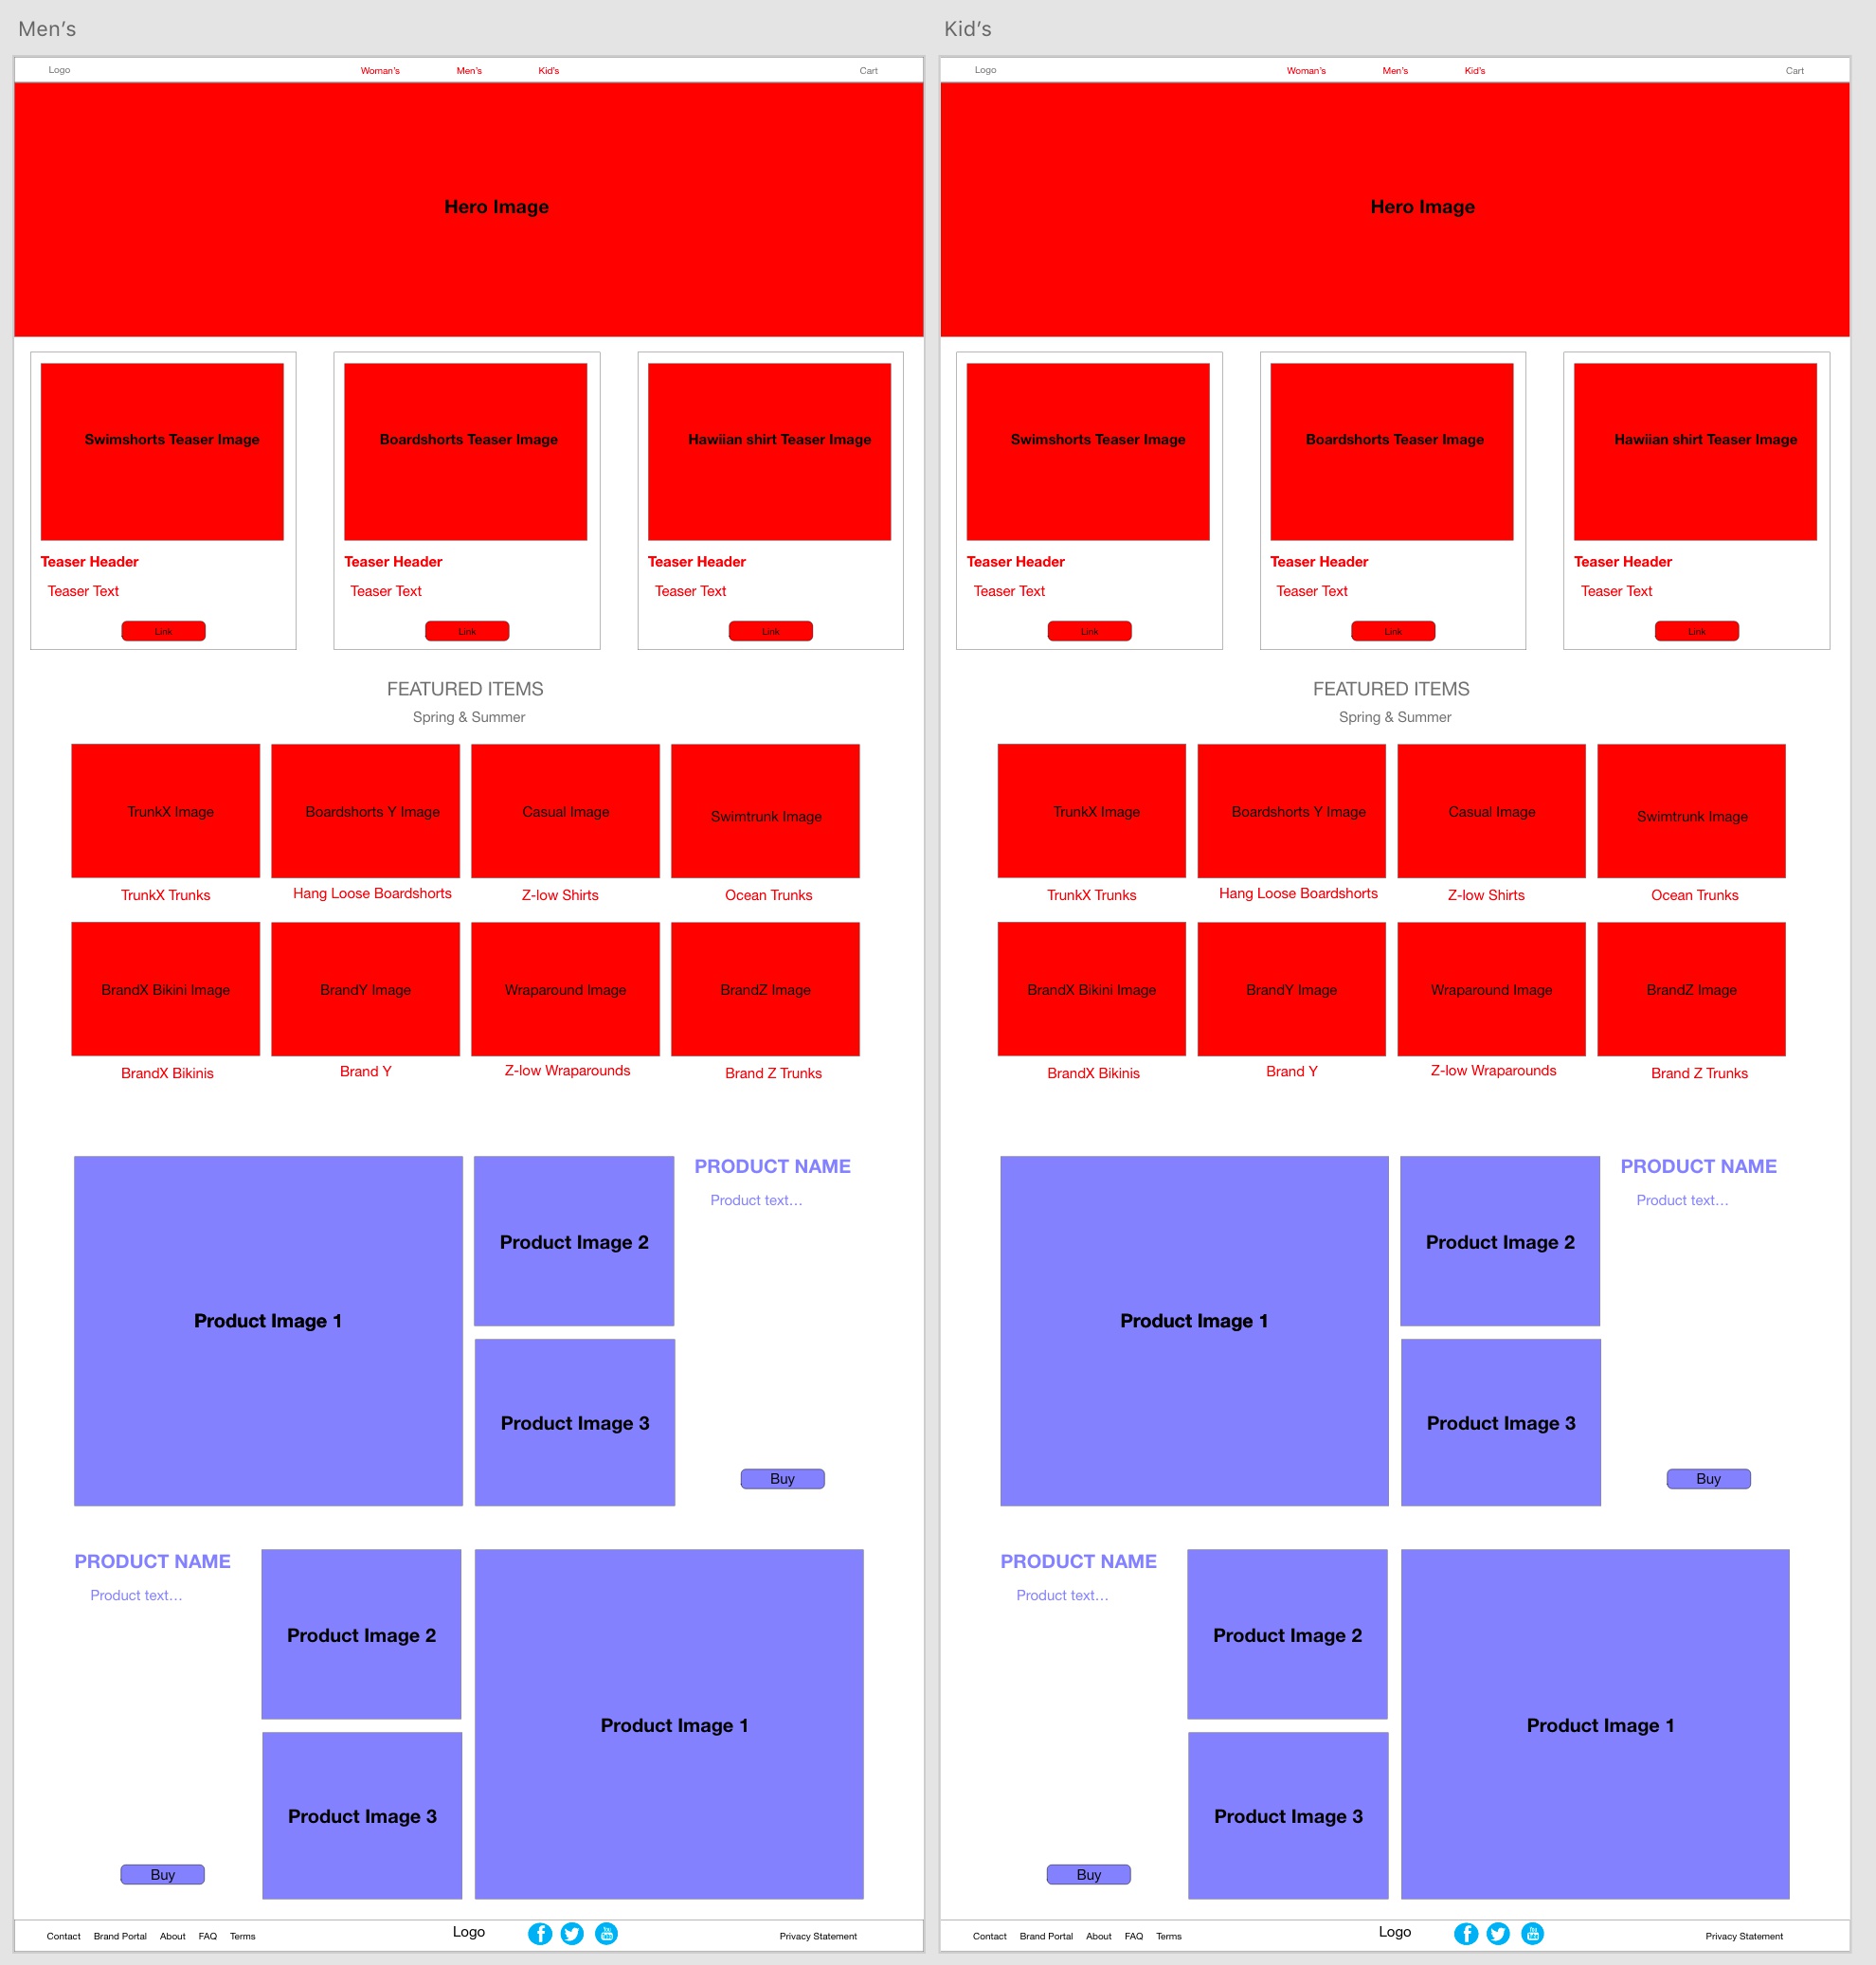
When working with Master pages it is worthwhile to mock your pages up to evaluate what will be carried over to multiple pages and needs to be editable, and what is unique to each page. I’ve put together a very rough wireframe of the homepage for this tutorial. I’ve colored any element that needs to be editable in the Child pages in red. Let’s take a look at what one of the interior pages looks like in wireframe.
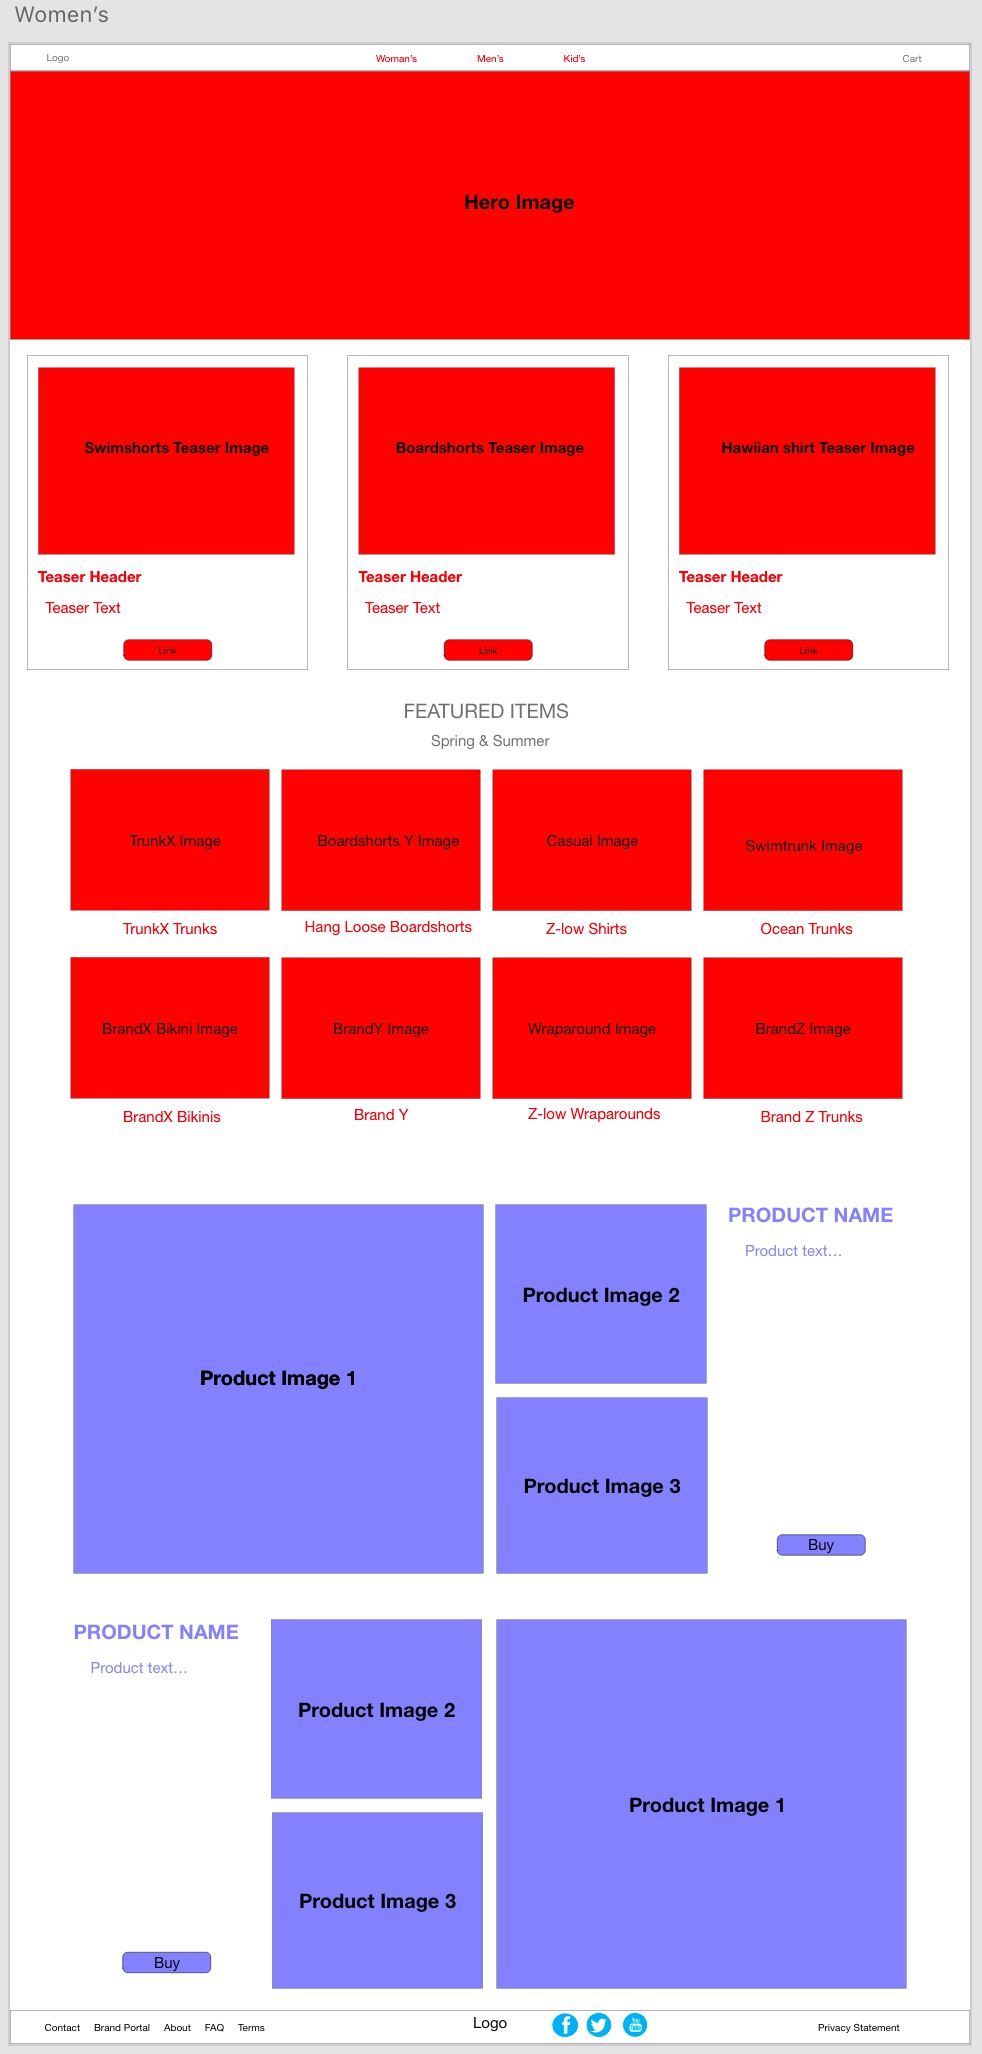
Comparing the pages we can see that they share the navbar and footer, plus a hero image, a block of large cards, and small cards consisting of images and a product name. The child page also contains two unique blocks for individual products.
I’ve already put together a Bootstrap project that roughly corresponds to the wireframe that we can convert to a Master page. You can download it here and follow along.
Let’s explore the page a little. This will give us a chance to review Components. Master pages operate somewhat like Components, with specific areas that can be edited and others that are locked to preserve the page design.
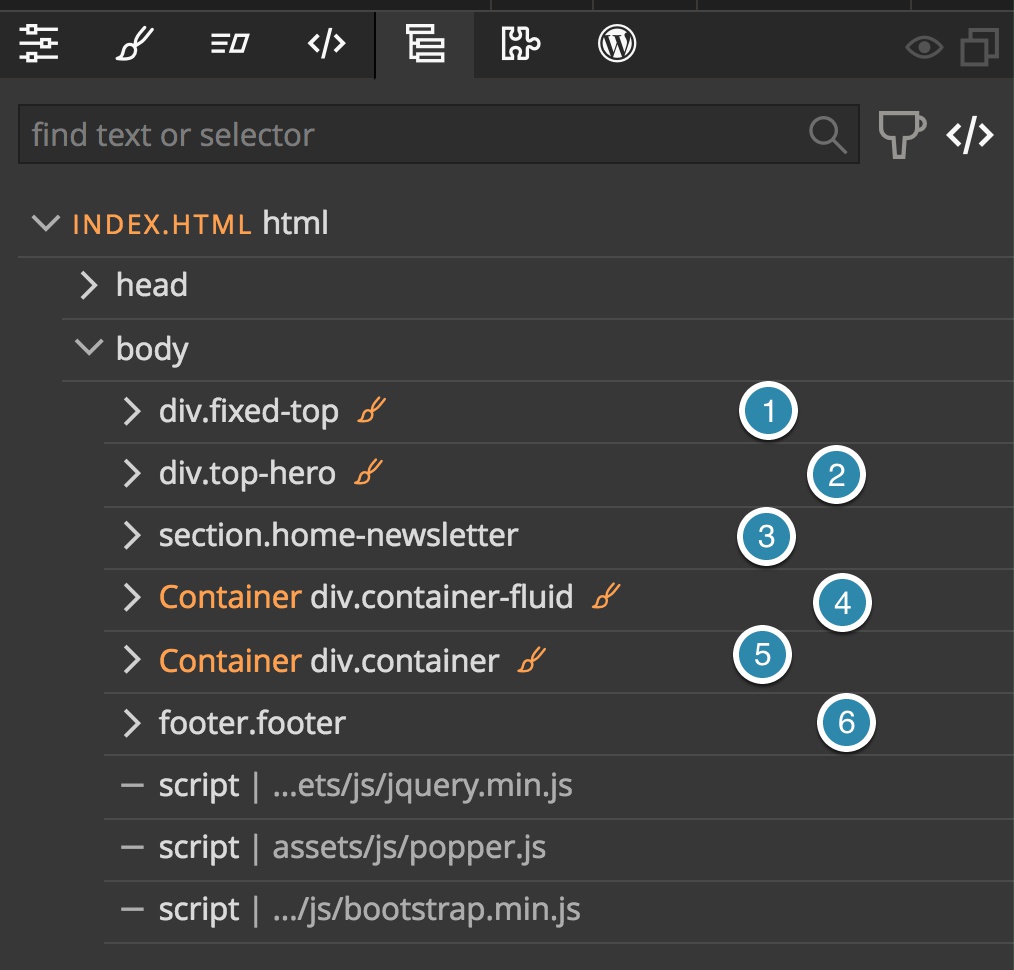
There are six sections to the page. Working from the top of the page down, first is the navigation section. We are going to leave this mostly unchanged on each page. The only thing we will need to change is adding a class of active to the menu link for the current page.
Next down in the large hero image with text. For each page we will want to change the image and the text across the image.
The third section down is a call-to-action for people to subscribe to the site newsletter. We are going to choose to exclude this from any interior pages
Next is a section of large cards. On the home page, these cards link to the major product categories of the site. On the interior pages these link to major subcategories, like bikinis for women. These cards are repetitive, so I’ve defined the first of the three as a Component with editable areas.

The fifth section is a series of small cards that provide links to all of the product categories. Once again, I’ve defined the first of these cards as a Component with editable areas and then used that Component for the other three cards. We will come back to how this can help us later in the tutorial.
Finally, we have the footer. This section doesn’t have any areas that will be modifiable on the child pages.
Okay, let’s dig into Pinegrow and see how to make this a Master page!
Designating a Master page

The settings for the Master page are contained in the Action panel, just like the component settings. To make a page a Master page, simply open the Action panel and select the ‘Master’ setting. Then from within the resulting settings panel click ‘Set As Master Page’.

Next, click on the orange circle arrows next to the ‘Components’ menu item in the top bar.
As we covered in a previous tutorial, the settings in the right hand column allow you to define HTML elements as custom Components. The ‘Editable Areas’ section below the ‘Master Pages’ section are used for both Master pages and Components.
Now that we have designated this page as a Master page, let’s walk through the Action settings for each of the sections and elements on the page.
Looking back at the wireframe, the first thing we have to make editable is the menu links. We want to be able to add a new class of ‘active’ to the link if we are on that particular page.
Making classes editable
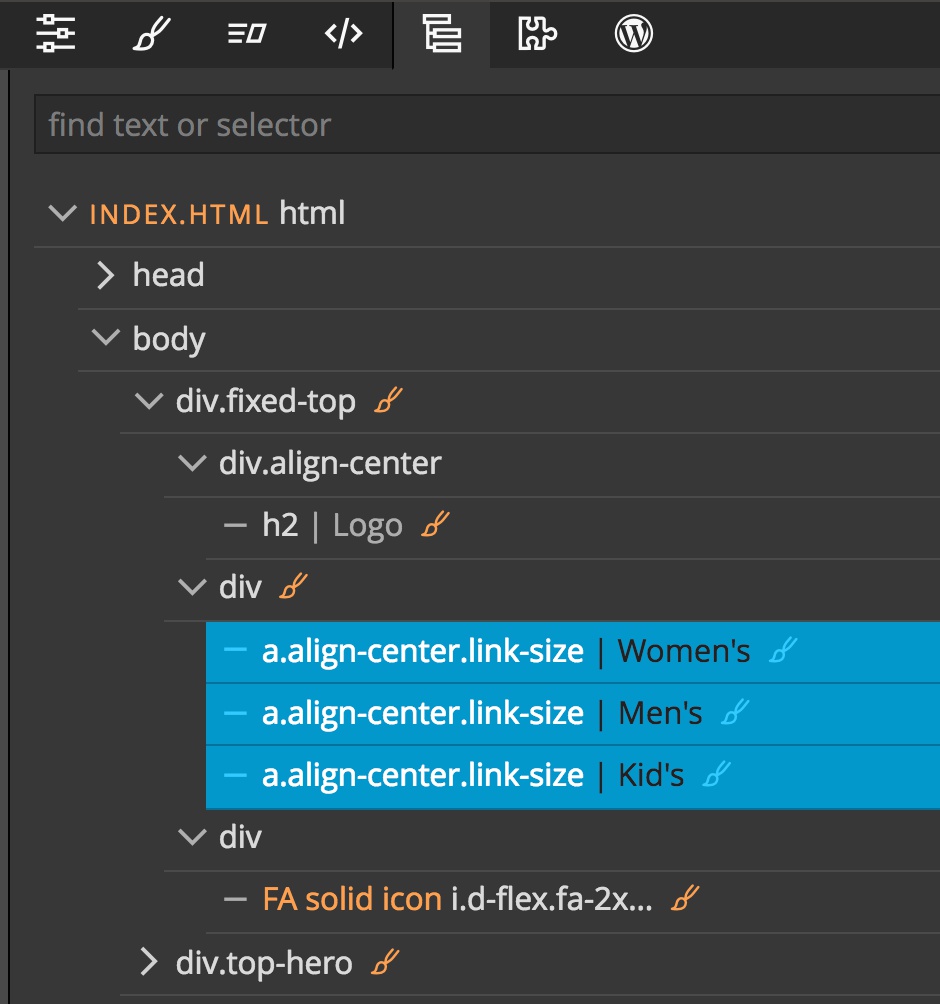
Select all three of the menu links either in the Page View, or in the Tree panel. Next, navigate to the Actions panel. From the Editable Areas section select the top ‘Editable’ selection. This will open up a form with a set of inputs.

Just as with Components, we need to give our editable areas a field Id. Unlike Components where we can load them into multiple projects, it is not as critical here that our Ids are completely unique since they will only be used in this project. However, it is generally a good practice to prefix our Ids. I’m adding tut. to each Id.
For each of these menu items we want to be able to add a class of active. Just like with Components, to achieve this type active into the ‘Classes’ input field. If there were multiple classes to select from we would either separate each with commas in this input field, or hit return before entering the next.
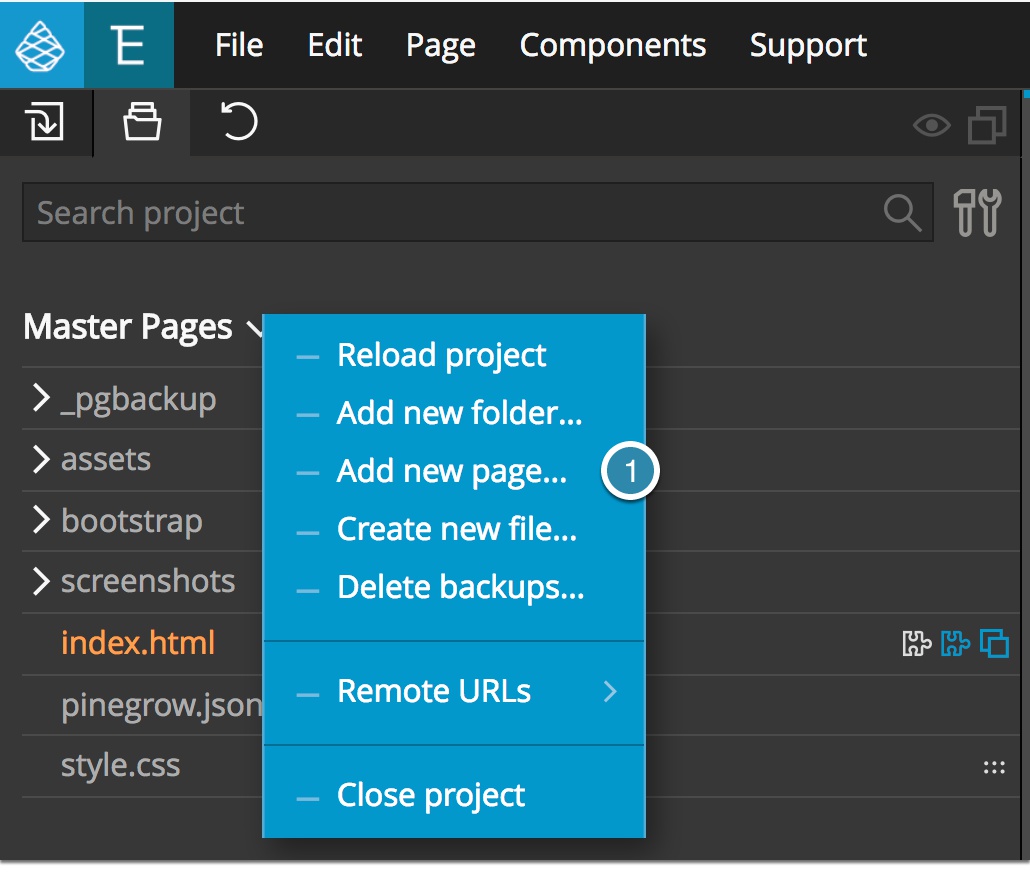
Let’s go ahead and create a new child page based on this Master to see our editable areas. First, save the page, and then under the ‘Components’ menu item select ‘Reload components from project’. Finally, from the Project panel click on the down caret next to the project title and select ‘Add new page…’.
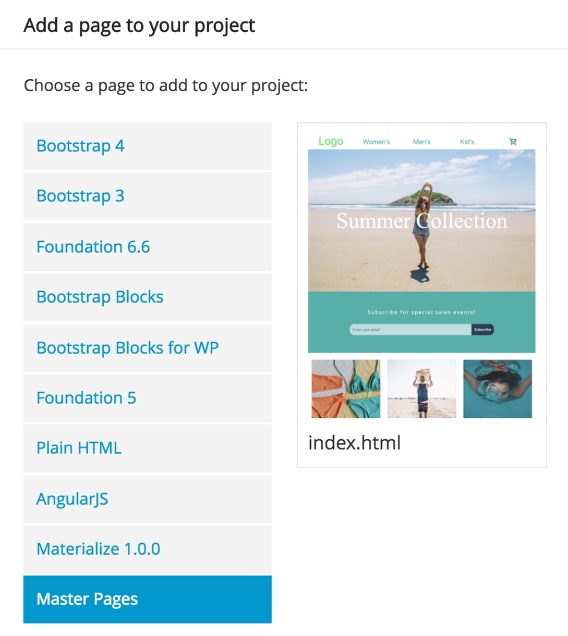
From the resulting pop-up select the bottom framework, which will have the same name as our project, and the ‘index.html’ template. You will then be asked to name the new page – I’m calling it ‘womens.html’.
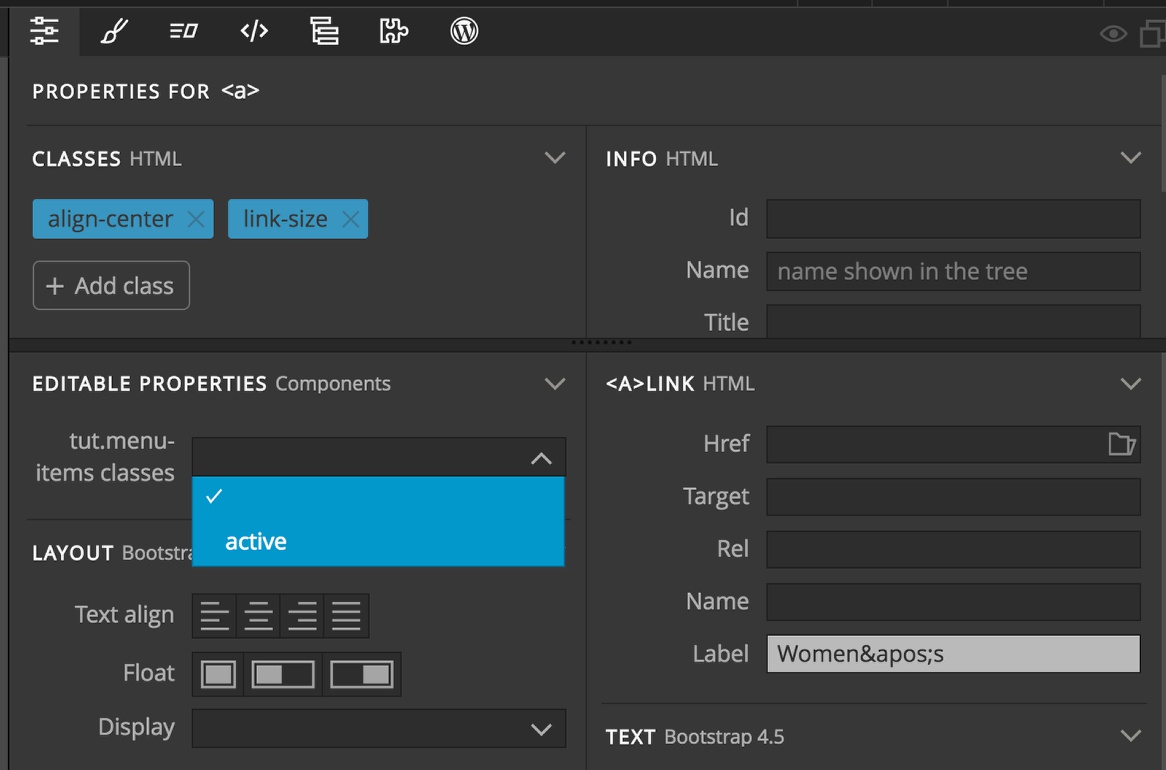
Your new page should look identical to the original ‘index.html’ page. If you select the “Women’s” menu link either in the Page View or in the Tree panel and then select the ‘Properties’ panel you will see a new control under a section named ‘Editable Properties’. This control, ‘tut.menu-items classes’, has a dropdown control that allows you to toggle the ‘active’ class on and off the element.
Let’s navigate back to our Master page and add the rest of our editable areas.
Making background images editable
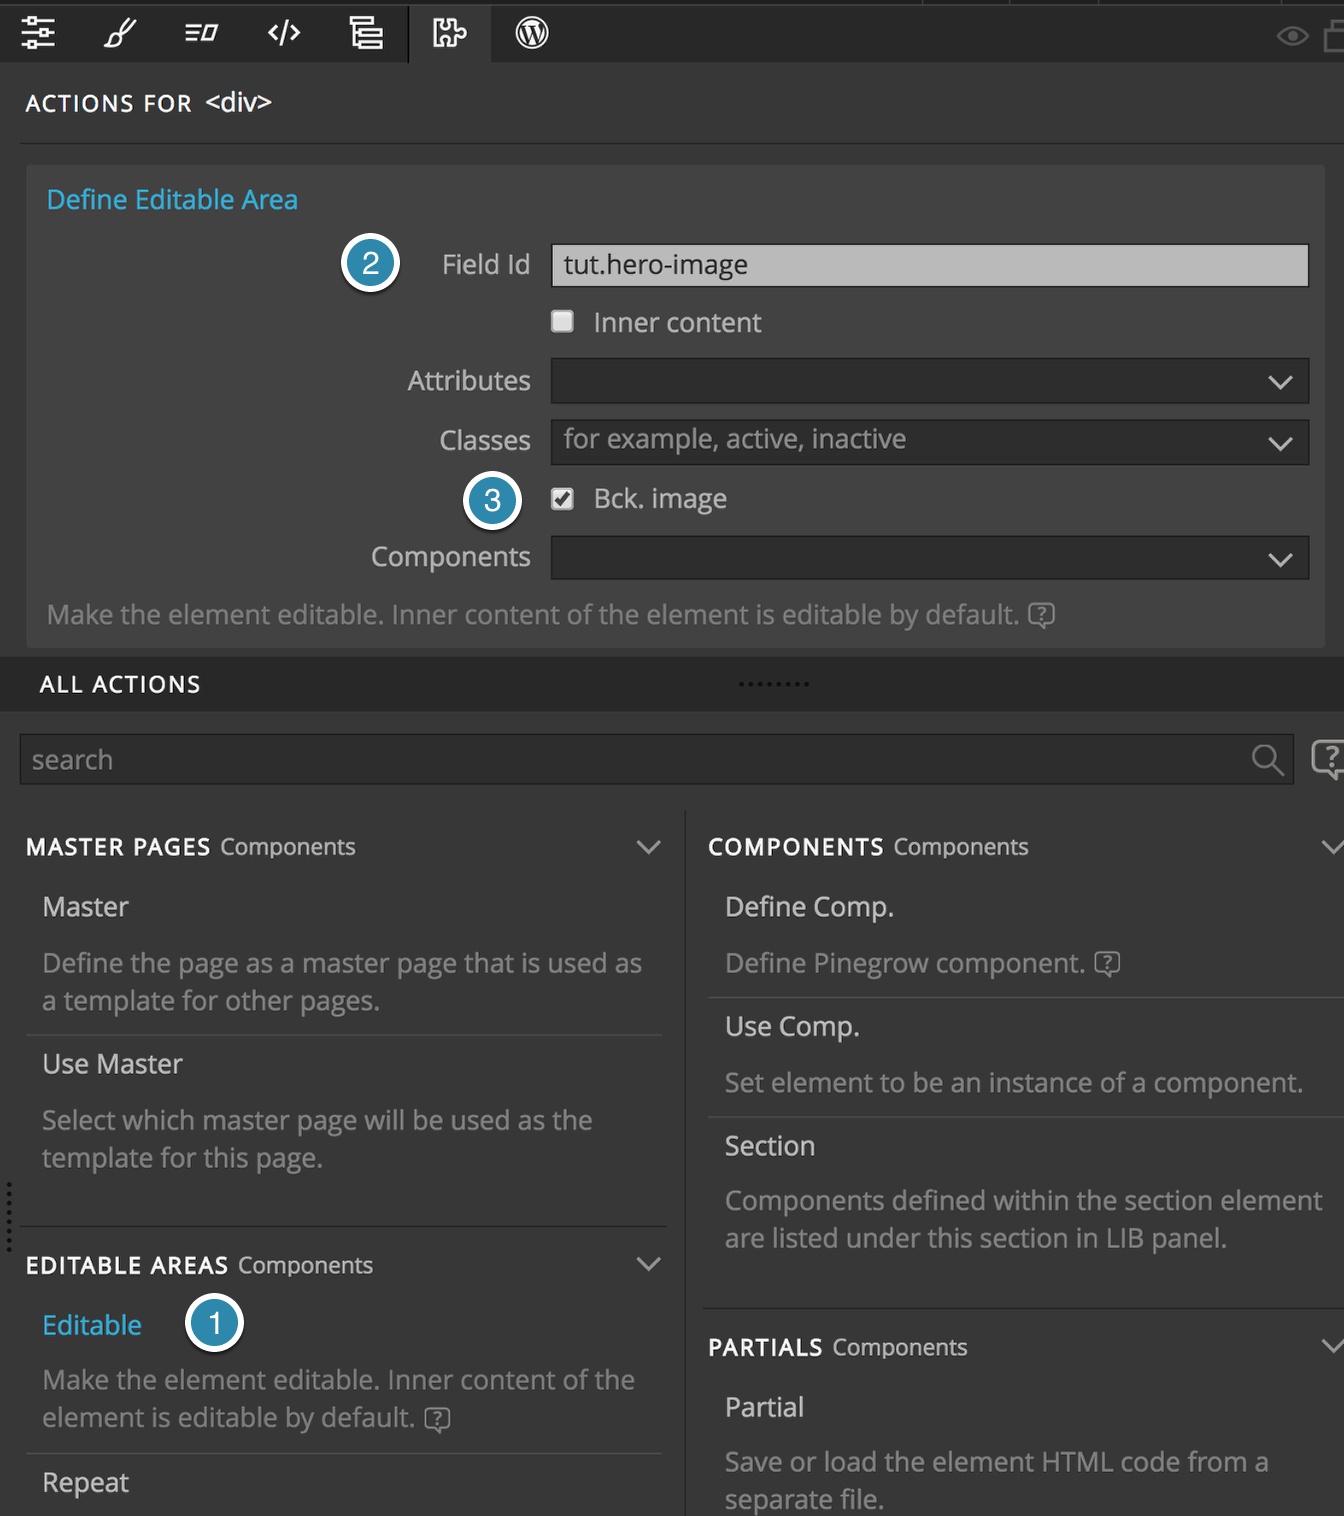
The hero image just under the navigation consists of a div with text inside another div with a background image. We want to be able to edit both the background image and the text. To edit the image, select the parent div. Next, navigate to the Actions panel and enter a Field Id. Again, I’ll prefix with tut.. In this case we want to be able to change the background image, so we should check the ‘Bck. image’ box.
Since the hero text is a div contained within the div we just made editable, we could leave the ‘Inner content’ box checked. This would allow for the inner div to be fully editable and would allow us to add any other elements into this div. This page and element are simple enough that it probably doesn’t make a difference, but I’m going to uncheck the box and make the inner div editable through a separate action.
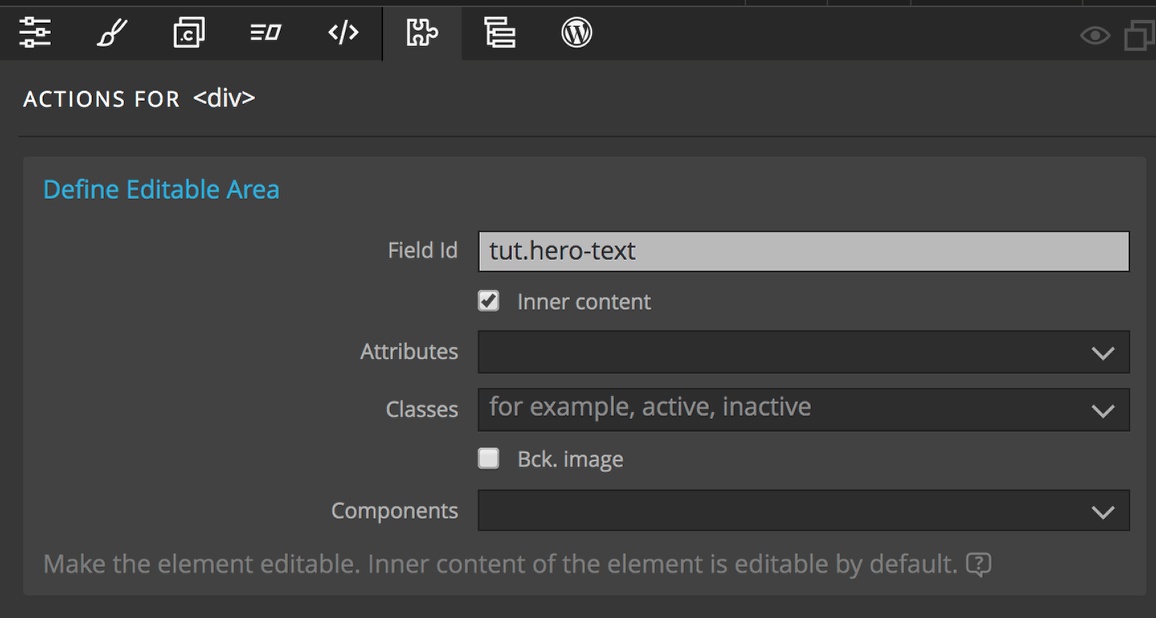
Select the text and navigate to the Actions panel. Click on ‘Editable’ and enter a field name. Since we want to enter the content, we don’t have to fill in any of the other settings fields. We want to leave the ‘Inner content’ checkbox ticked in this case.
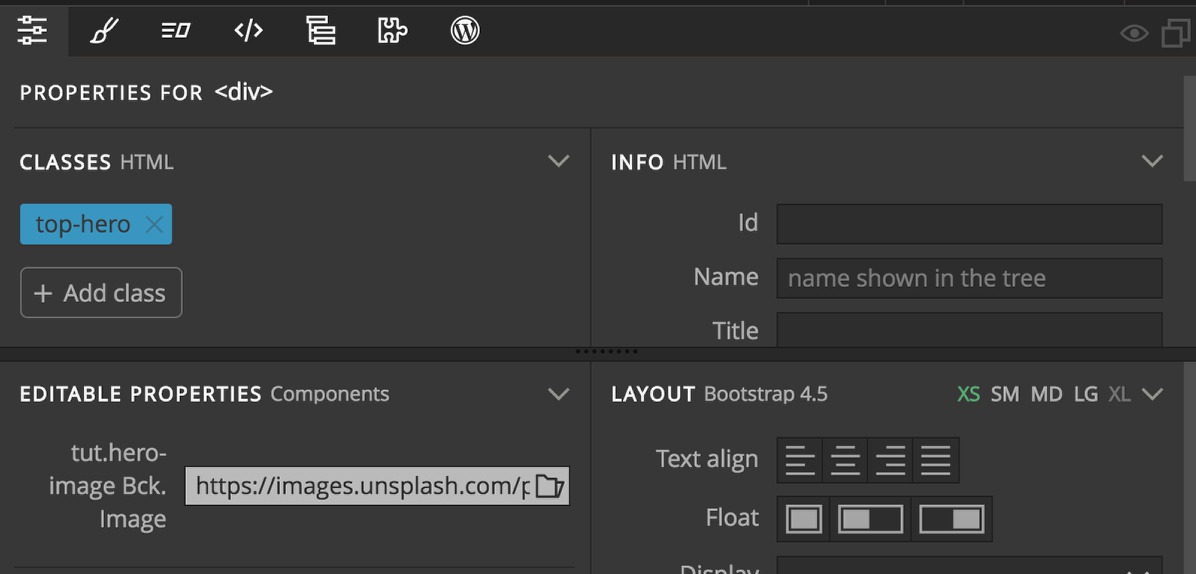
Navigating back to our ‘womens.html’ Child page, we can see our progress. Update our components by clicking on the orange arrows again. Then click on the hero image and open the Properties panel. We can now see a setting for changing our background image. We can either click on the folder to load in a local image, or we can use the built-in Pinegrow Unsplash image selector tool to change the image.
The text can be edited as you normally would or from the settings field in the Properties panel.
Making sections optional
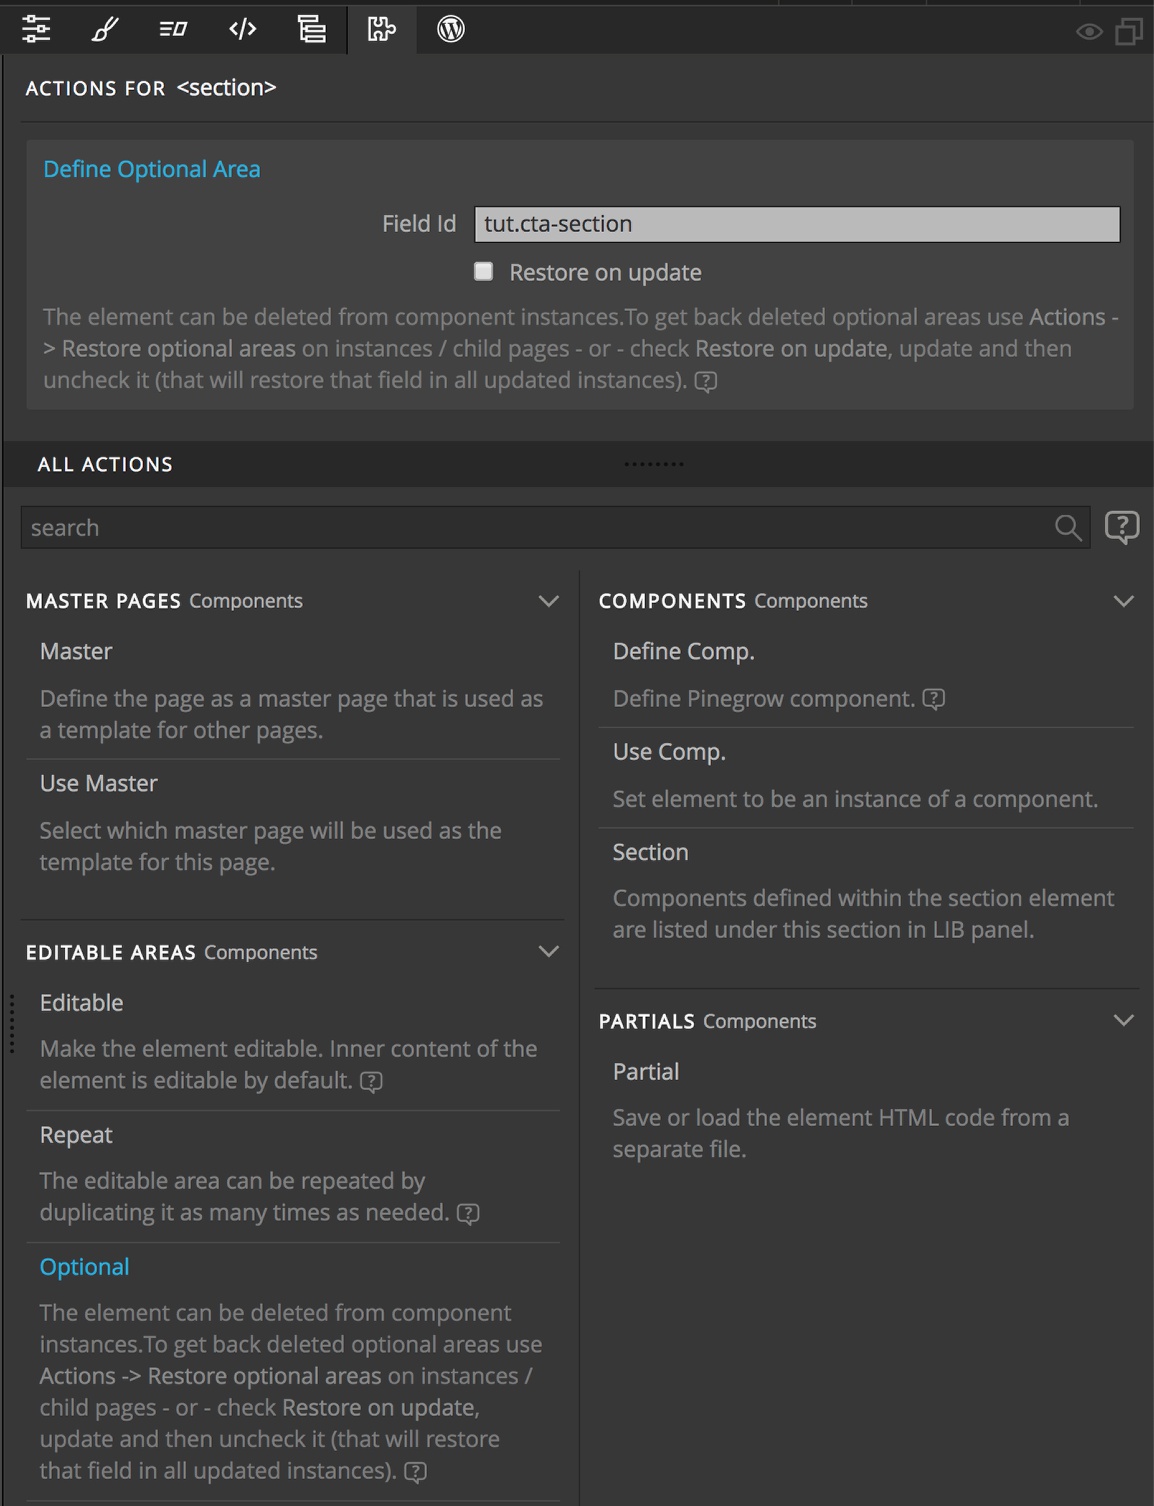
The next section on our page is the subscribe CTA component. I’ve elected not to present this section on the interior pages. In order to accomplish this, we can make it ‘optional’ from the Actions panel. Simply highlight the section in the Page View or Tree panel, open the Actions panel, and select ‘Optional’. Next, enter a Field Id – I’m adding tut.cta-section.
Next, click on the orange arrows to update our project and then open up the ‘womens.html’ interior page. Our CTA is gone! In this case, this is the desired behavior, but there are cases where we might want to display the CTA on some, but not all interior pages.
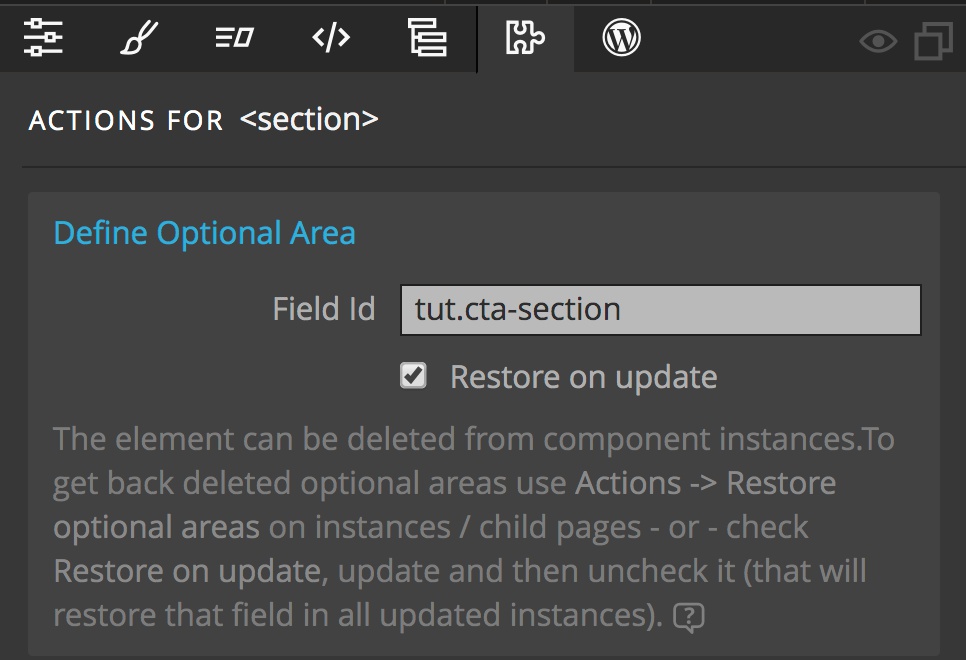
Because I’m deleting the whole section, the only way we can restore it is to go back to the Master page. Select the CTA section from the Page View or Tree panel and then from the Actions panel click on the ‘Restore on update’ checkbox. Now if you refresh your Components by clicking on the orange arrows the CTA section will reappear on your ‘womens.html’ page. To make sure that you don’t have the undesirable behavior of the CTA appearing on new pages you have to save the ‘womens.html’ page and then uncheck the ‘Restore on update’ checkbox.
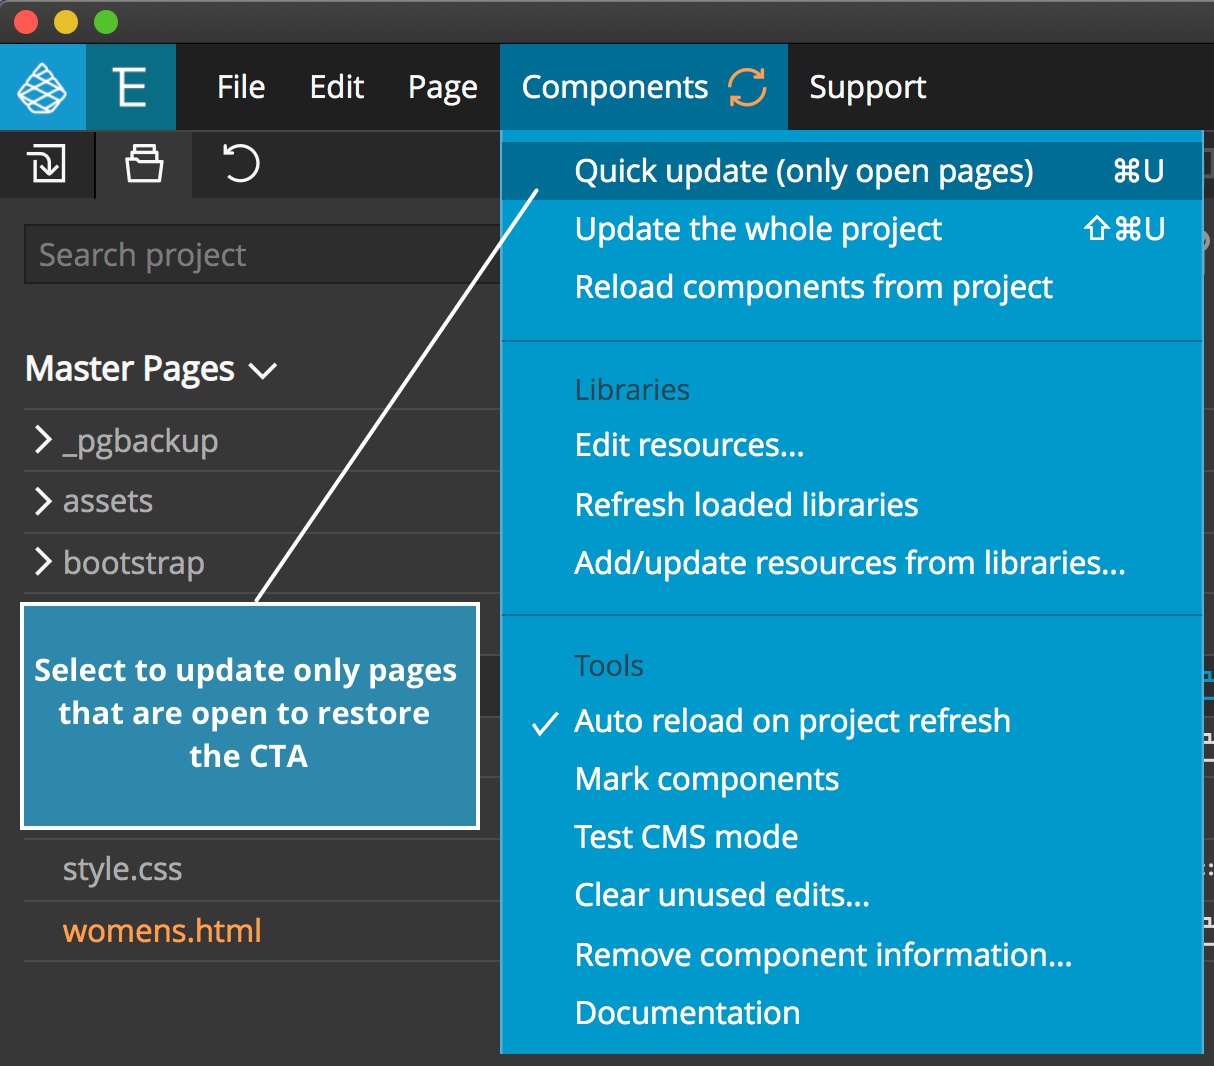
If we have more than one child page in our project and we only want the CTA to appear on selected ones, make sure that any page(s) where we do not want the CTA appearing are closed. Then click on the ‘Restore on update’ checkbox, but instead of then clicking the orange arrows as before select the ‘Quick update’ option from the Components menu. As you can see in the image, there is also a hot key combination to trigger the limited update that depends on your OS.
Making areas with Components editable
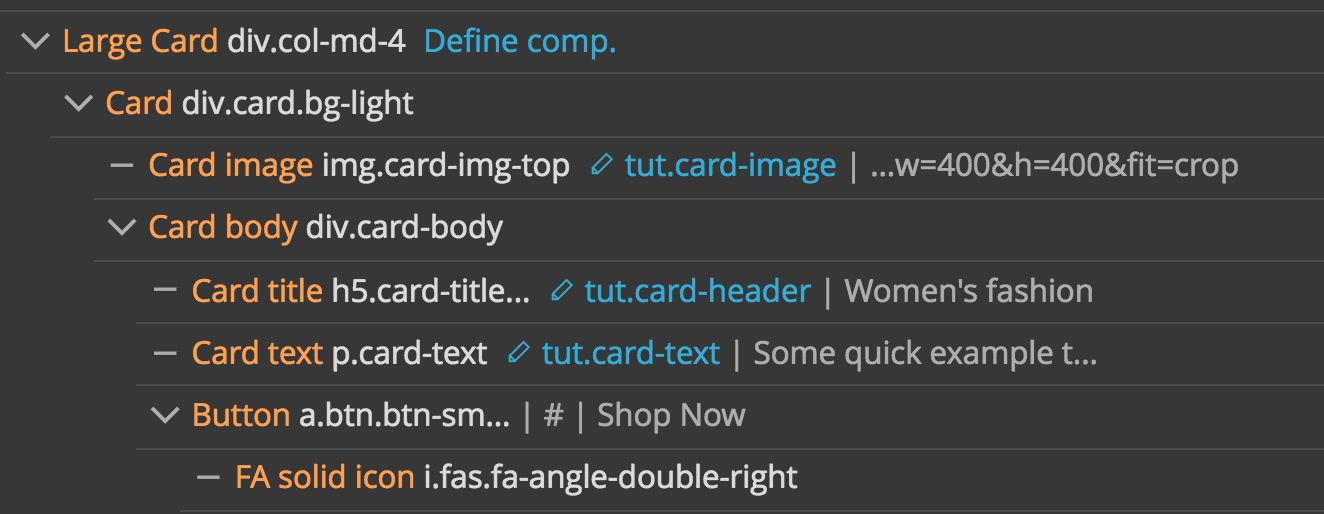
The next section down is composed of three ‘Large Card’ Components. In our interior pages we will want to be able to change out the general card content found on the home page for content specific for the page we are on, like bikinis on the women’s swimware page.
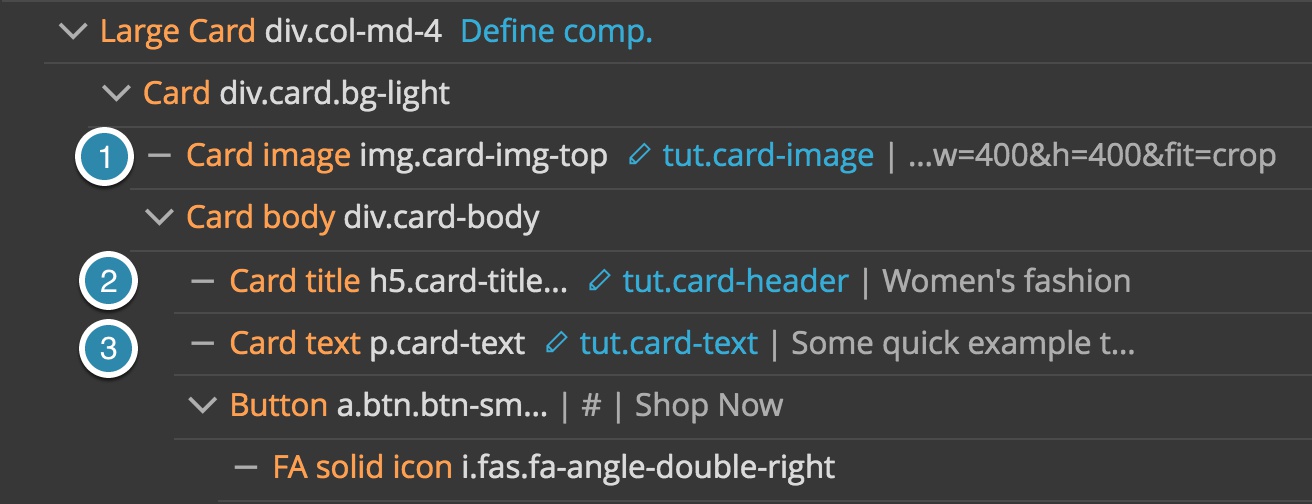
Our Component definition currently has three editable areas – the top image, the card title, and the card description. On our Master page, all of the fields are editable and if we make a change to the Component definition it will update in all of the instances of the Component – including on the Child pages. For example, we could add some text to indicate if the item was in stock. After updating, the other two ‘Large Card’ Components on the Master page and all of them on the Child page will reflect the change.
However, if we try to edit the “editable” areas on the Child pages we will get an error message and when we update our project any edits will be lost. This is because the Master page has control preference over the Components – a little like how CSS operates with the rule loaded last gets applied. Even though those fields were designated editable in the component and will be editable on the Master page, the content on the Master page will ‘dominate’ over the edit function of the Component and overwrite any changes.
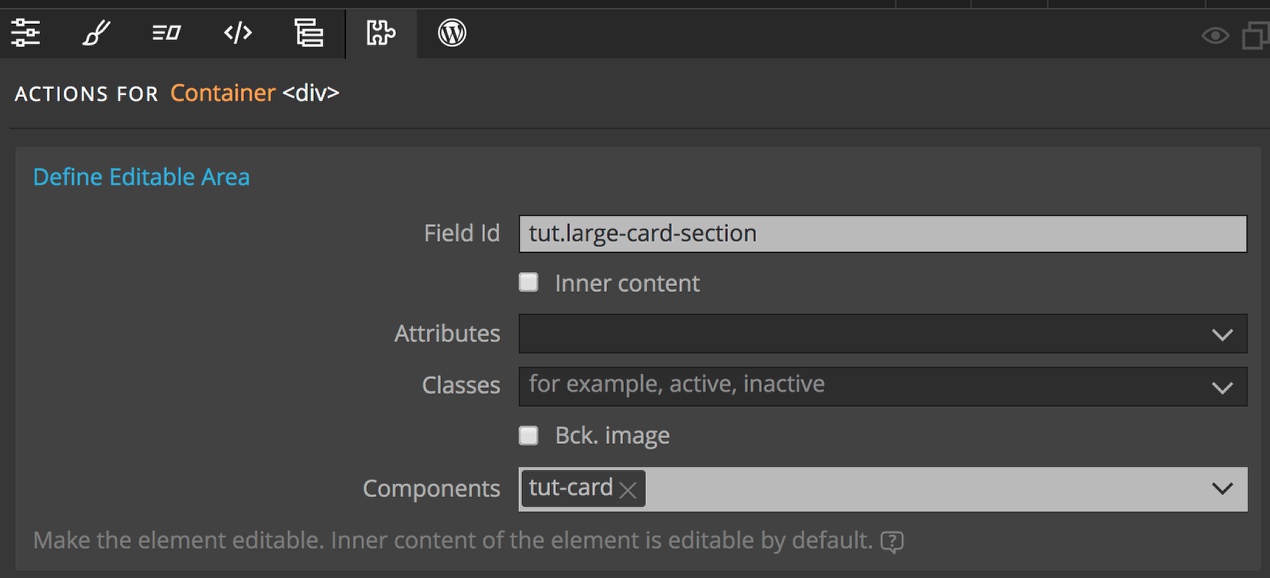
Let’s see how Pinegrow lets us change this behavior. We can select the container that the Large Cards are contained within from either the Page View or the Tree panel. Next, open the Actions panel and select ‘Editable’. In the resulting settings form add a Field Id – I’m using tut.large-card-section. Un-click the ‘Inner content’ checkbox and then for the ‘Components’ field select the ‘Large Card’ Component from the dropdown menu. It has an Id of tut-card.
Now if we click on the orange arrows and navigate to our ‘womens.html’ page, we can edit any of the areas that we have marked on the Component definition as editable.
Adding additional Components
If we look at our wireframe again we can see for the next section down there is one row of four ‘Small card’ Components on the Master page, but we want two rows on the Child pages. If we made this section simply editable as we did with the large cards section, we could add in additional ‘Small card’ Components, but they would not be contained within a Bootstrap row and so they may not collapse correctly on smaller screens. So, how do we solve this?
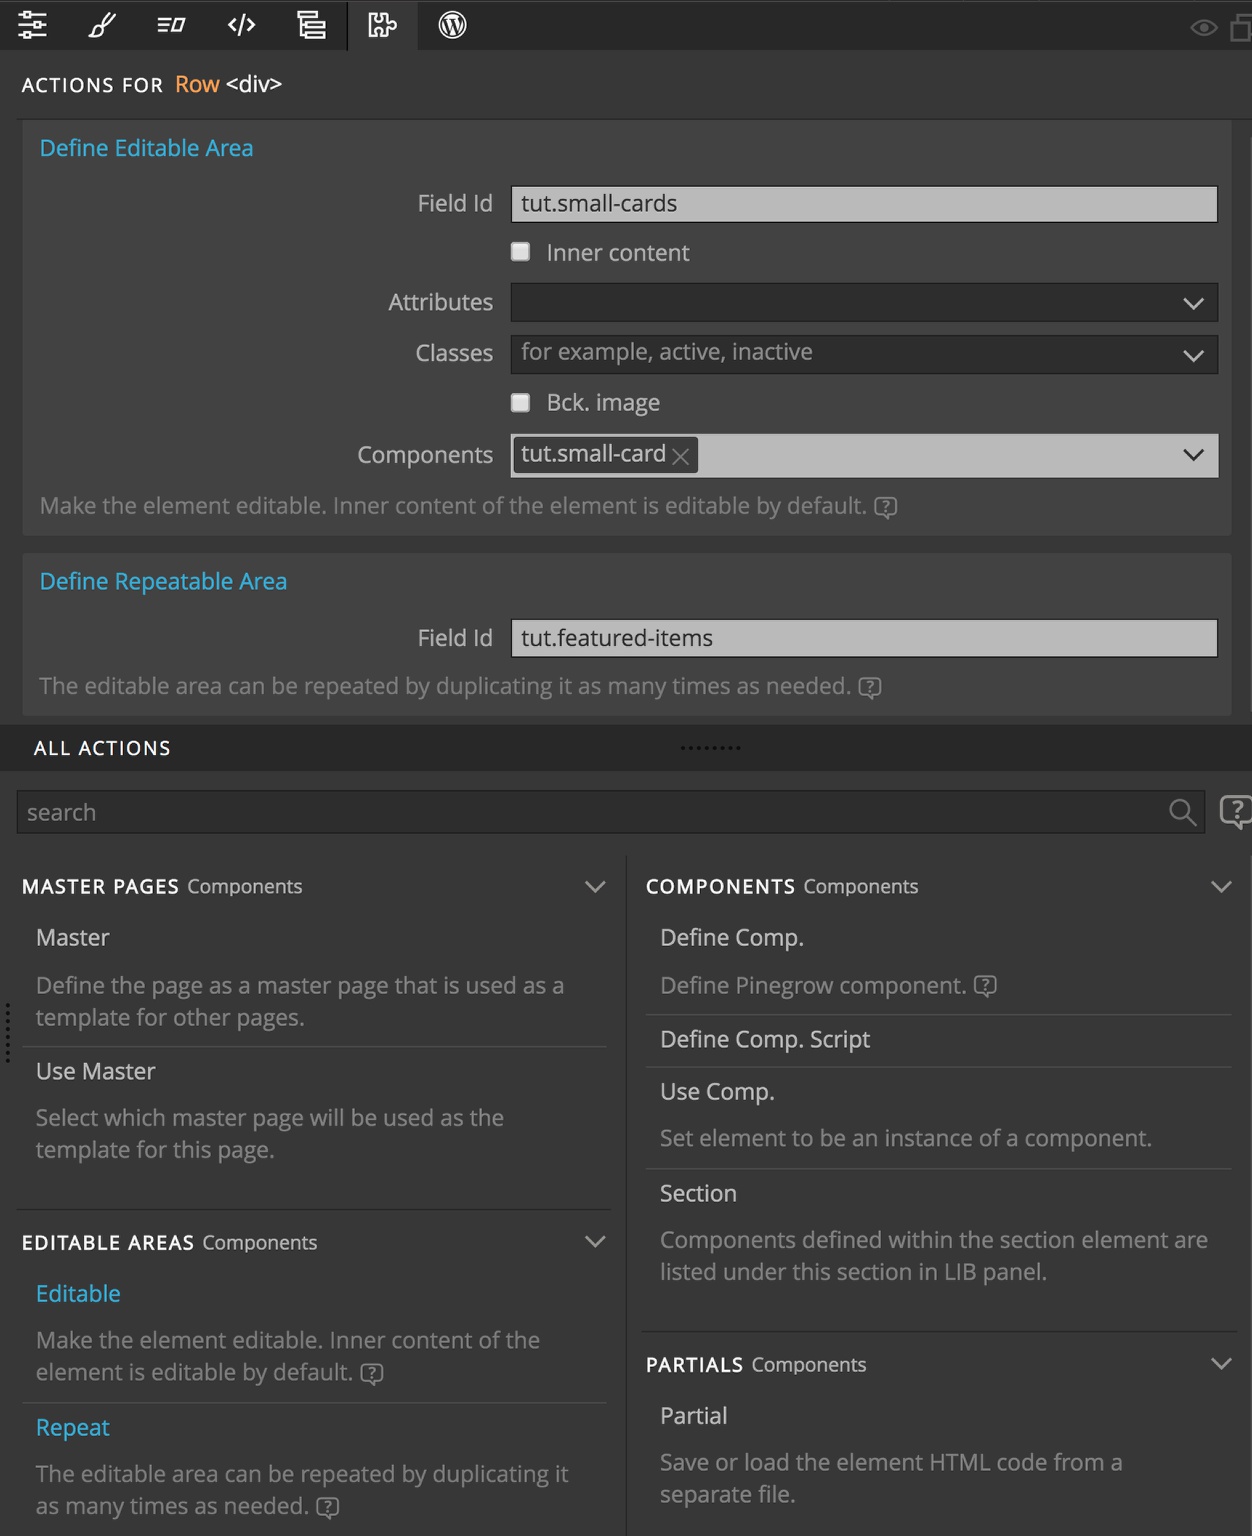
First, from the Page View or Tree panel select the row that contains each of the ‘Small card’ Components. Switch to the Actions panel and click on ‘Editable’, then enter a Field Id – I’m using tut.small-cards. Unclick the ‘Inner content’ checkbox and select `tut.small-card` for the ‘Components’ field. This will allow us to edit the various Component fields that we defined. Next, click on the ‘Repeat’ action. From the settings form add another Field Id – I’m using tut.featured-items. After updating our Components we can now navigate to the ‘womens.html’ page, select the row and duplicate it!
Adding Child page exclusive content
Again looking at our wireframe we can see that the interior pages have some unique content not found on the Master page in the form of two product blocks. If we were to try and add these to the ‘womens.html’ page Pinegrow won’t allow it. In order to accomplish this we need to add a dummy section to our Master page.
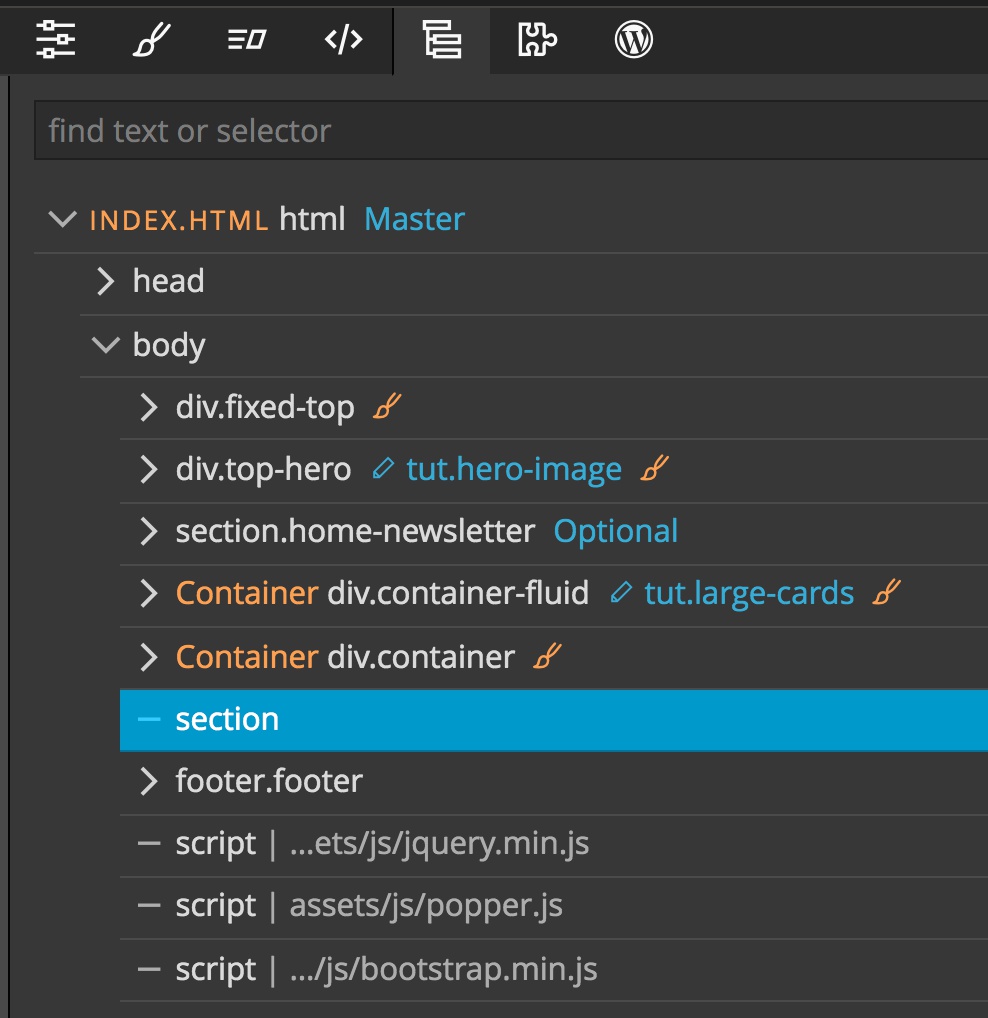
On the Master page, first drag a ‘section’ element to the tree between the small cards container and the footer. Next, click on the Action panel and click on ‘Editable’. As with the other sections, add a Field Id – I’m using `tut.extra-section`. This time however, leave the ‘Inner content’ checkbox ticked. This will allow us to add any content we want within this section on the Child pages!
I’ve saved the two product blocks as Components. That way I can simply drag them onto each of the Child pages since they won’t be created by the Master page template.
Conclusions
Now that our Master page is complete we can very quickly make our last two interior pages. First, from the Components menu select ‘Reload components from project’. Then in the Projects panel click on the down caret and select ‘Add new page…’. Select the project title at the bottom of our frameworks list and then click on the ‘index.html’ template. Create the ‘mens.html’ page. Repeat to add the ‘kids.html’ page.
Now all we have to do is change the ‘active’ class for the menu link, duplicate our small cards row and drag the two product blocks to the page to have the basic layout of our pages ready for content changes without impacting any other pages in our project!
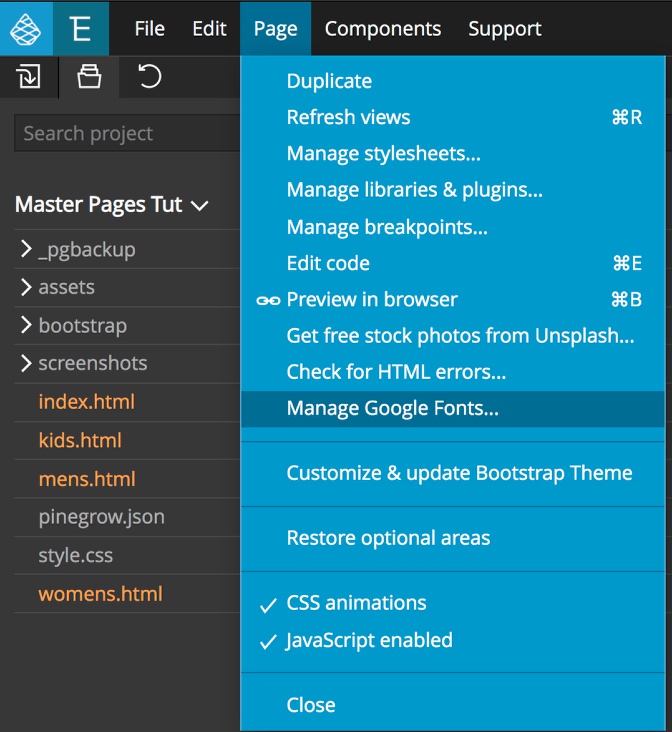
As I mentioned in the intro, Master pages let us make project-wide changes easily, including adding non-HTML info to the page. For example, we could add some JavaScript to all of the pages by adding the script to the Master page. Another example is adding in a Google font. If our design changed and now required a different font for the hero image we could use the built-in Pinegrow tool found under the ‘Page’ menu – ‘Manage Google Fonts…’. Then change the CSS for our hero text. This will have the effect of adding the Google font link to all the project pages.
This concludes our tutorial about using Master pages in the Pinegrow web editor. I hope this illustrated how powerful it is to combine Components and Master pages to quickly put together multi-page projects.
Until the next tutorial, have fun designing with Pinegrow!
Discuss this tutorial
Have questions or comments about this tutorial? Let’s talk about it on our forum.
Get in touch
Would you like to see your favorite theme or blocks library featured in the next tutorial? Let us know in the forum or by email!