Working with Froala Blocks
A step-by-step guide on how to add Froala Blocks to Pinegrow library and use them to quickly build a great looking website.
The internet has a wealth of pre-made components for various frameworks like Bootstrap, but also for plain HTML. Pinegrow comes with tools that make it easy to use such themes and libraries for building your website. In this series of tutorials, we will take a more detailed, step-by-step look at how to do that.
First up, we will cover how to utilize one of these design libraries in Pinegrow for your own projects. This will also give you an idea of how easy it is to use any similar library.
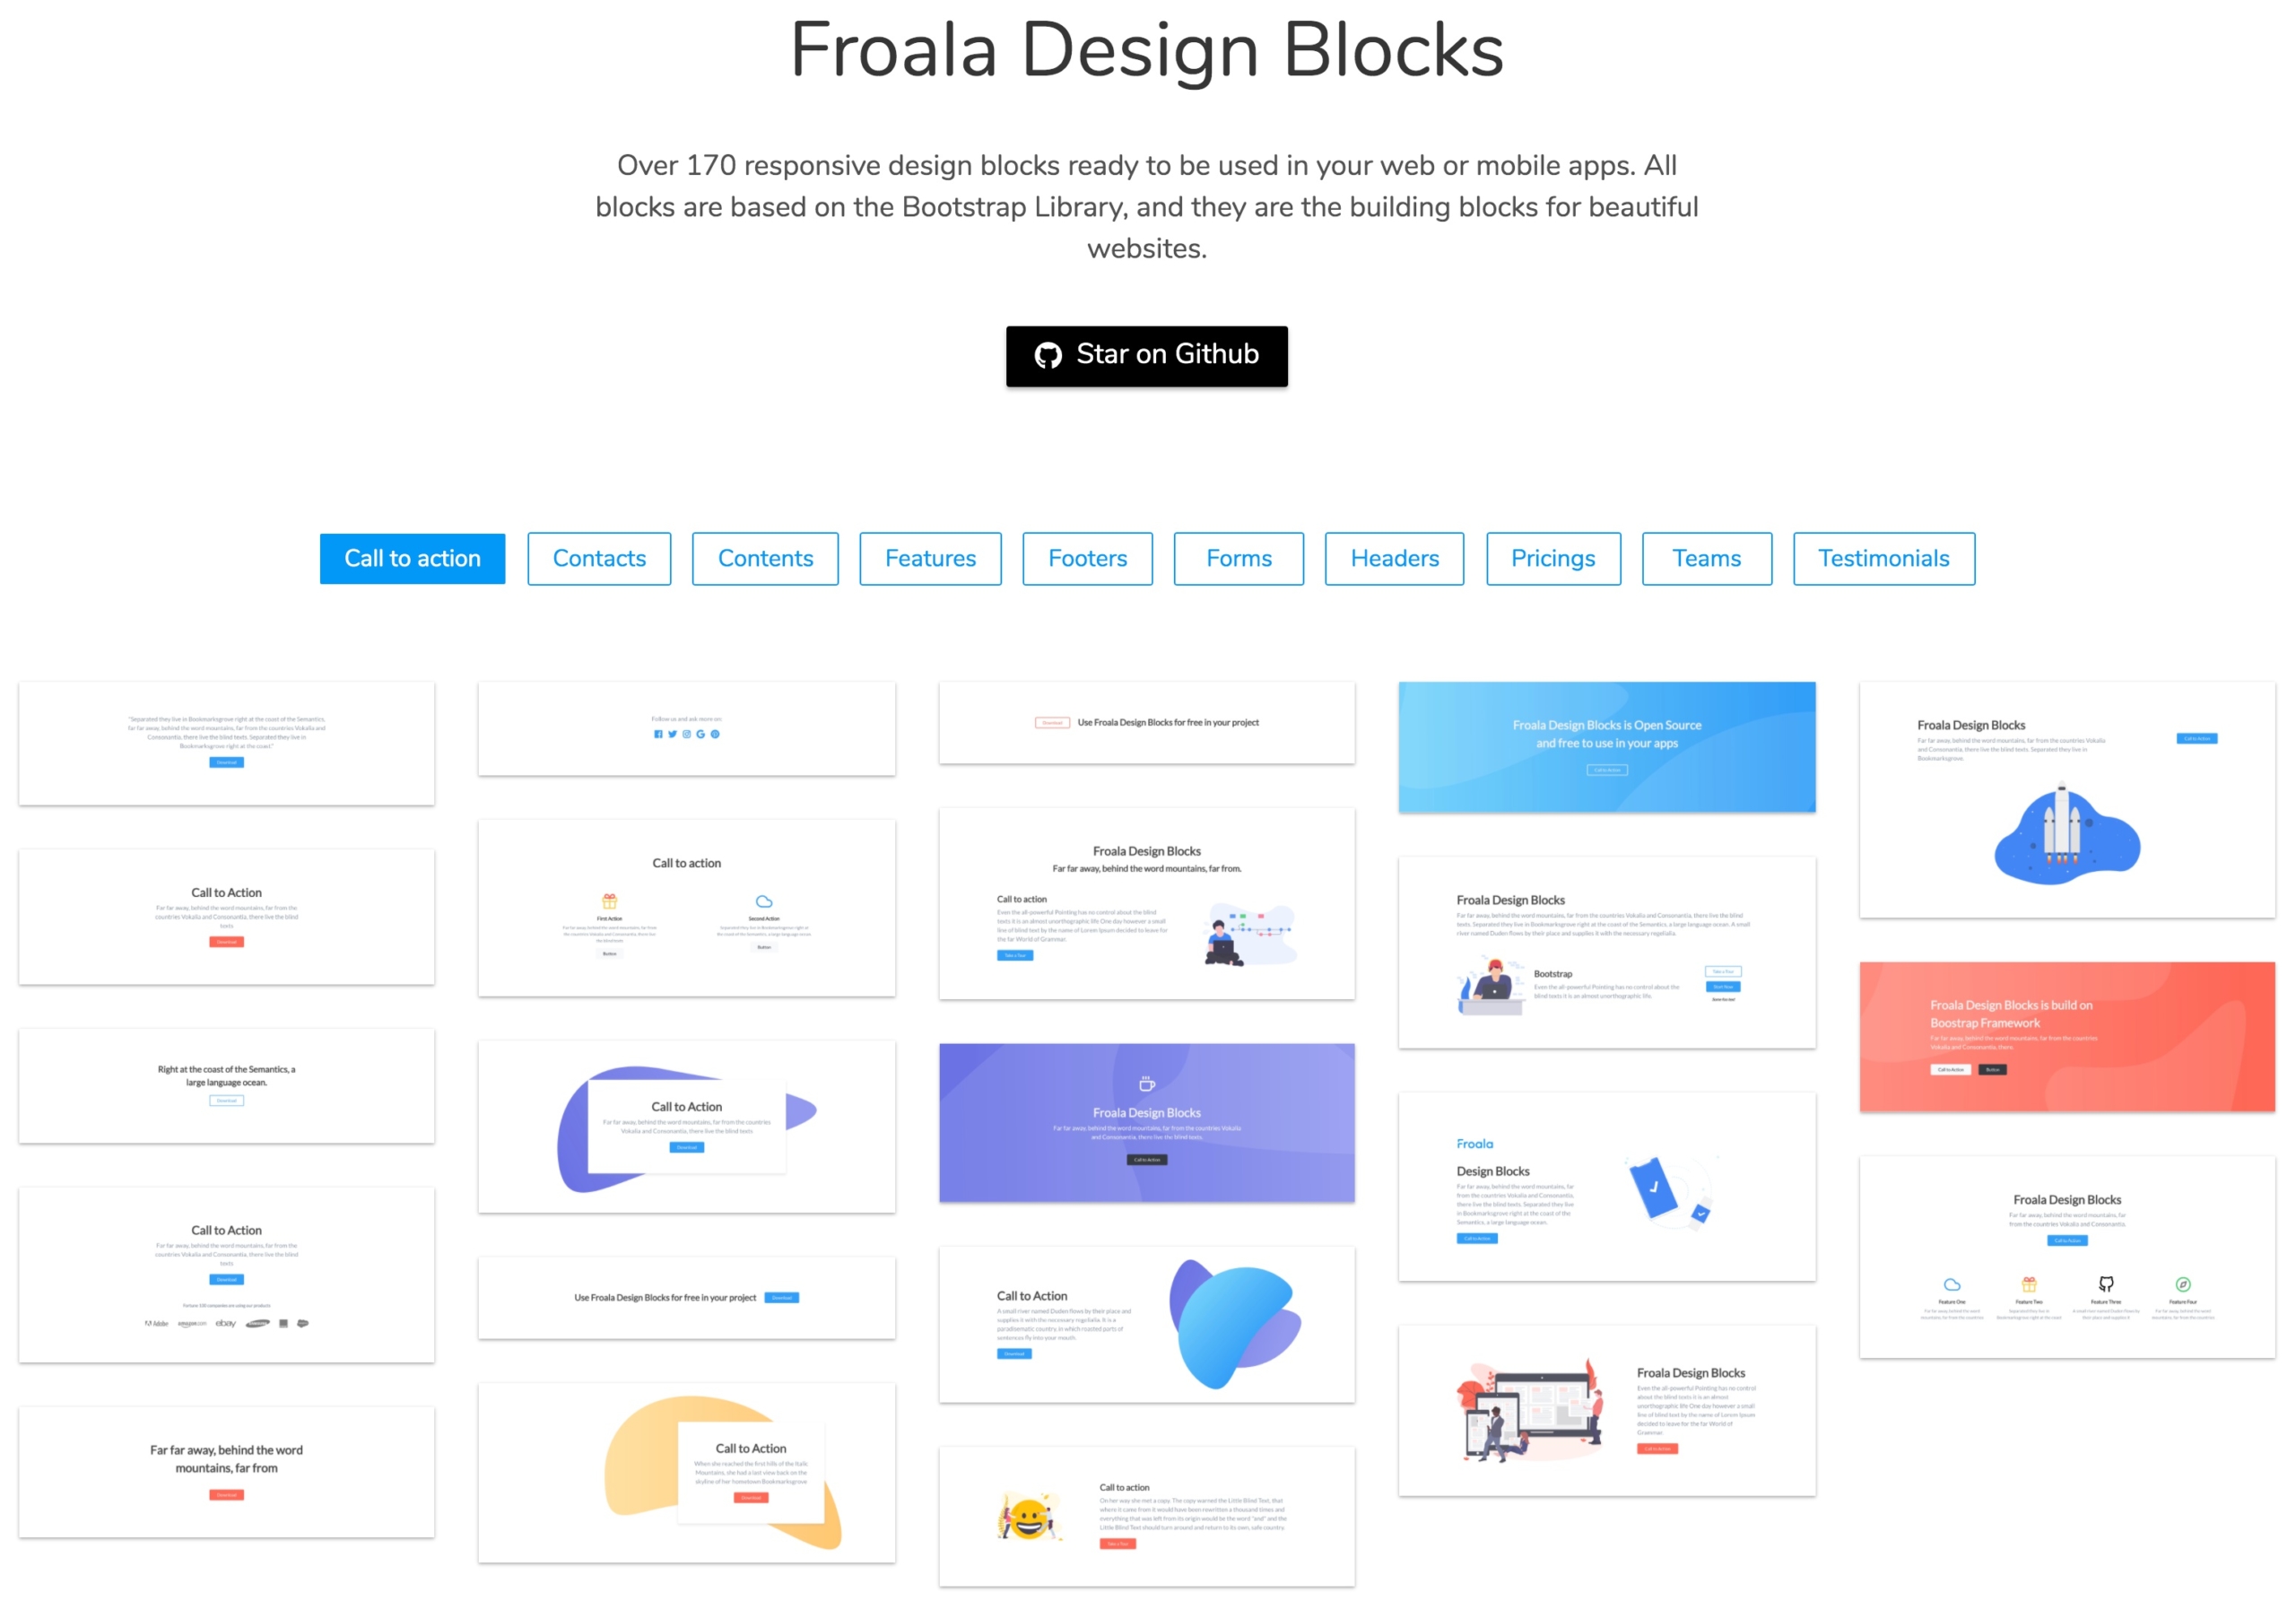
For this tutorial we will be using an elegant and clean block library, Design Blocks from Froala. They have put together a library covering ten different categories of content, with multiple blocks in each. All of these blocks are clean HTML put together using the Bootstrap 4 framework. They are ideal for bringing in to Pinegrow to create a beautiful website quickly.
Let’s get started!
Prefer to read? Scroll past the videos.
This tutorial is available in video and textual form. Watch the two videos, or continue reading if you prefer to read. Of course, you can also do both!
Video 1 – Setting up the project
Video 2 – Building the page
Note, my dogs have a small barking fit at around 10 minutes. Yours might too! ?
1. Download Froala Blocks
Open up the Froala Design Blocks Download page and click the “Download” button located in the ZIP Archive section.
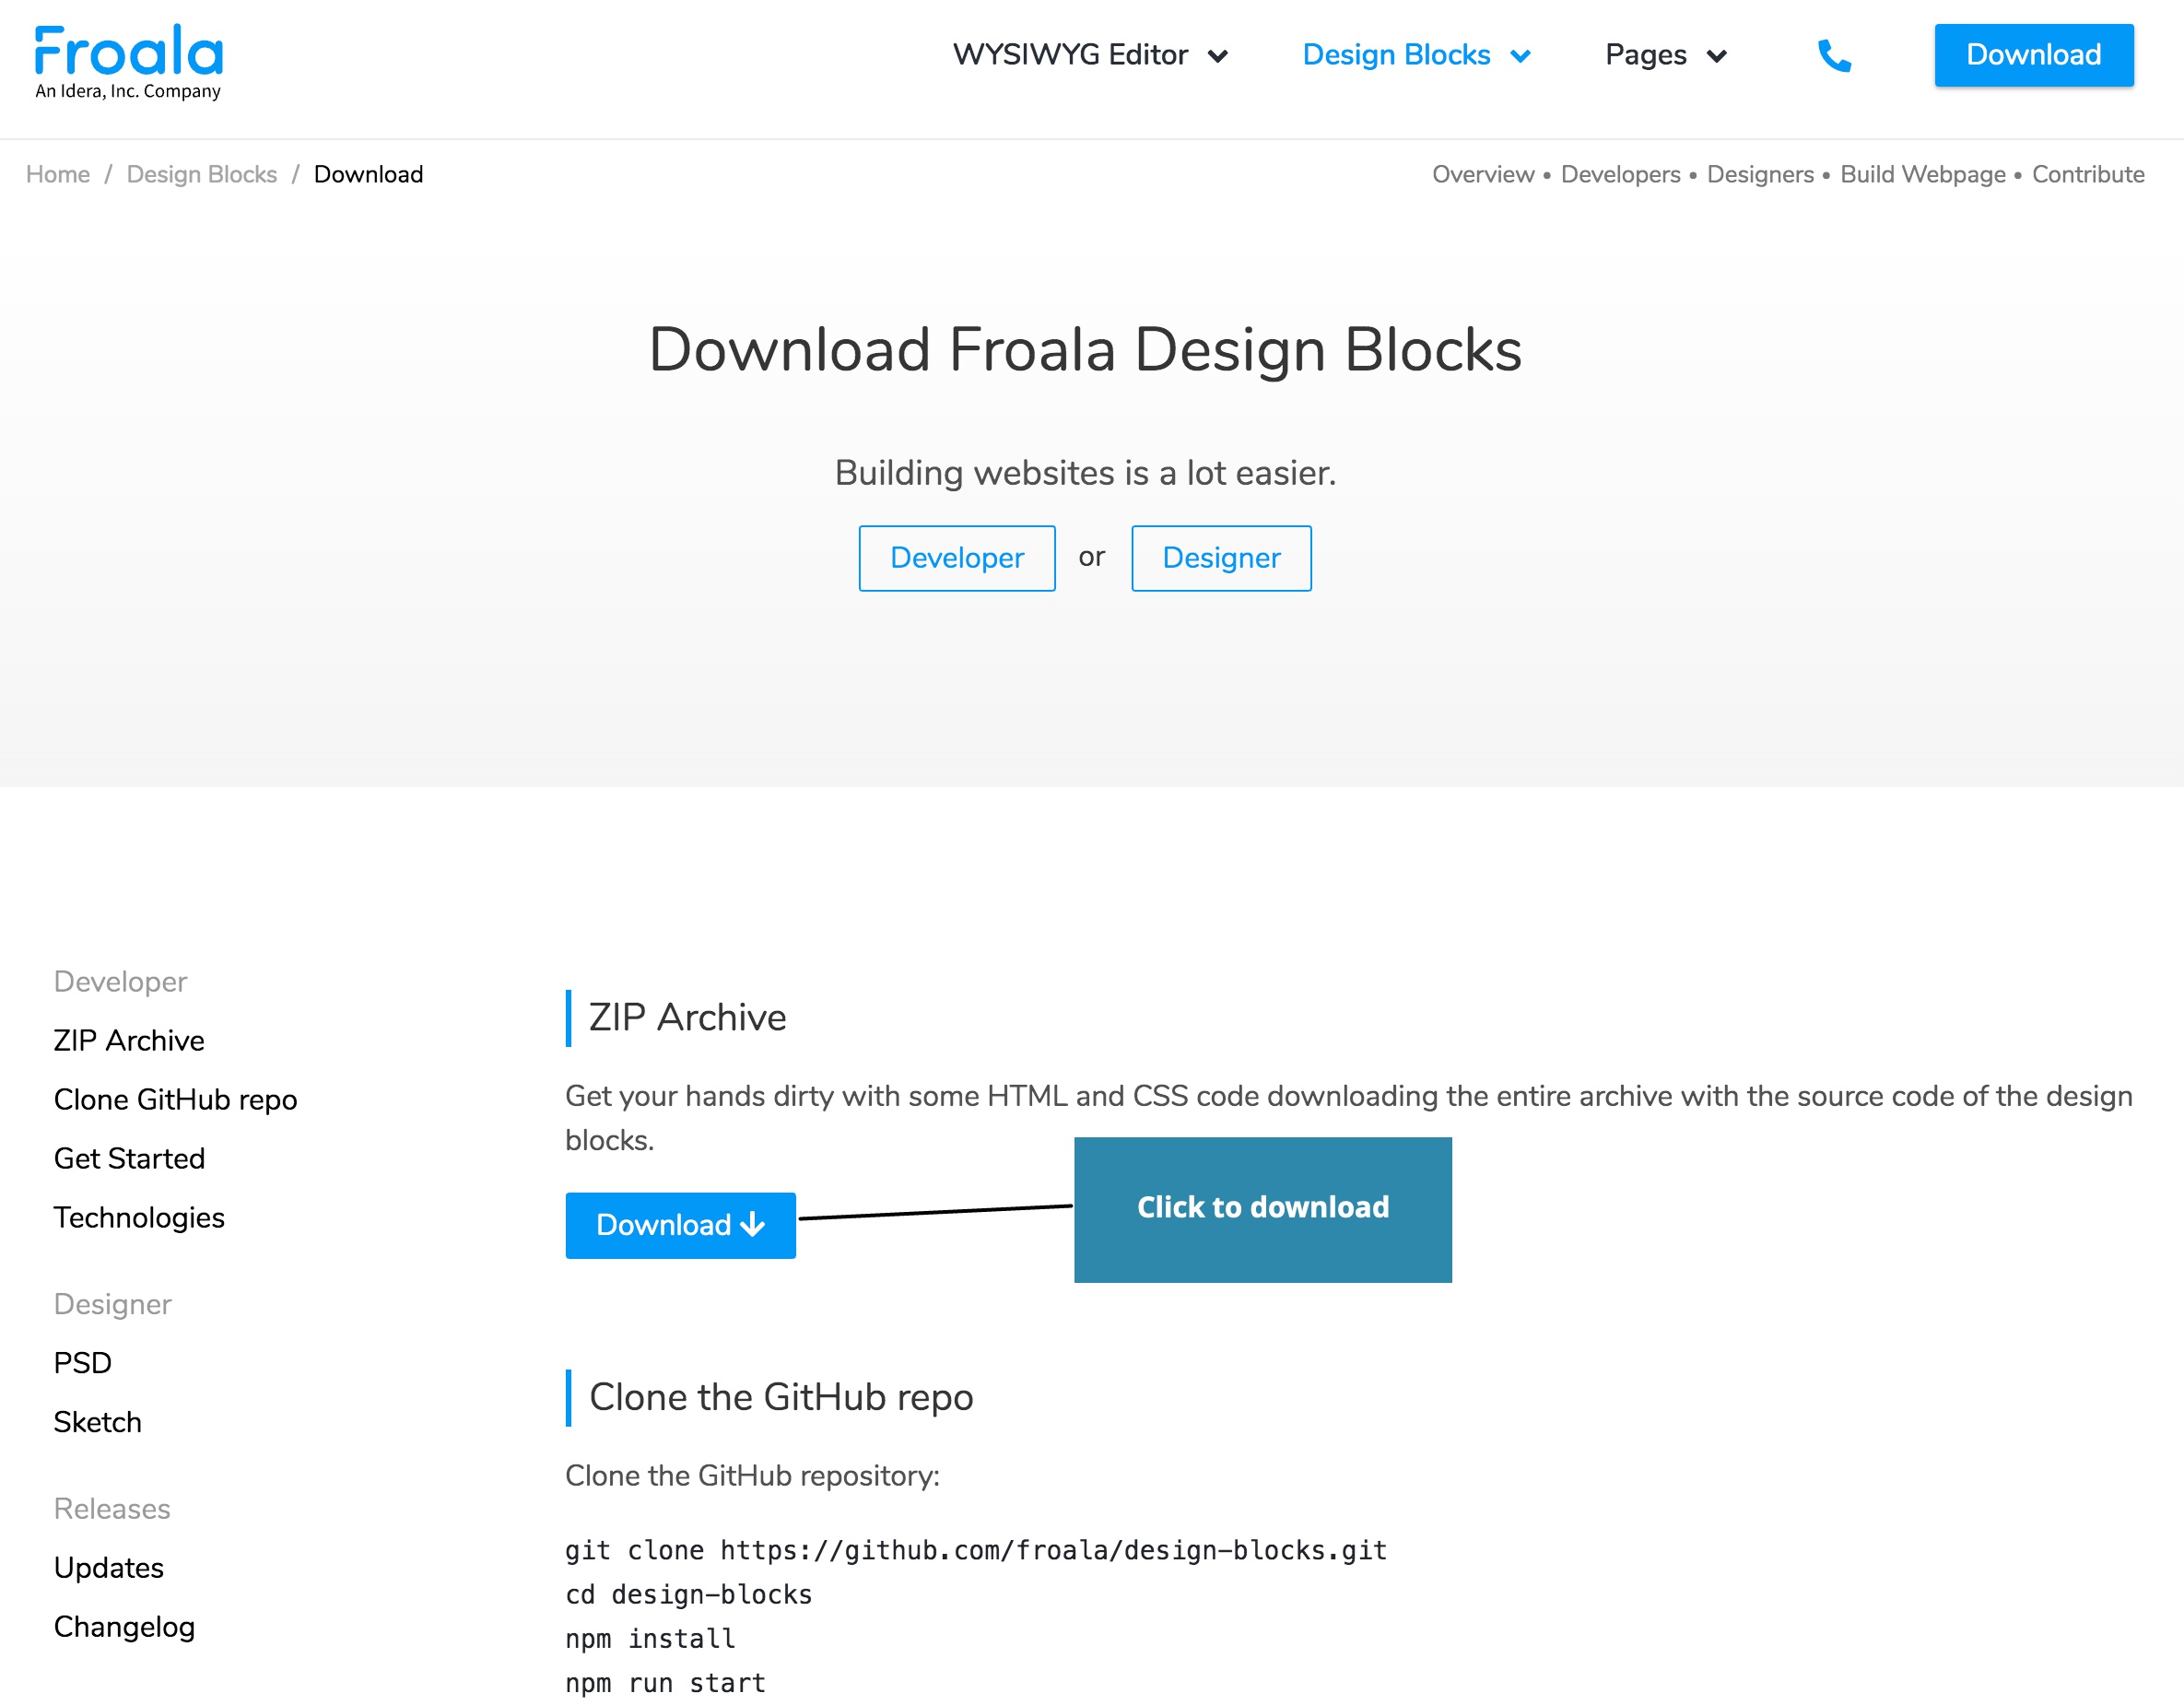
Unarchive the zip file in a location of your choosing. We will need to open the newly created folder both to copy some files and to load pages into Pinegrow.
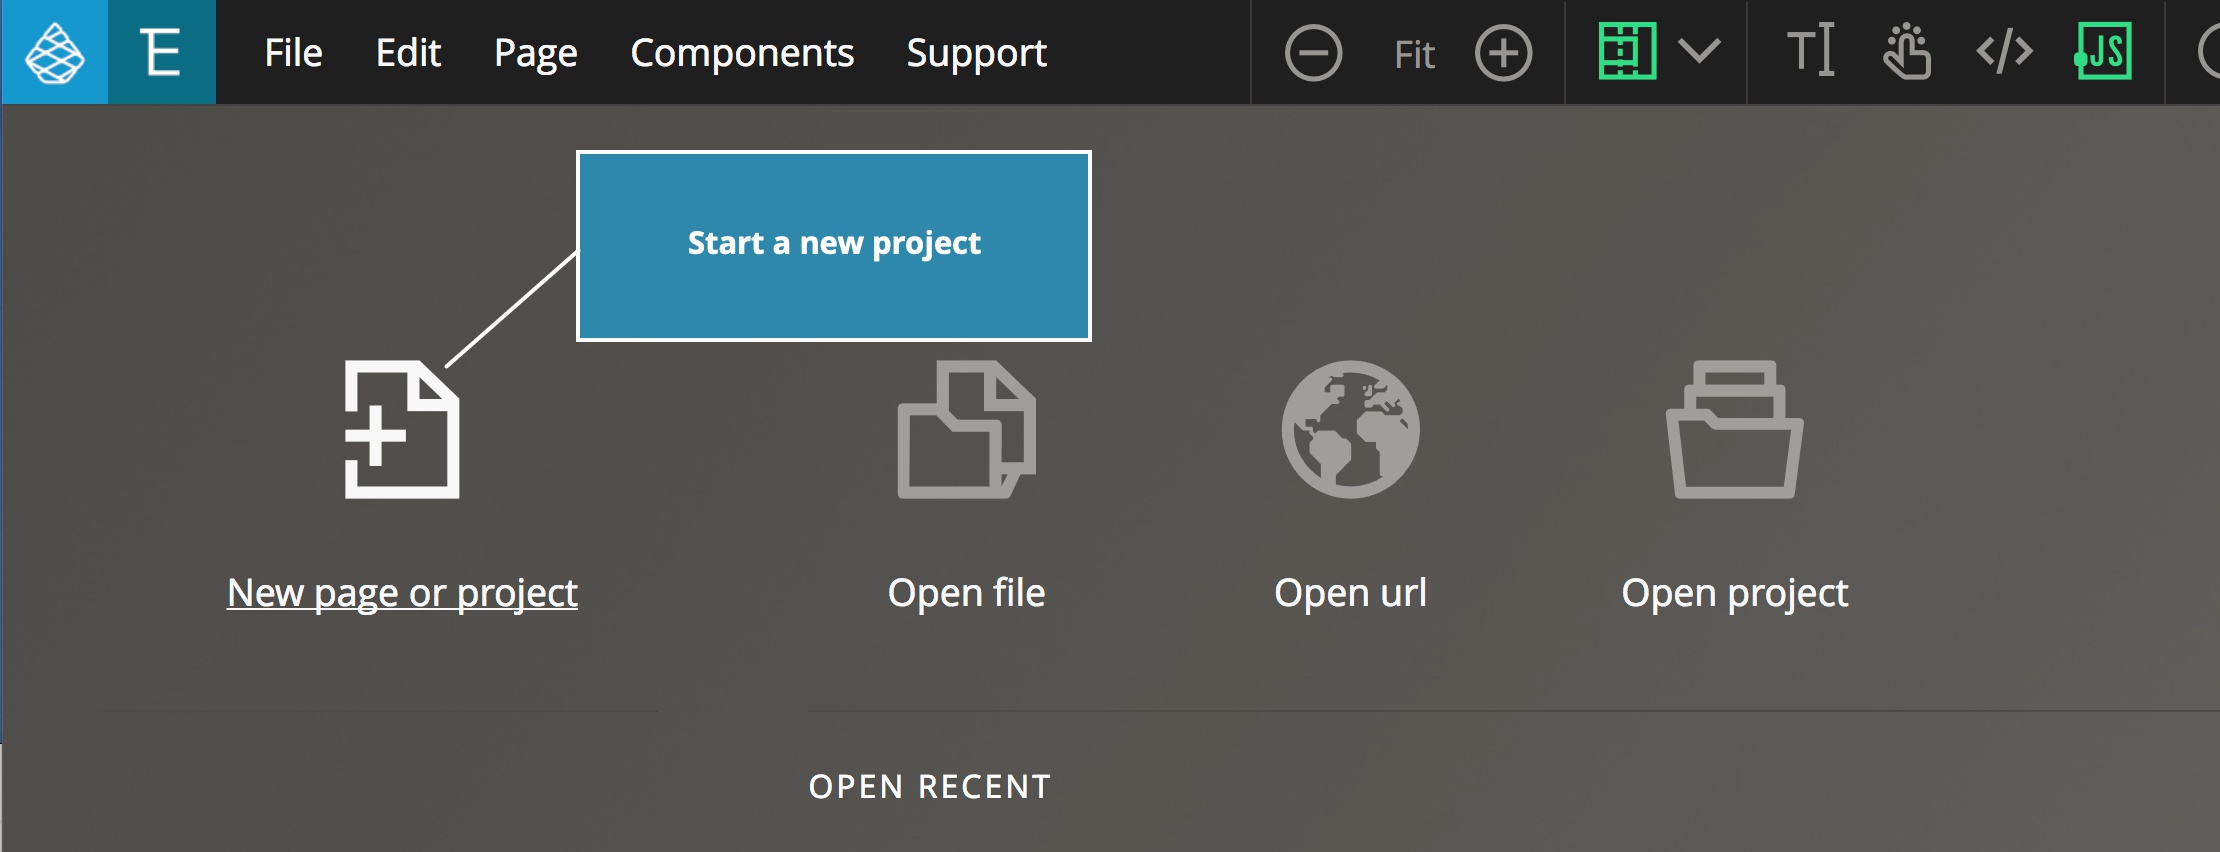
2. Create a new Pinegrow project
You can skip this step if you want to add Froala Blocks to an existing Bootstrap 4 project.
Next, we will open up Pinegrow and start a new Bootstrap 4 project. First, Click on the “New page or project”.
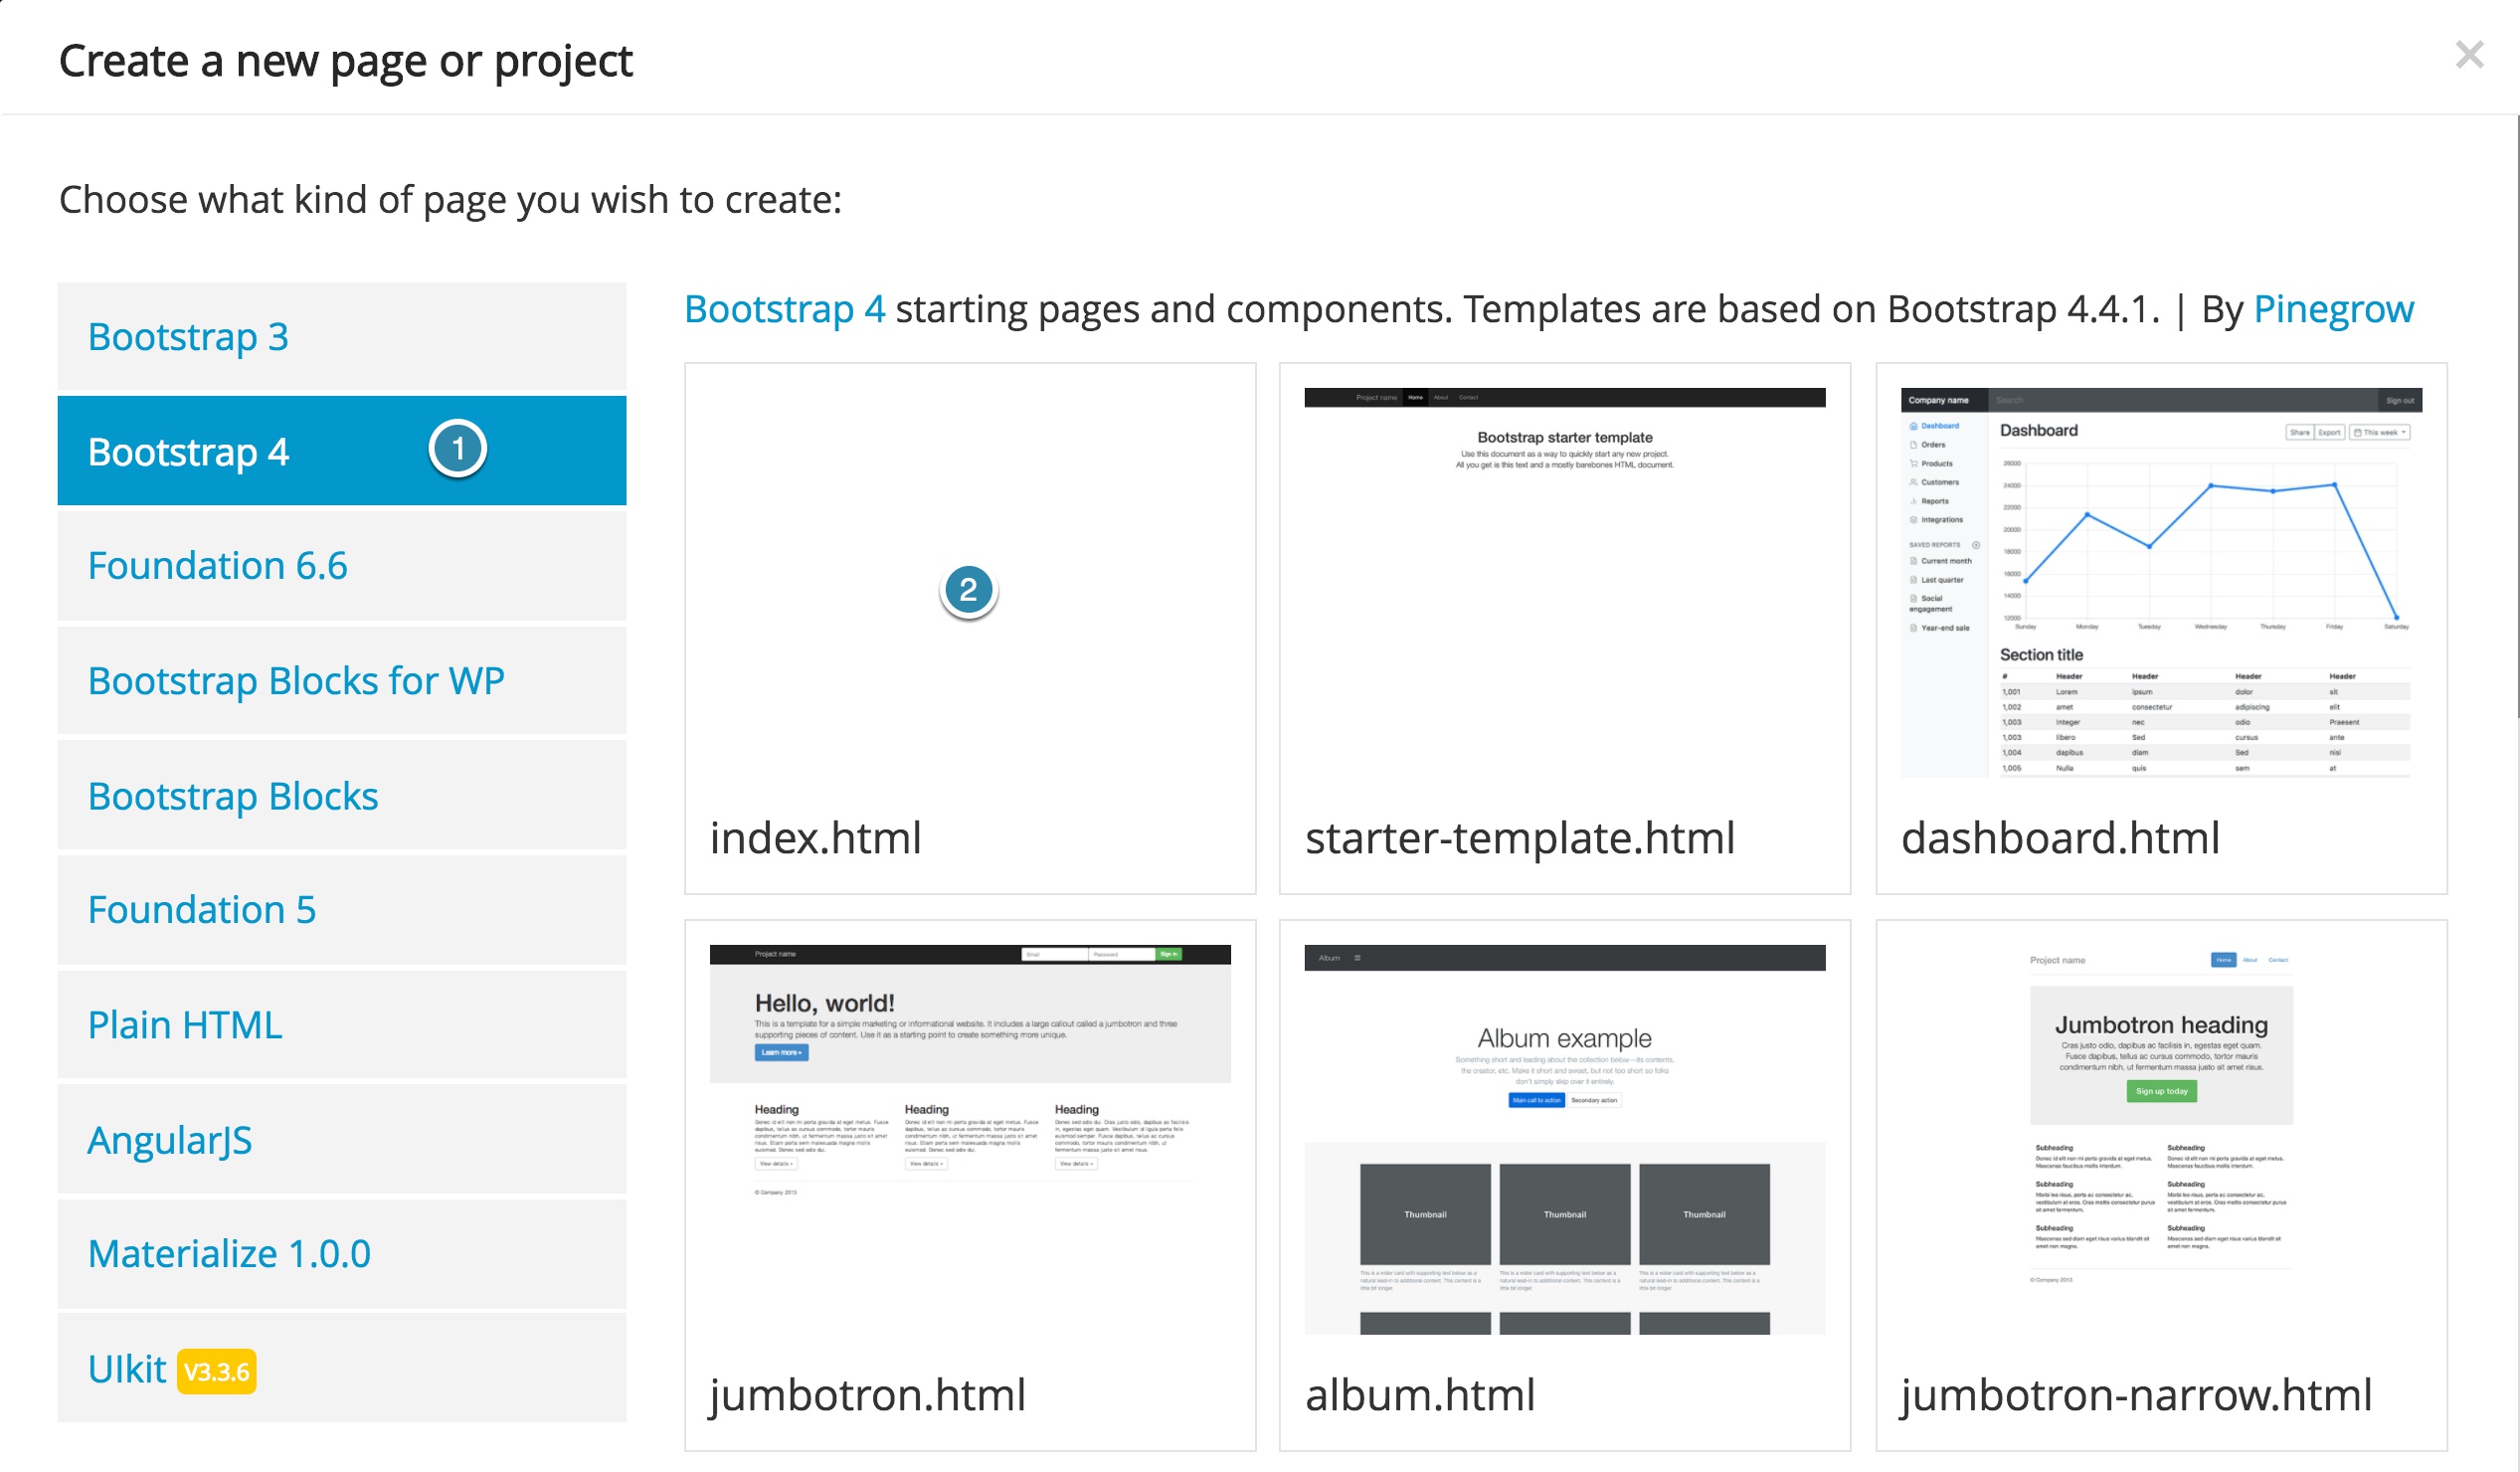
Then, from the pop-up select a “Bootstrap 4” project and open one of the templates. For this tutorial I’m using the empty “index.html” template.
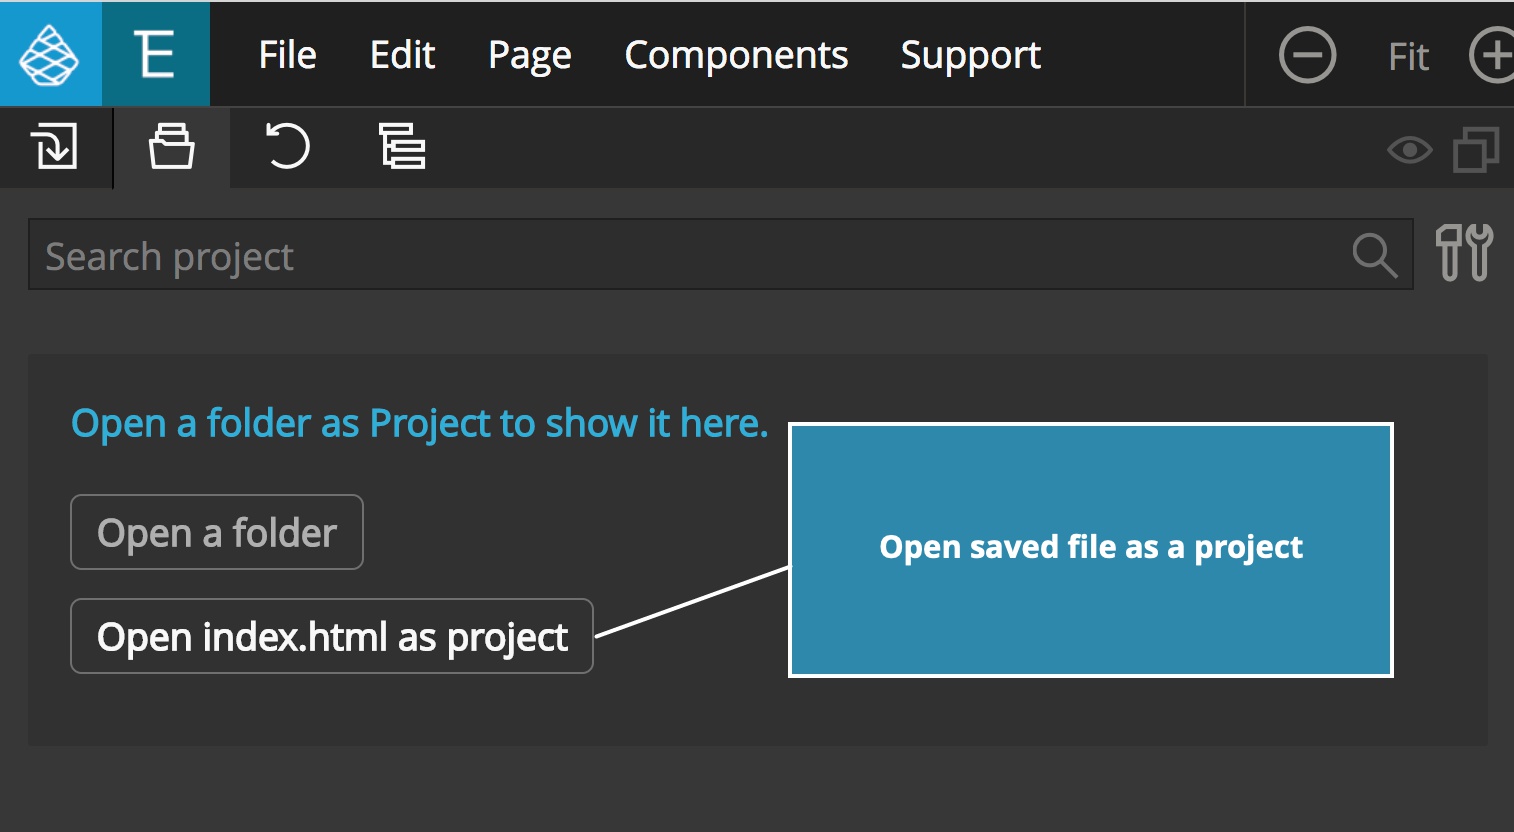
Once you have your new page opened, save it into a new folder and then either open it as a project when prompted or click on “Open index.html as project” from the project tab. This will be your final project folder.
3. Add Froala Blocks resources to your project
Next, we have to copy resources from the Froala folder you downloaded and unarchived in step 2.
Copy images and stylesheets
Navigate to that folder on your computer and then copy the “css” and “imgs” folders to your newly created final project folder, which I have named “Froala Tutorial”. If you move them out of the original folder, none of the blocks will display correctly.
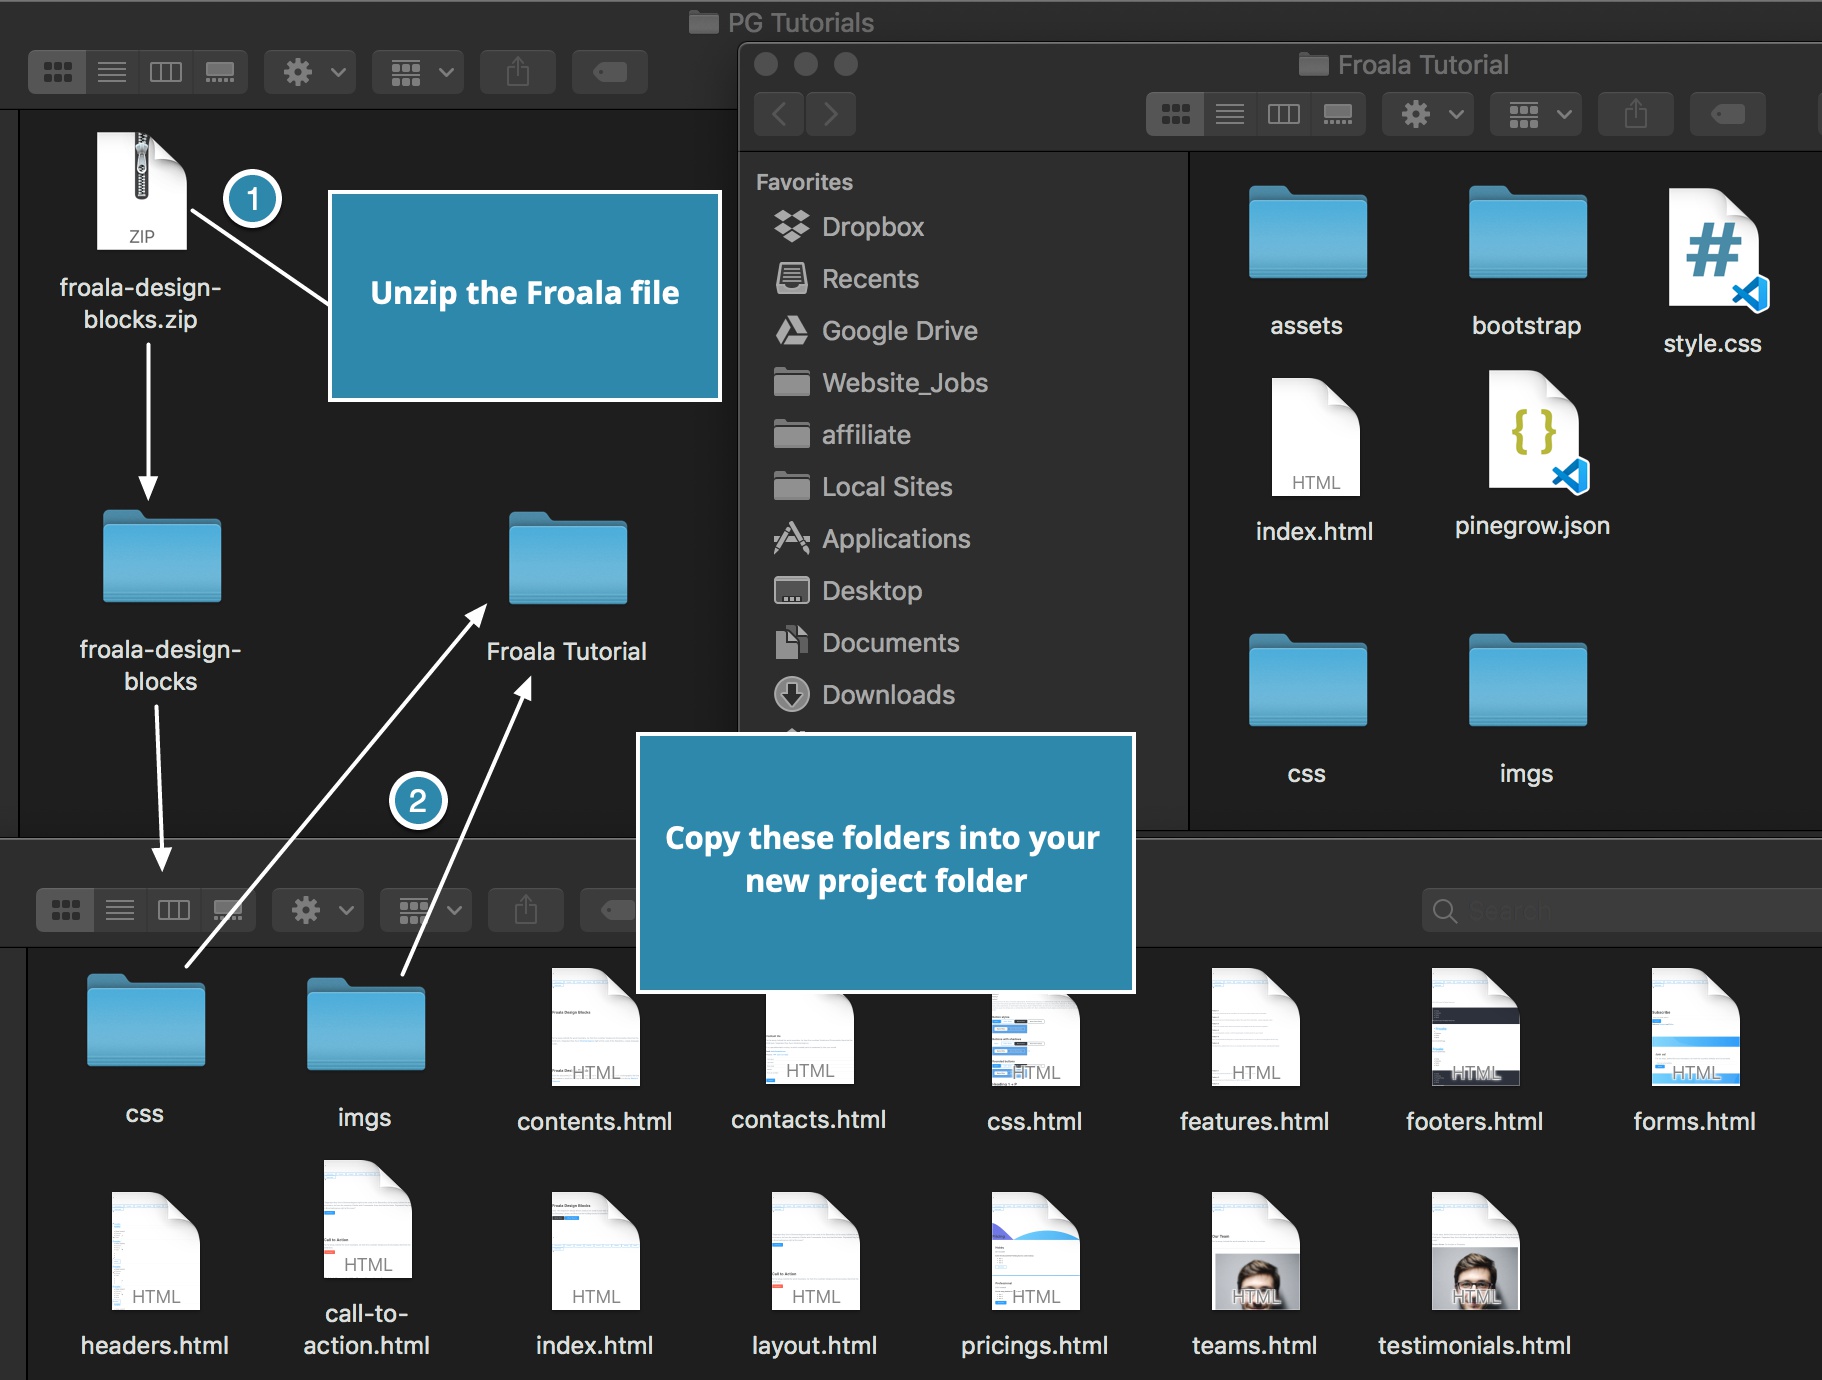
I normally prefer to copy these folders into the “assets” folder of my project, however, the Froala blocks have the images hardlinked to be at the same level as your main template file. If you choose to put the “imgs” in the “assets” folder, you will have to run the “repair links” command after saving the file. We will cover this later in the tutorial.
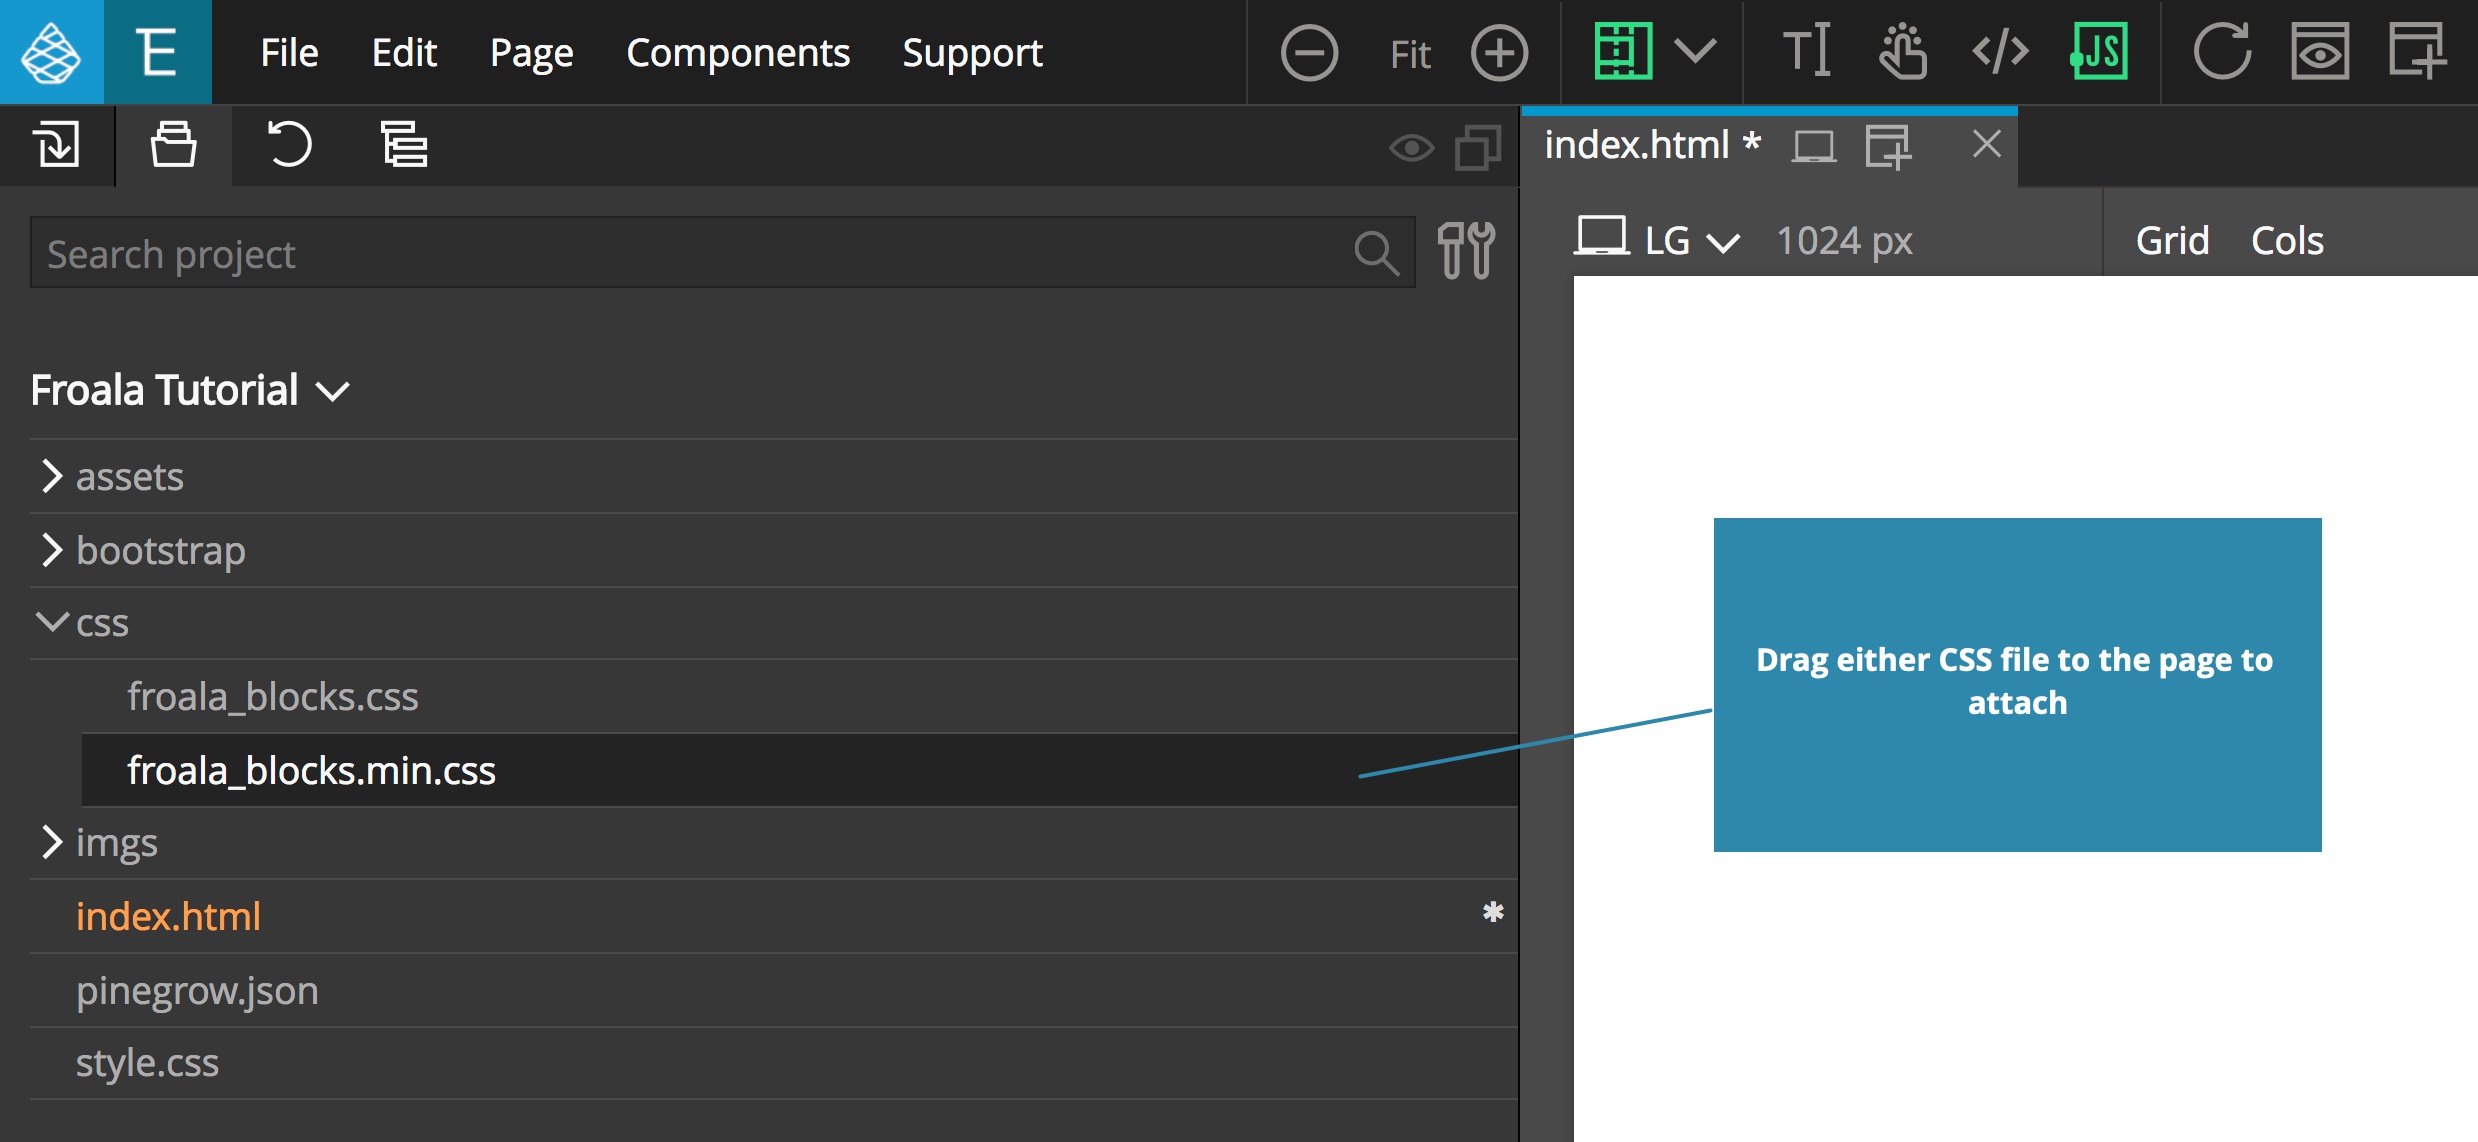
Add the stylesheet to the page
Next, we need to add the Froala stylesheet to our project. In your project view open the “css” folder you copied into your project and drag either the “froala_blocks.css” or “froala_blocks.min.css” stylesheet to your Page view. This will add it to your page.
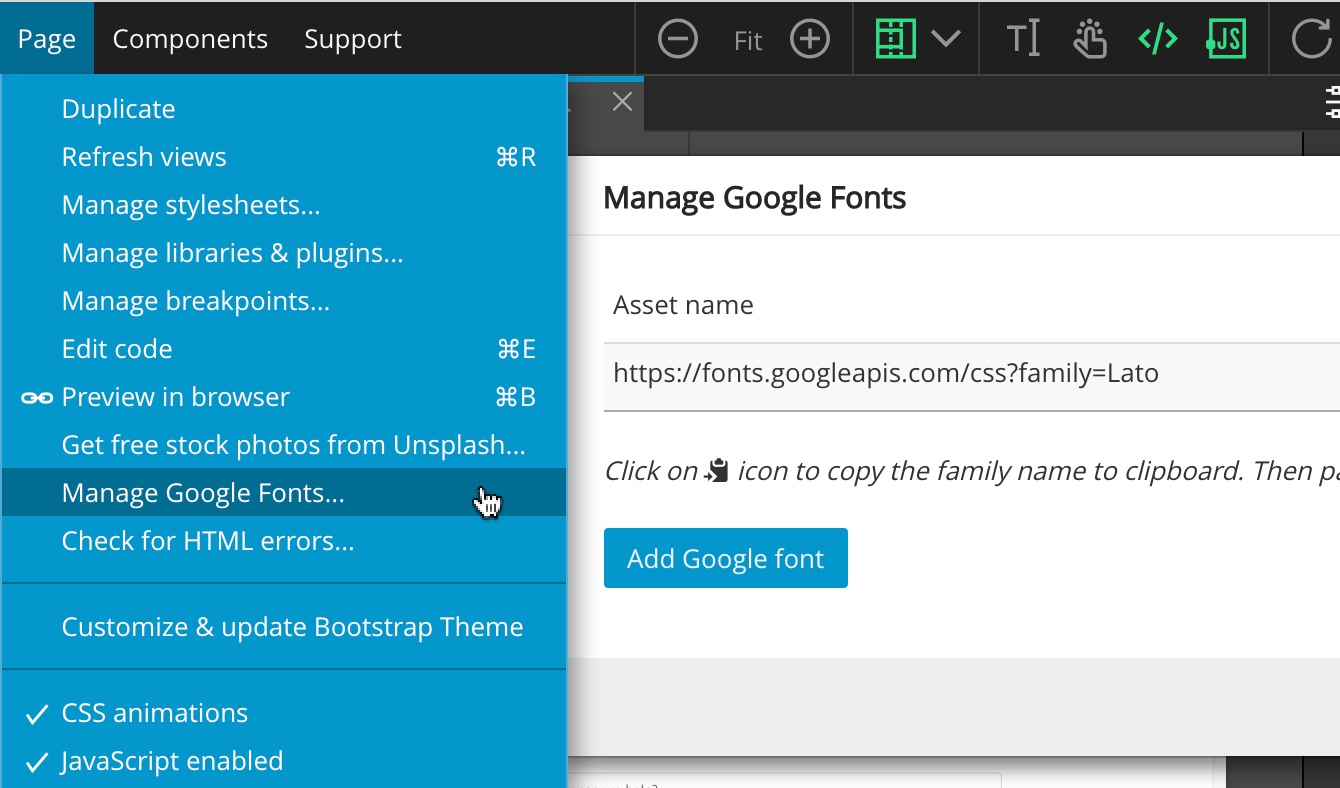
Add the Lato font to the page
Froala Blocks use a font called “Lato”, hosted on Google Fonts. We need to the font to our page as well. The easiest way is with “Page -> Manage Google Fonts” tool. Click on “Add font” and select “Lato” from the list.
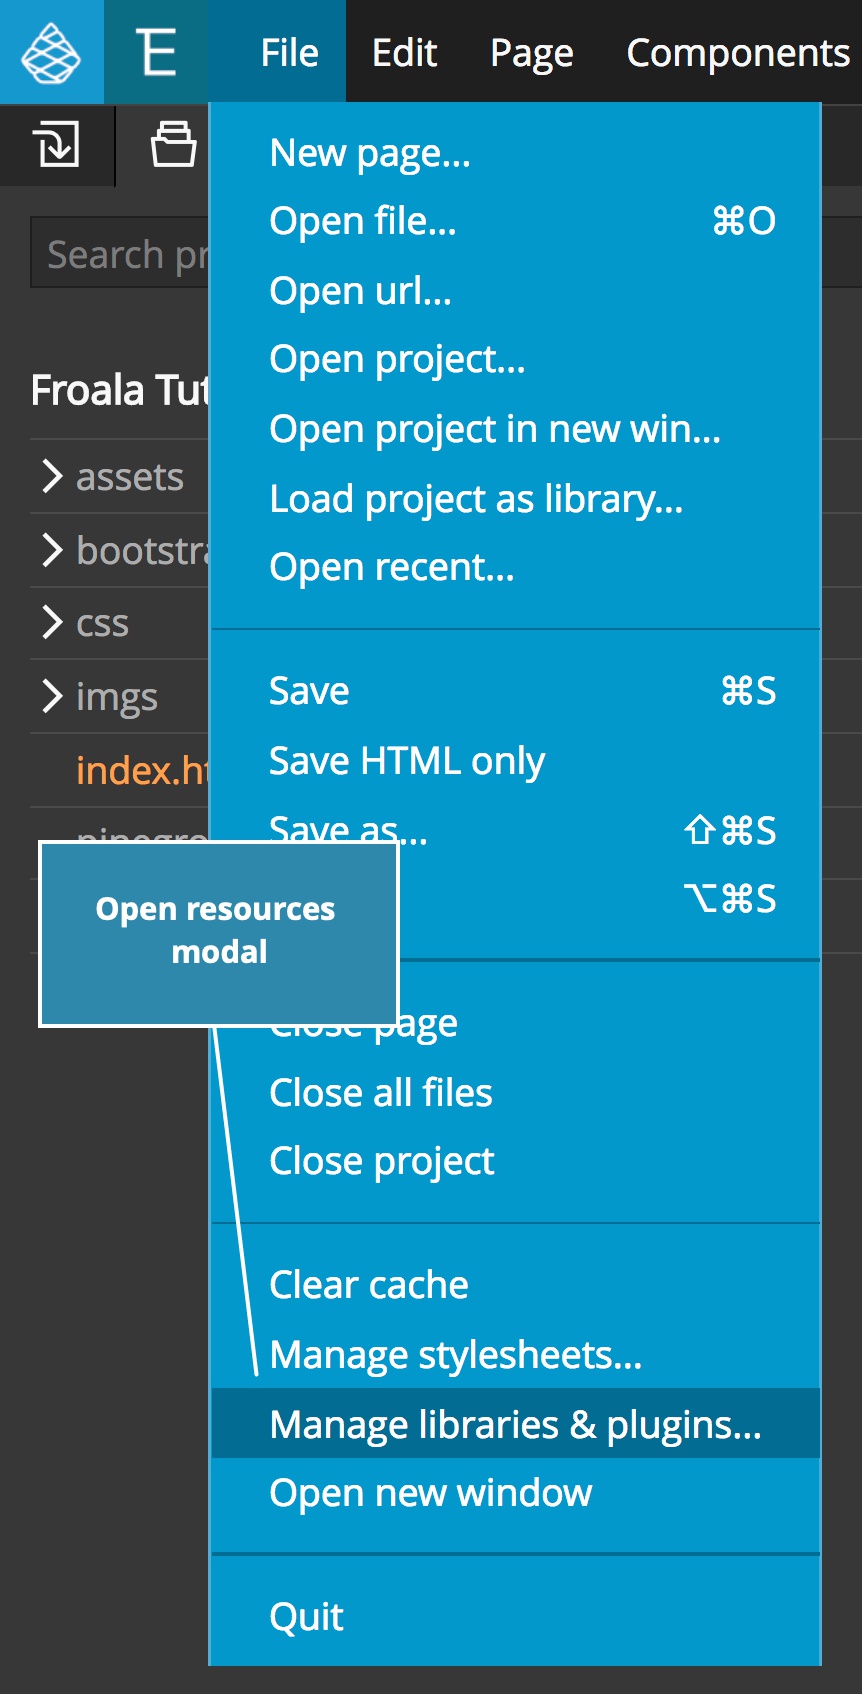
4. Activate Font Awesome
The Froala blocks use FontAwesome 5, so we need to add that resource into our project. In Pinegrow, open the “Manage libraries and plugins…” modal from the “File” dropdown.
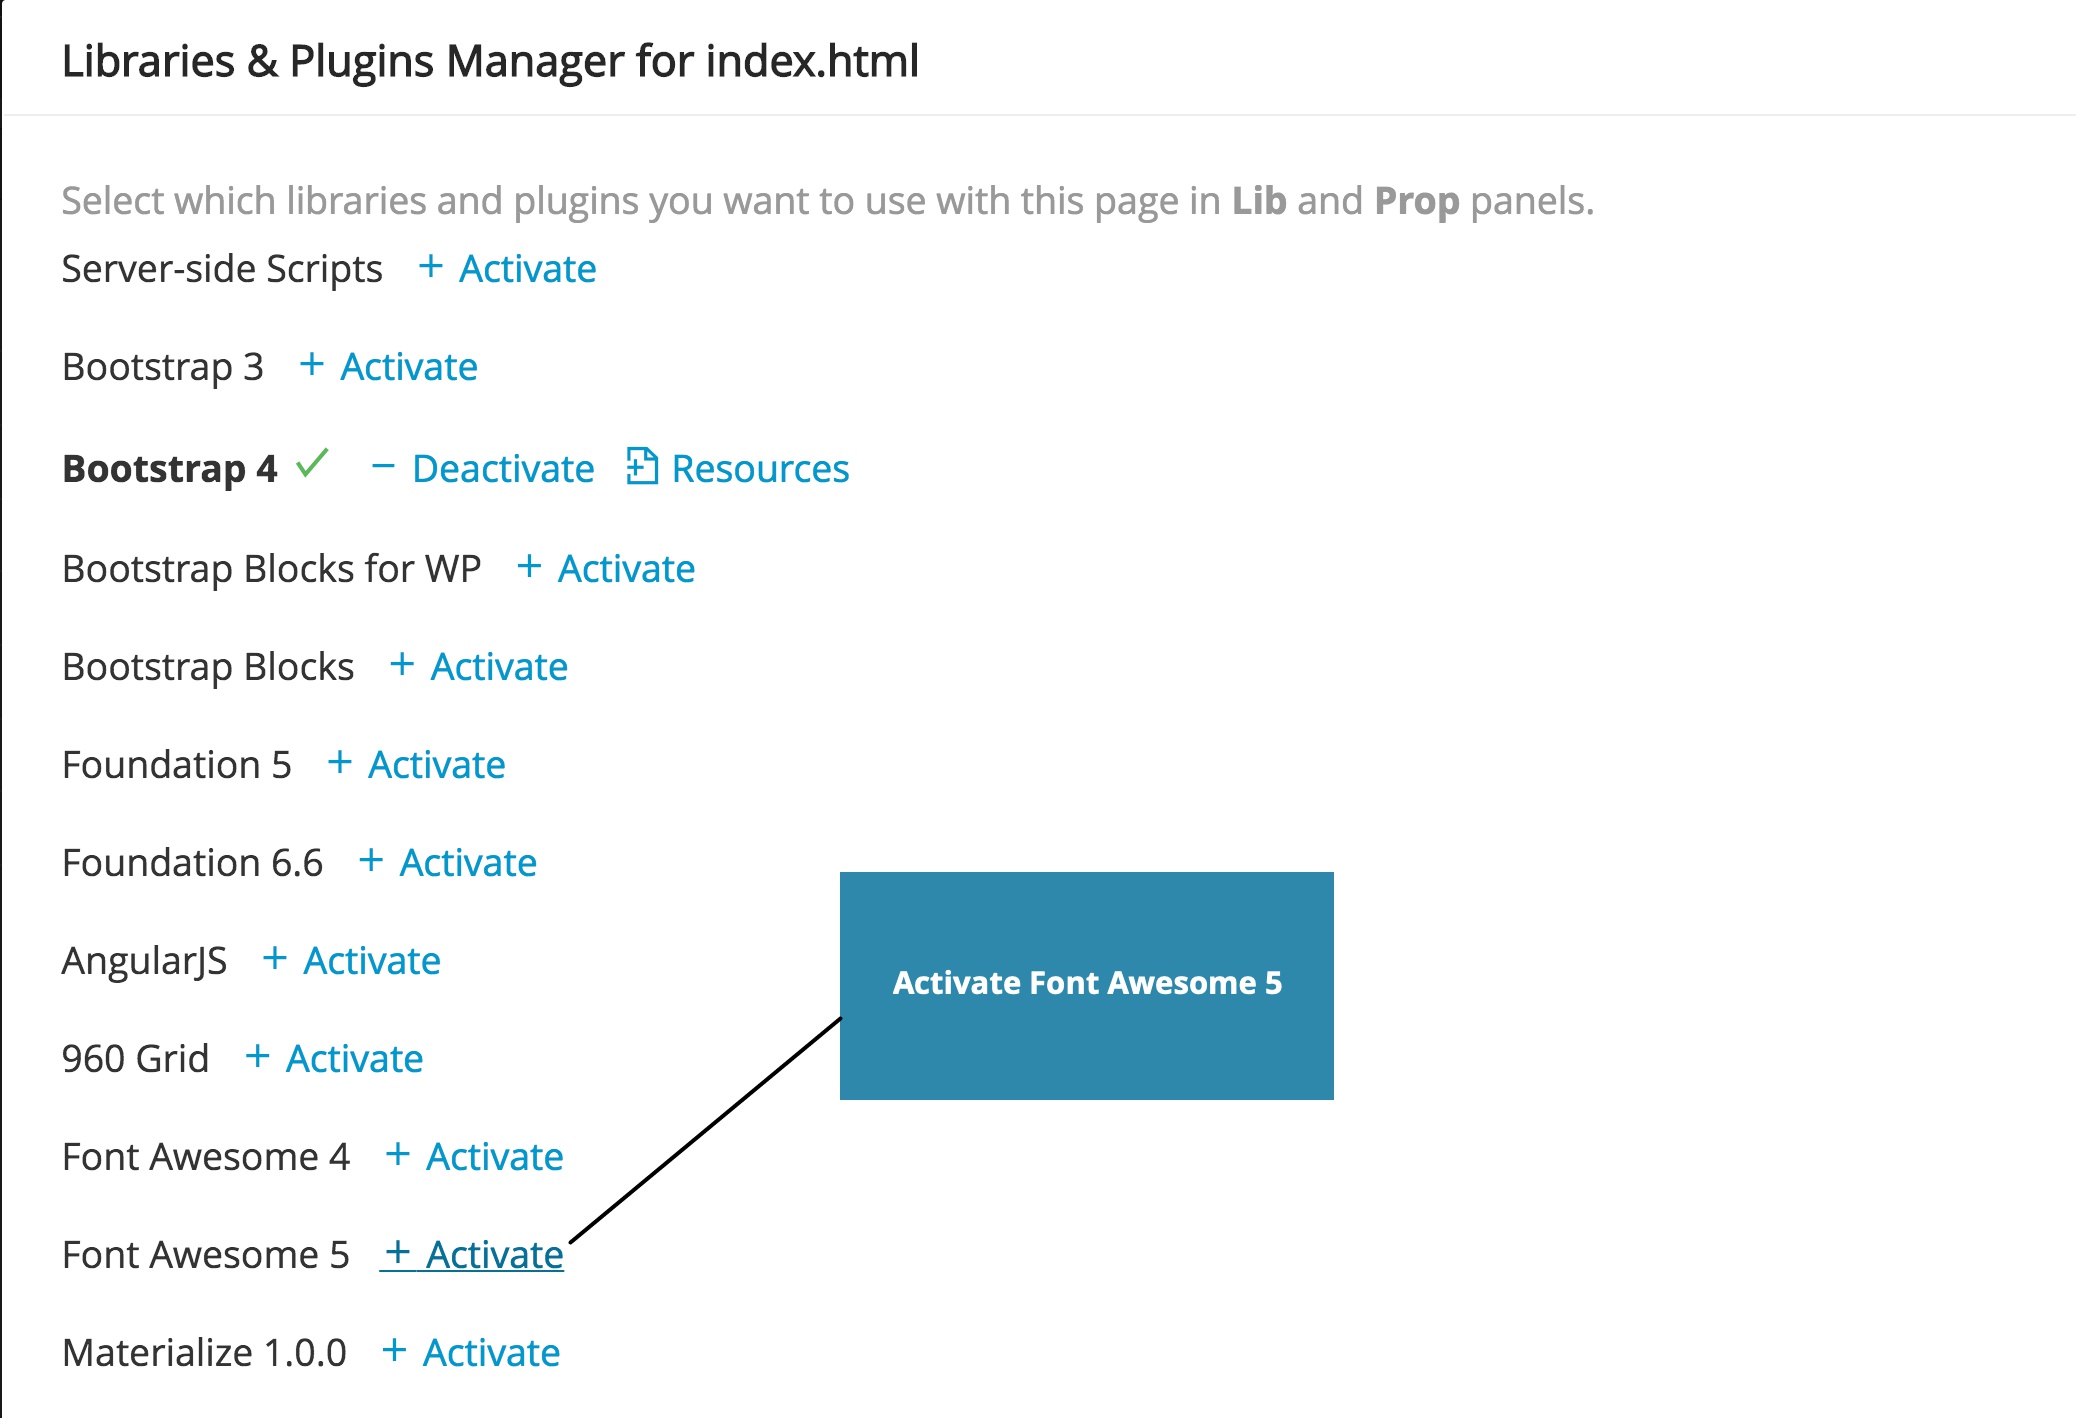
From the pop-up activate “FontAwesome 5” plugin…
…and add the resources either to the page or the project.
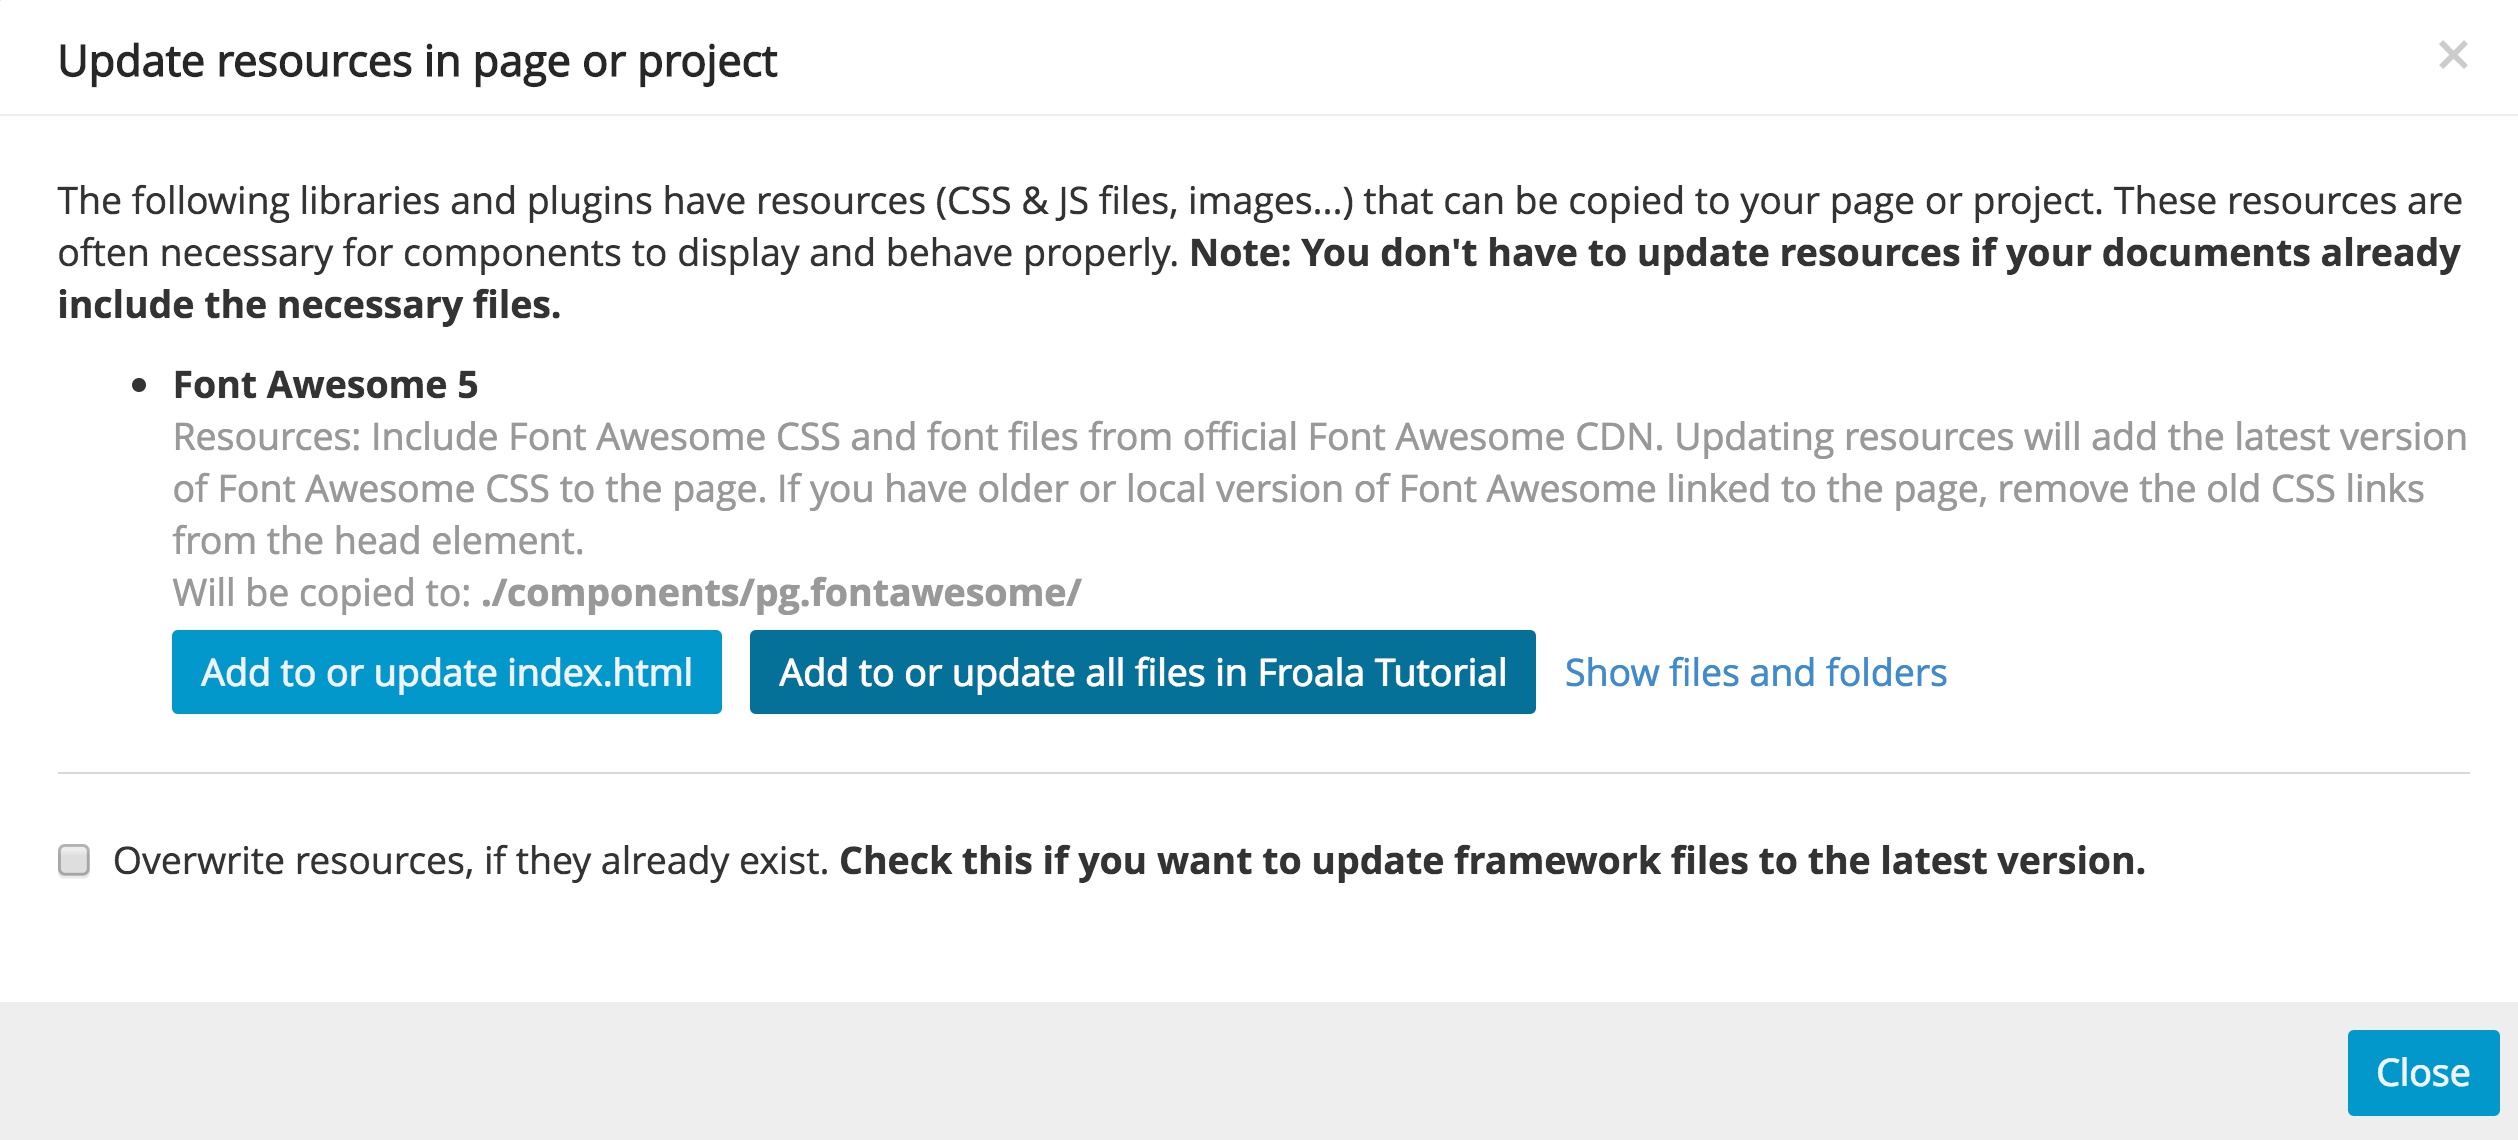
There will be one more modal asking if you want to add by JavaScript or CSS – either will work. I chose to add it by CSS.
5. Use blocks to build your page
Now the magic of Pinegrow! We will load a catalogue of Froala blocks into our Library panel so that we can easily drag them to our Page view.
In the Library panel, click the plus sign at the top of the panel and then click on “Open file…”.
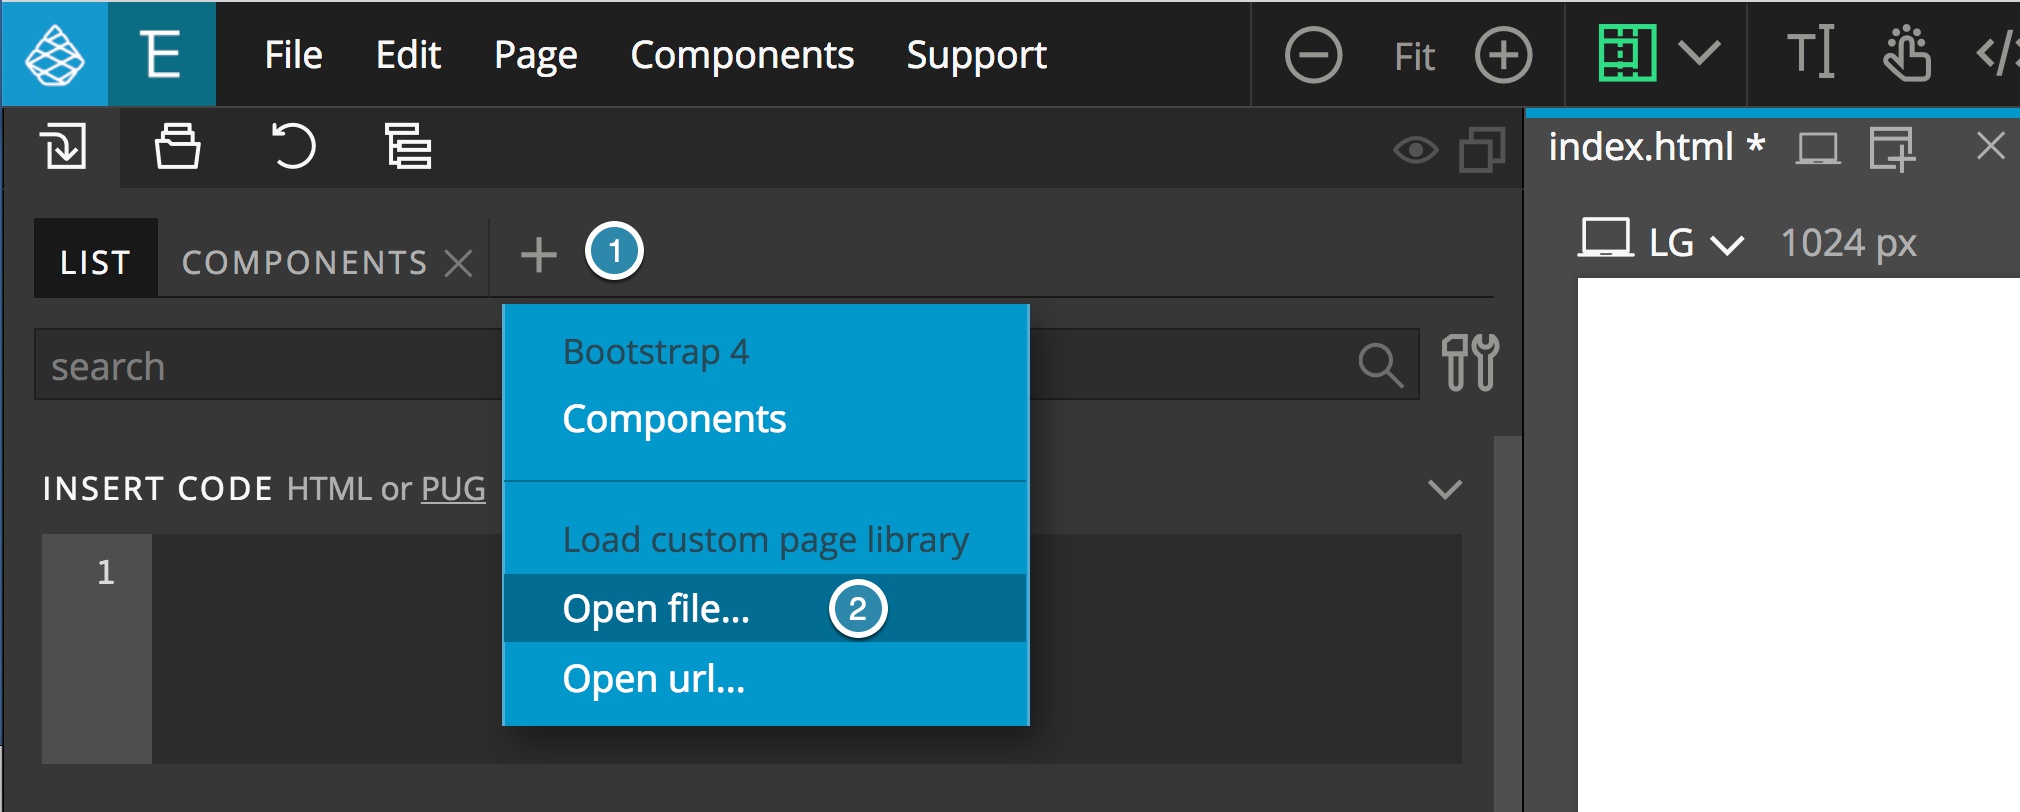
From the file selection pop-up, navigate to the original folder that was created when you unarchived the file from Froala. Select any of the html files to open. For right now, I will select “contacts.html”. Your Library panel should now look something like this…
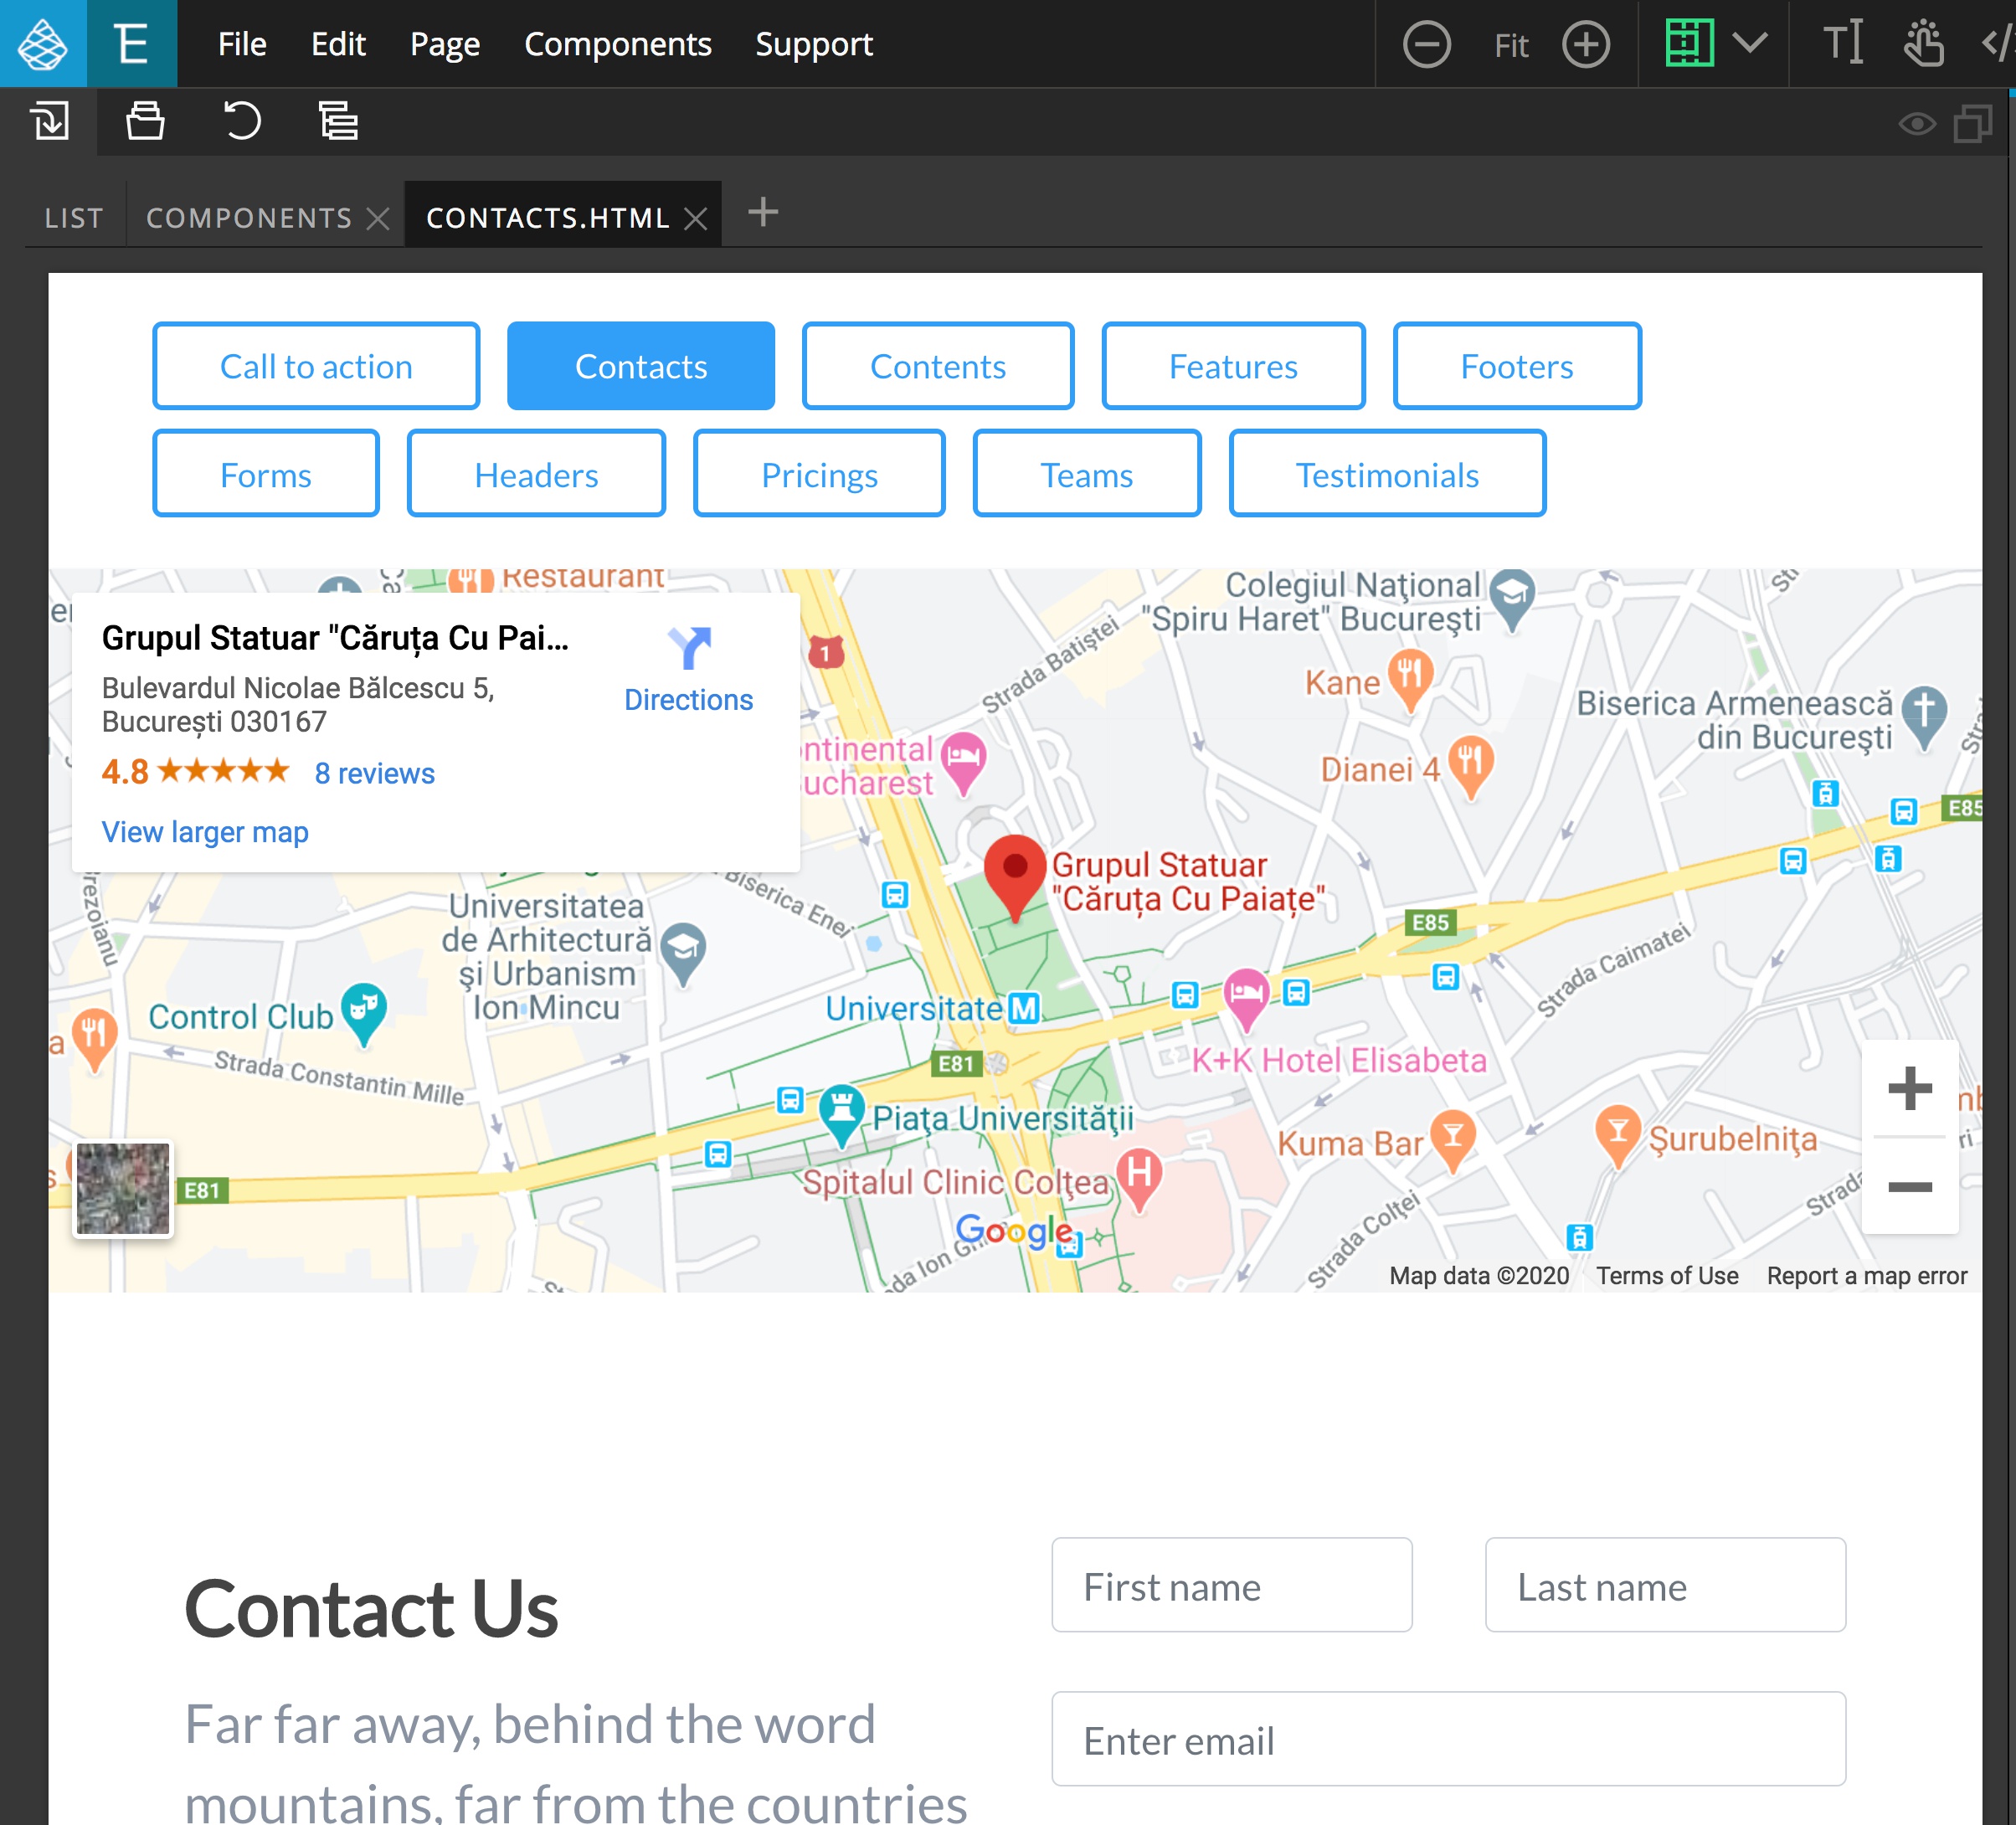
Scrolling down you will see that there are a large number of different blocks that you can select from in the panel. To use them on your page, you simply have to drag-and-drop them either in the page view, or in your Tree Panel for greater precision.
While you can drag any portion of the block to the page typically you will want to drag the entire block to your page. Most of the Froala blocks are implemented as <section> elements (except the headers). In order to ensure that you are selecting the entire block and not only a portion of the block, you can use the breadcrumbs at the bottom of the library panel.
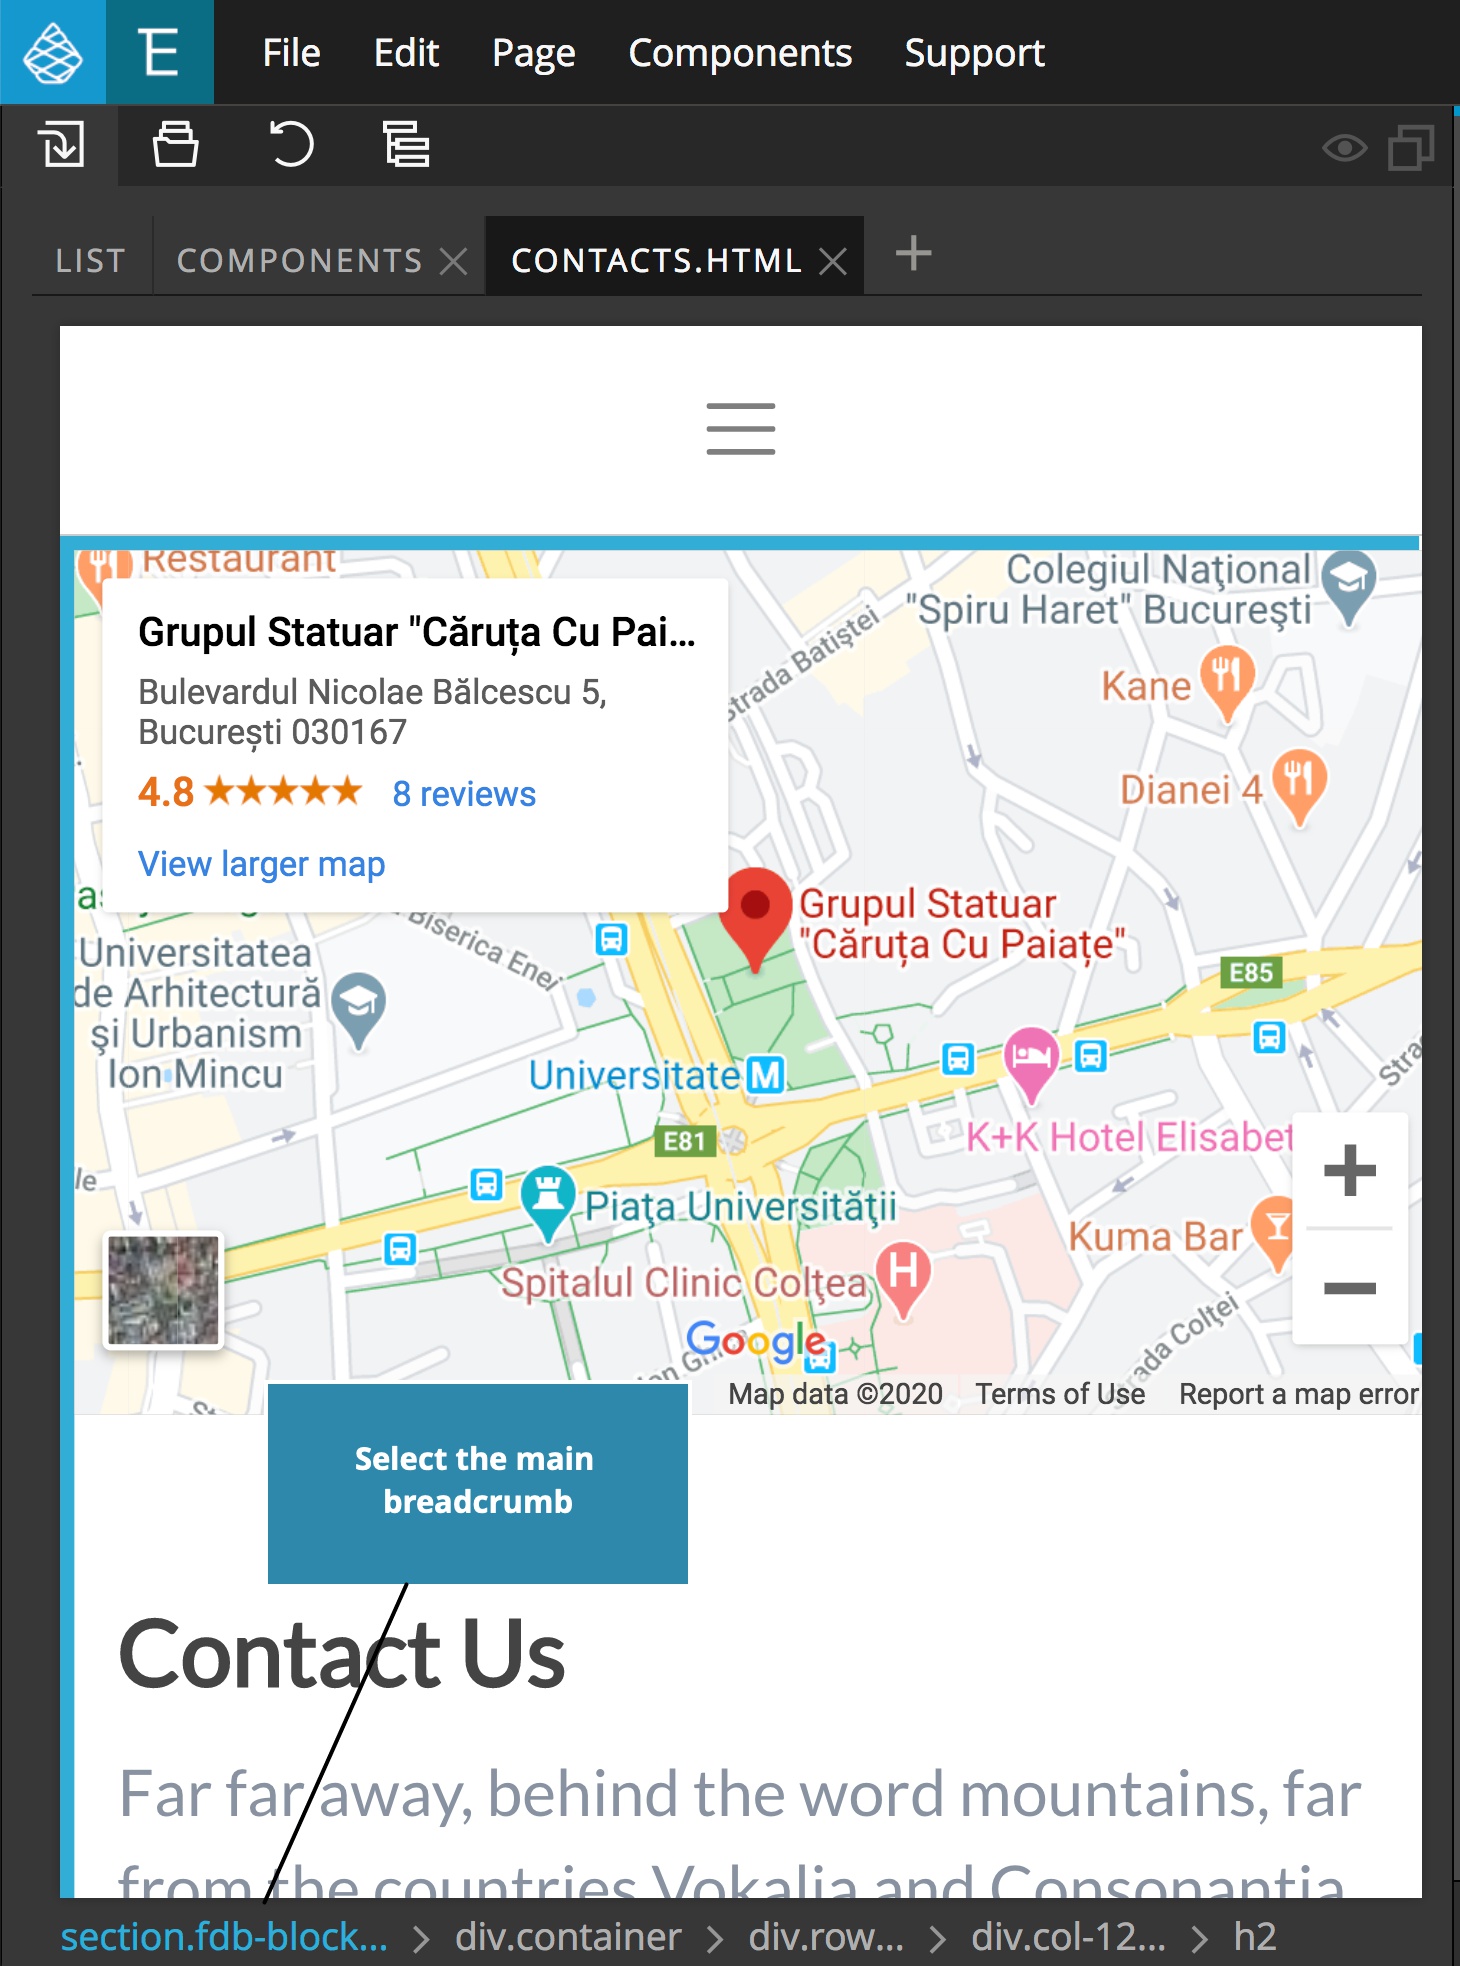
Select any portion of the block and then click the main <section> breadcrumb.
6. Navigate between different Block categories
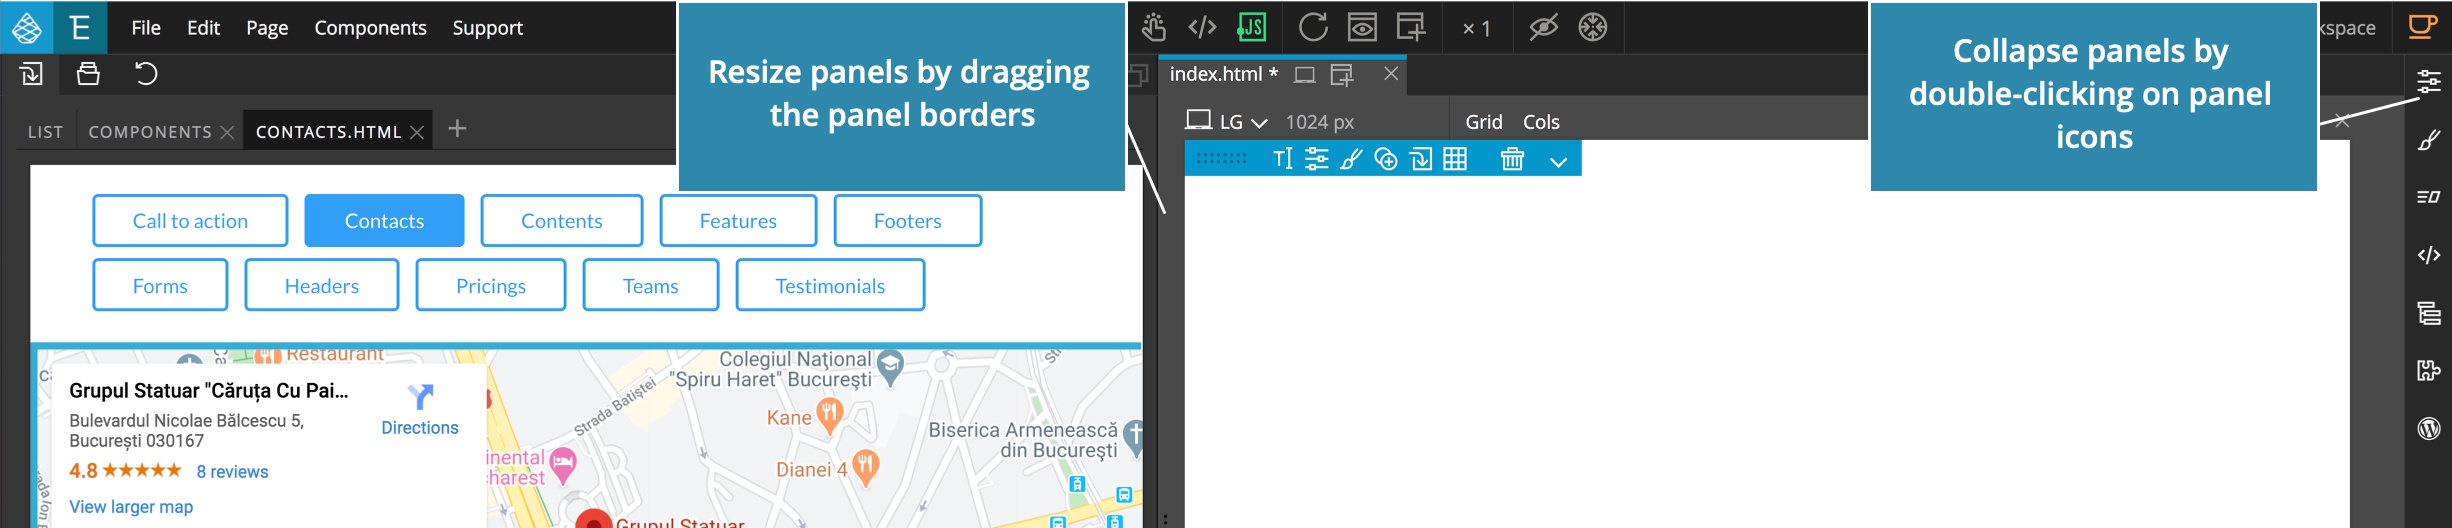
If you want to add blocks from a different category, make sure that you see the full navigation at the top of the imported page. In the image above, my Library panel has a hamburger menu because it is too narrow. Expand the panel width until you see the full navigation menu. One way this can be accomplished is by collapsing your other panels, leaving just the Library panel and Page view. Pinegrow makes this easy by letting you resize and collapse panels.
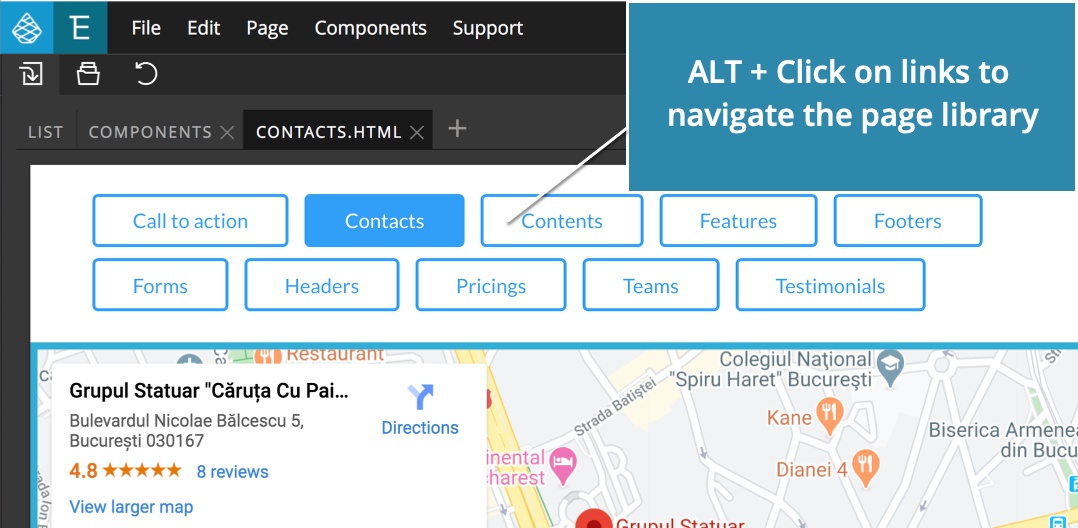
Now, with the navigation menu of the Froala blocks being visible you can simply change between component pages by ALT-clicking on any of the navigation items. This will load the next page in for you to drag-and-drop blocks to your page!
With this we can quickly build the structure of our website. Then we can use Pinegrow to edit the content, fine-tune the HTML layout, and further style the project.
Discuss this tutorial
Have questions or comments about this tutorial? Let’s talk about it on our forum.
Get in touch
Would you like to see your favorite theme or blocks library featured in the next tutorial? Let us know in the forum or by email!