Adding multiple levels of submenus to a Bootstrap 4 navigation bar in your WordPress theme
One of the Bootstrap 4 most wanted feature can now be available within your WordPress themes.
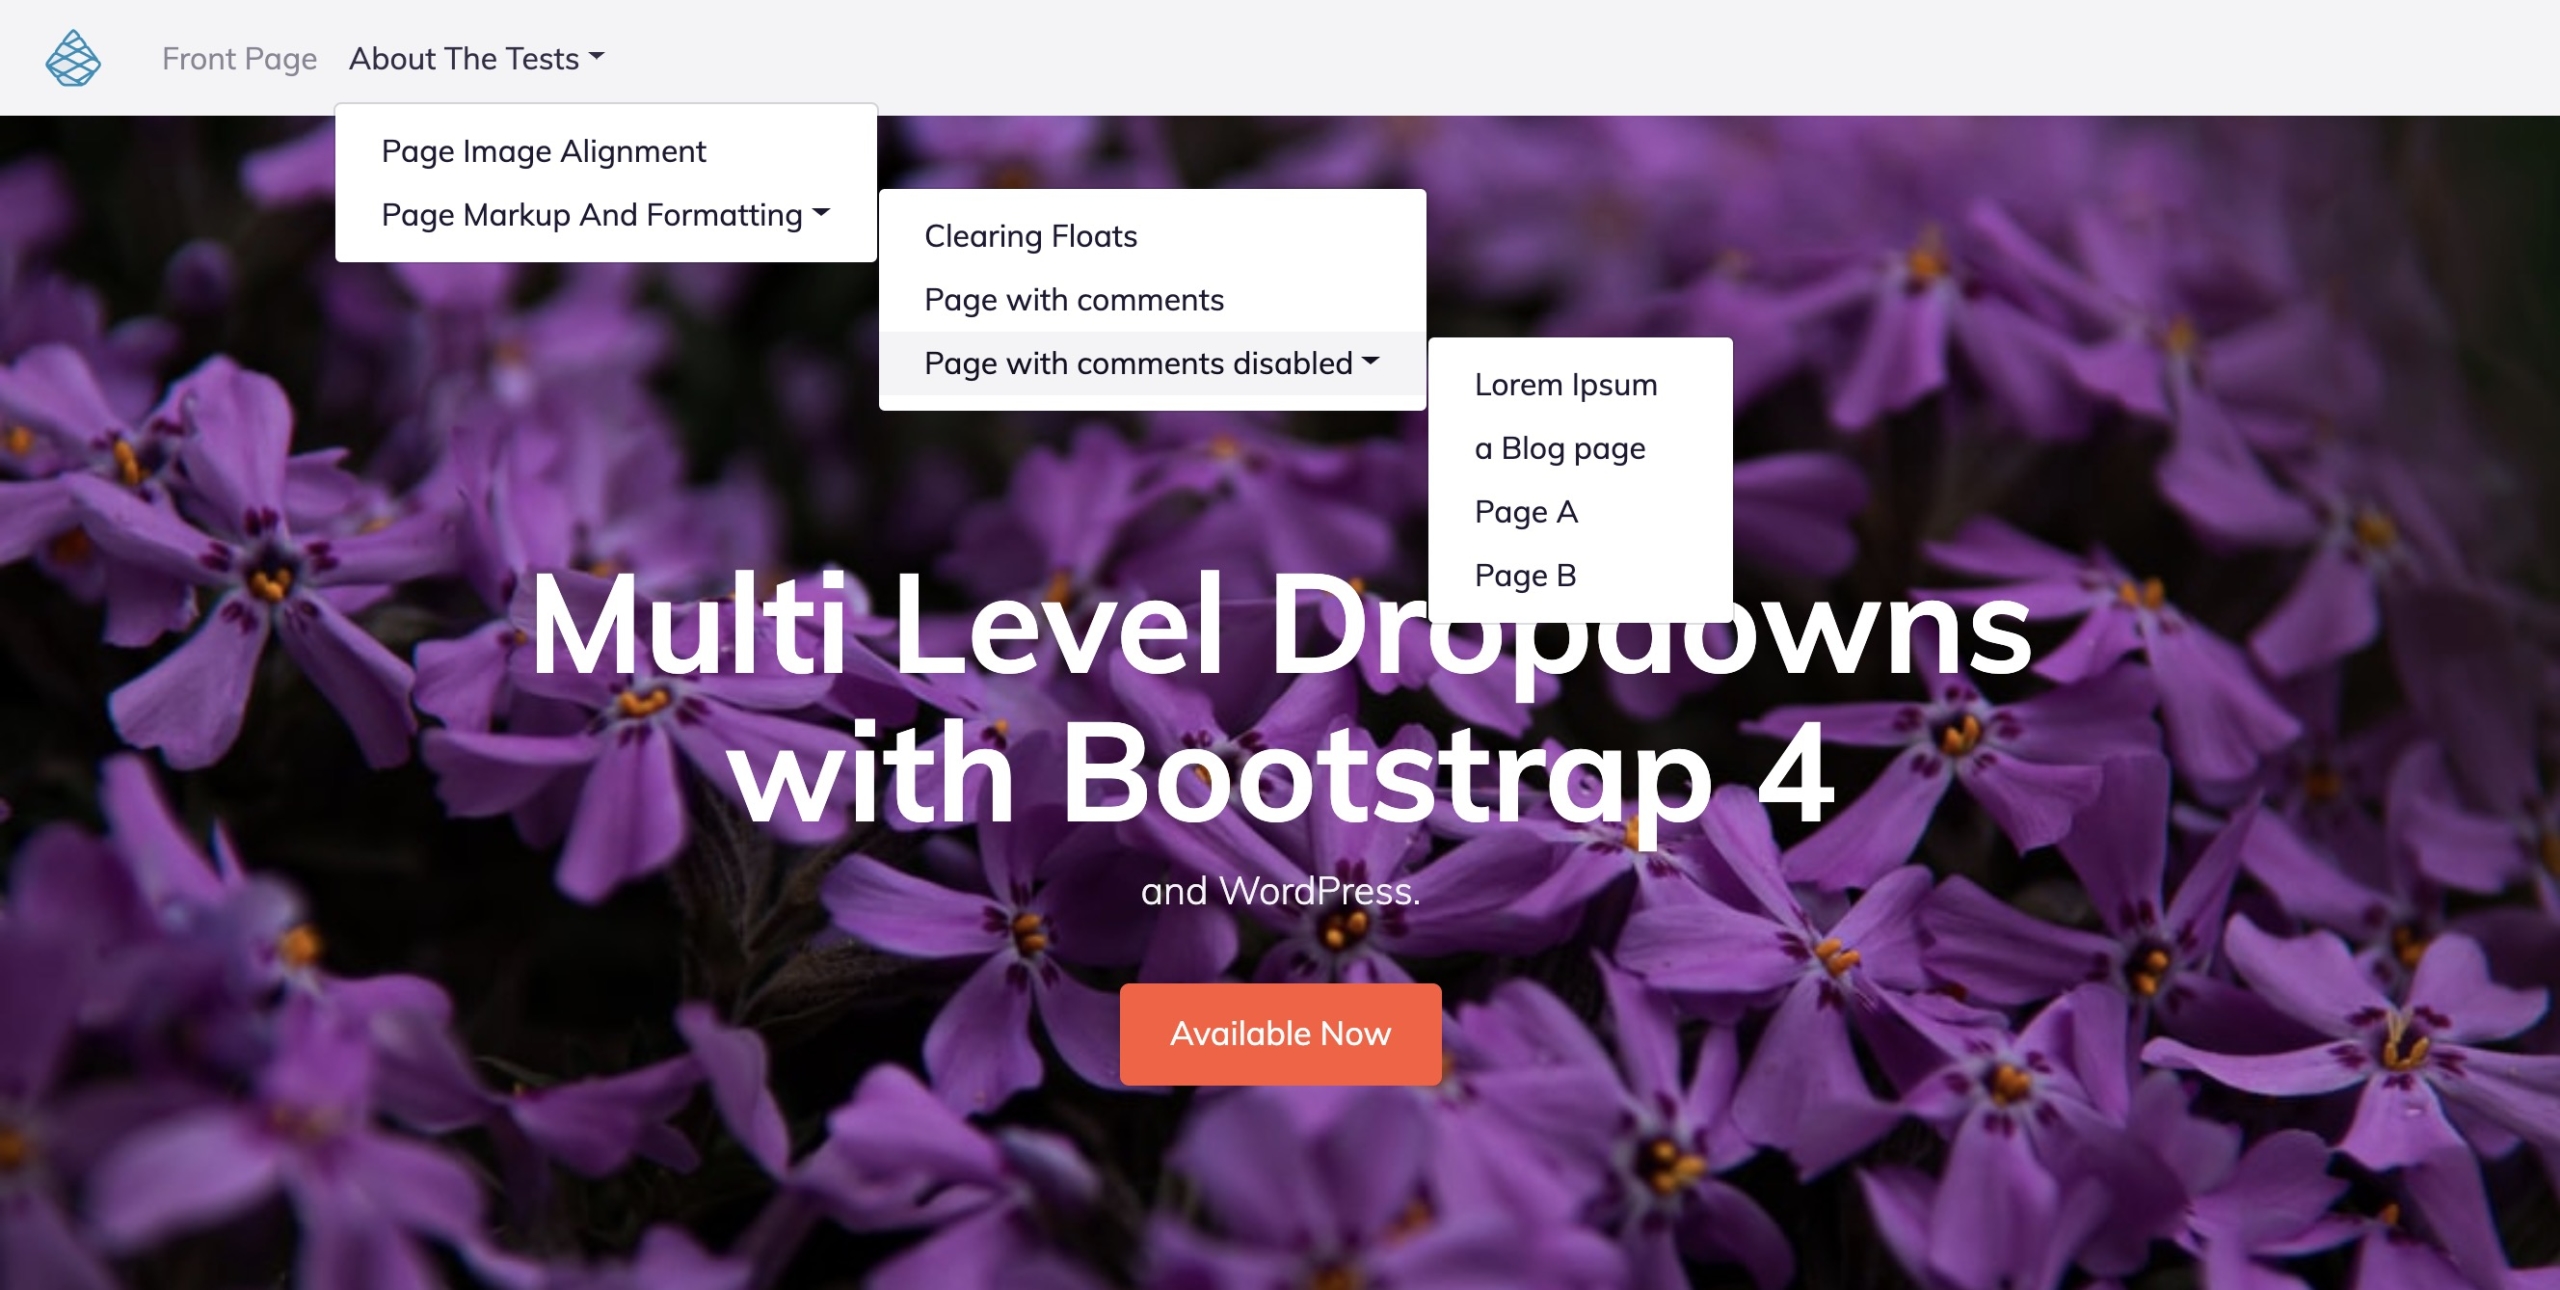
In December 2012, in a statement posted on the Bootstrap 3 Development Github, Mark Otto (the creator of Bootstrap) said “We haven’t seen anyone using submenus in meaningful ways and the code necessary to make them work well is just too much overhead. Submenus just don’t have much of a place on the web right now, especially the mobile web. They will be removed with 3.0.”.
In 2016, when asked again about the support of submenus as part of the development of Bootstrap 4, he said “Nested dropdowns aren’t supported and haven’t been since v3. I made the decision over three years ago, and it hasn’t stopped anyone from building anything :).”.
For accessibility issues, and particularly on mobile touch devices, the use of such menus is nowadays widely discussed and it is generally recommended not to use them.
However, the demand remains strong and in the context of the creation of WordPress themes, it is a request that comes back very regularly in our community forum or in the email box of our technical support.
We have been exploring the web in search of an effective solution that we deliver to you today.
We tested the following method in a Bootstrap 4 project with a classic navbar whose styles and structure have not been modified or altered and we found it satisfactory.
However, this method remains a tweak intended to fill a lack of functionality that was purposefully omitted in the Bootstrap 4 framework and we will be careful not to guarantee its universality for all your projects.
How to proceed?
IMPORTANT: Some points in this tutorial require a good knowledge of Pinegrow and the creation of WordPress themes. If you are new to creating themes, we invite you to consult our documentation.
Configuring the desired number of levels in your Bootstrap menu
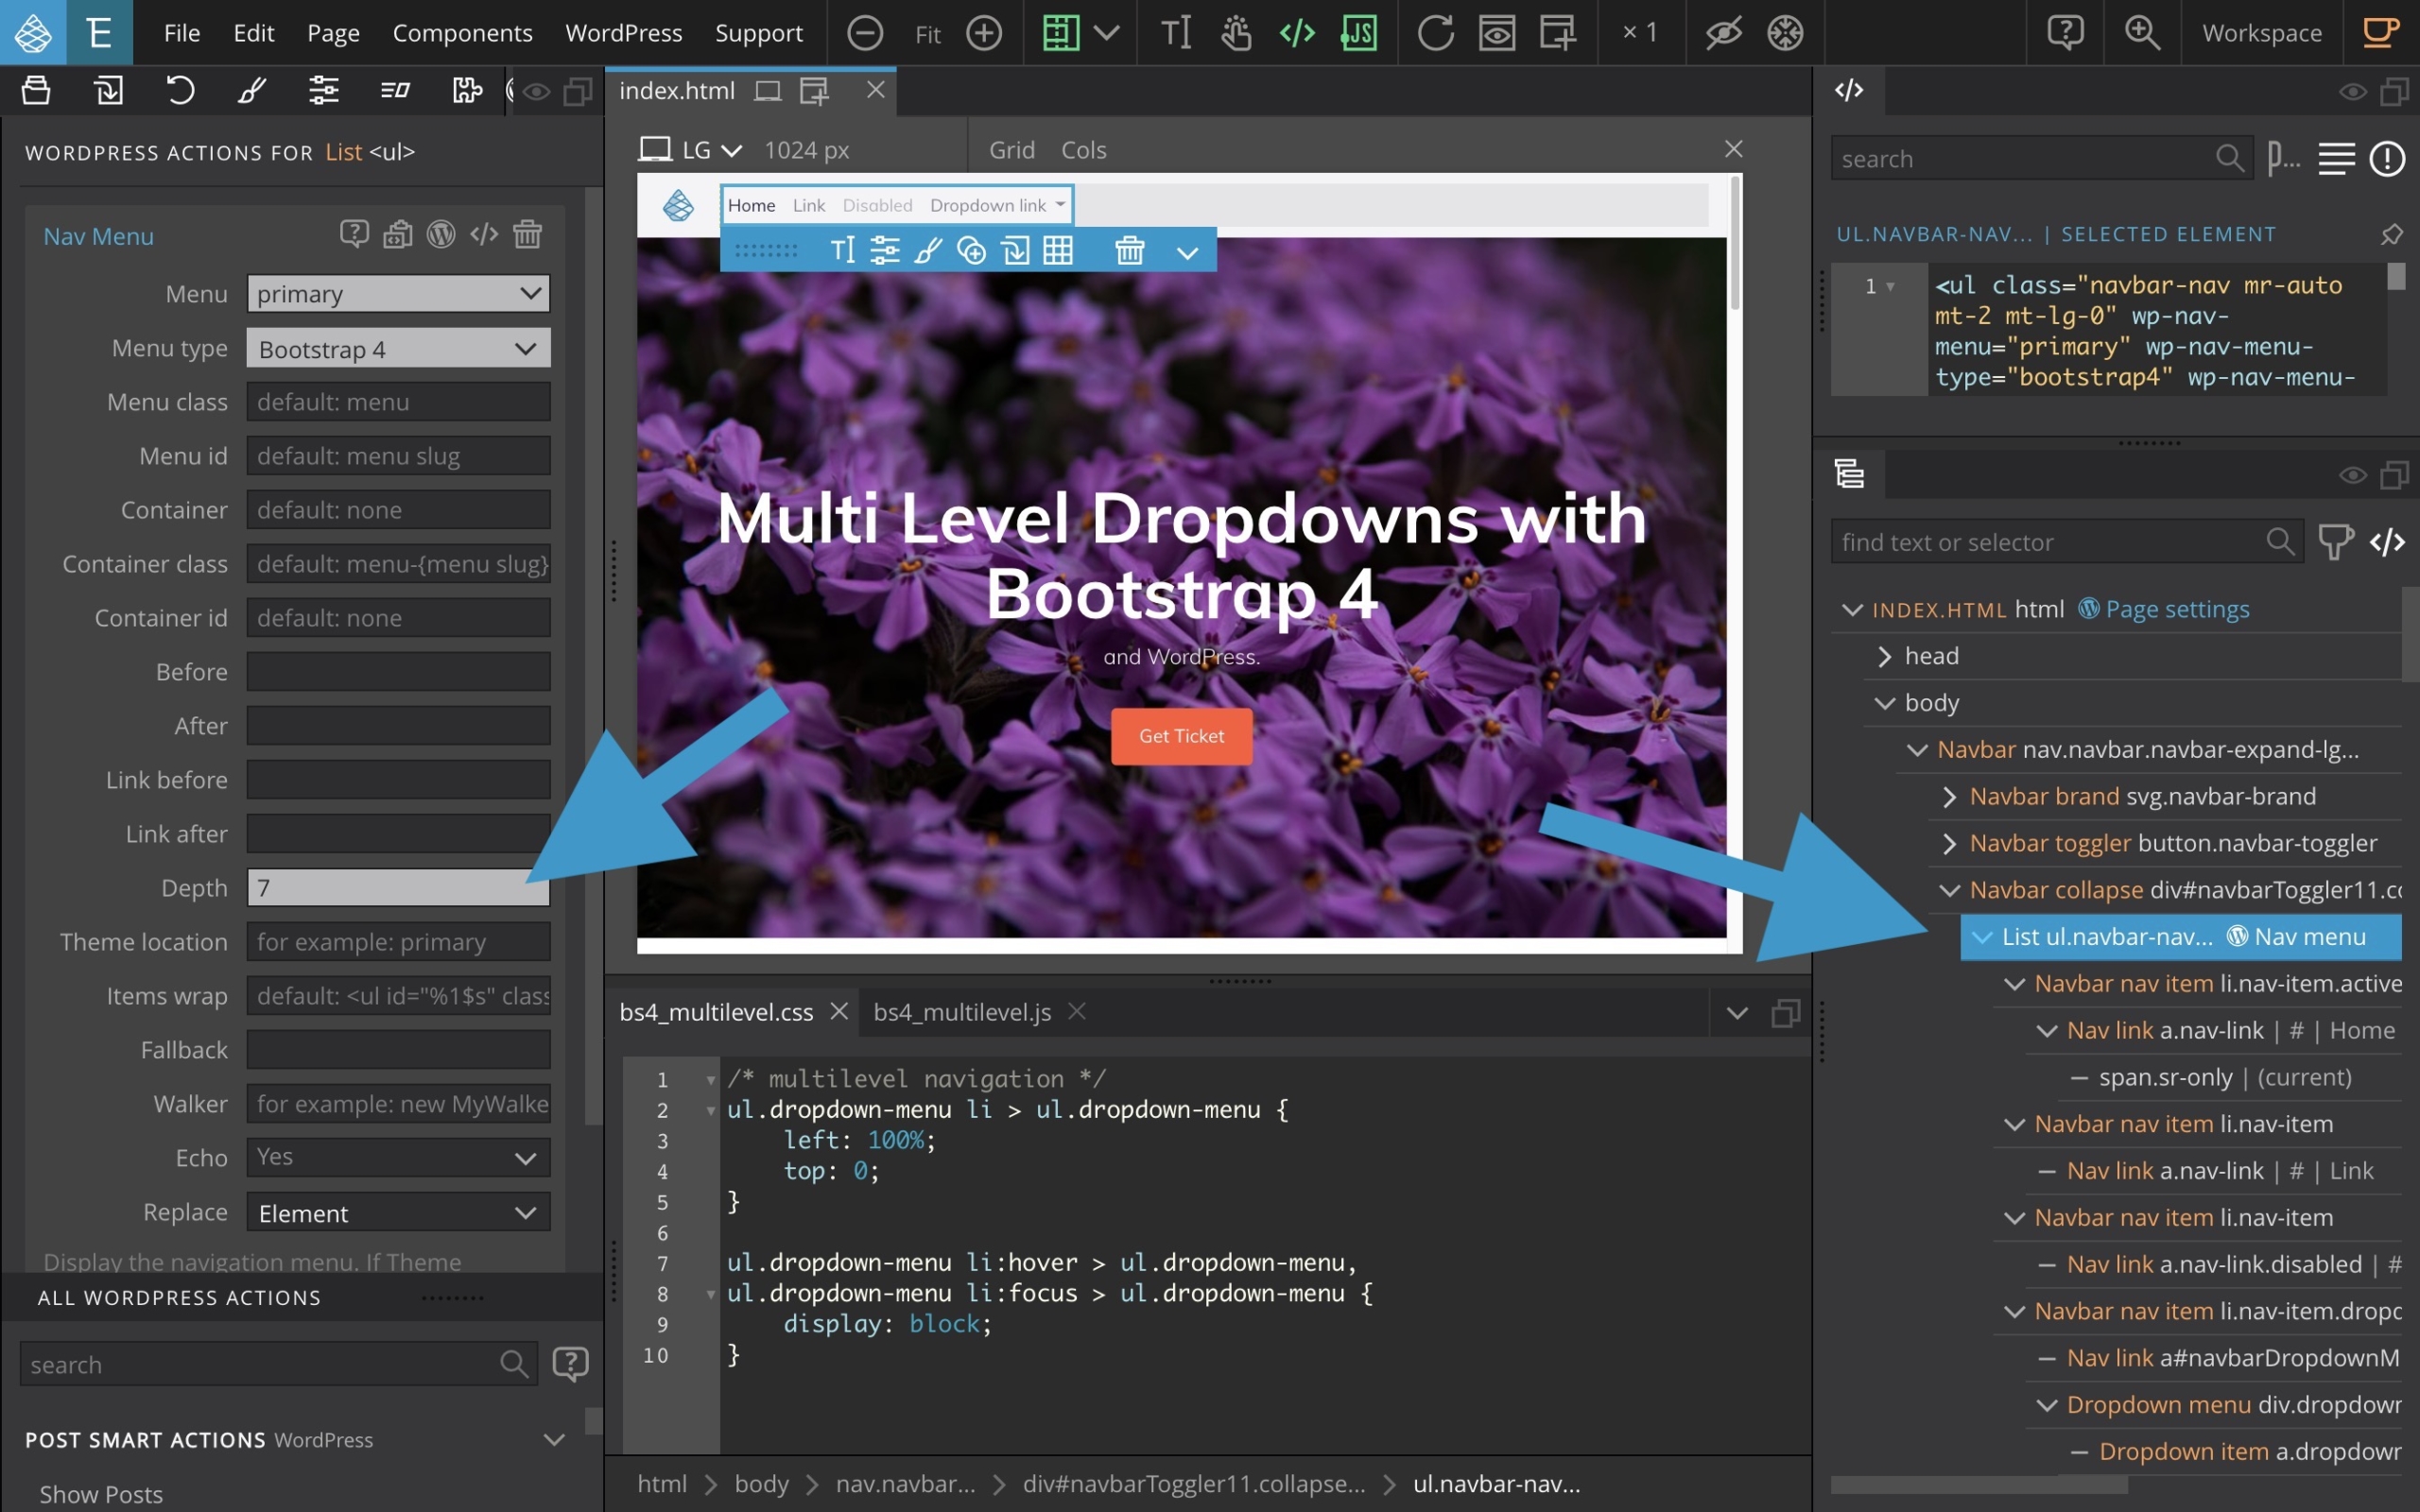
Once you have added the Nav menu smart action to the list item of your main menu, proceed with the configuration of your menu, taking care to set the Menu type to Bootstrap 4 and the Depth option to the number of levels you wish to use in your sub-menus.
Adding extra CSS properties to your project
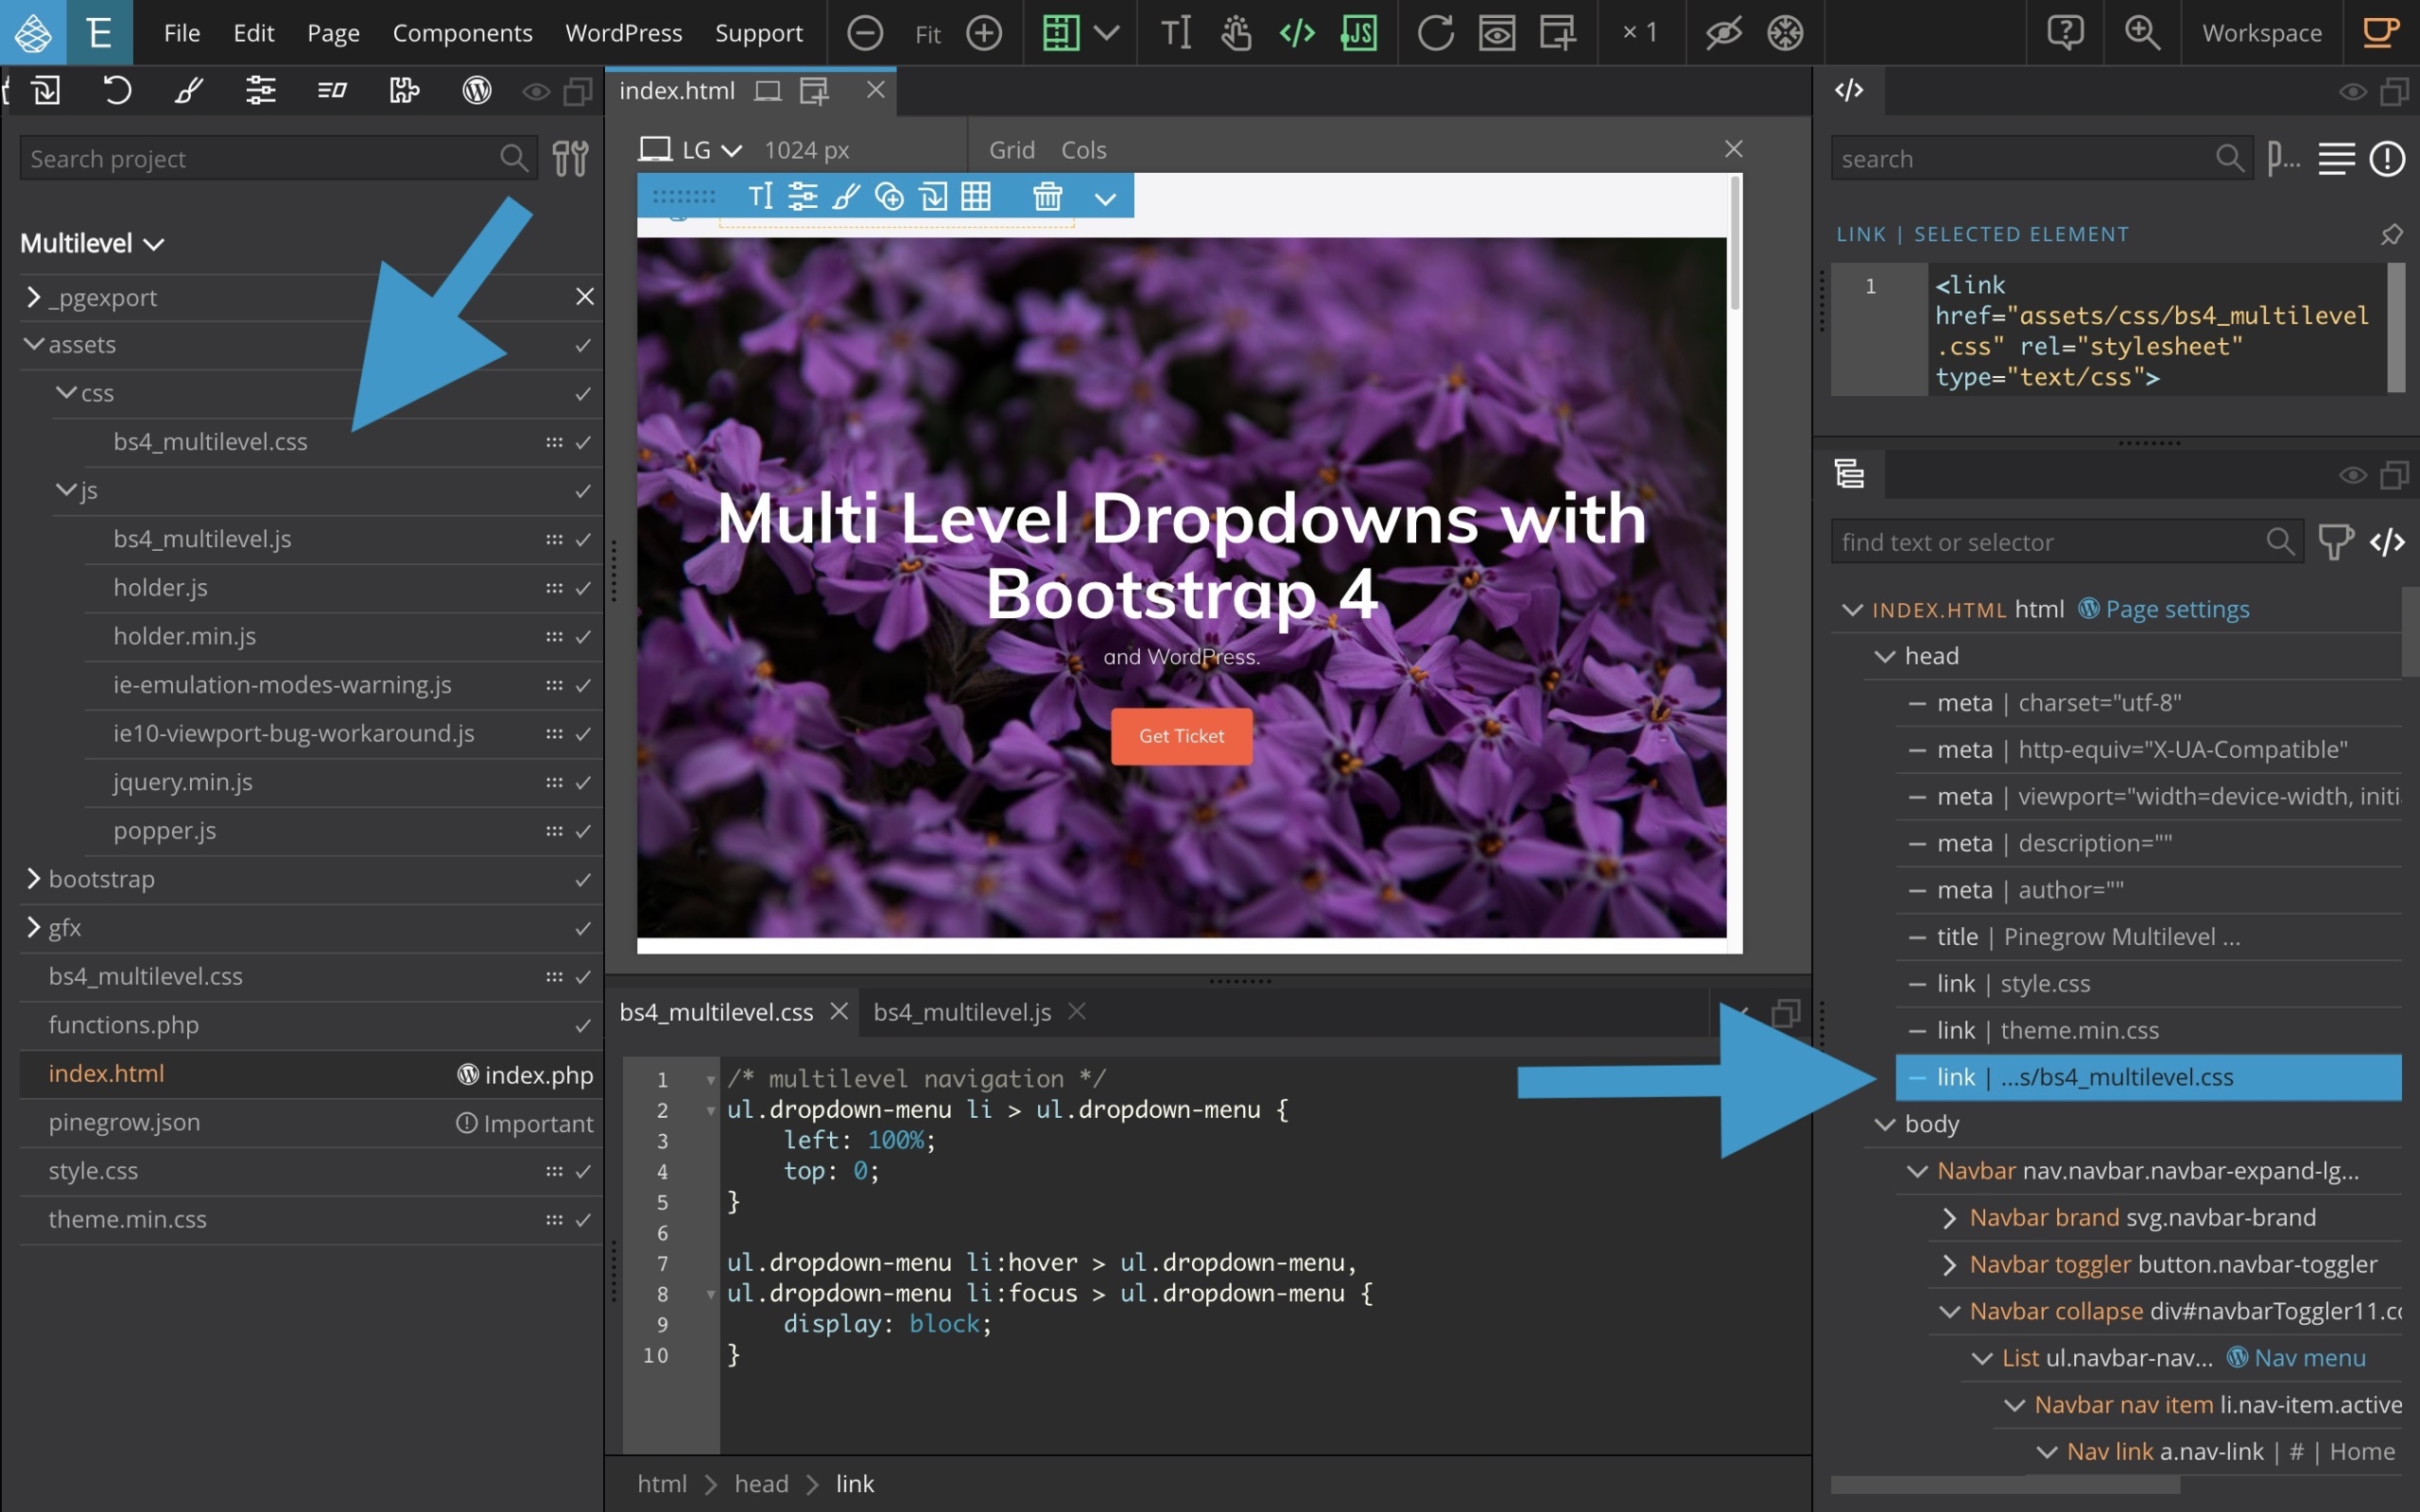
Copy the following CSS properties and paste them into your main CSS file (.css style or any other file in your project)
/* multilevel navigation */
ul.dropdown-menu li > ul.dropdown-menu {
    left: 100%;
    top: 0;
}

ul.dropdown-menu li:hover > ul.dropdown-menu,
ul.dropdown-menu li:focus > ul.dropdown-menu {
    display: block;
}
or download this CSS file (unzip it) and simply add it to your project using a drag and drop from the project tab to the page view.
Read more about how-to add stylesheets or scripts to the page.
It is important that this CSS is positioned after loading the main Bootstrap CSS file.
Adding an extra javascript to your project
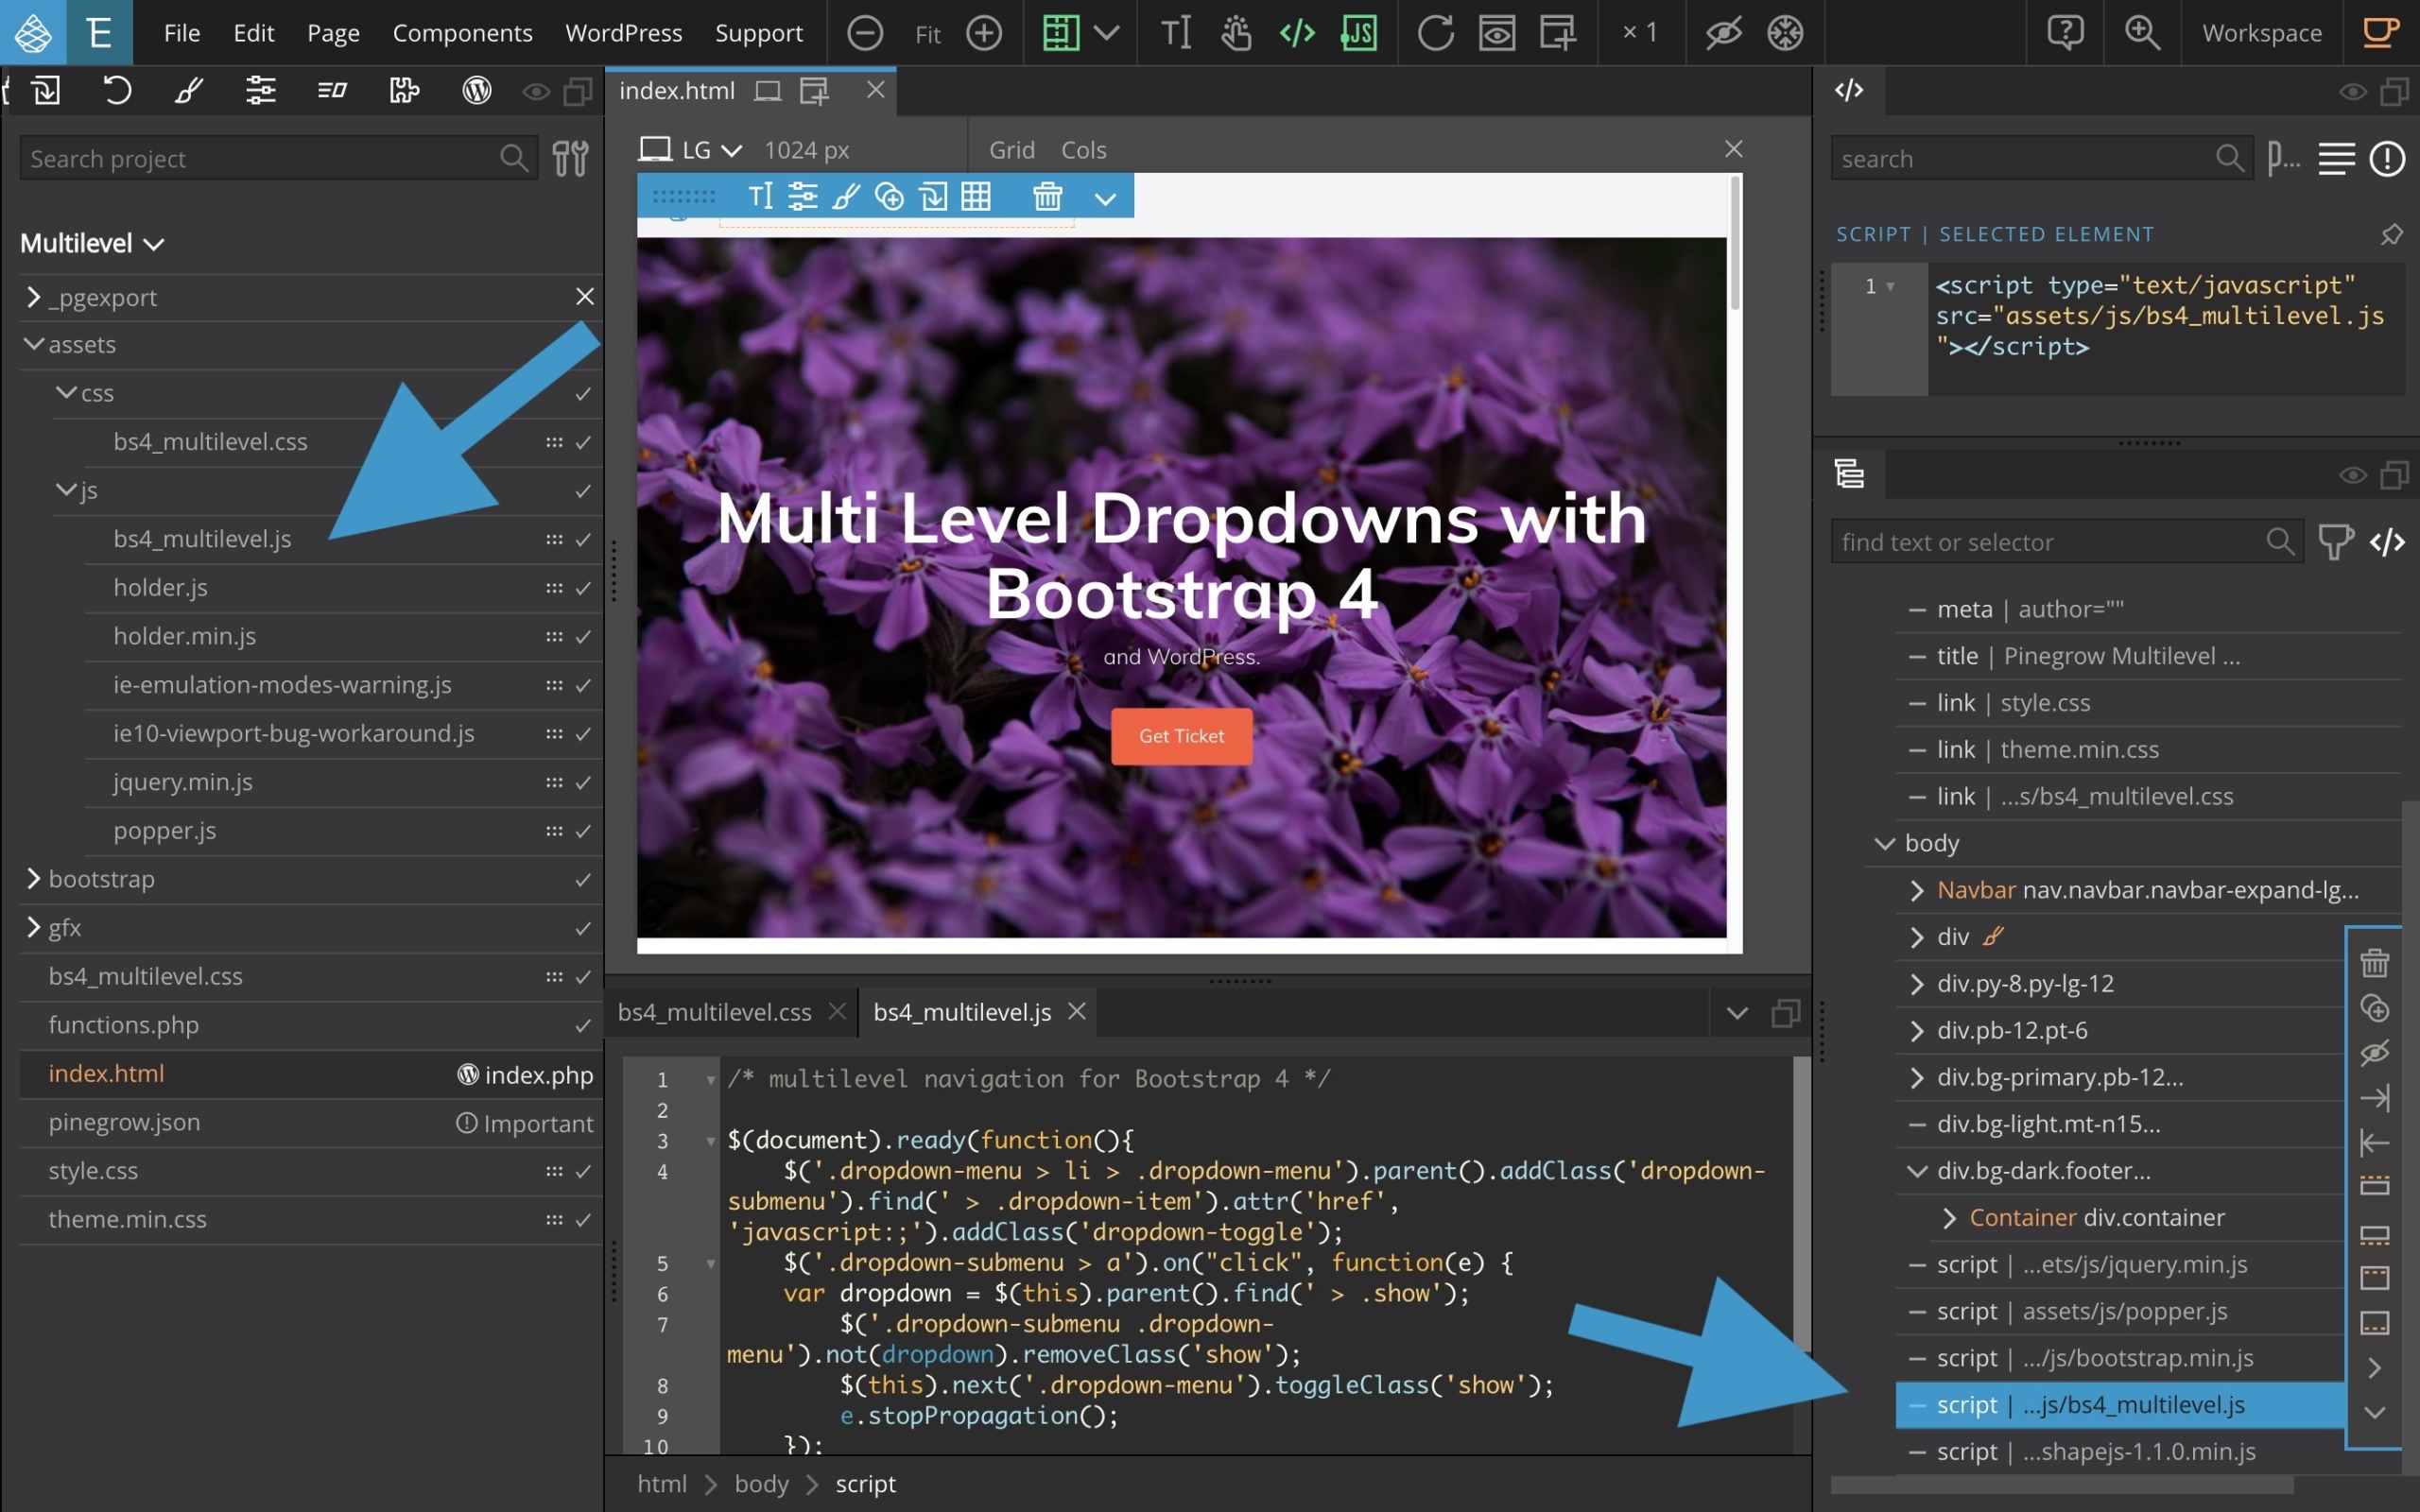
Copy the following Javascript code and paste it into an existing JS file from your project or simply create a new file and paste this content inside.
/* multilevel navigation for Bootstrap 4 */

$(document).ready(function(){
	$('.dropdown-menu > li > .dropdown-menu').parent().addClass('dropdown-submenu').find(' > .dropdown-item').attr('href', 'javascript:;').addClass('dropdown-toggle');
	$('.dropdown-submenu > a').on("click", function(e) {
	var dropdown = $(this).parent().find(' > .show');
		$('.dropdown-submenu .dropdown-menu').not(dropdown).removeClass('show');
		$(this).next('.dropdown-menu').toggleClass('show');
		e.stopPropagation();
	});
	$('.dropdown').on("hidden.bs.dropdown", function() {
		$('.dropdown-menu.show').removeClass('show');
	});
});
Or, just download this JS file (unzip it) and add it into your project folder then simply insert it in your document footer using a drag and drop from the project tab to the page view.
WARNING: In some cases, there may be a problem with jQuery. You can find out about this by looking at your browser’s inspector console.
Uncaught TypeError: $ is not a function
    at bs4_multilevel.js:3
In this situation, please use the following version of the script. (no downloadable version available, please copy/paste the following content )
/* multilevel navigation for Bootstrap 4 jQuery Fix October 2020 */

jQuery(document).ready(function(){
	jQuery('.dropdown-menu > li > .dropdown-menu').parent().addClass('dropdown-submenu').find(' > .dropdown-item').attr('href', 'javascript:;').addClass('dropdown-toggle');
	jQuery('.dropdown-submenu > a').on("click", function(e) {
	var dropdown = $(this).parent().find(' > .show');
	jQuery('.dropdown-submenu .dropdown-menu').not(dropdown).removeClass('show');
	jQuery(this).next('.dropdown-menu').toggleClass('show');
		e.stopPropagation();
	});
	jQuery('.dropdown').on("hidden.bs.dropdown", function() {
		jQuery('.dropdown-menu.show').removeClass('show');
	});
});
Read more about how-to add stylesheets or scripts to the page.
Configure your menu in WordPress and add some levels to your menu

Afterwards, you just need to configure your menu in WordPress and add a few levels to your menu so you can fully test your changes.
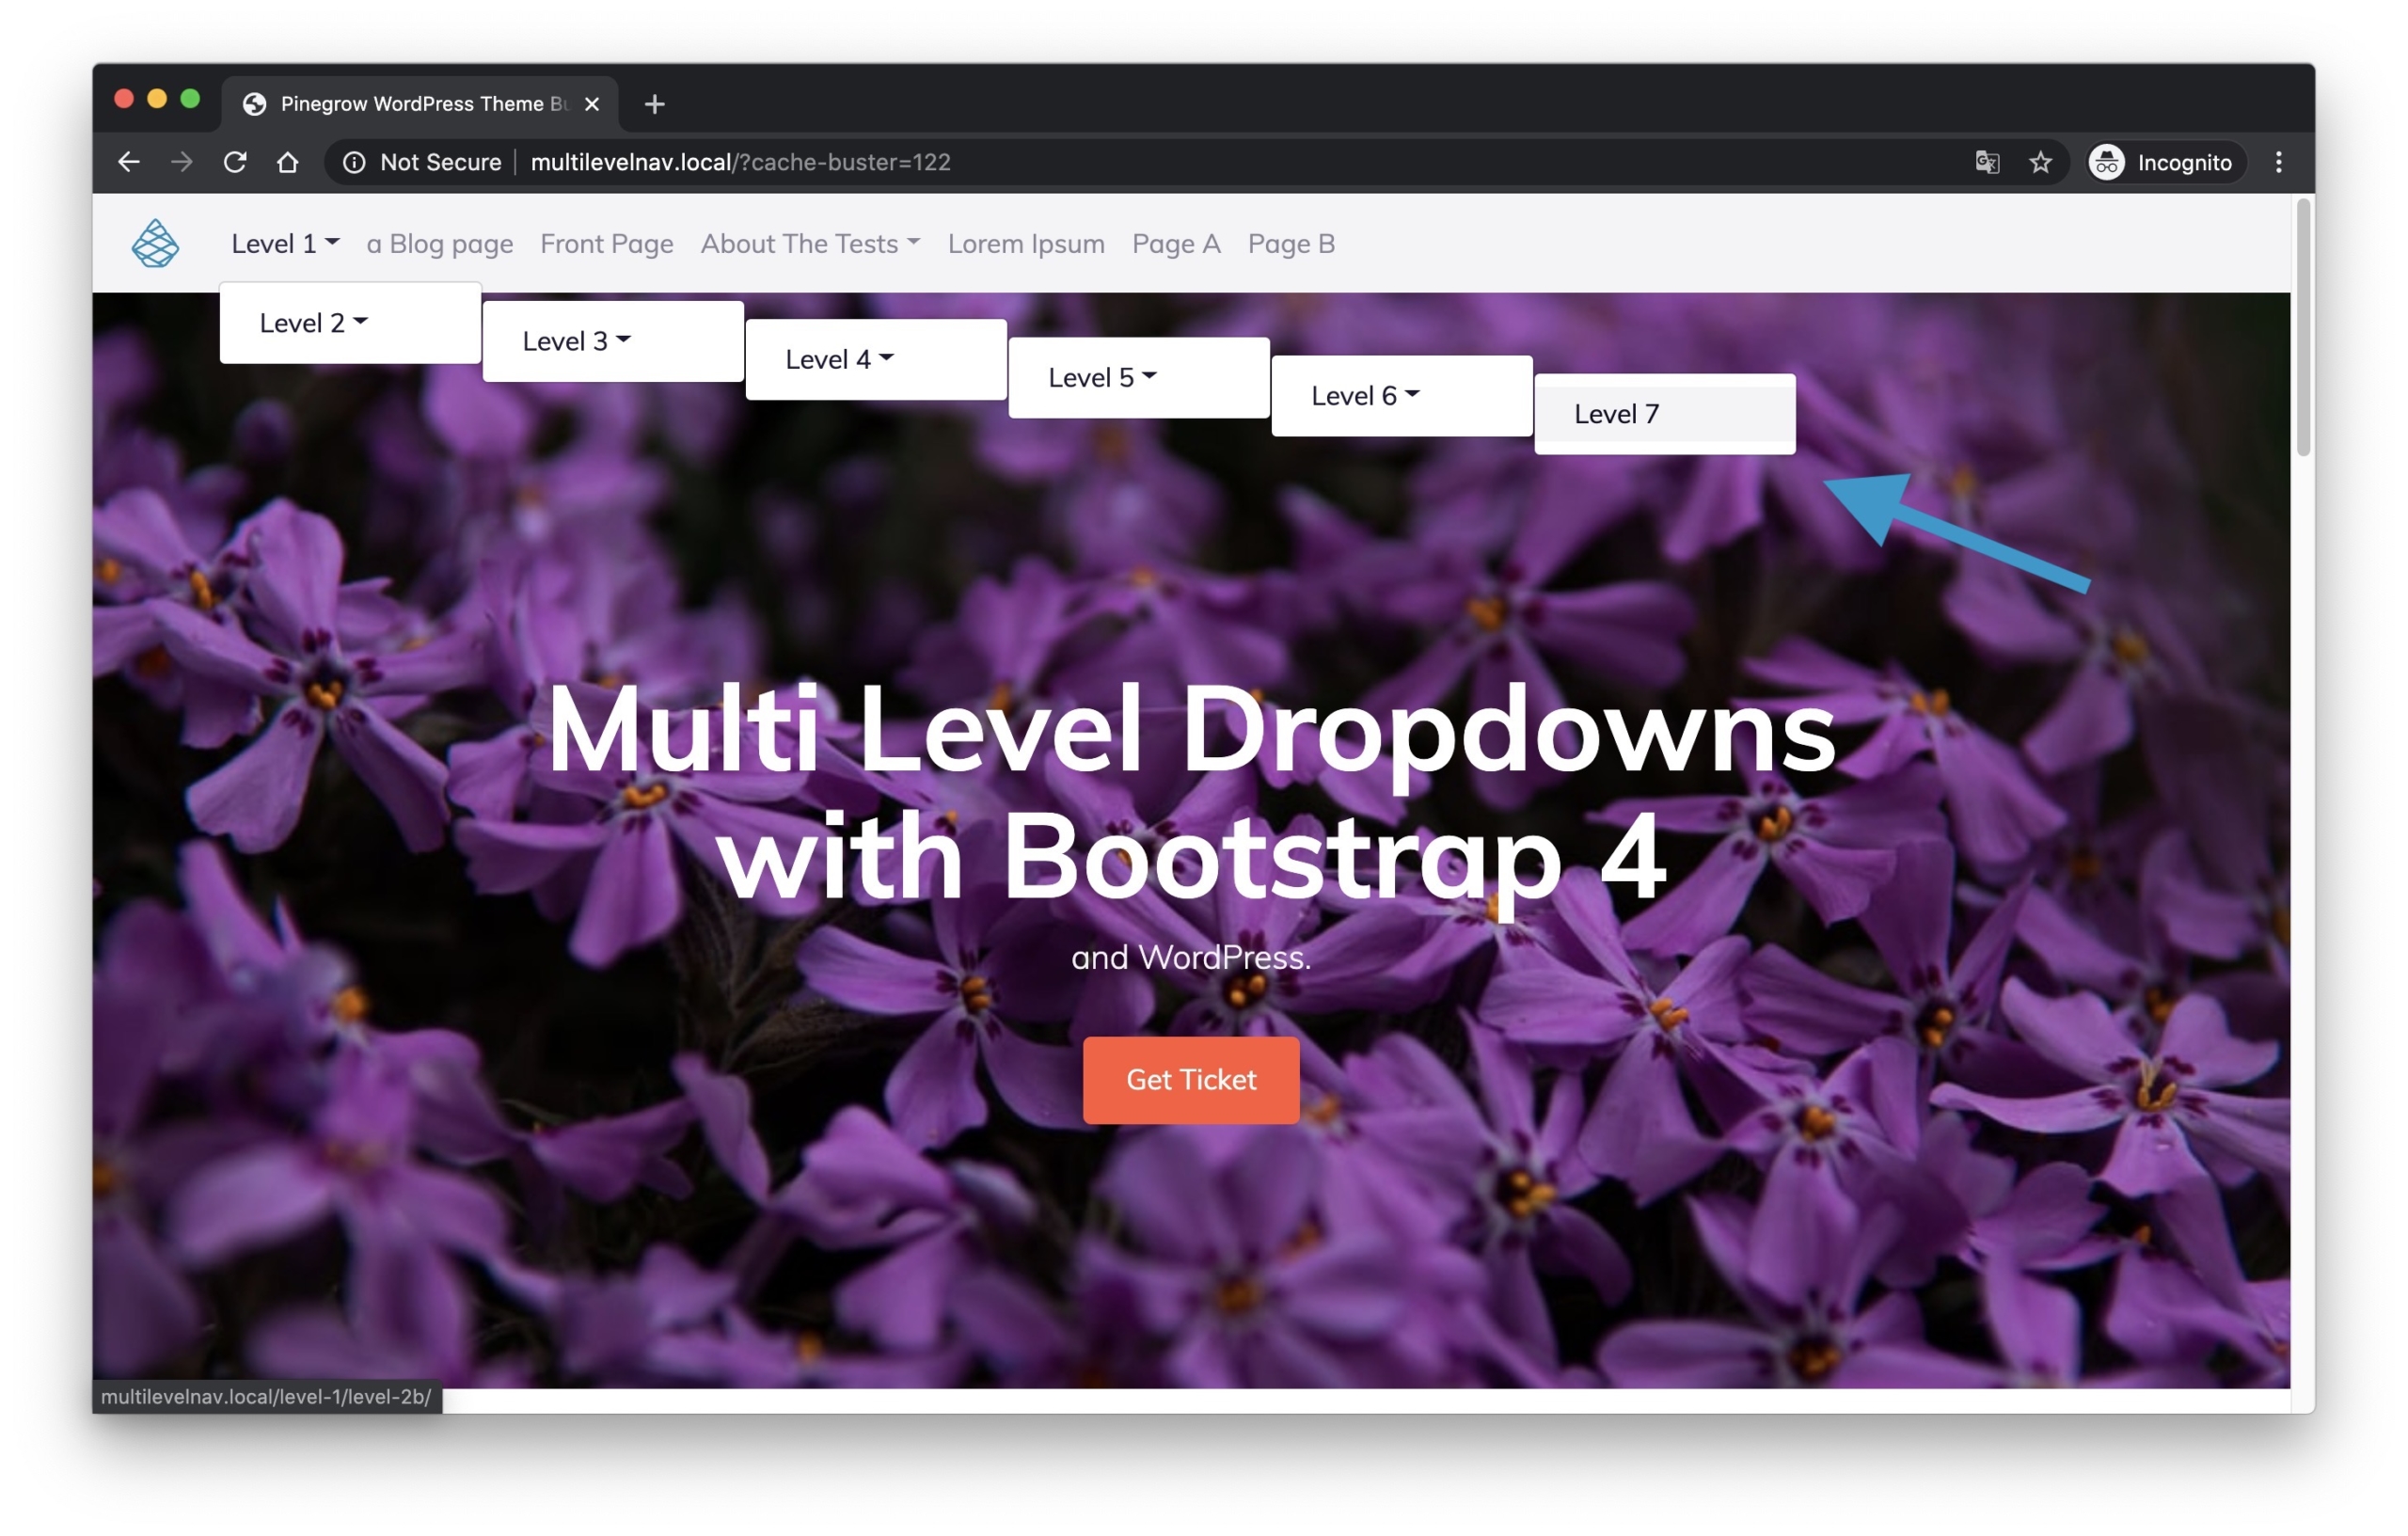
You can now see your beautiful multi levels dropdown menu on your local WordPress test site.
What about the result?

You will notice that if the desktop display is satisfactory with a small number of levels, the mobile display is a little less so.
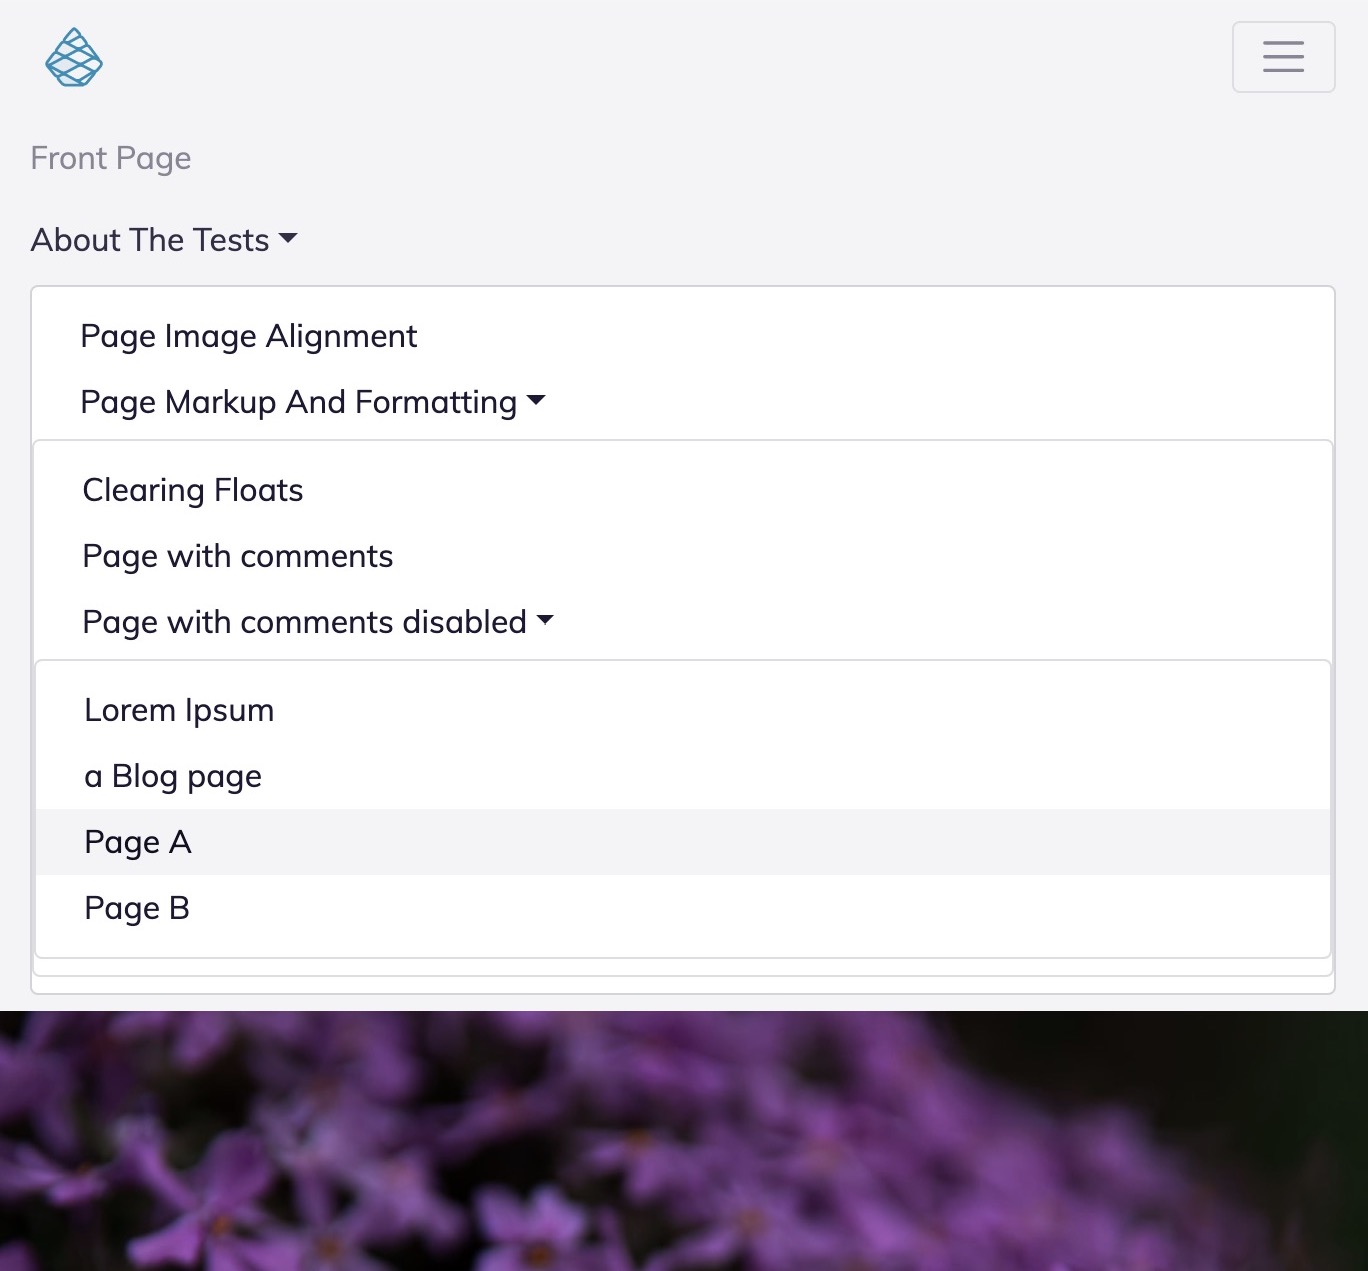
As we said before, dealing with mobile devices is the main constraint with this type of menus, at least with Bootstrap 4.
You can of course explore the contents of the CSS and JS files we provide and experiment with styles and behaviour modifications to improve the situation. With a bit of work, this is definitely possible.
We are curious about your future integrations, so please let us know by posting your comments on the community forum.
Discuss this tutorial
Have questions or comments about this tutorial? Let’s talk about it on our forum.