Styling your Bootstrap project with Bootswatch and SASS
A quick introduction to using the Bootswatch free Bootstrap themes and Sass to make your web page look great.
Styling can be the difference between a good and a great page. Pinegrow has a built-in SASS compiler that allows you to work with the SASS style sheet language without the need to manually recompile after every change. This means that you can take advantage of powerful features like variables and mix-ins to quickly put together a great-looking page, but also one that can easily be updated with different styles project-wide.
In this tutorial, we will look at one free resource that provides SASS-based themes you can use in your projects.
While any type of project made with Pinegrow can use SASS styling, we will be creating an example using Bootstrap 4 and styling from the Bootswatch website. These designers have put together a series of different styles that can be quickly downloaded to change the style of our pages.
Let’s get started!
Prefer to read? Scroll past the video.
This tutorial is available in video and textual form. Watch the video, or continue reading if you prefer to read. Of course, you can do both!
Video – Styling with Bootswatch and SASS
1. Start a new Bootstrap 4 project
You can skip this step if you want to use SASS and Bootswatch styling on an existing Bootstrap 4 project
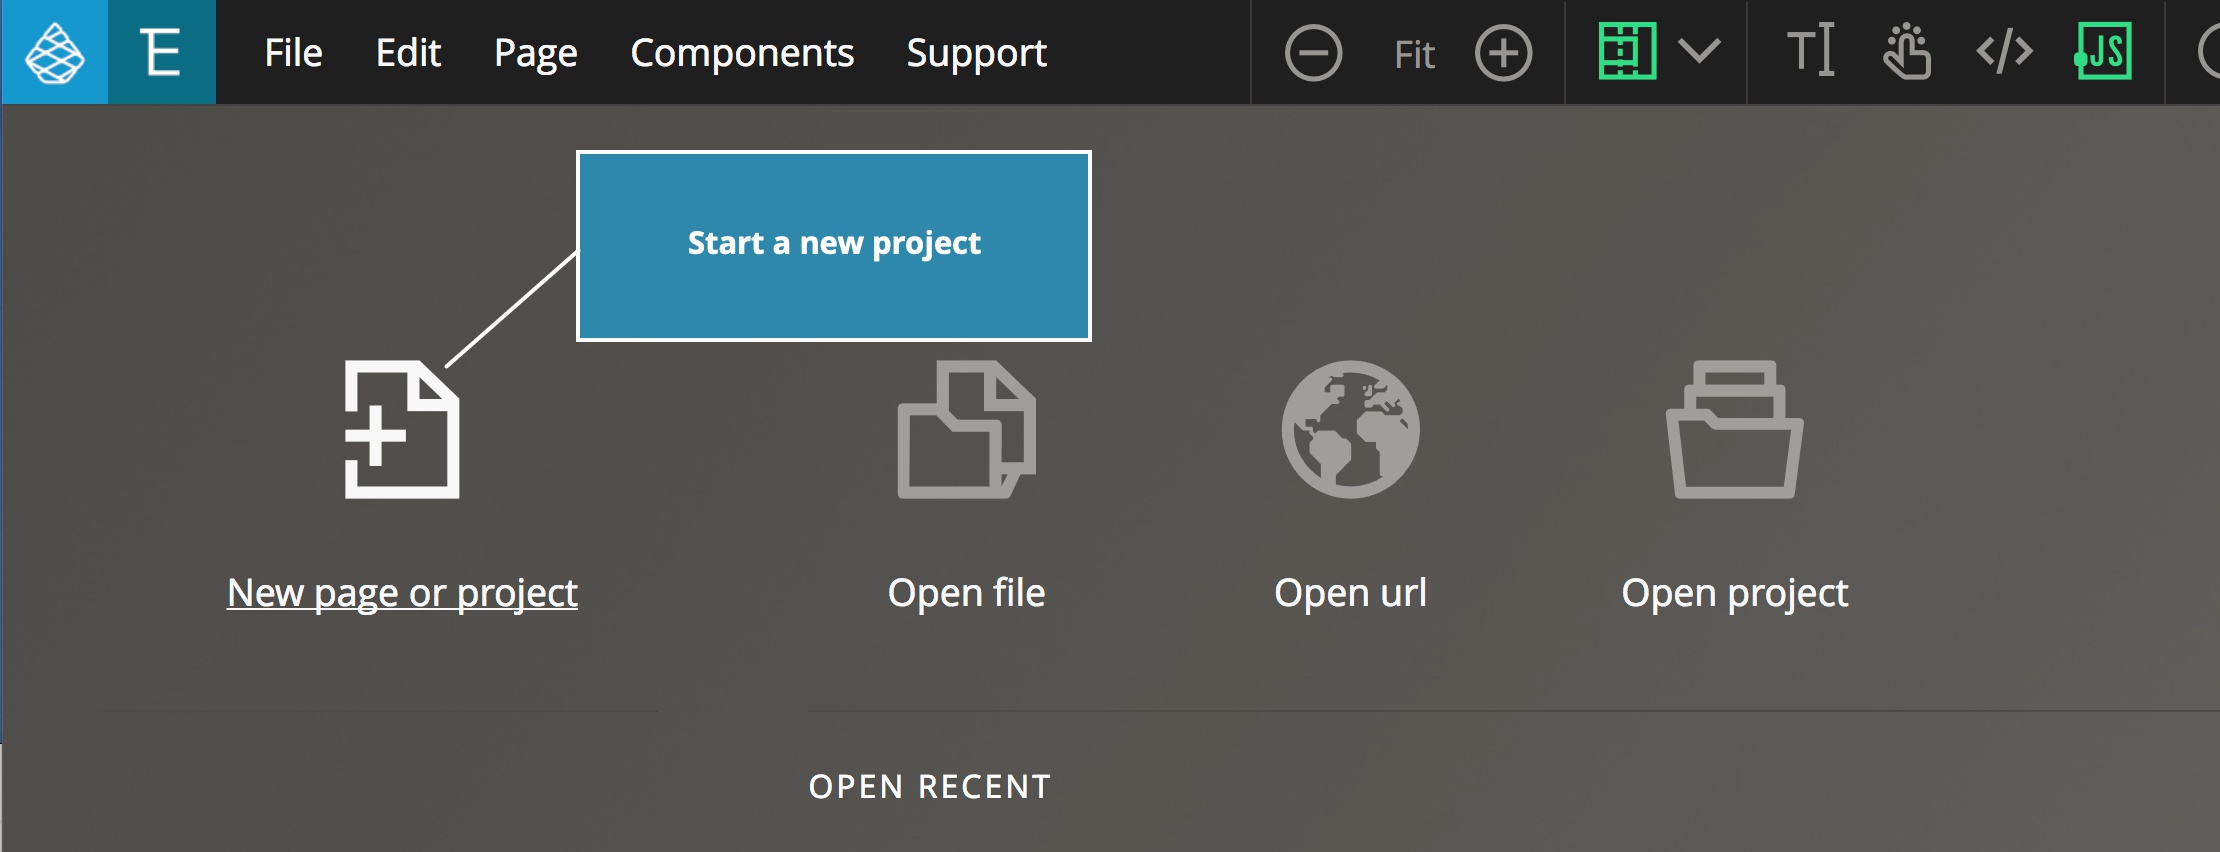
First, open up Pinegrow and start a new Bootstrap 4 project. First, click on the “New page or project” button.
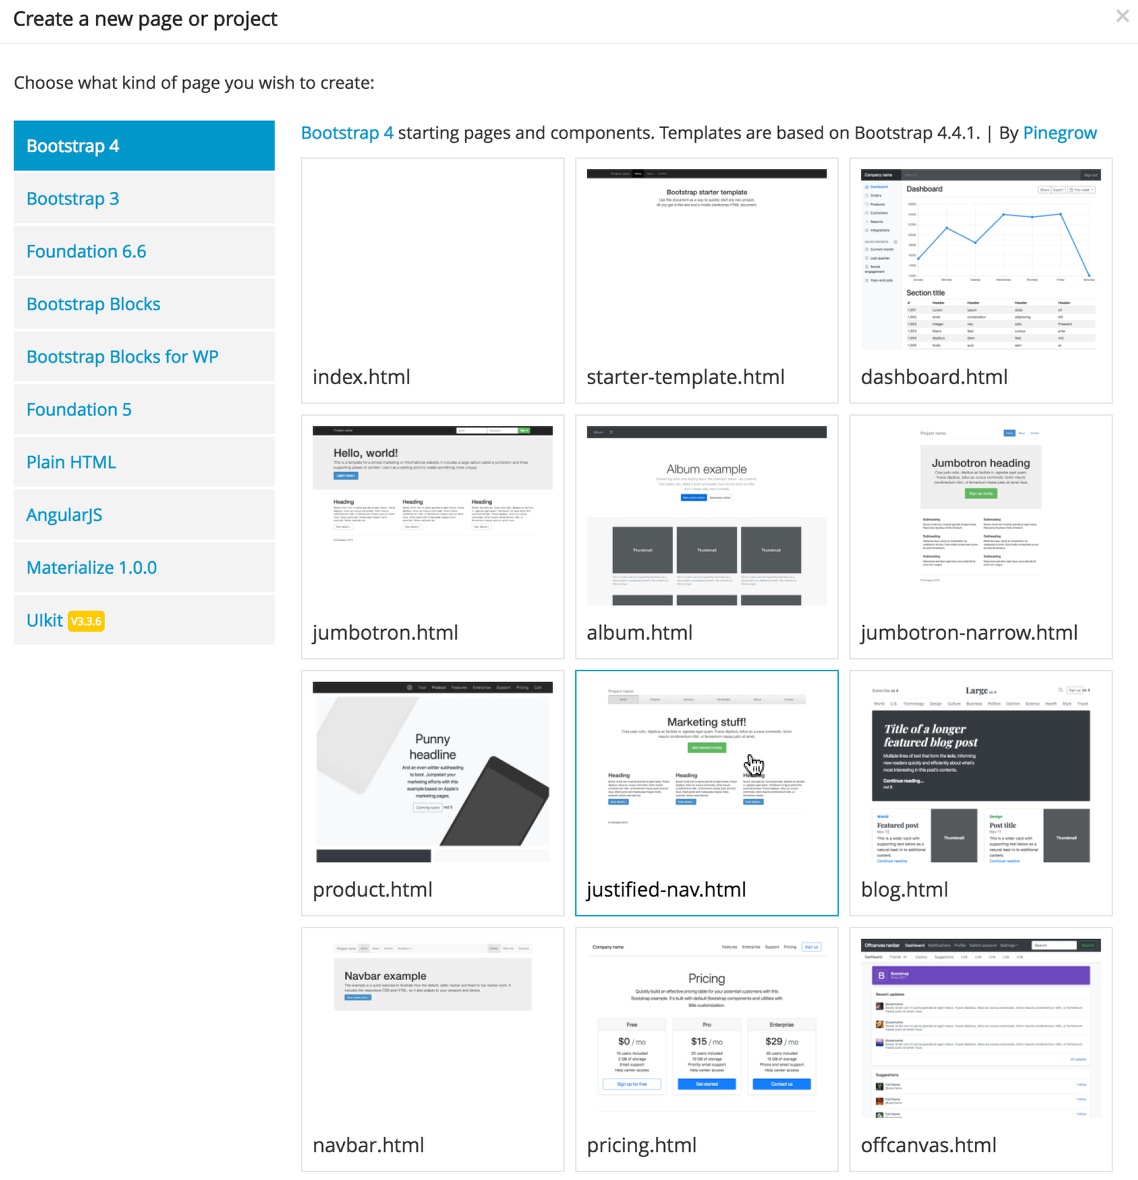
Then, from the pop-up select a “Bootstrap 4” project and open one of the templates. For this tutorial I will select the “justified-nav.html” template so that we have some content to view with different styling.
Optionally, add some extra content
You can skip this step if you already have enough content on the page. We’re just doing this to add more visual elements to the page.
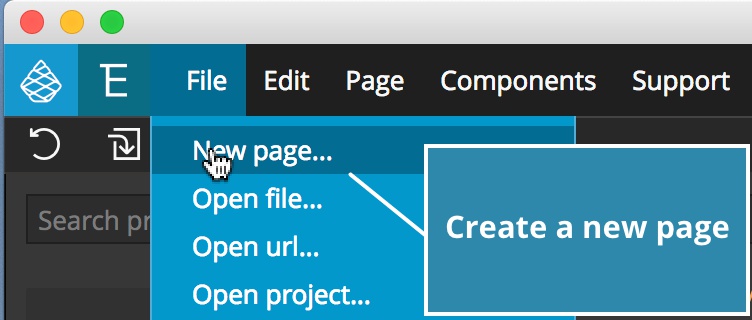
To add a little more content I’m going to open an additional page and copy the content to our initial page. From the file menu, select “New Page” and then choose the Bootstrap 4 “pricing.html” template located just below the “justified-nav.html” template.
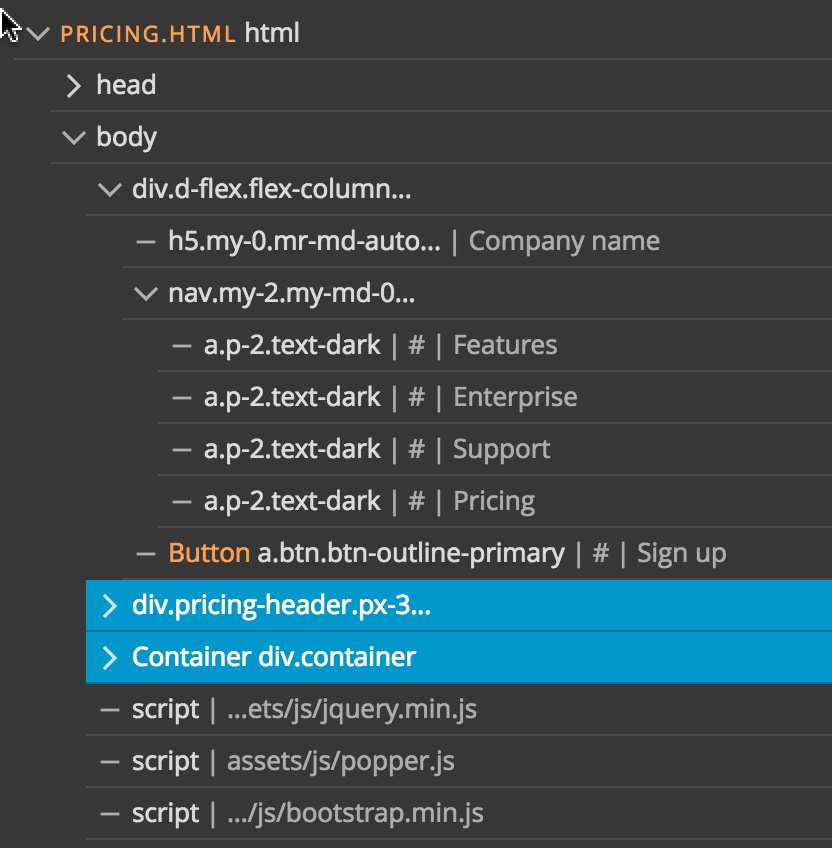
Select both the pricing header and price cards container in the Tree panel.
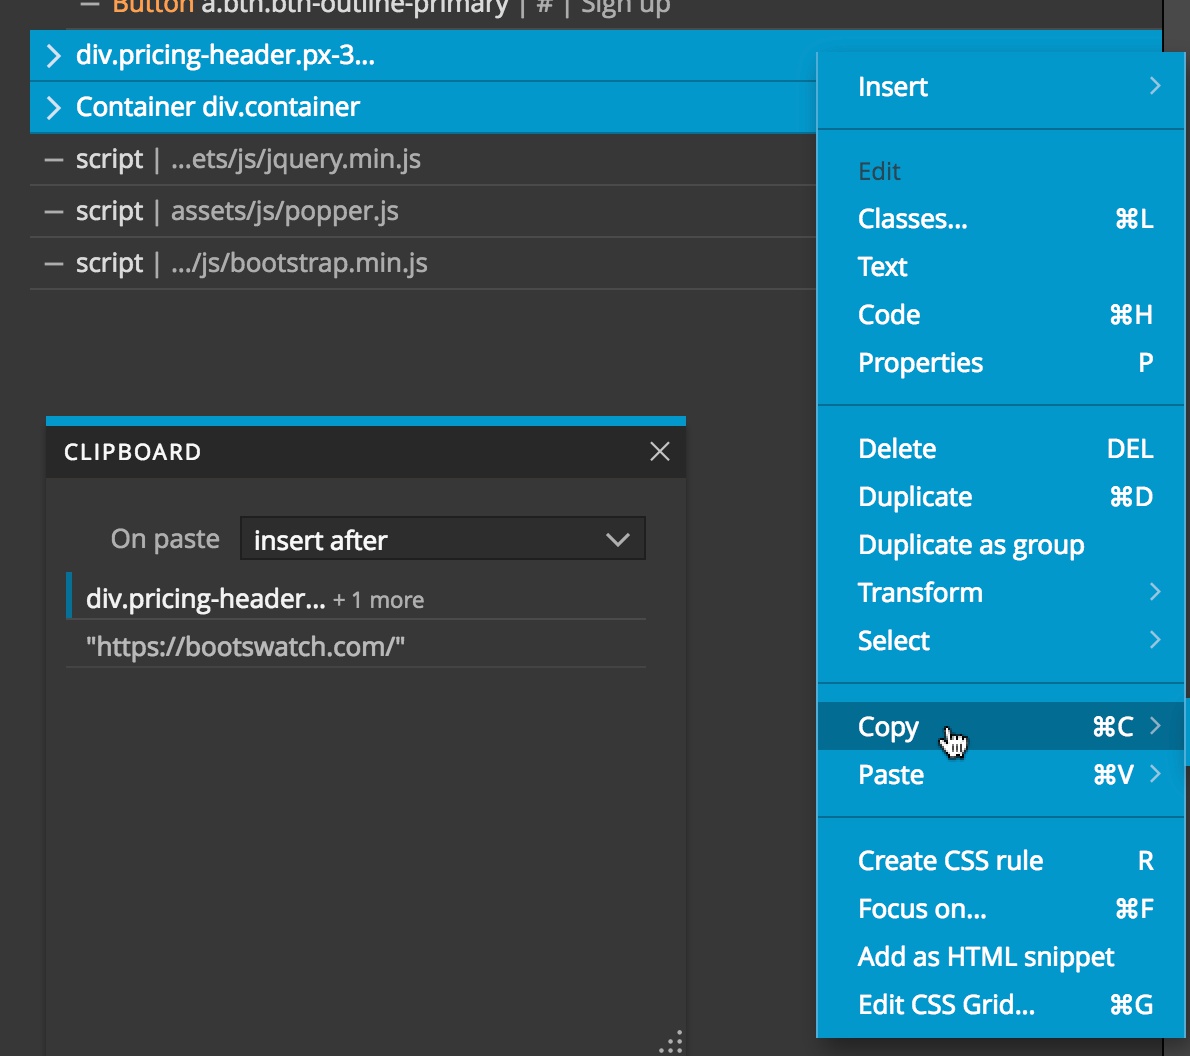
Then either use the copy hot keys for your system, or bring up the context menu using right click and select “Copy”.
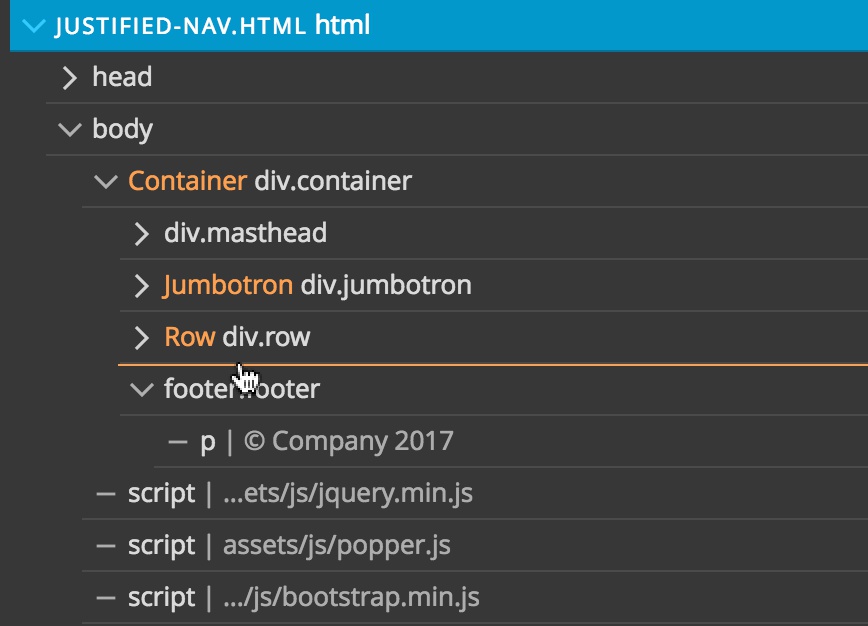
Navigate back to the original page and paste the copied content before the footer either by hovering over the tree in the correct place until an orange line appears and then either selecting “Paste” from the context menu or using the paste hotkeys.
Save your page and open it as a project
Save the page – I named mine “index.html” – to a new folder and open it as a project. We now have a project where we can see changes to our styling.
2. Add SASS styling to the page
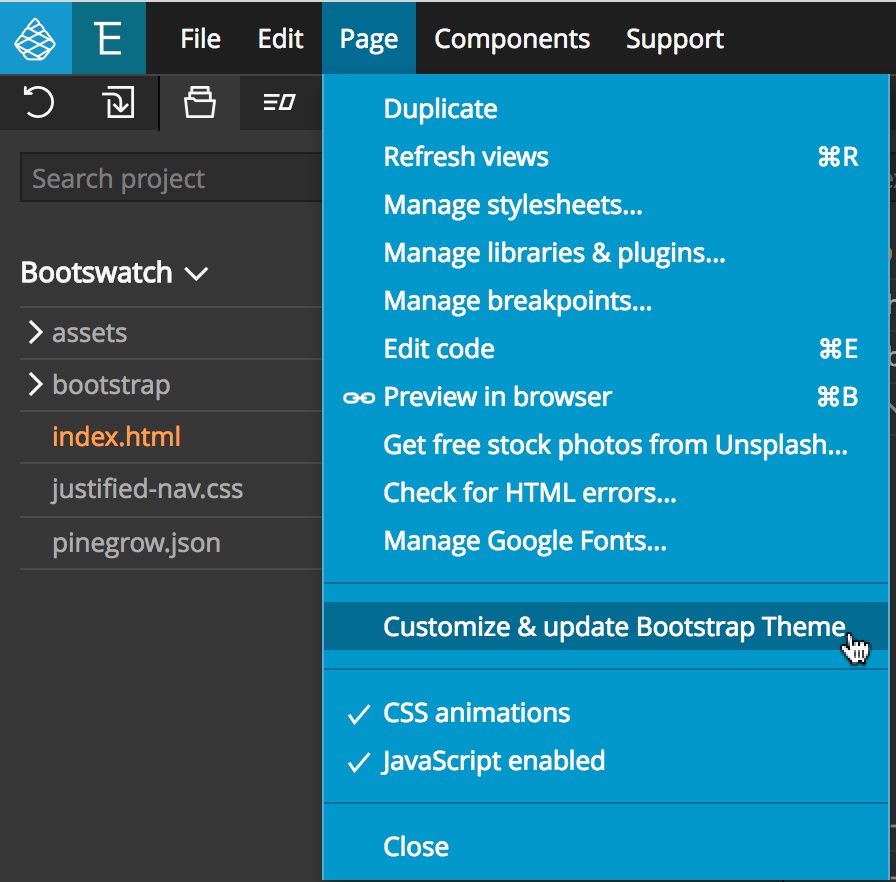
Bootstrap projects are initially loaded in with normal stylesheets and we have to elect to turn on the use of dynamic styling, like SASS. To do this, pull down the “Page” menu and select “Customize & update Bootstrap Theme”.
You will see a modal asking if you want to proceed. Click on “Sure, let’s do it!”. After a short time you will see another modal explaining how to further customize your project.
To better understand what this final modal means, let’s review how SASS works. The SASS compiler (in this case built-into Pinegrow) takes a source file containing the SASS (.sass) or SASS scripting language (.scss) code and interprets it, writing the output to a standard CSS (.css) file. Any changes made to the targeted “.css” file will be overwritten the next time the source file is compiled. In this case, our source file is “custom.scss” located in the newly created “bootstrap_theme” folder of our project. The target is the “bootstrap.css” file located in the “css” folder inside the “bootstrap folder” of our project. The important part of using Sass styling is to *not* make any alterations to that “bootstrap.css” file and only make changes in the “custom.scss” file.We will cover using our own variables later in the tutorial.
3. Add styling files from Bootswatch.com
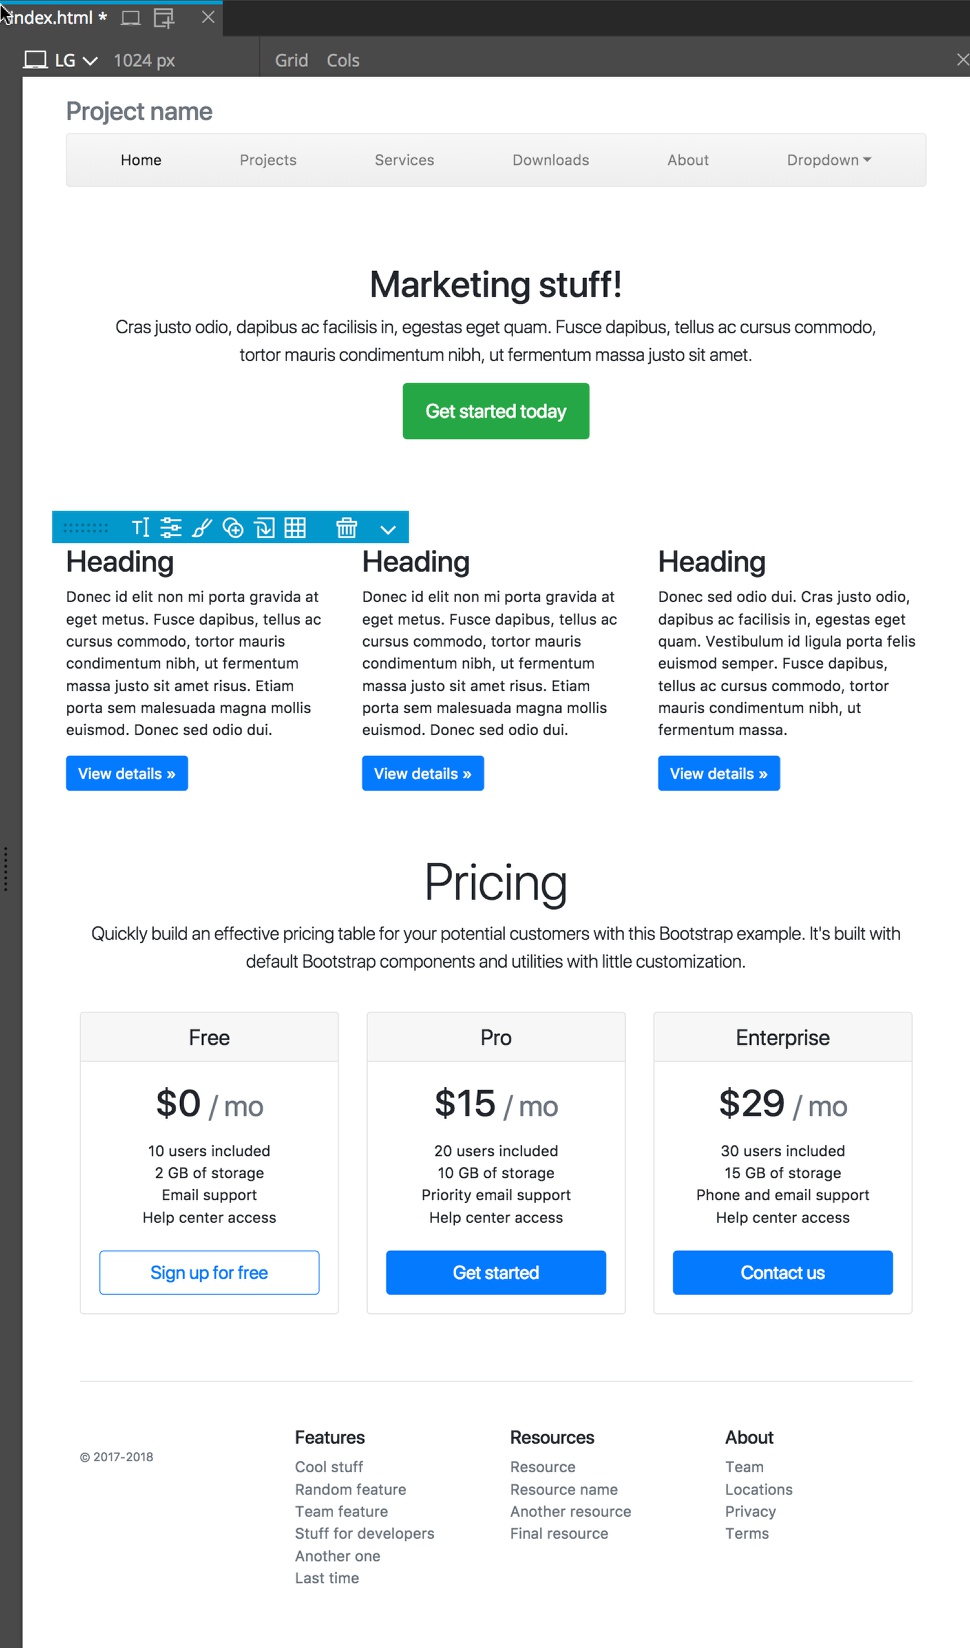
Right now our page has plain Bootstrap styling.
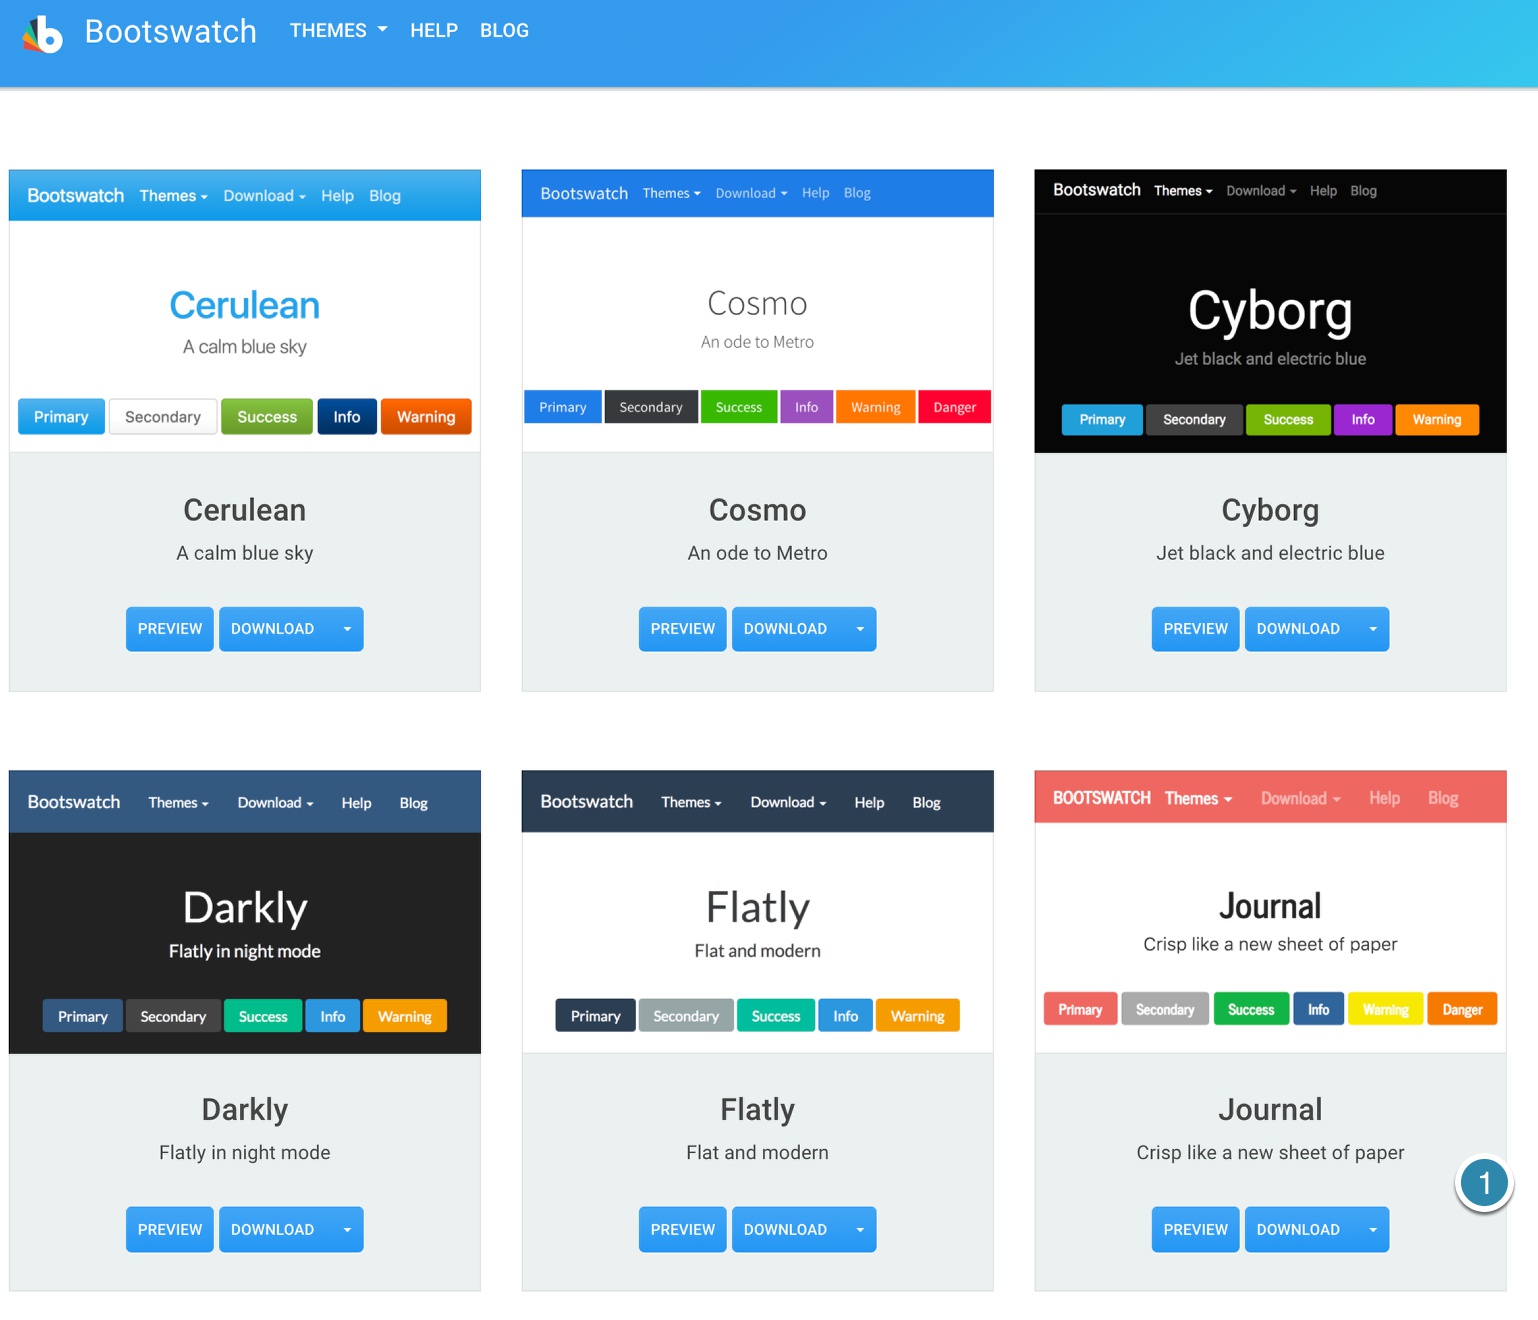
Navigate to Bootswatch.com and scroll down to the “Minty” theme. We will apply this styling because it will be immediately clear we have changed the page styling. Click on the “DOWNLOAD” button dropdown at the right and select the “_variables.scss” file. Save it in your project folder at the same level as your “custom.scss” file in the “bootstrap_theme” folder.
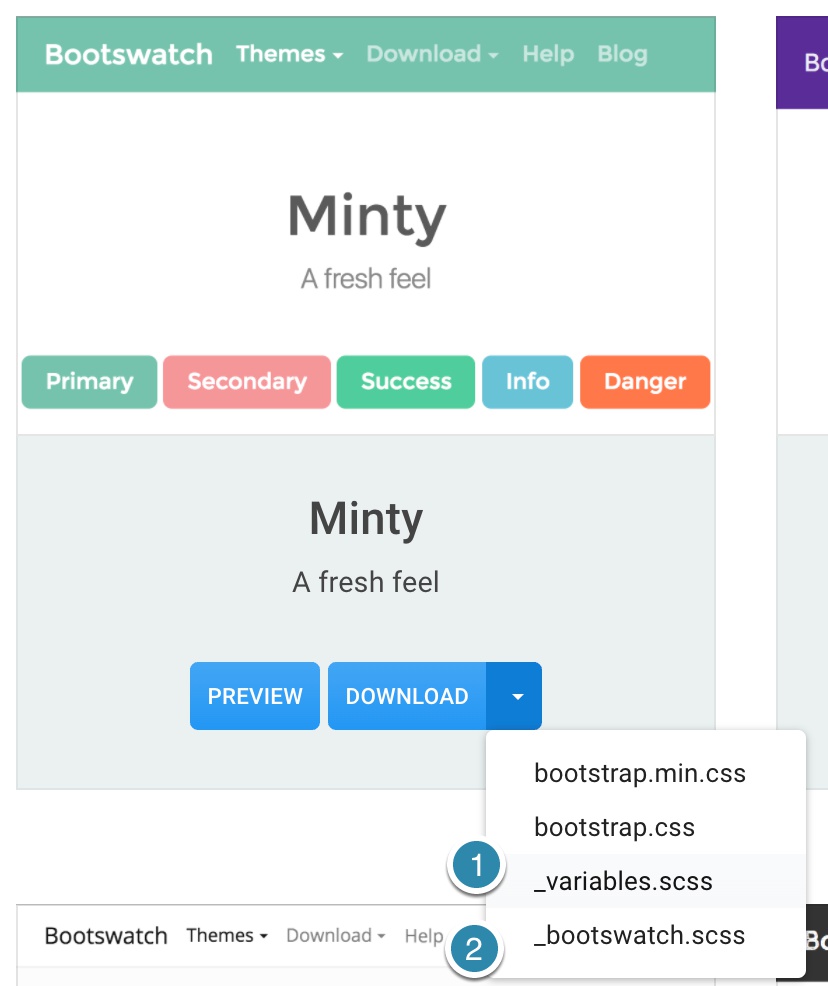
Next, download the “_bootswatch.scss” file to the same location.
Add new SASS styling to page
In order to have the new set of styling rules added to our page we need to alter two files, the “_bootswatch.scss” file we just downloaded, and the “custom.scss” file that was created for us by Pinegrow. I find this easiest to do using an external code editor, but it can be done directly in Pinegrow with one caveat. At this time, the Pinegrow compiler doesn’t synch well with files added after the mainsheet import. It is important to alter any files that will be loaded after the main sheet – in this case the “bootstrap.scss” file – before bringing them into the project or with the project closed.
Alter the “_bootswatch.scss” file
Open the “_bootswatch.scss” file either in an external editor or by double-clicking the filename in Pinegrow. Then combine the first two lines of code after the comments into a single line:
//These two lines
$web-font-path: "https://fonts.googleapis.com/css?family=Montserrat&display=swap" !default;
@import url($web-font-path);
//Should get changed to
@import url("https://fonts.googleapis.com/css?family=Montserrat&display=swap");
As written, the `$web-font-path` variable is assigned a URL for the Google font ‘Montserrat’, and then that variable is imported. The version of compiler that Pinegrow has incorporated doesn’t support this behavior and we have to import the font URL directly.
Alter the “custom.scss” file
Open the “custom.scss” file, again, either in Pinegrow or an external code editor. The original file has a single line of code:
@import "bootstrap/bootstrap";This line directs the compiler to import the “bootstrap.scss” file from the “bootstrap” folder within the “bootstrap_theme” folder of our project using a relative path from our “custom.scss” file. In other words, it tells the compiler to look in the current directory where the file is located for a folder named “bootstrap” and then for a file, “bootstrap.scss”. within that folder. Note that we don’t have to add “.scss” or “.sass” to our file names.
Before this line add:
@import "variables";This tells the compiler to bring in the Bootswatch “_variables.scss” file. Any file in SASS proceeded by an underscore is a partial that should only by compiled in the presence of another SASS file that utilizes it. In this case, it contains variables that substitute for values in the “bootstrap.scss” file and so *must* be loaded before the “bootstrap.scss” file. We do not need to pass in the underscore in the file name.
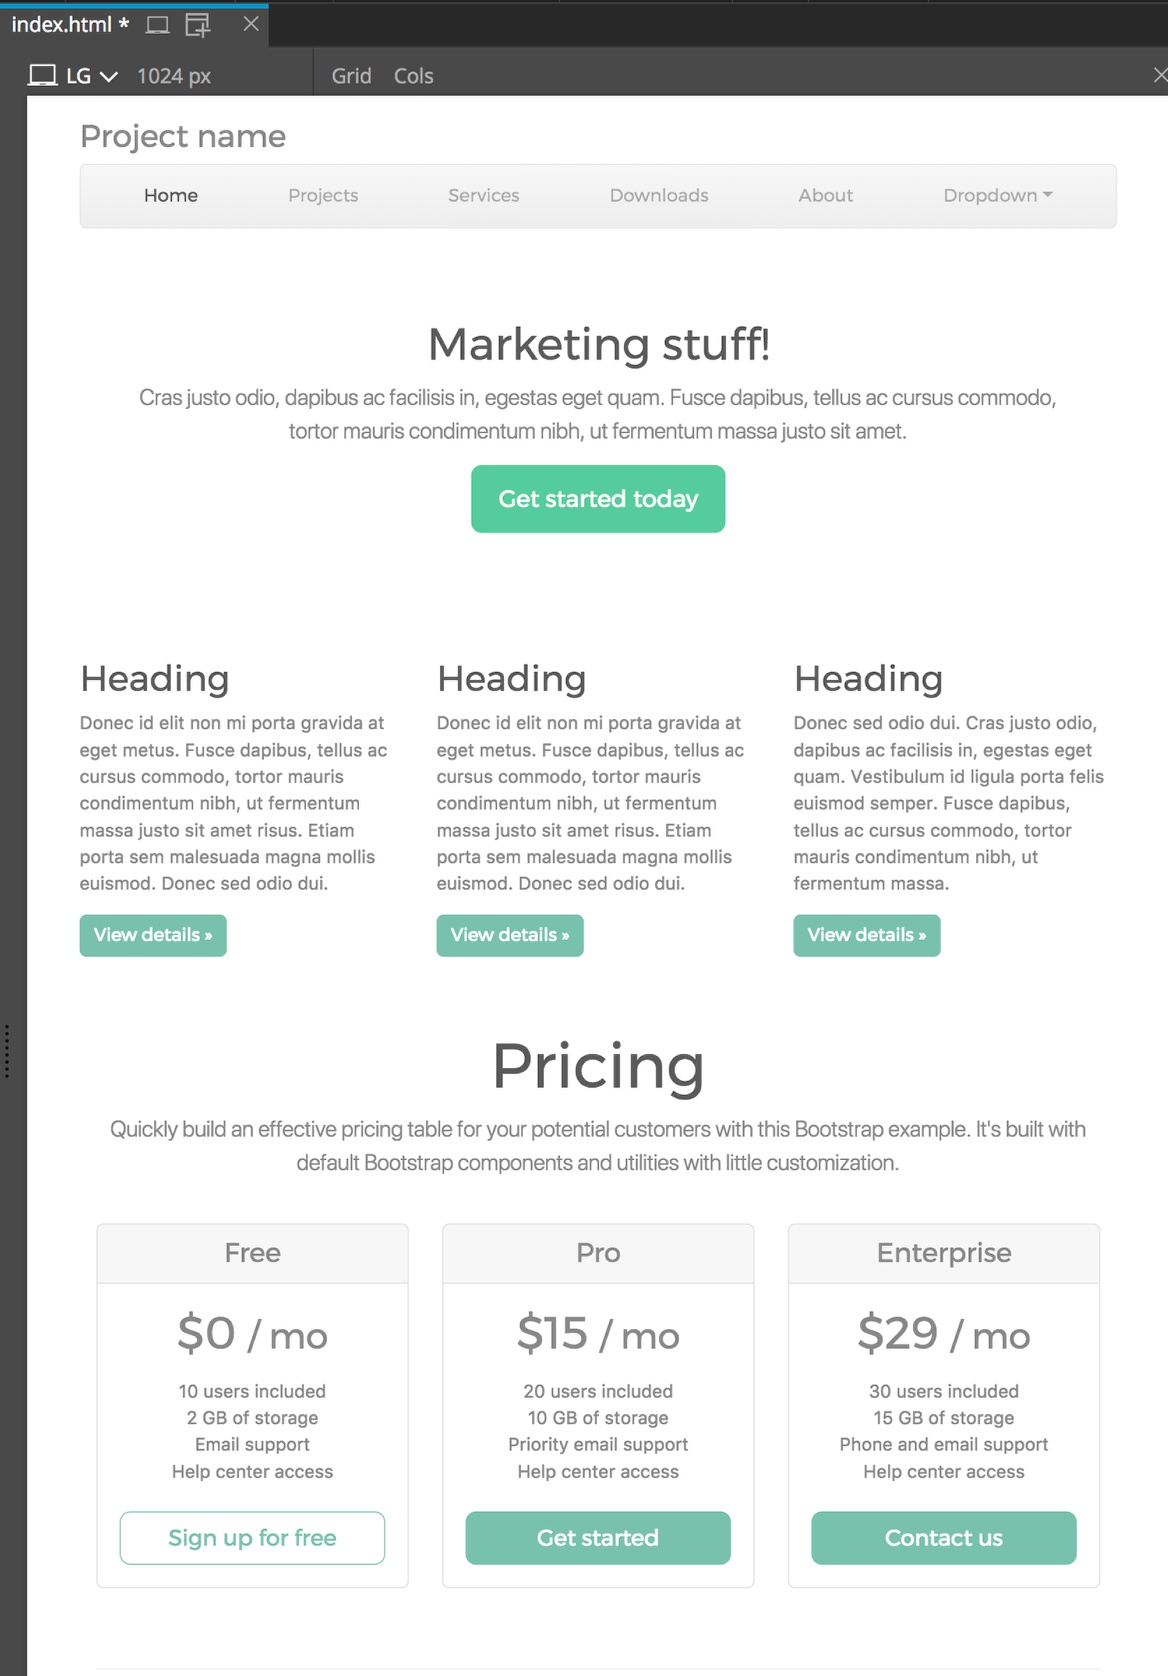
We can already see changes in our page!
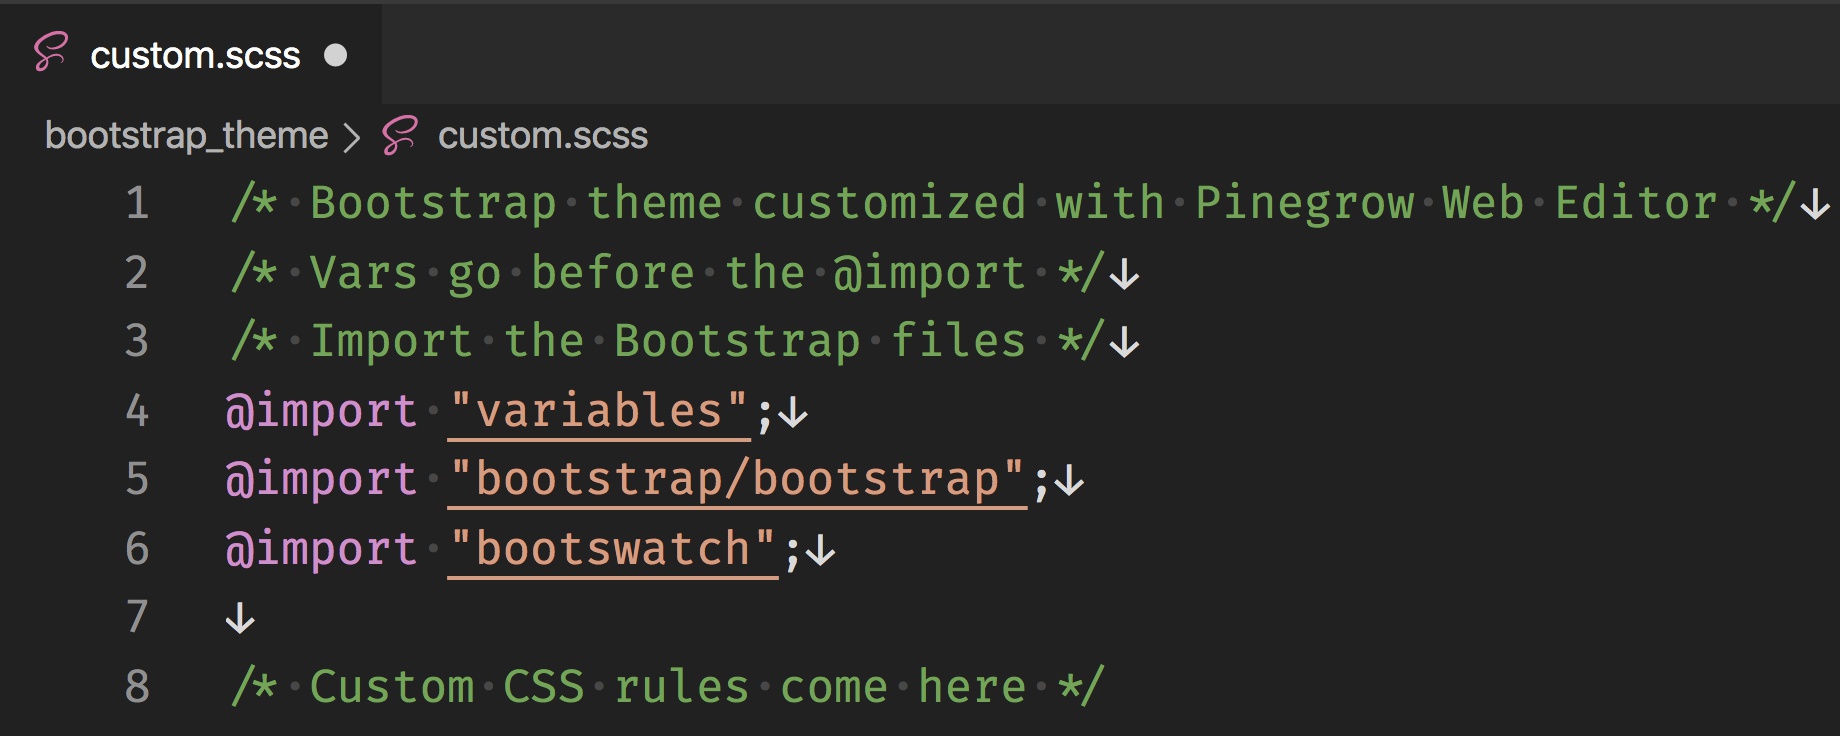
Next, import the “_bootswatch.scss” file by adding an import statement *after* the “bootstrap” import:
@import "bootswatch";Your file should now look like this:
After saving the “custom.scss” file you may need to either reload the project, or close and re-open the project to see your changes.
4. Add your own variables and styles
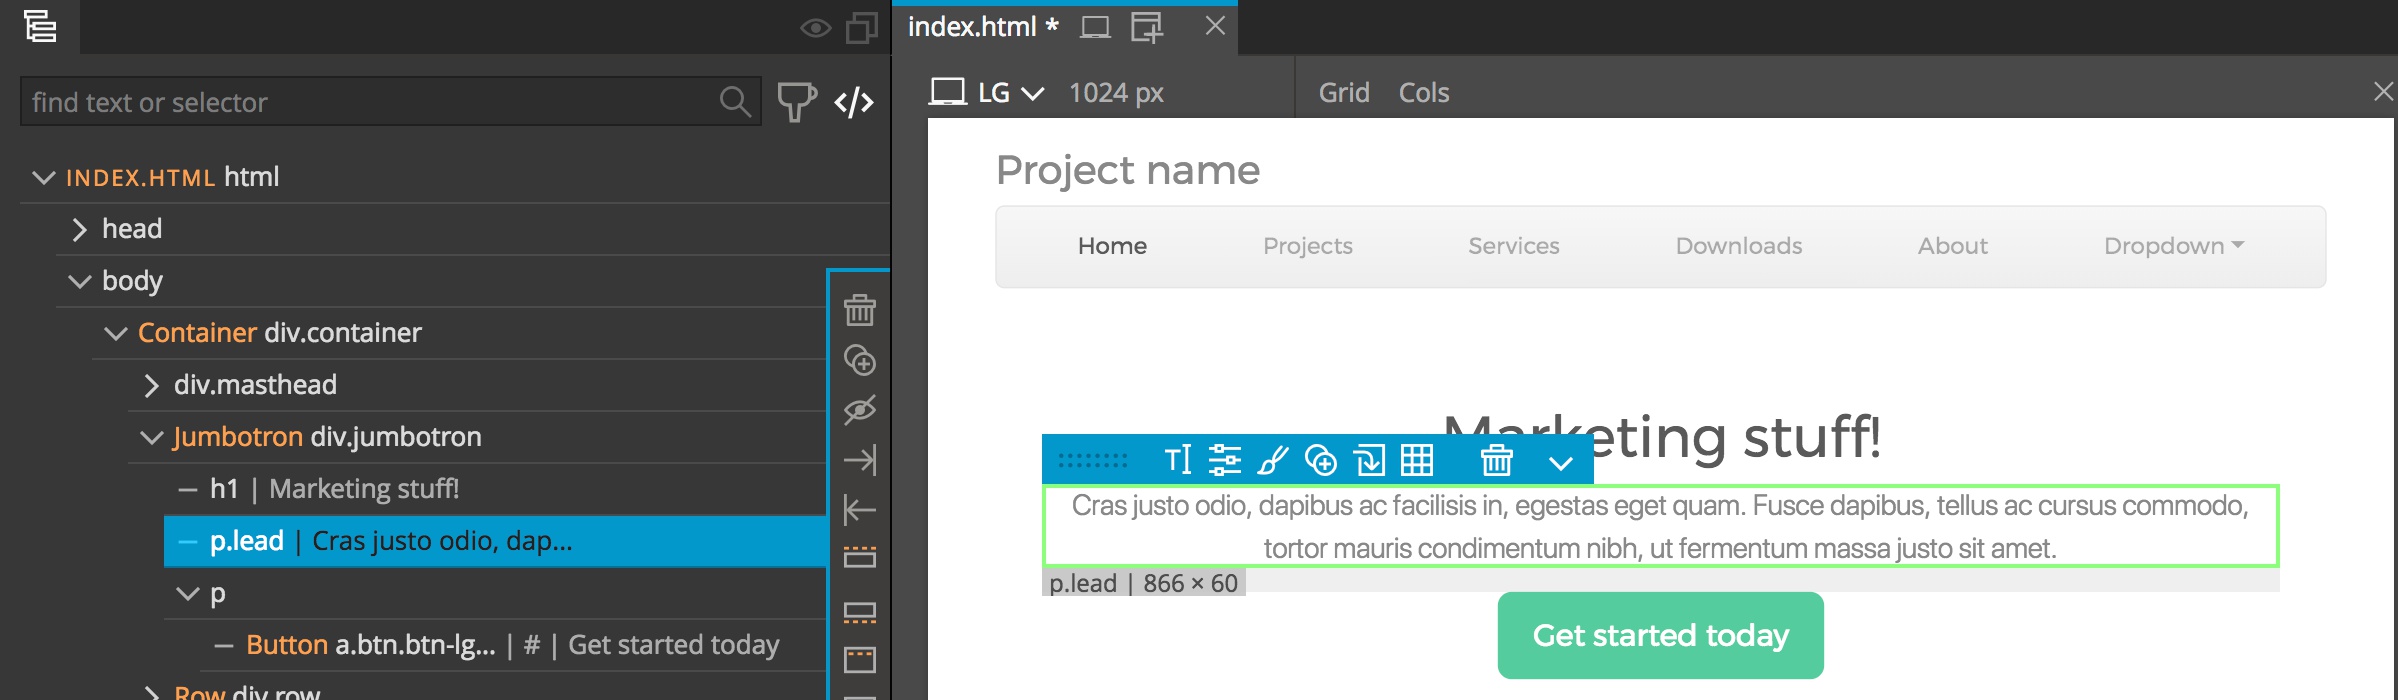
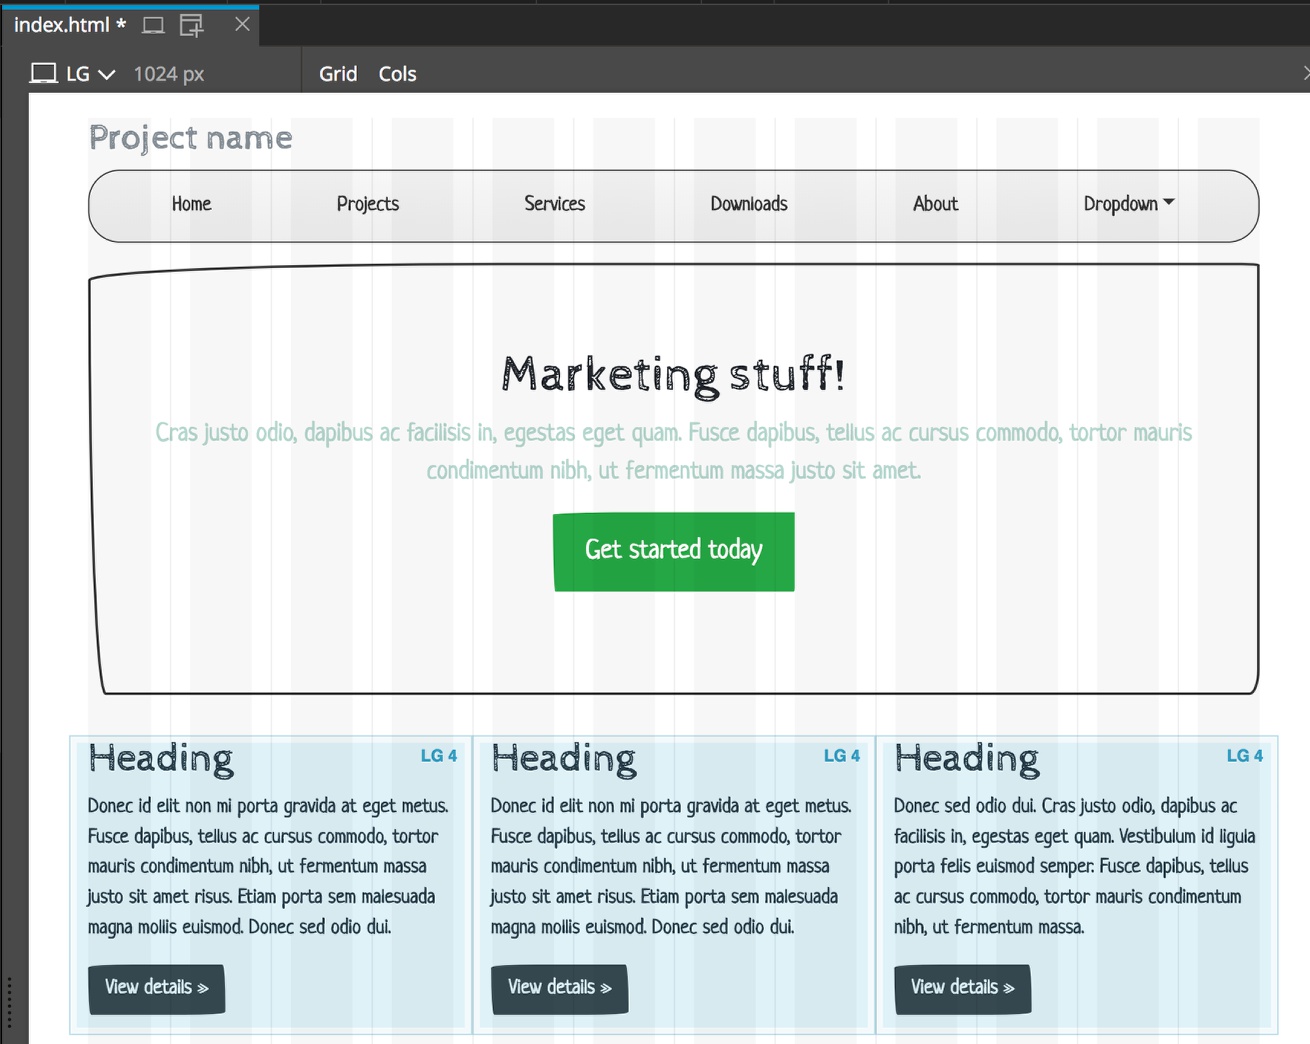
Now that we have the theme styles added from Bootswatch, we can make the styling our own by adding new rules and variables. As an example, let’s change the color and font weight of the hero text below “Marketing stuff!”.
Select the text in either the Tree or the page.
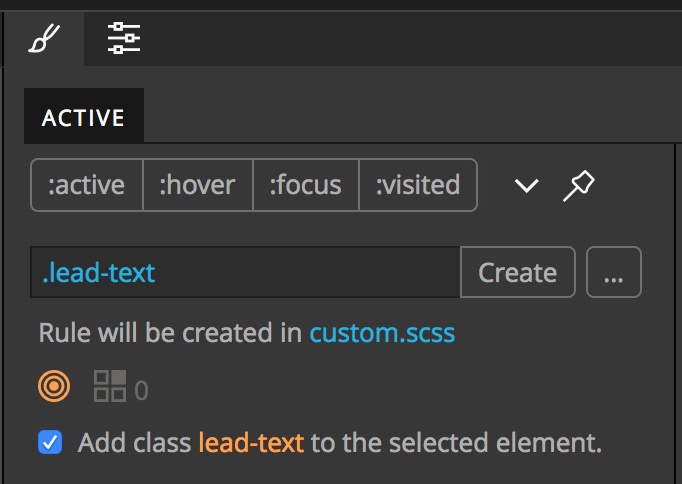
Next, within the Style panel, create a new rule using the “.lead-text” selector. Add the rule to the “custom.scss” stylesheet. Make sure to leave the “add class” checkbox on.
With the rule selected, scroll to the “FONT/TEXT” styling section in the Style panel. In the “Color” input type '$cyan'. Our text changed color!
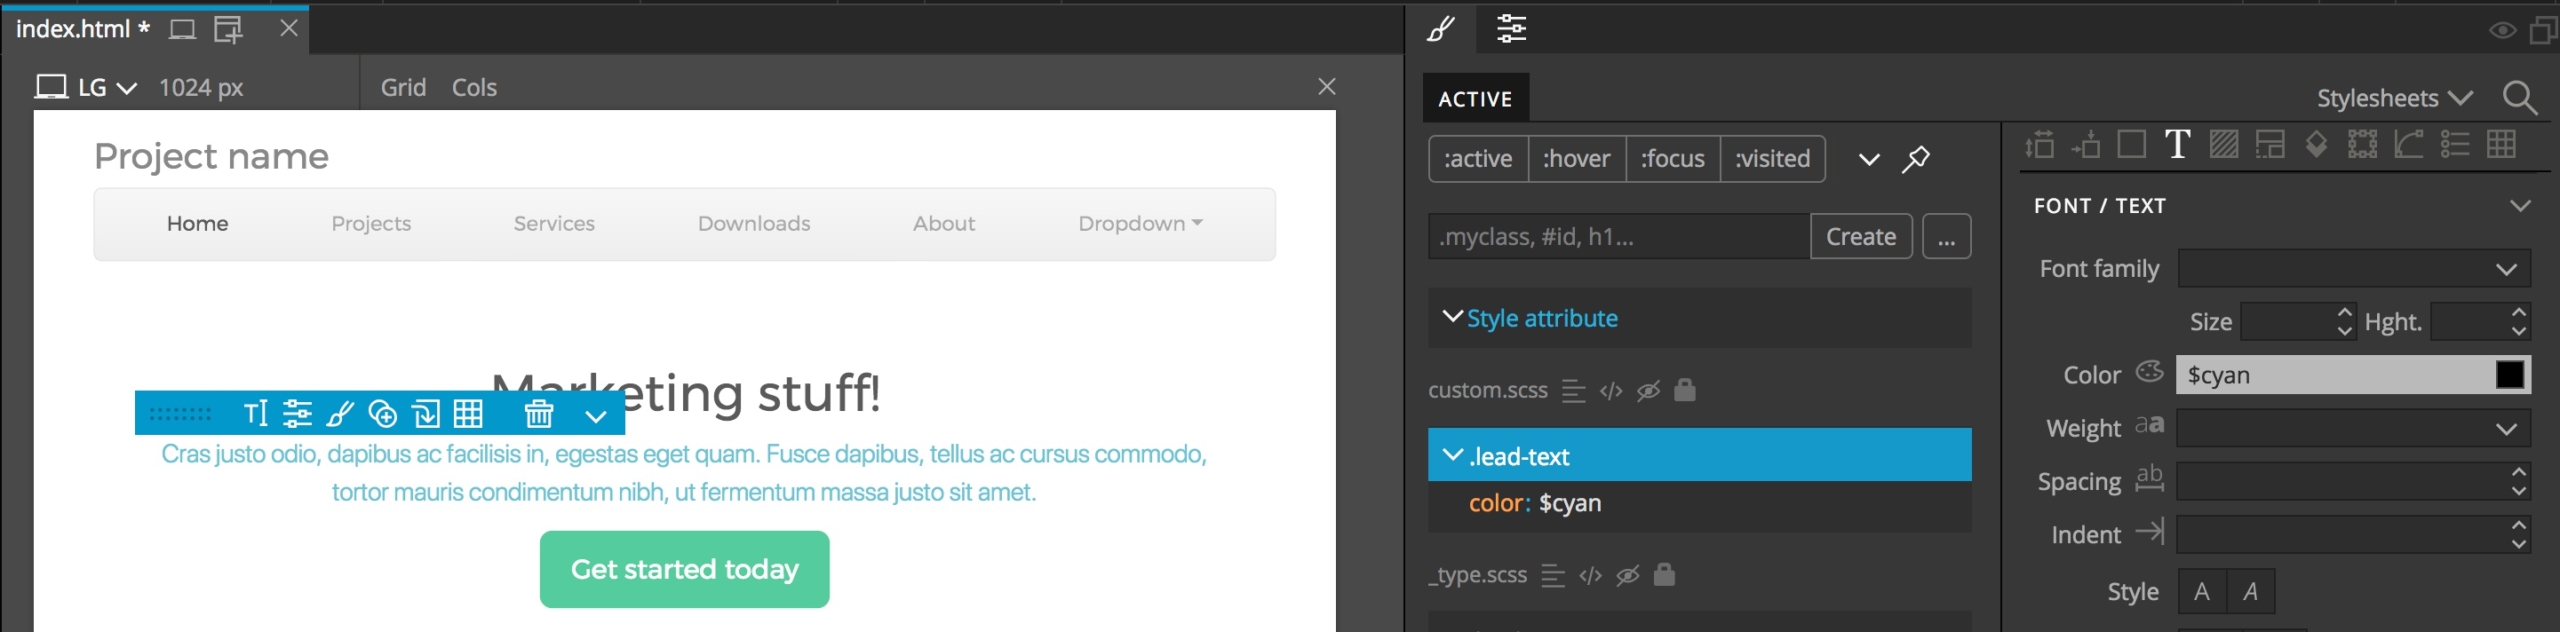
If we look in our “custom.scss” file, we will see a new rule added after our imports.
Change a variable
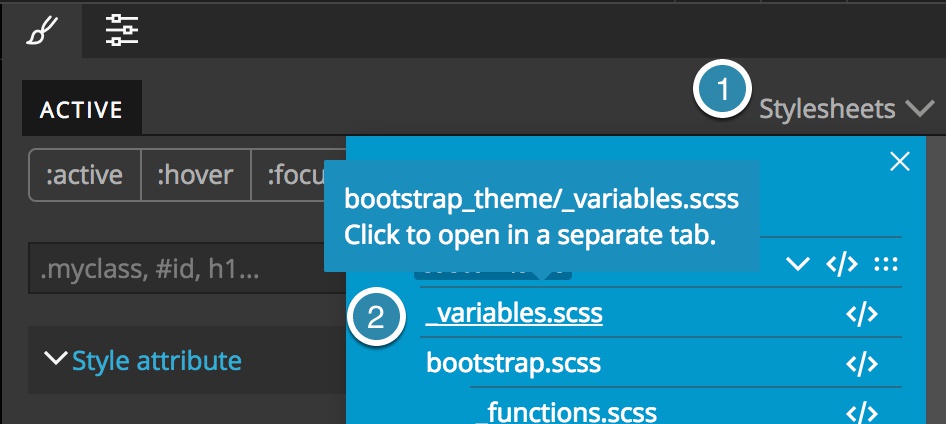
Okay, what if you now decide that you like everything about your project styling except the cyan color. Maybe you want it with a touch more green. The best way to do that is to change the base '$cyan' variable. This color is defined by a variable in the “_variable.scss” partial from Bootswatch. If we were to directly edit this variable in our Bootswatch file, any updates would be lost on update. Instead, we need to edit it in our “custom.scss” file. From the stylesheets menu in the Style panel, click on the “Stylesheets” dropdown at the upper-left and open the “_variables.scss” file.
Next, scroll down to the '$cyan' variable and right-click. Then select “Customize in custom.scss”.
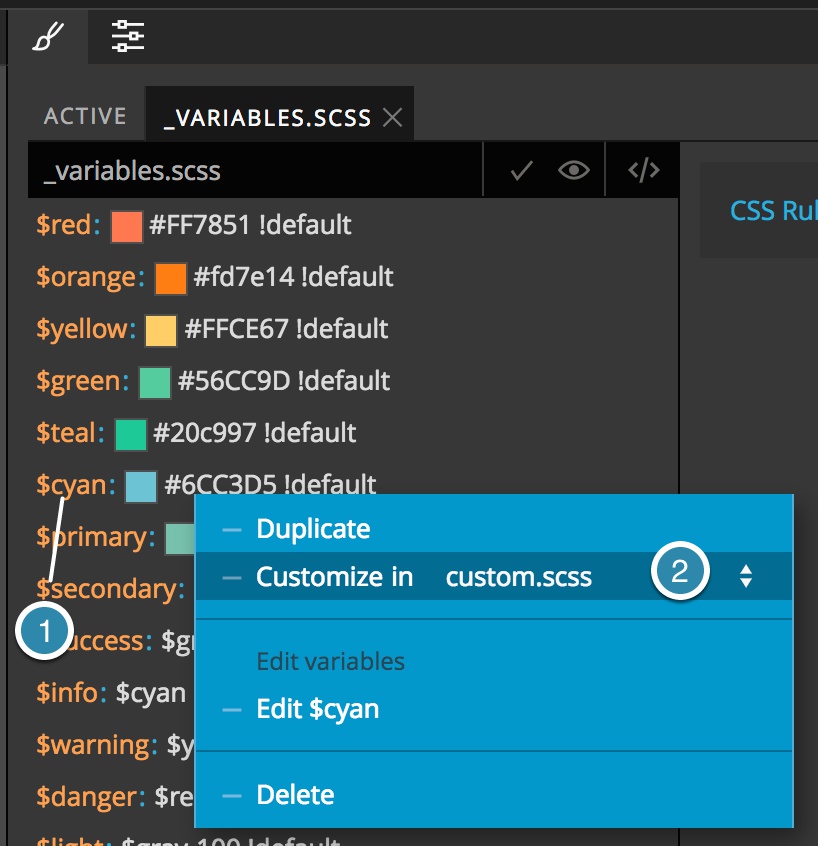
This will open the “custom.scss” stylesheet and paste in the variable at the proper place. All you have to do is change the variable value. In this case we will change it to '#B3D6CB'.
5. Keep our customization, but change our base style.
If we get tired of the mint theme, we can easily change to a new style from Bootswatch.com. First, close your project to prevent a conflict with the compiler. Then, navigate back to the site. Select another theme – I will demonstrate with the “Sketchy” theme – and download the two Sass files. Save them to the same place you saved the “Minty” files, over-writing the originals. Open the “_bootswatch.scss” file in an external editor and change the font import. Then reopen your project and reload the page.
Viola! New styling that still maintains the new '$cyan' and custom styling.
Have fun playing with your new SASS superpowers in Pinegrow!
Discuss this tutorial
Have questions or comments about this tutorial? Let’s talk about it on our forum.
Get in touch
Would you like to see your favorite theme or blocks library featured in the next tutorial? Let us know in the forum or by email!