A step-by-step guide to using the resources on CodePen in your own Pinegrow Web Editor projects.
In this tutorial I’m going to introduce you to the developer social networking site Codepen.io. I’ll demonstrate how you can easily search and bring resources from this page into your own projects in the Pinegrow web editor.
For this tutorial we will be using a vertical navigation menu that I have already forked into my own personal account. Feel free to follow the link in order to follow along with the tutorial and even fork the Pen into your own personal account to make changes in the design!
Let’s get started!
Prefer to read? Scroll past the video.
This tutorial is available in video and textual form. Watch the video, or continue reading if you prefer to read. Of course, you can also do both!
Introduction to CodePen
The CodePen website is a great resource of code snippets, ranging from complex CSS drawings, to complex elements made with HTML, JavaScript and CSS, from designers around the world.
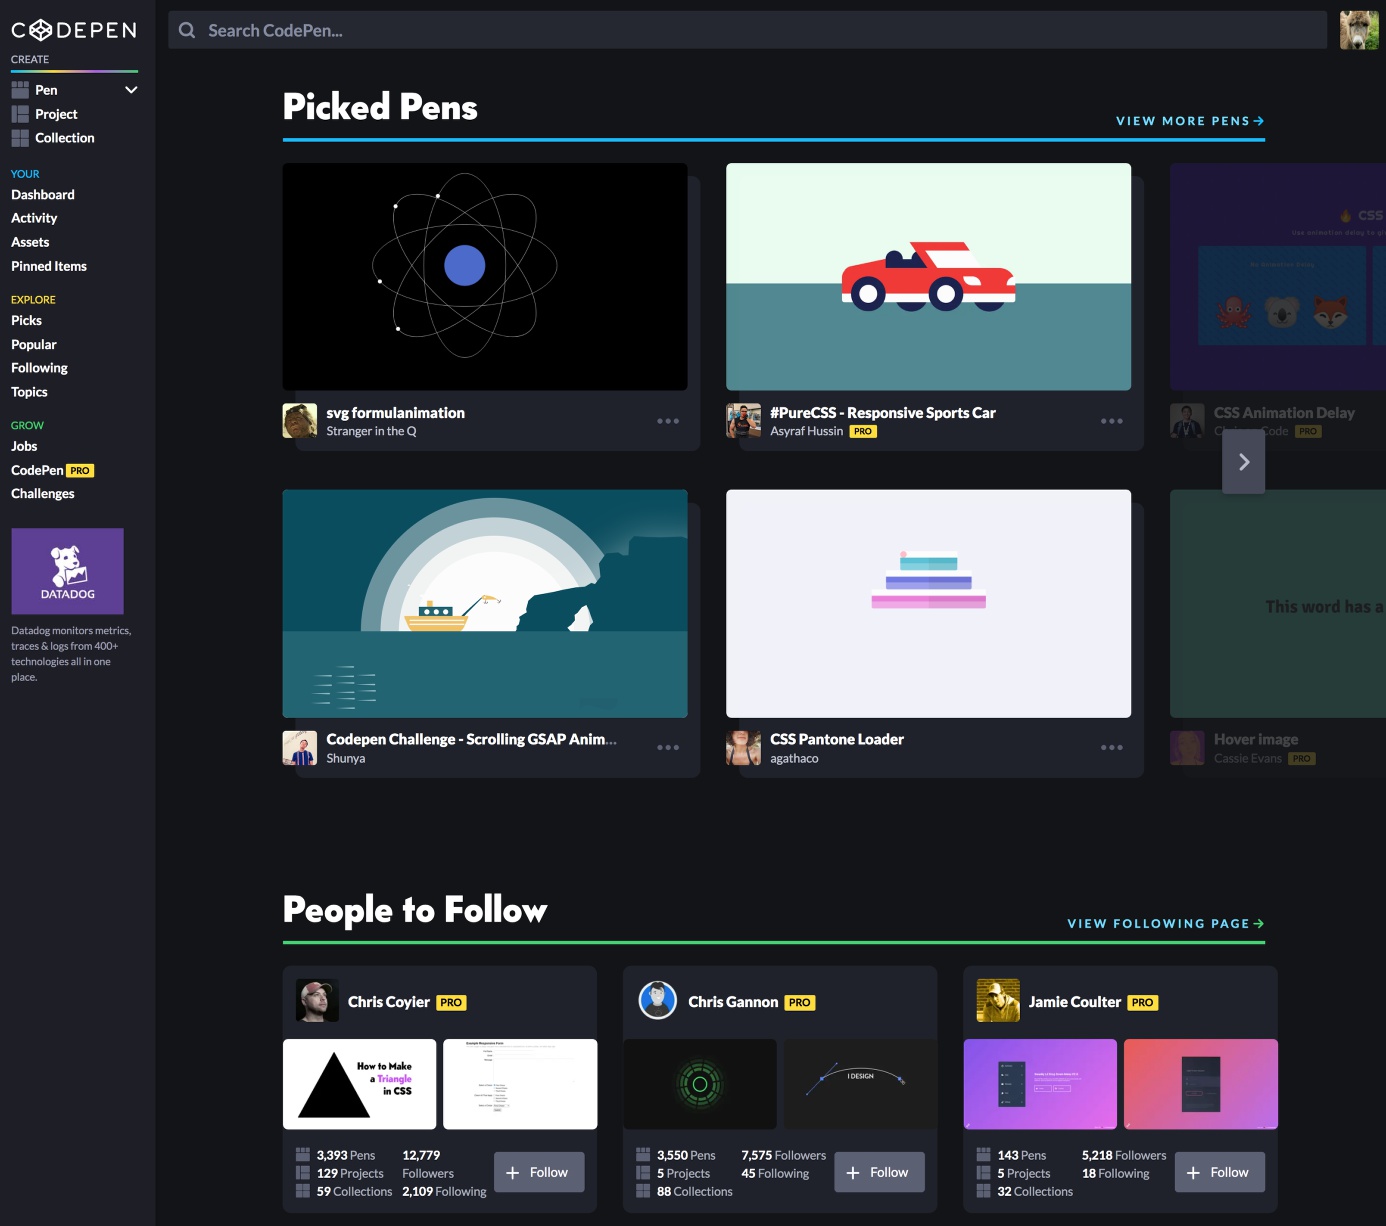
Opening up to the homepage you can see a series of featured snippets (called “Pens”), as well as a list of people to follow. These are people who are regular and prolific contributors, like Chris Coyier – a regular writer for both Smashing Magazine and CSS-Tricks.com, plus a co-founder of CodePen.
In the sidebar there are ways to find other popular pens and pens with a specific topic.
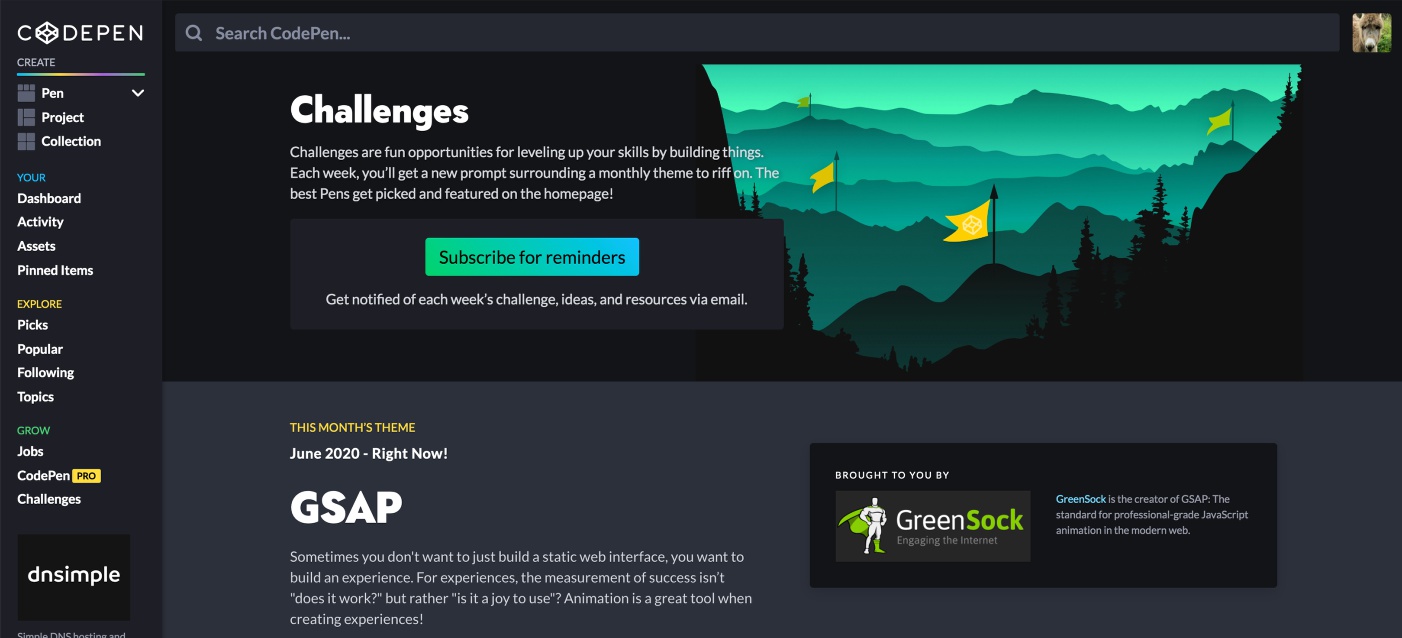
You can also find the weekly challenges to help you improve your website coding skills. You can post your own code for feedback, as well as check out how other people solved the same challenge.
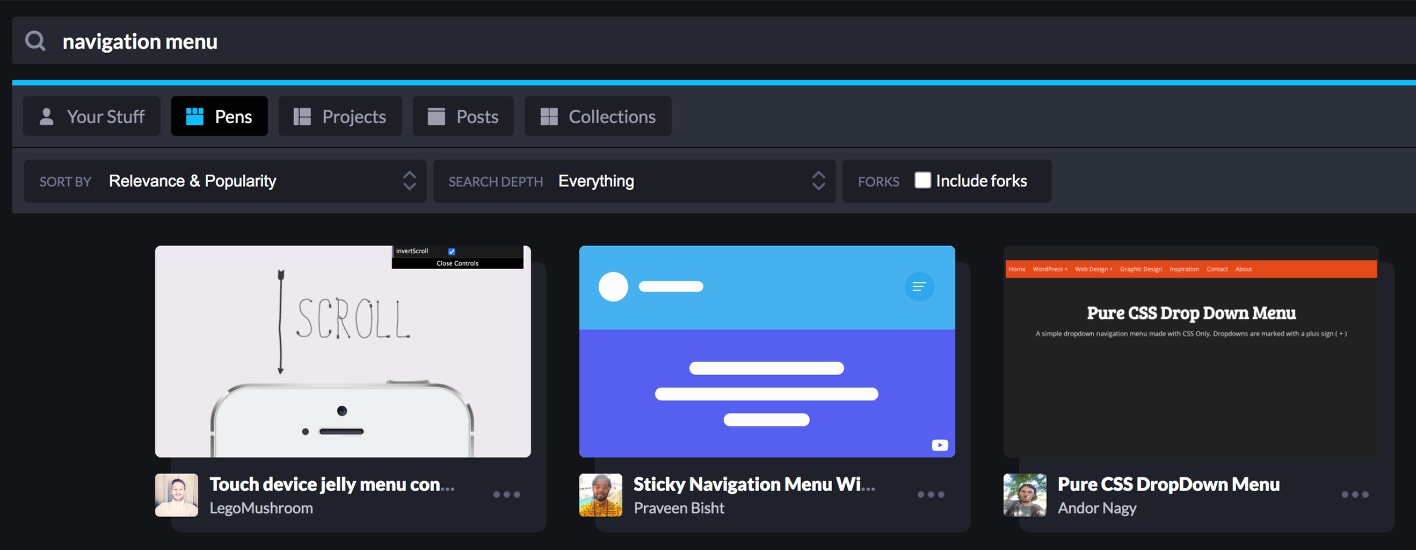
At the top of the page, they also have a search box that lets you narrow down the code to the exact type of element that you want.
For this tutorial, I’m going to use a pretty simple navigation menu. I’ve already searched through the pens and found one. In order to make sure that the owner of the pen doesn’t change or delete it I have “forked” it into my own account. Basically, this just makes a copy that I can freely change and not worry about the original. Here is the link.
Right now, I have the example I will be using opened up in a customized “Editor” view.
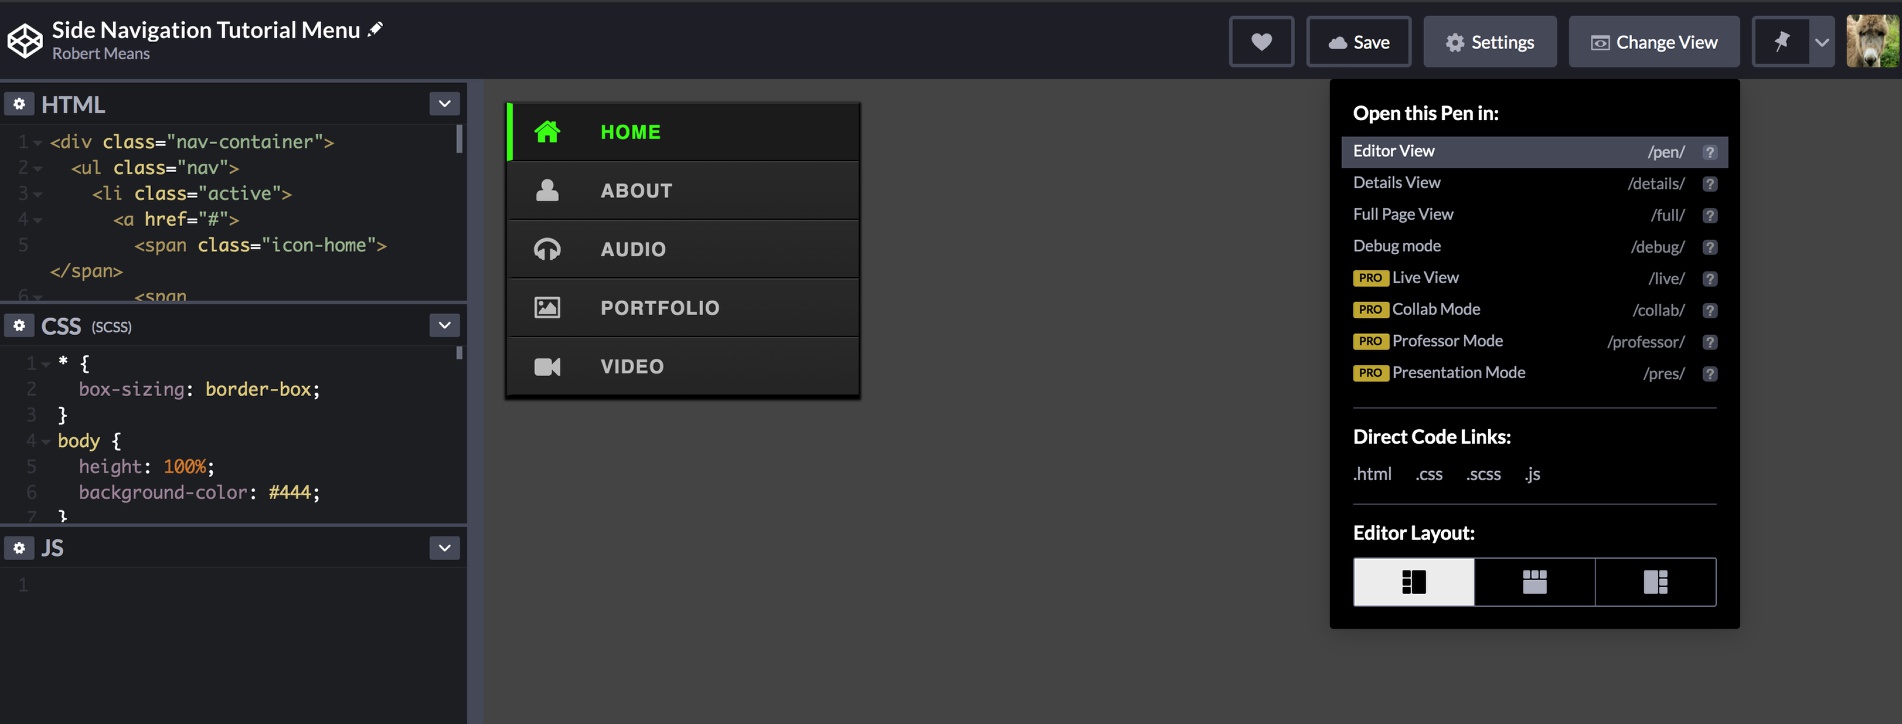
Normally, the Editor view has three windows along the top and a large one at the bottom. For visualization purposes I’ve opened the “Change View” modal by clicking the button at the top and moved the three windows to the left-side and the large to the right.
The top-most of the three windows contains the snippets HTML, the next down the styling (CSS), and the last displays any JavaScript – in this case there isn’t any. The large screen to the right displays the resulting browser output from the code.
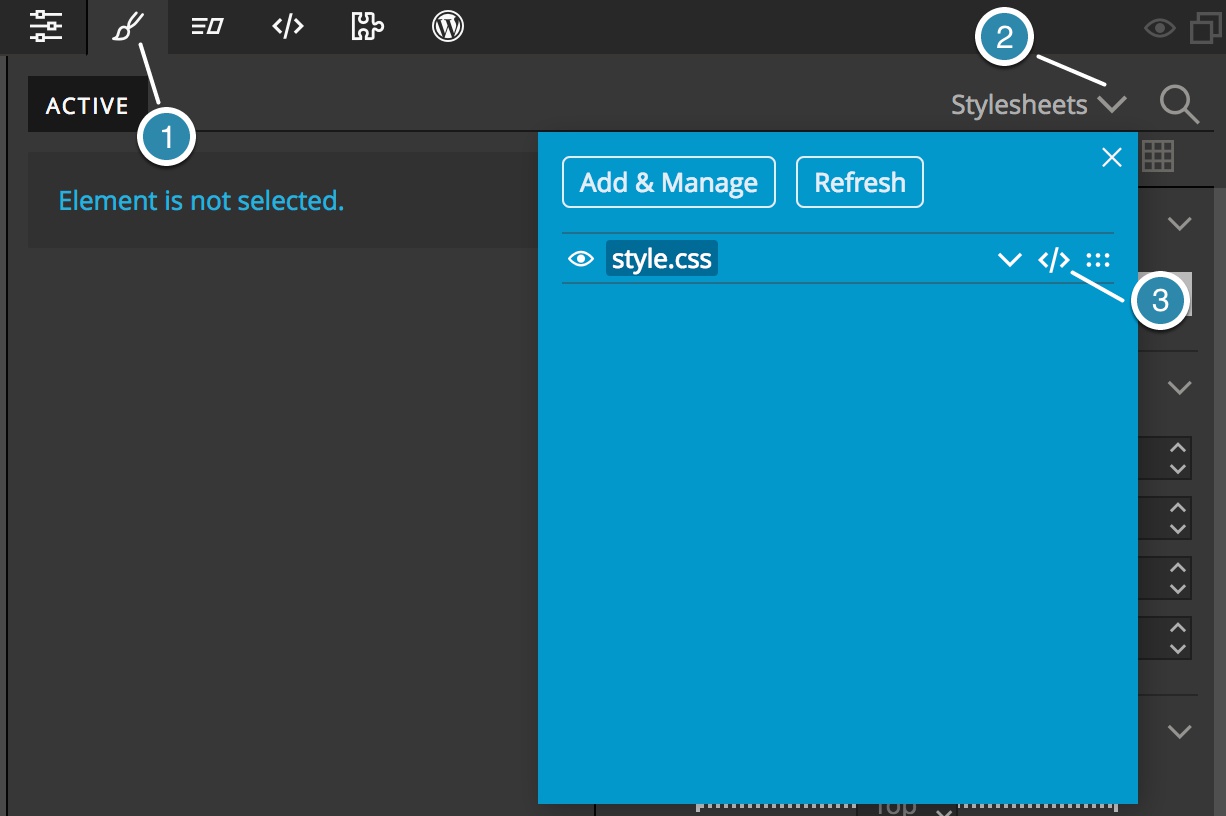
The first thing we need to do is determine what resources we will need along with the code displayed on the page. To determine this we can click on the gear icon located at the upper-left of each window.
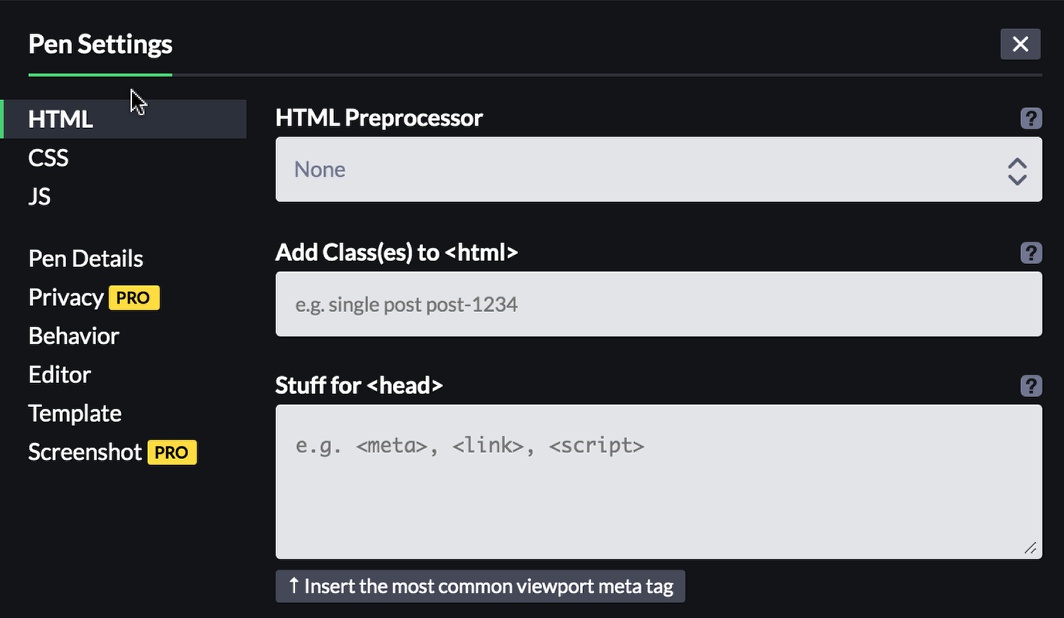
For this pen, we can see that there aren’t any extra HTML resources being loaded.
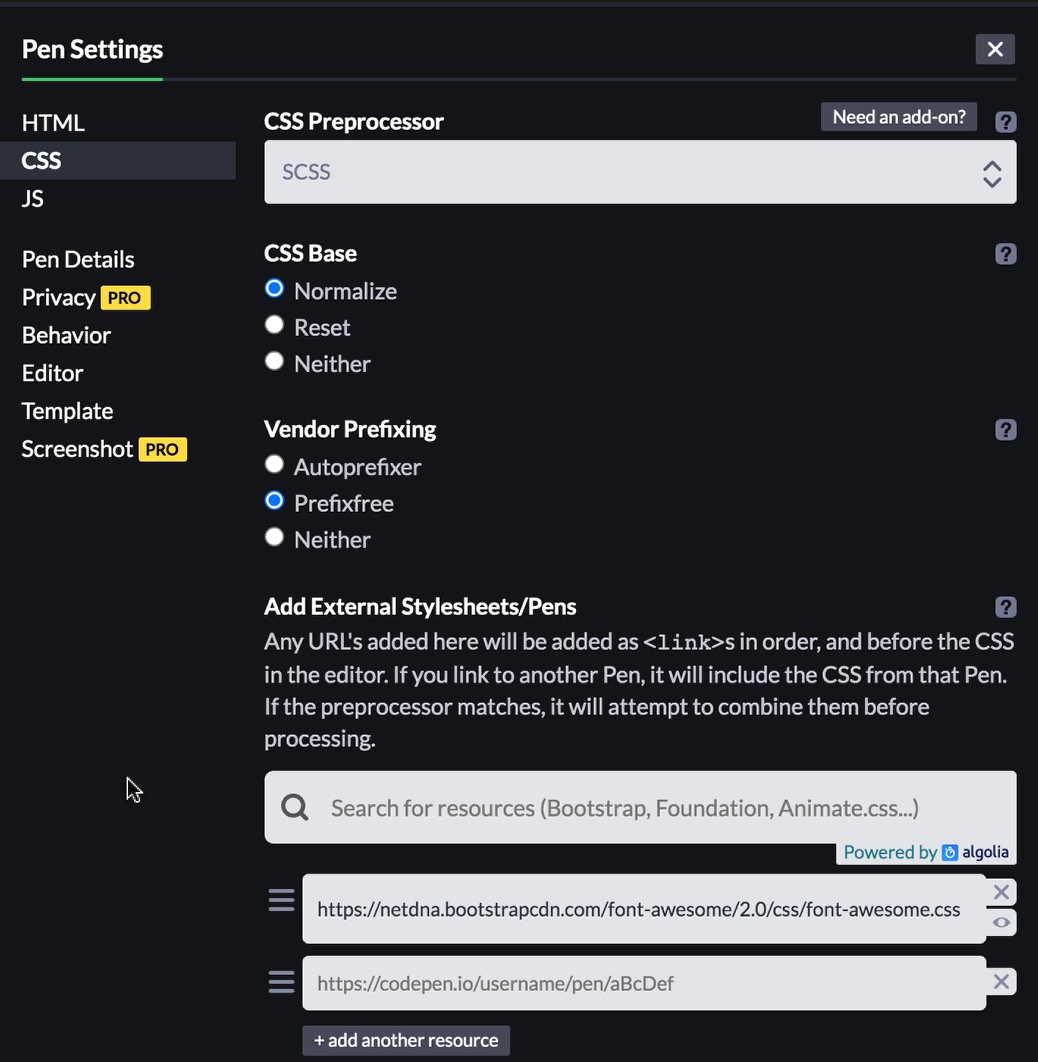
Next, looking at the CSS setting, we can see that this pen was put together with a CSS preprocessor – this will be important later. It also loads in the font-awesome style sheet. We will have to enable that for this to display correctly in our project. Note, if this pen was built using Bootstrap it would be shown here as loading a version of the Bootstrap CSS.
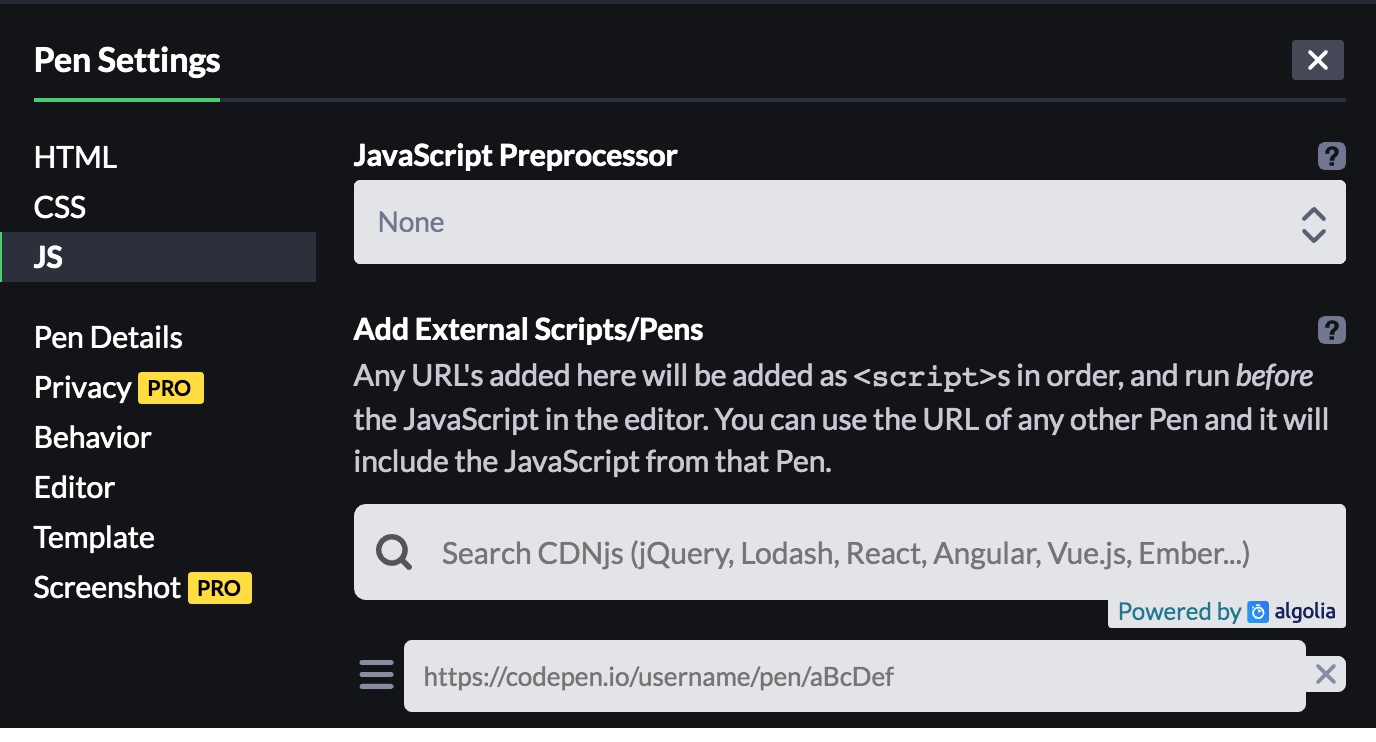
Finally, we can see that there are not any additional JavaScript libraries, like jQuery, being loaded. If there were we would also have to make sure these were loaded onto our project pages.
Importing into the Pinegrow Web Editor
In order to use this pen in our own project, we basically need to copy the contents of each of the three editor windows into our own pages.
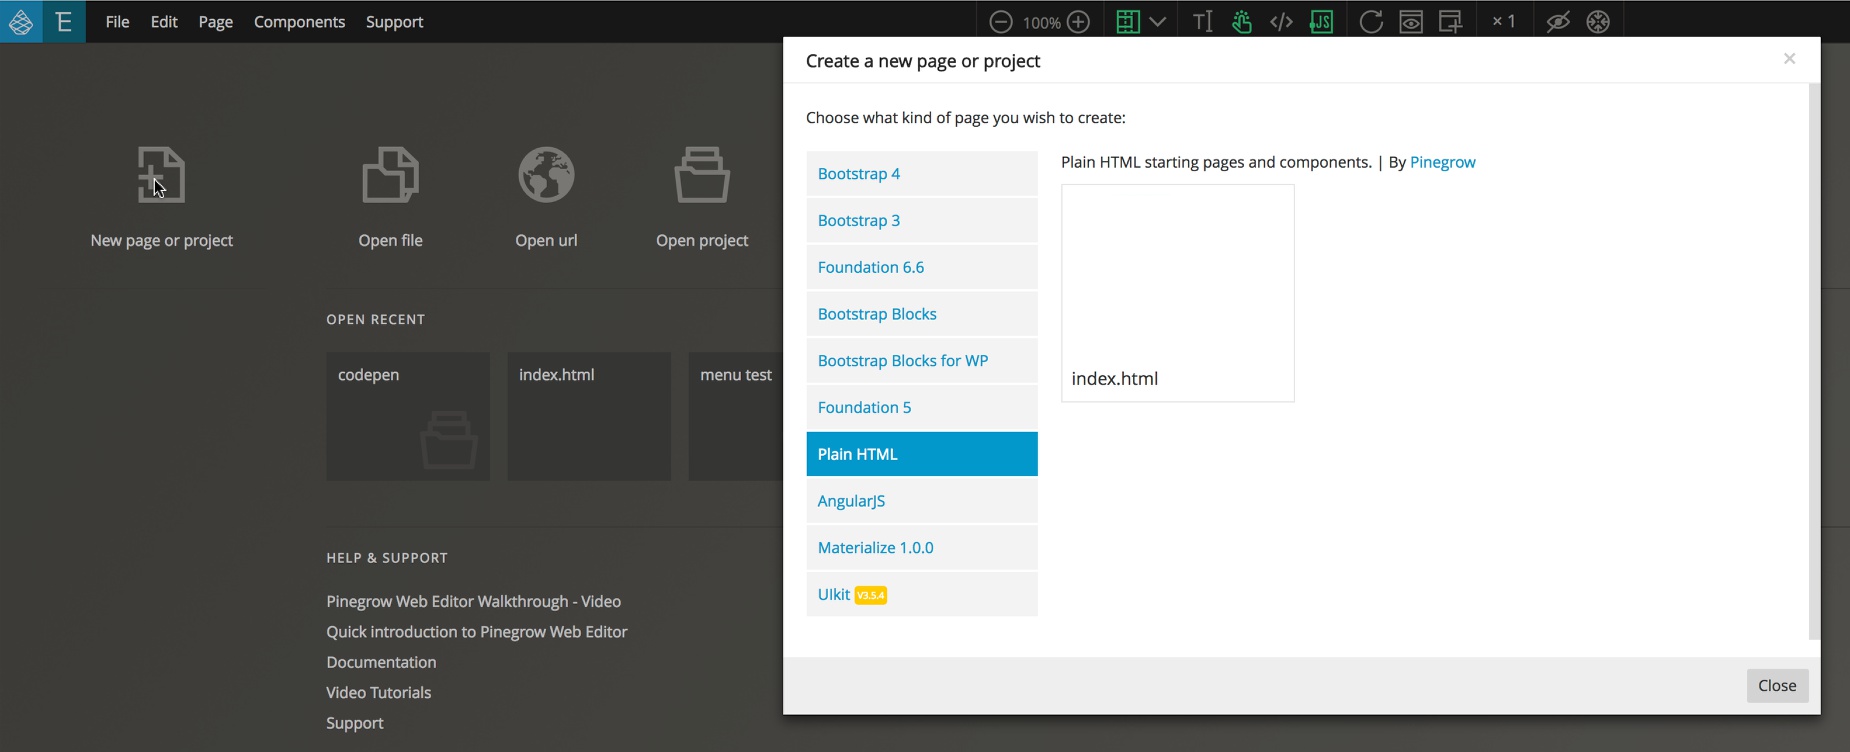
First, since this is a plain HTML snippet with no additional framework elements, open up Pinegrow and go ahead and create a new blank page by clicking on the “New page or project” button and then selecting “Plain HTML”. If the project utilized Bootstrap it would be better to start from a blank Bootstrap template. Next, save the page and open it as a project, either from the modal if it appears, or from the project panel.
Importing the HTML
Starting with the HTML we can import the code several ways with Pinegrow. First, we could simply highlight and copy all of the HTML, then paste it either onto our page using the Pinegrow code editor, or another code editor connected to Pinegrow, like Visual Studio Code. But Pinegrow has a better solution! Instead, we will use the Library panel insert code box and then drag the resulting element to the page, allowing us to easily save this element for reuse in our project.
Navigate back to CodePen, click on the HTML editor box and click either CTRL+A or CMD+A to select all the code. Copy the code with the appropriate hot key, either CTRL+C or CMD+C, and then navigate back to your Pinegrow Web Editor page.
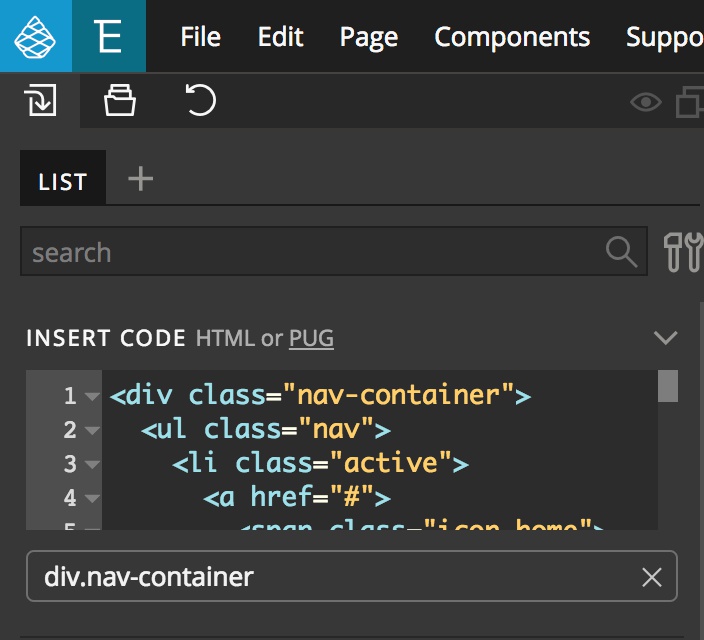
Open the Library panel and paste your code into the Insert Code box at the top.Now, drag the resulting element that appears below the Insert Code box to the page.
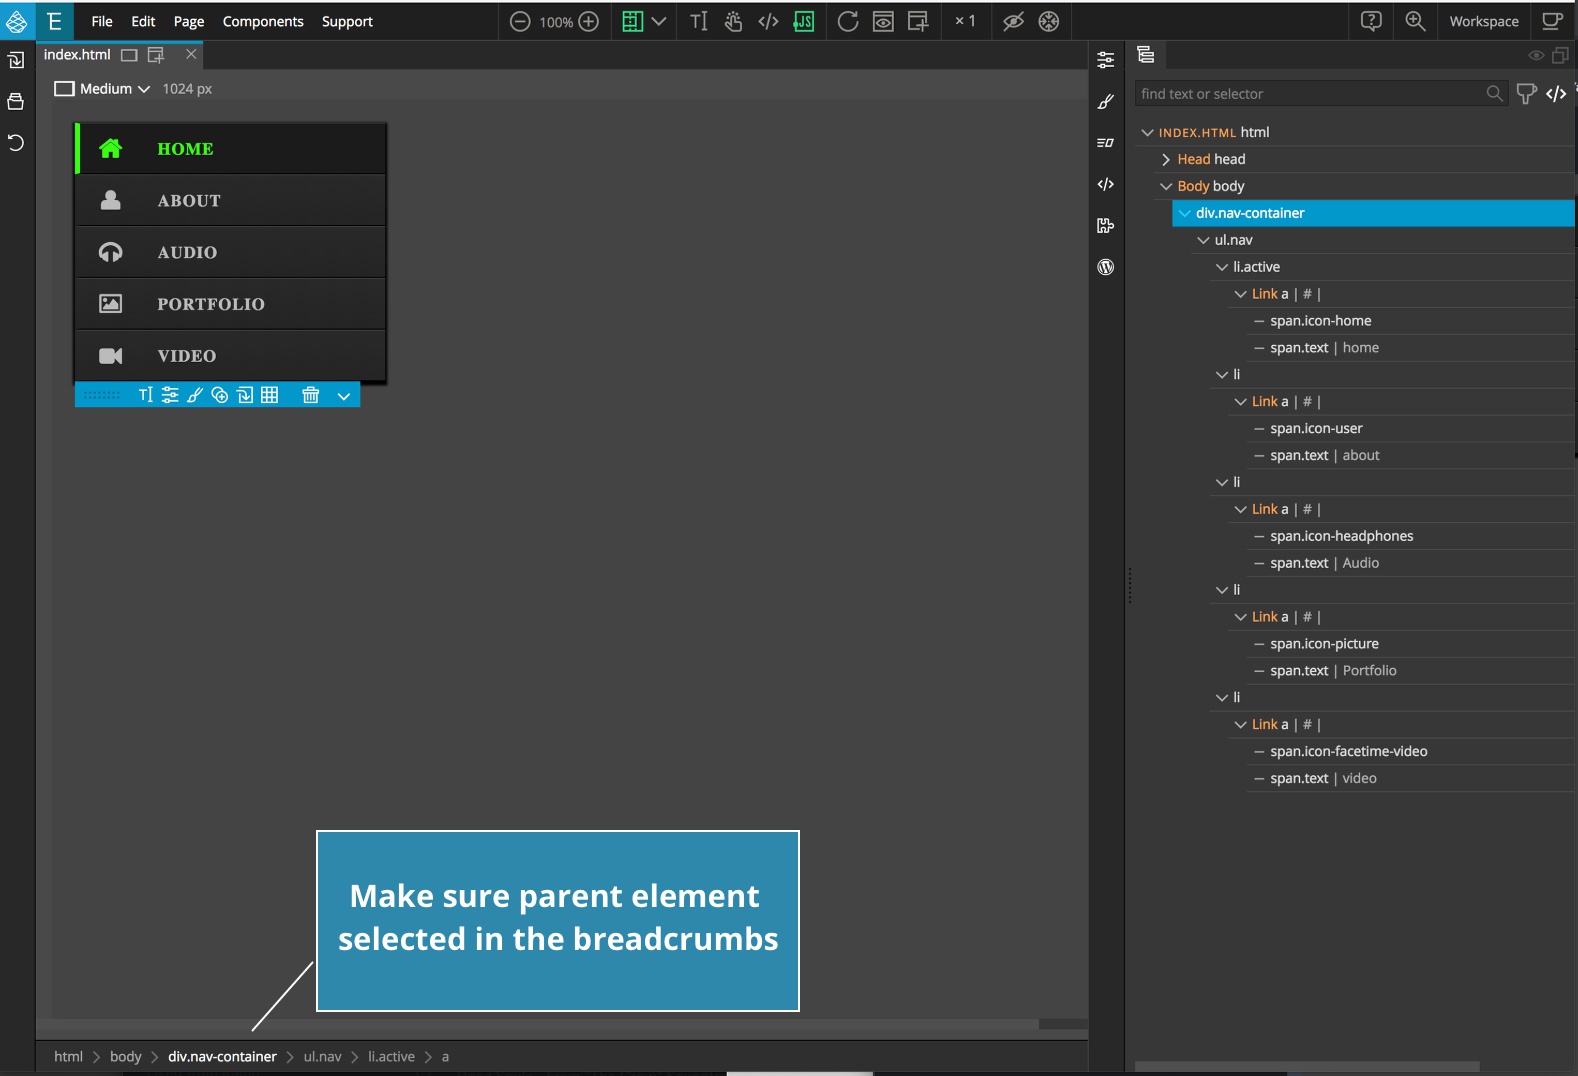
Since this is a navigation menu that we will potentially want to reuse in our project, we are also going to copy this element into our Library panel. To accomplish this, select the top-most element in our tree or on the Page View.You can check the breadcrumbs at the bottom to make sure you have the “div.nav-container” selected.
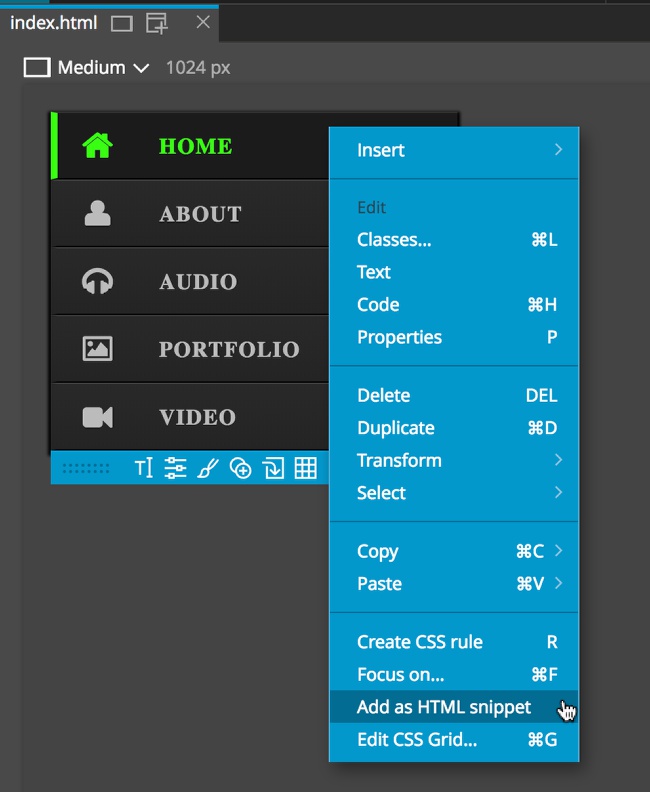
Then right-click on the element to bring up a context menu. From there select “Add as HTML snippet”. You should now see a new element in the Library panel in a section named “Snippets”. That snippet can be renamed if desired by right-clicking. If you select “Save all” from the File menu at this point you will get a file dialog asking for a name for your new snippet library. This custom library can be opened in any of your projects.
Importing the styling
Now that we have the HTML, we need to bring in the CSS. Navigate back over to our pen on CodePen and change the view back to the Editor view. Next, remember that the CSS was being put through a preprocessor. We could also easily do this for less or sass, but not if the CSS was written in Stylus, so let’s see how to import without a pre-processor.
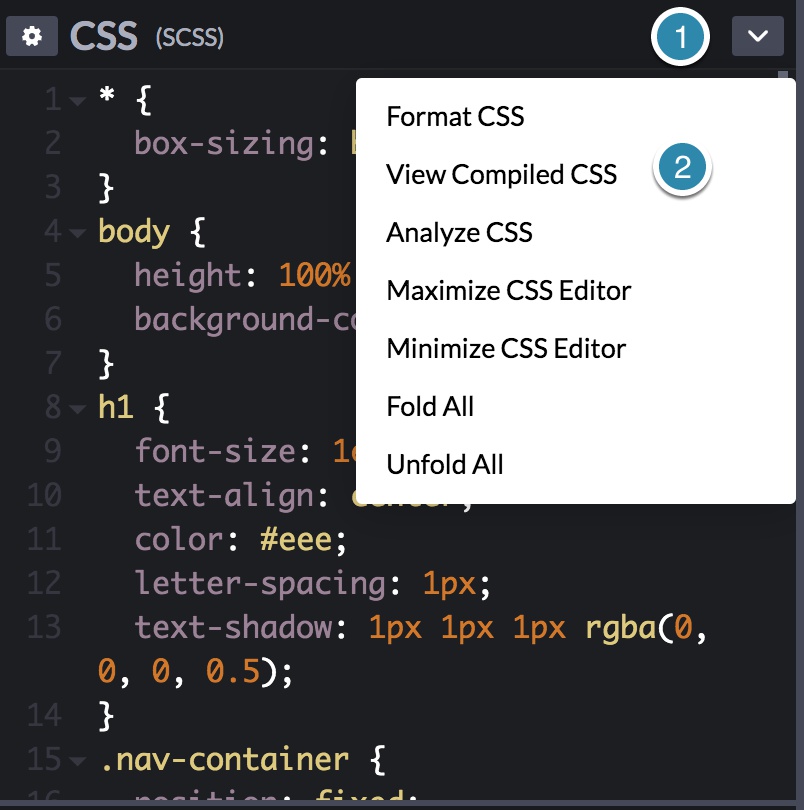
Before copying the CSS, click on the downward caret to the right of the window. Then click on “View Compiled CSS”. This will convert the styling to conventional CSS you can copy and paste into your project style sheet.
Adding other resources
Looking at the output in the Page View panel, it still doesn’t look like the CodePen snippet. This is because, if you remember, this page also needs font-awesome loaded. We can do this a couple of ways. Pinegrow has two versions of font-awesome as built-in libraries to add to your page. We could just activate one of those, but that wouldn’t help us for other pens where Pinegrow didn’t have built-in support. Instead, let’s navigate back to CodePen and open up the CSS settings by clicking on the gear icon.
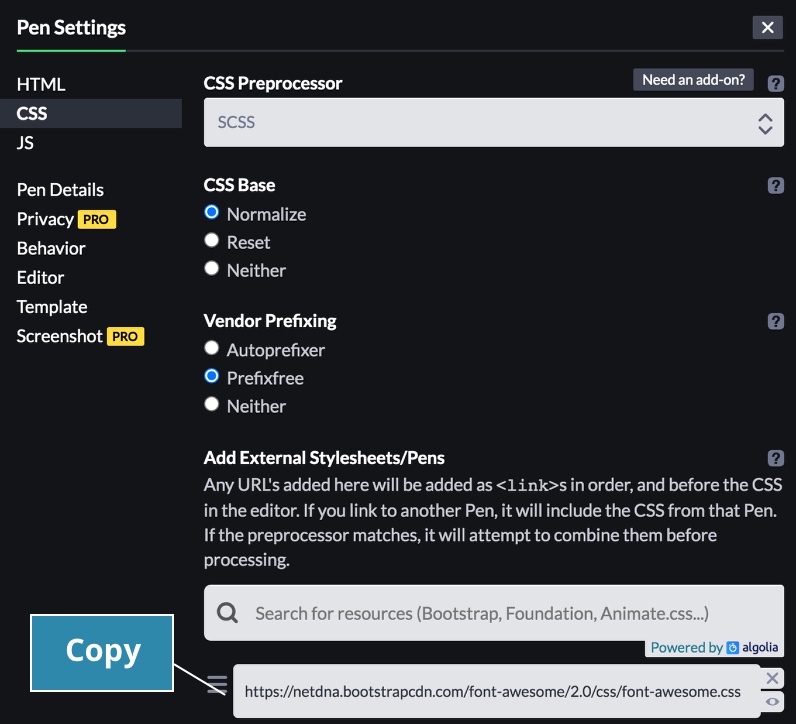
Next, copy the font-awesome link. Then navigate back to Pinegrow and click on the File menu. From there select “Manage stylesheets”.

From the resulting modal select “OPEN URL…” and paste in the link, and click “Add”. You will then have to attach it to your page by clicking on the attach link below the new stylesheet.
Okay! We are almost there, but something doesn’t look quite right – the font. If we navigate back to our CodePen snippet and open the Developer’s Tools we can see that the font family being used is “sans-serif”. This is just a base system-font.
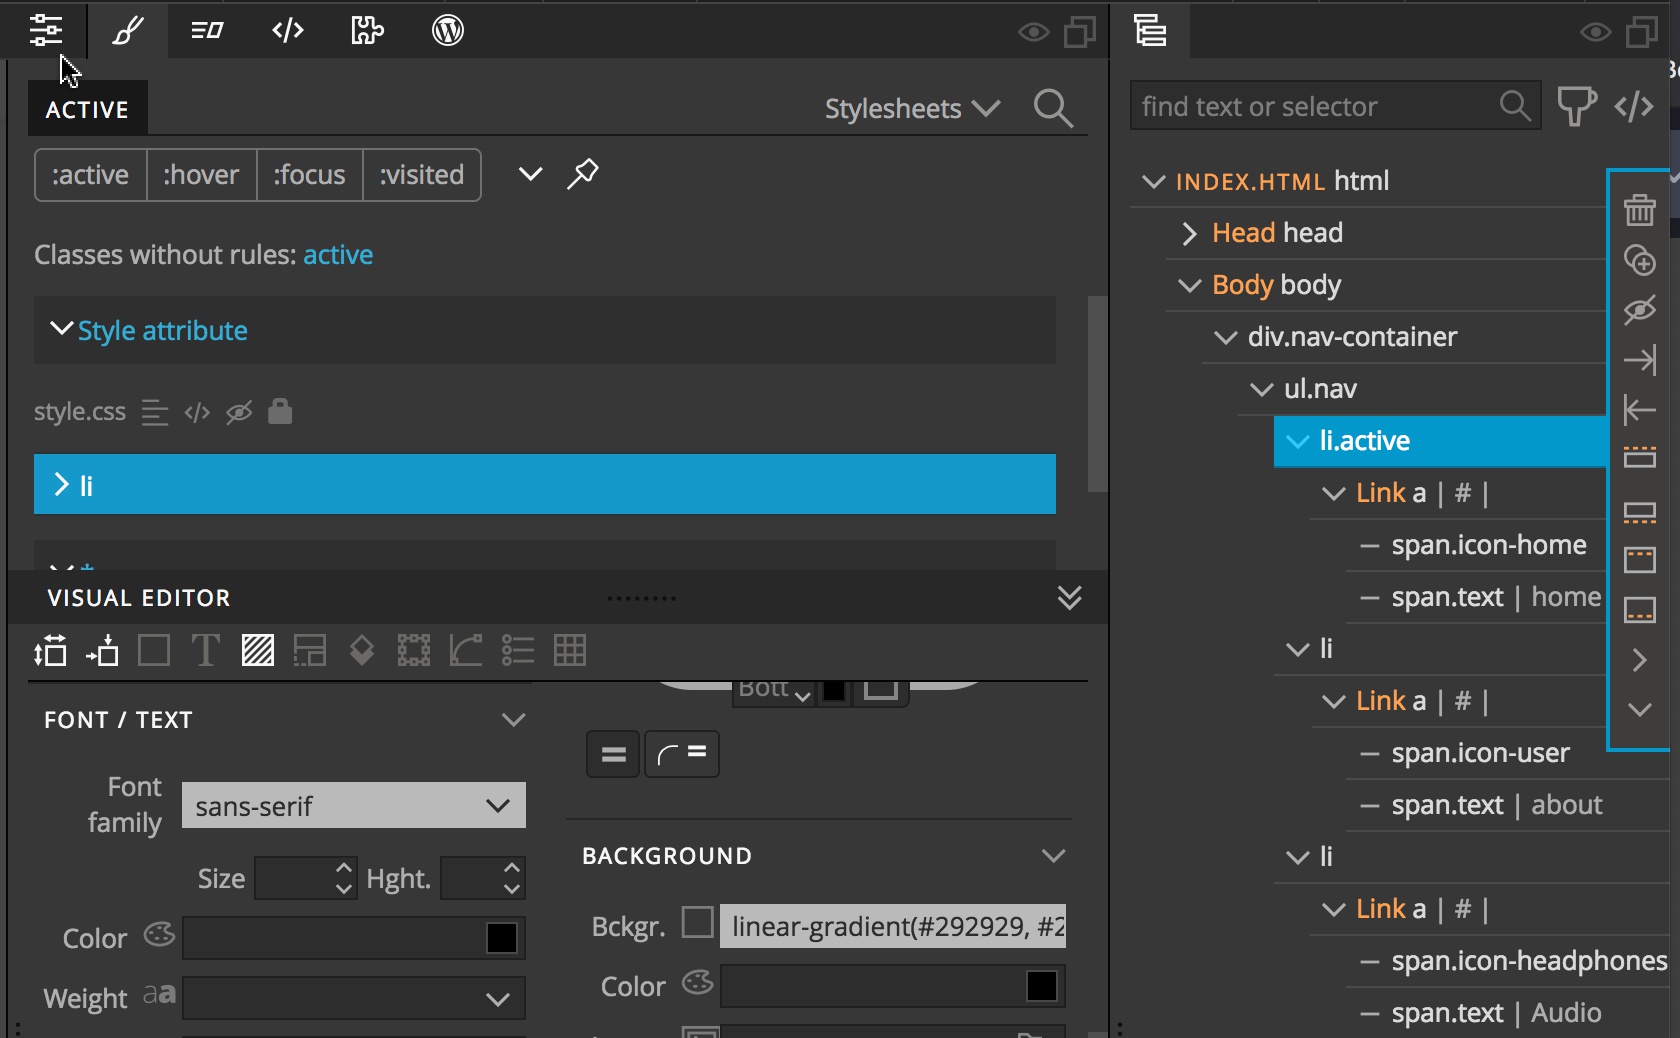
Switching back to Pinegrow we can change one of our styling rules to include this. Select one of the list elements either on the Tree or Page View. Now open the Style panel and select the “li” rule set. From the visual editor scroll down to the FONT/TEXT section and type in “sans-serif”.
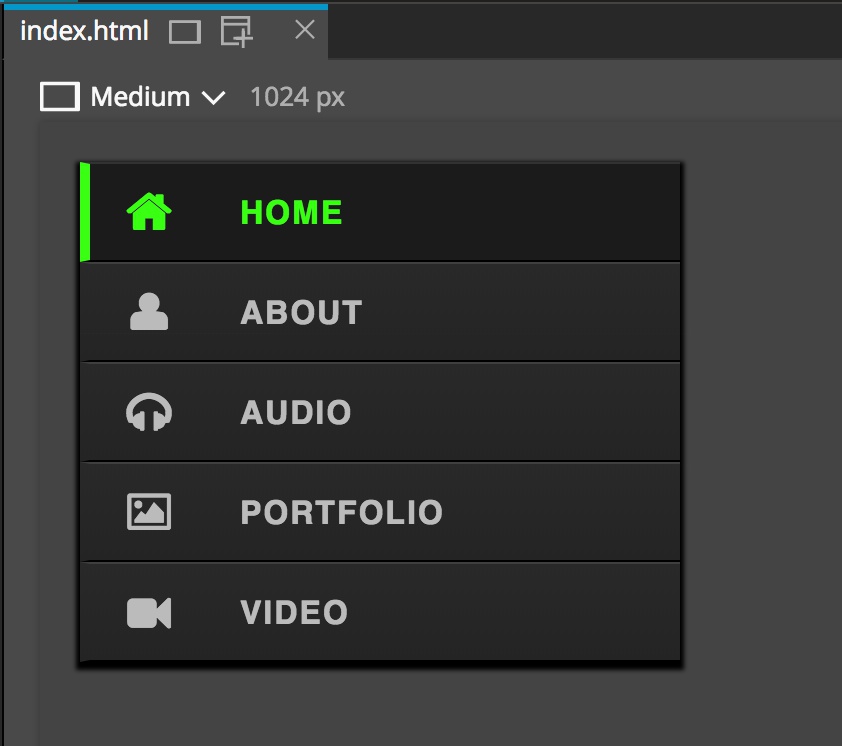
Now it looks like the CodePen snippet! If we did need to add JavaScript we would need to either put it into the Library panel “Insert Code” box, or directly in the page code editor. Alternatively, we could also add the Javascript into a separate file that we then add to the page like other libraries like jQuery.
I hope you can see the power of CodePen and the utility it offers in building our own projects quickly. I hope this tutorial was helpful for your Pinegrow projects!
Discuss this tutorial
Have questions or comments about this tutorial? Let’s talk about it on our forum.
Get in touch
Would you like to see your favorite theme or blocks library featured in the next tutorial? Let us know in the forum or by email!