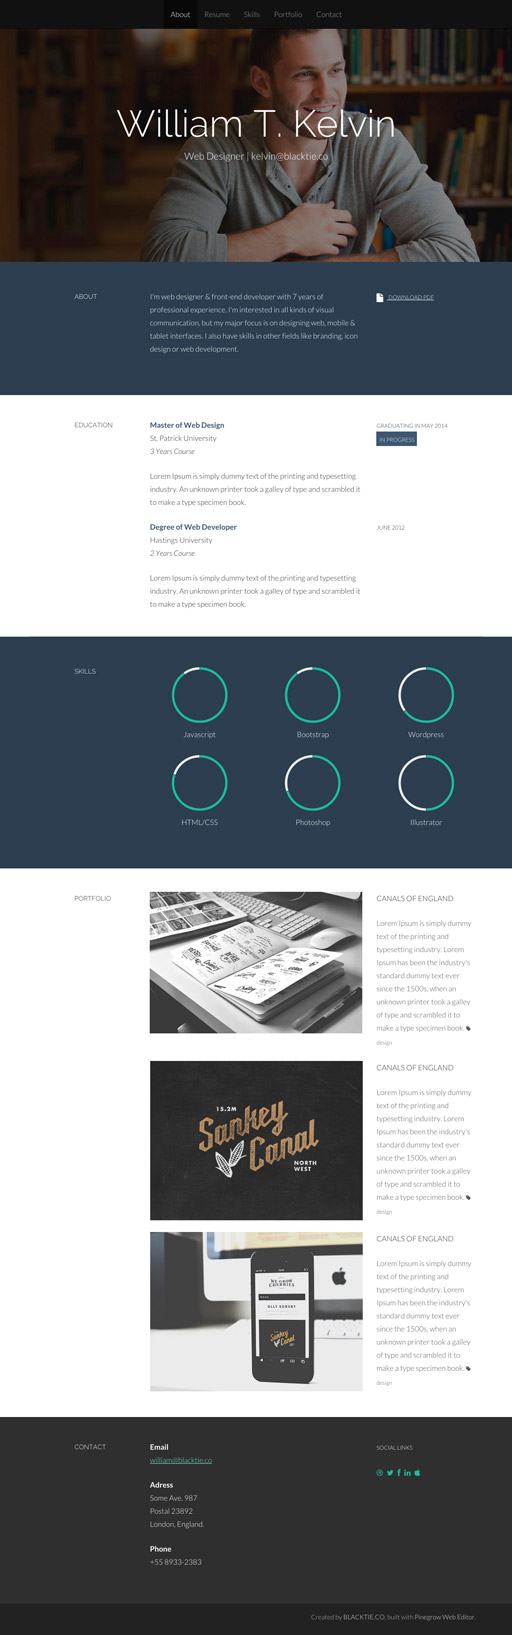
Kelvin Pine - a Free Personal Resume Bootstrap Theme
Kelvin Pine is a free Pinegrow-ready resume Bootstrap theme based on Kelvin theme created by BlackTie.co. This elegant template is great for putting your resume, portfolio or CV online.
What does “Pinegrow-ready template” mean?
A couple of super-useful things:
The template comes with a special Pinegrow plugin that adds elements like Topbar, Header, Intro, Skills… to the Lib panel in Pinegrow so that you can easily build your webpage by dragging elements to the page:
Plus, you can use element properties to control things like the header image size or control skill charts:
The header image, colors and fonts are implemented as variables so that you can easily change how your webpage looks:
To make this possible we had to modify the original Kelvin theme a bit:
- Skill charts are now controlled with data- attributes and shown when scrolled into view.
- CSS rules use classes instead of ids so that more than one section of the same type can be placed on the page.
- Header size and caption background options were added.
- Alternative text-based navbar was added.
Video tutorial
You can watch a video tutorial or read the guide with images below.
Let’s get started!
Download and unzip the theme ZIP file.
Open Pinegrow Web Editor. Use Pinegrow 1.27 and above for best results.
Please note that the trial version will not let you save HTML and CSS files. You can get the code by copy-pasting it from Page -> Edit code view or by saving Page -> Preview in Browser as the complete page in your browser.
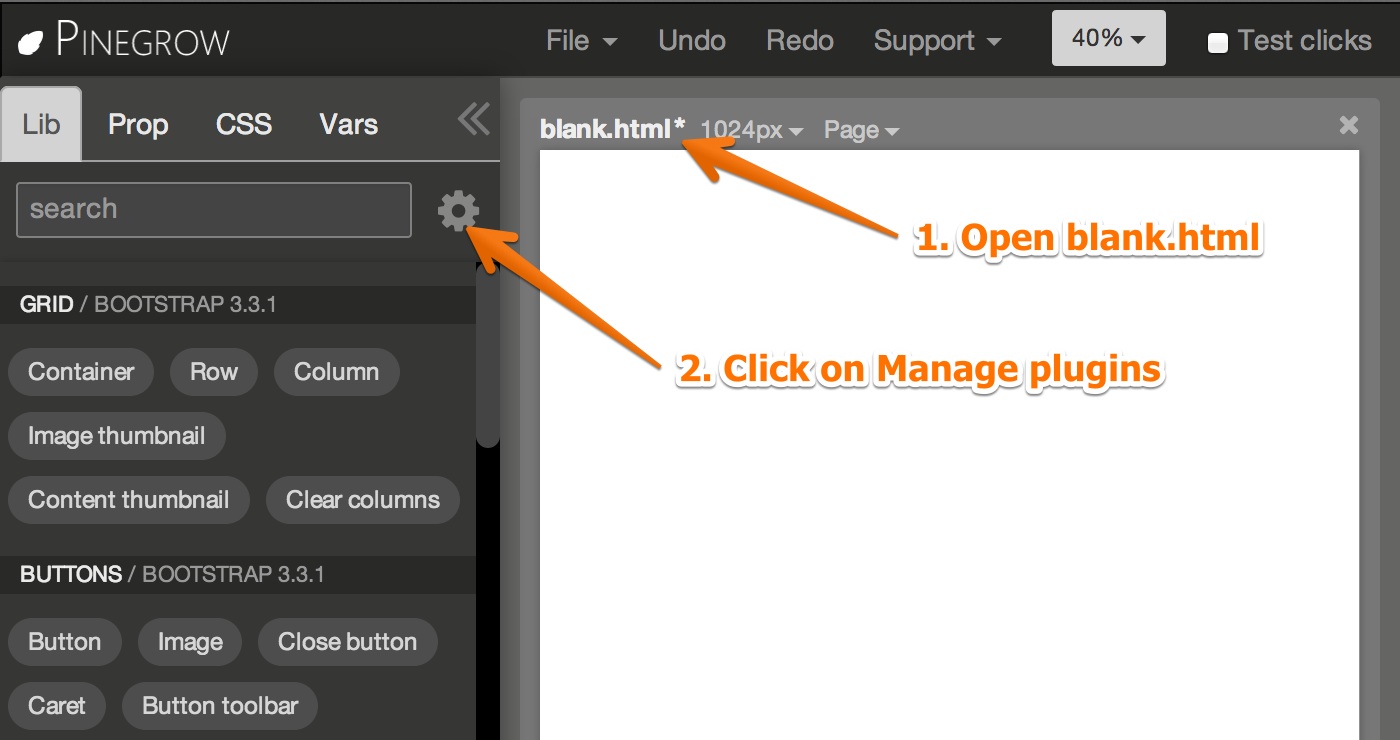
You can either start from scratch by opening blank.html in Theme folder or custumize the existing index.html. Starting from scratch is more fun, so let’s do that.
We also have to enable the theme’s Pinegrow plugin.
With blank.html opened, Open Manage Plugins:
Select and load Pinegrow/KelvinPinegrowPlugin.js:
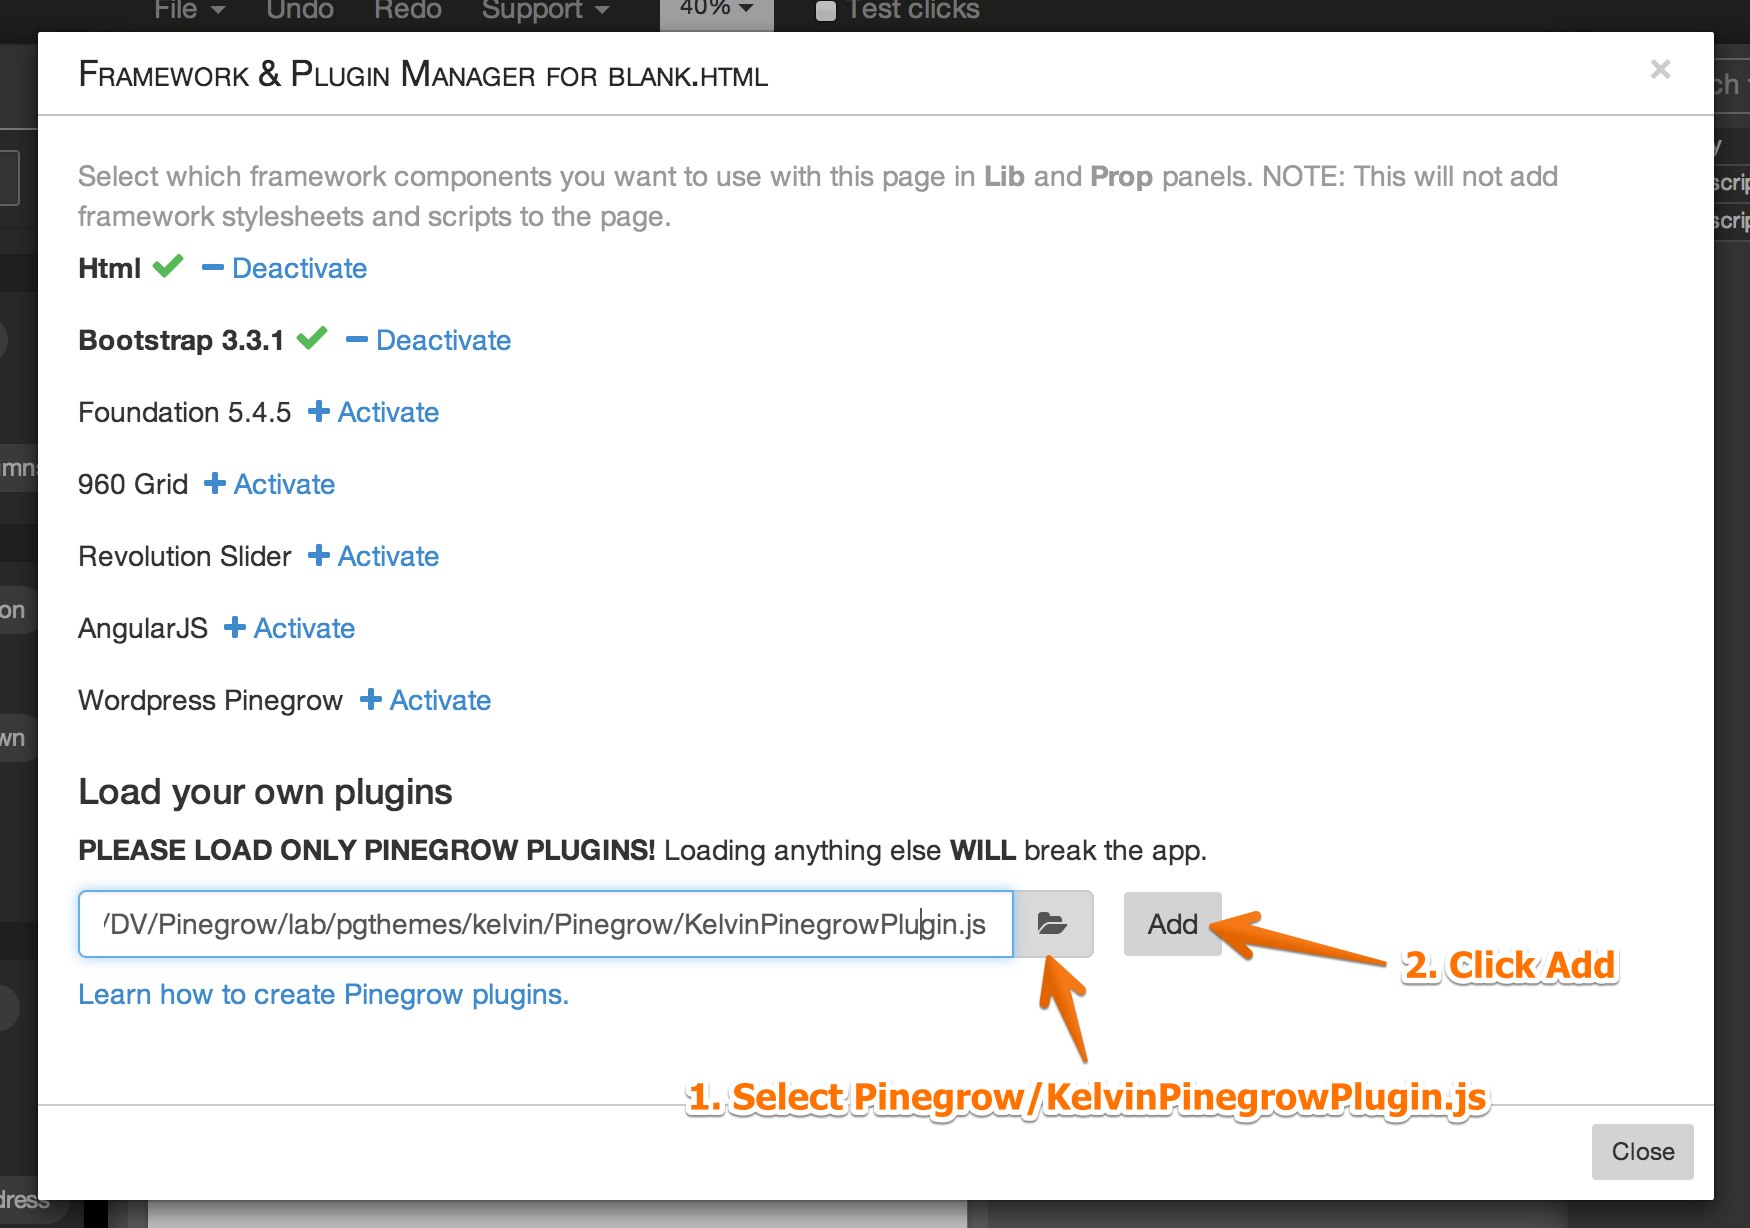
Activate the plugin for blank.html:

This is done only once. After you save and reopen the page the plugin will be automatically activated for the page.
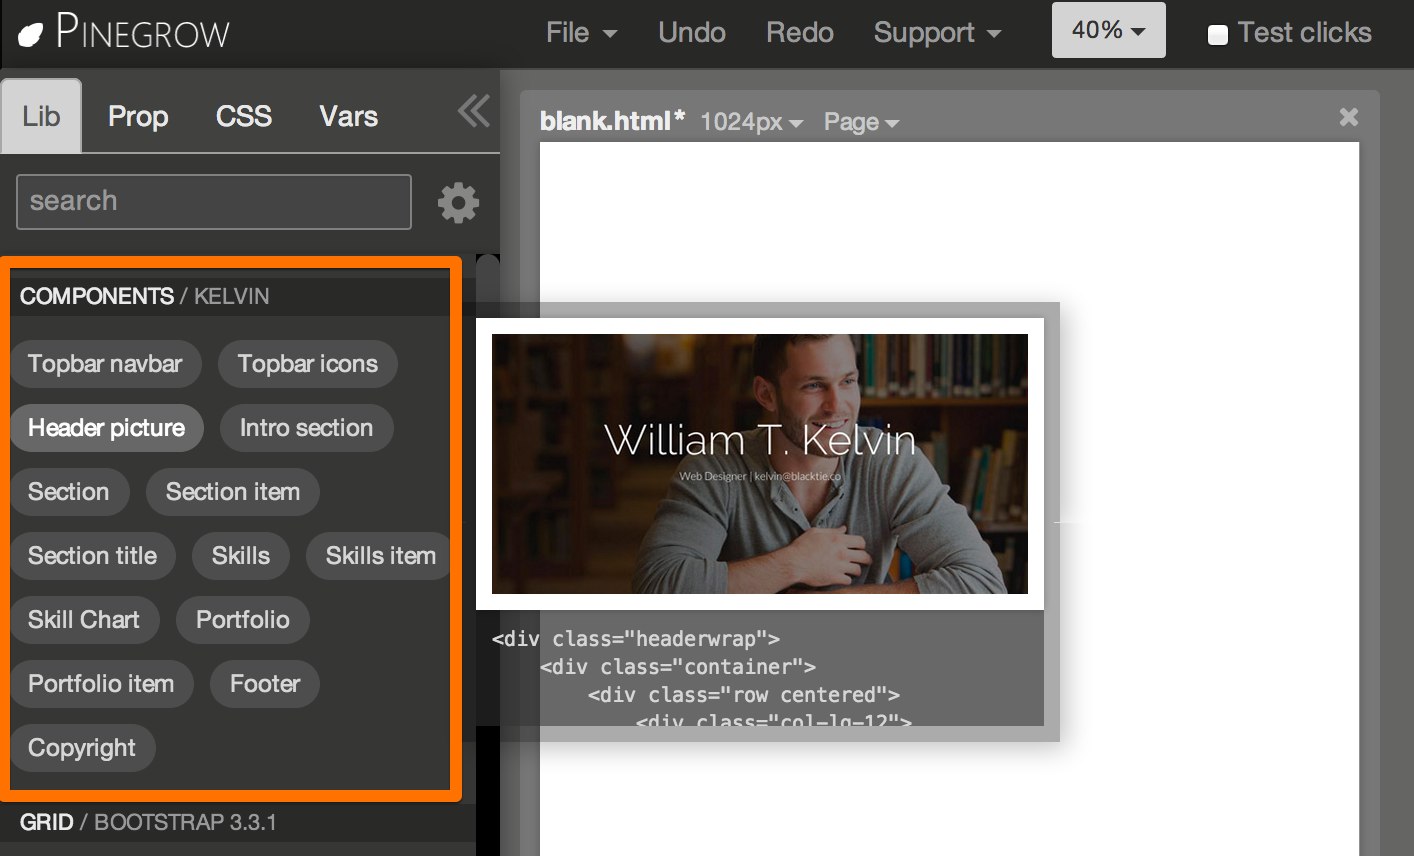
You can see that Kelvin components were added to the Lib panel:
Add components to the page
With Pinegrow you can use a couple of different ways of adding elements to the page. In this case the easiest is to drag them to the page.
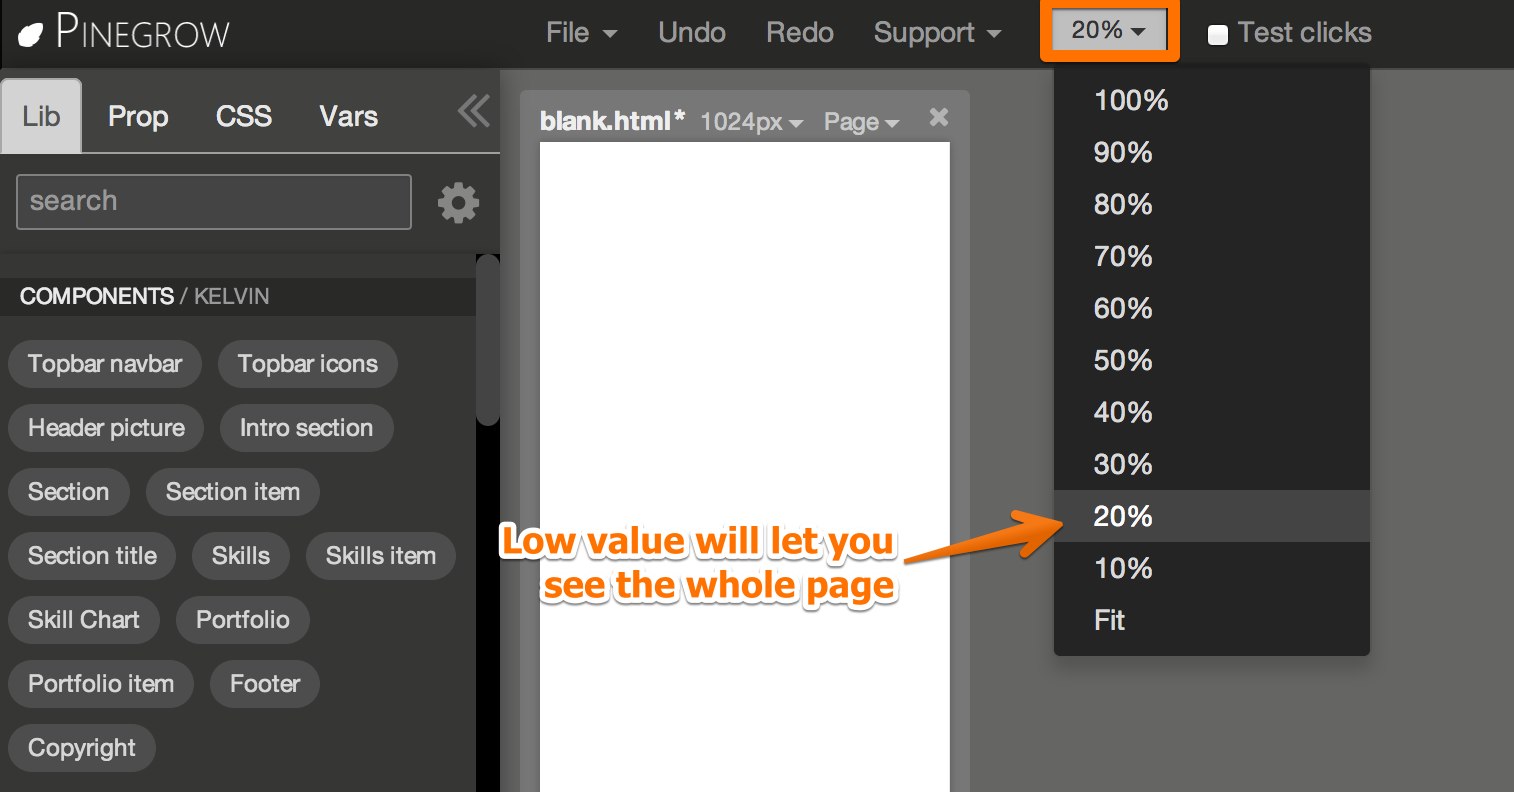
Use Zoom setting to see the bird’s view of the whole page:
Then drag Topbar, Header picture, Intro section, Section, Skills, Portfolio, Footer and Copyright to the page:
And the layout is ready!
Of course, you can add as many elements as you want to the page. You can also rearrange website sections by dragging them by their Move handle or by using the outline tree:

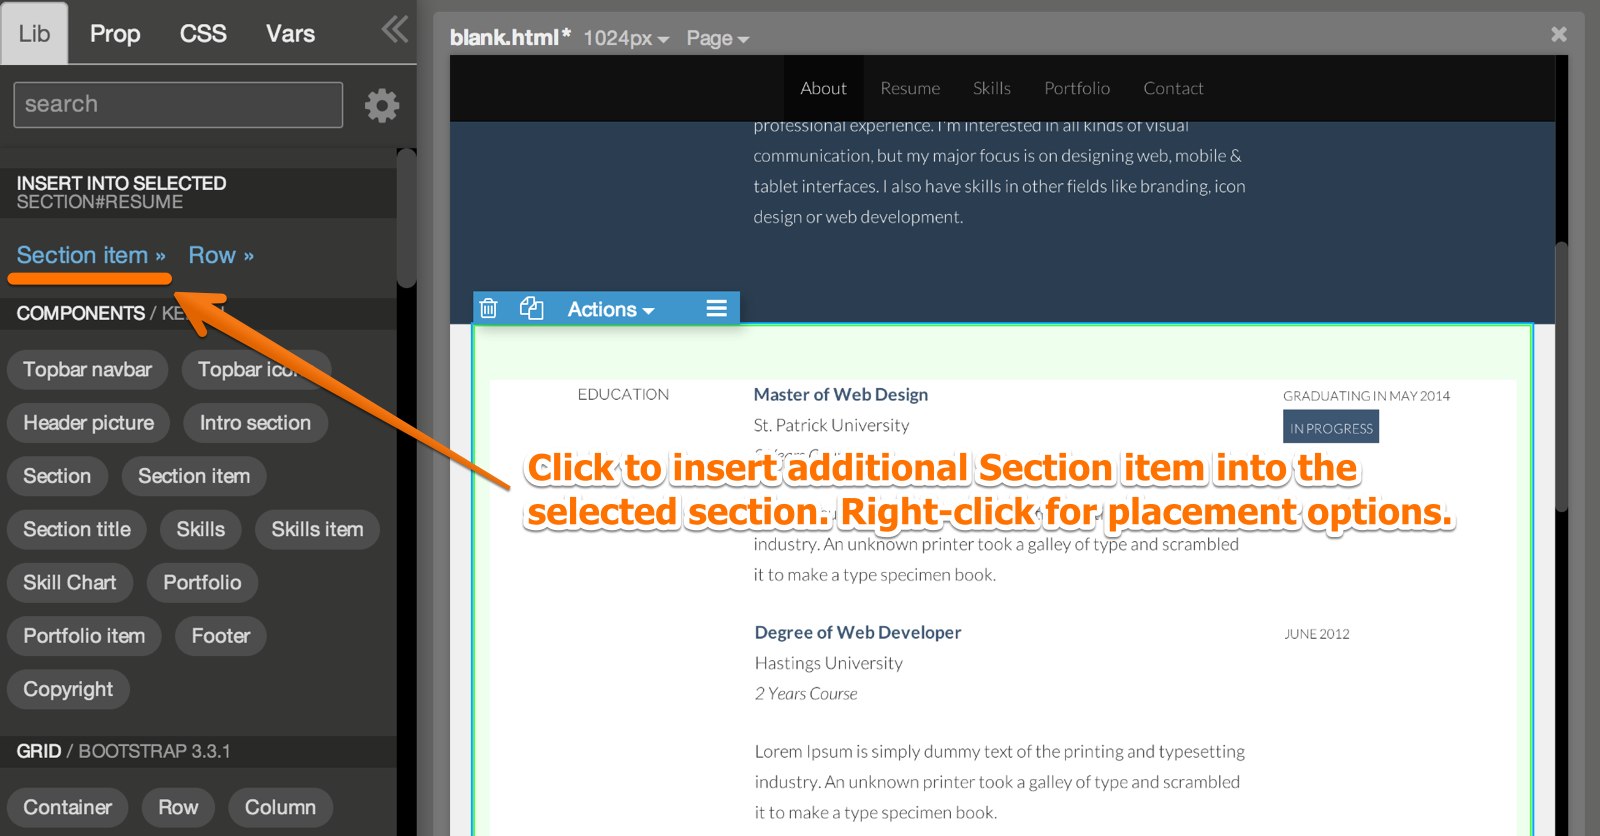
You can also add additional Section items, Portfolio items or Skills.
Drag the element into the section:
Or select the section and click on the quick insert link:
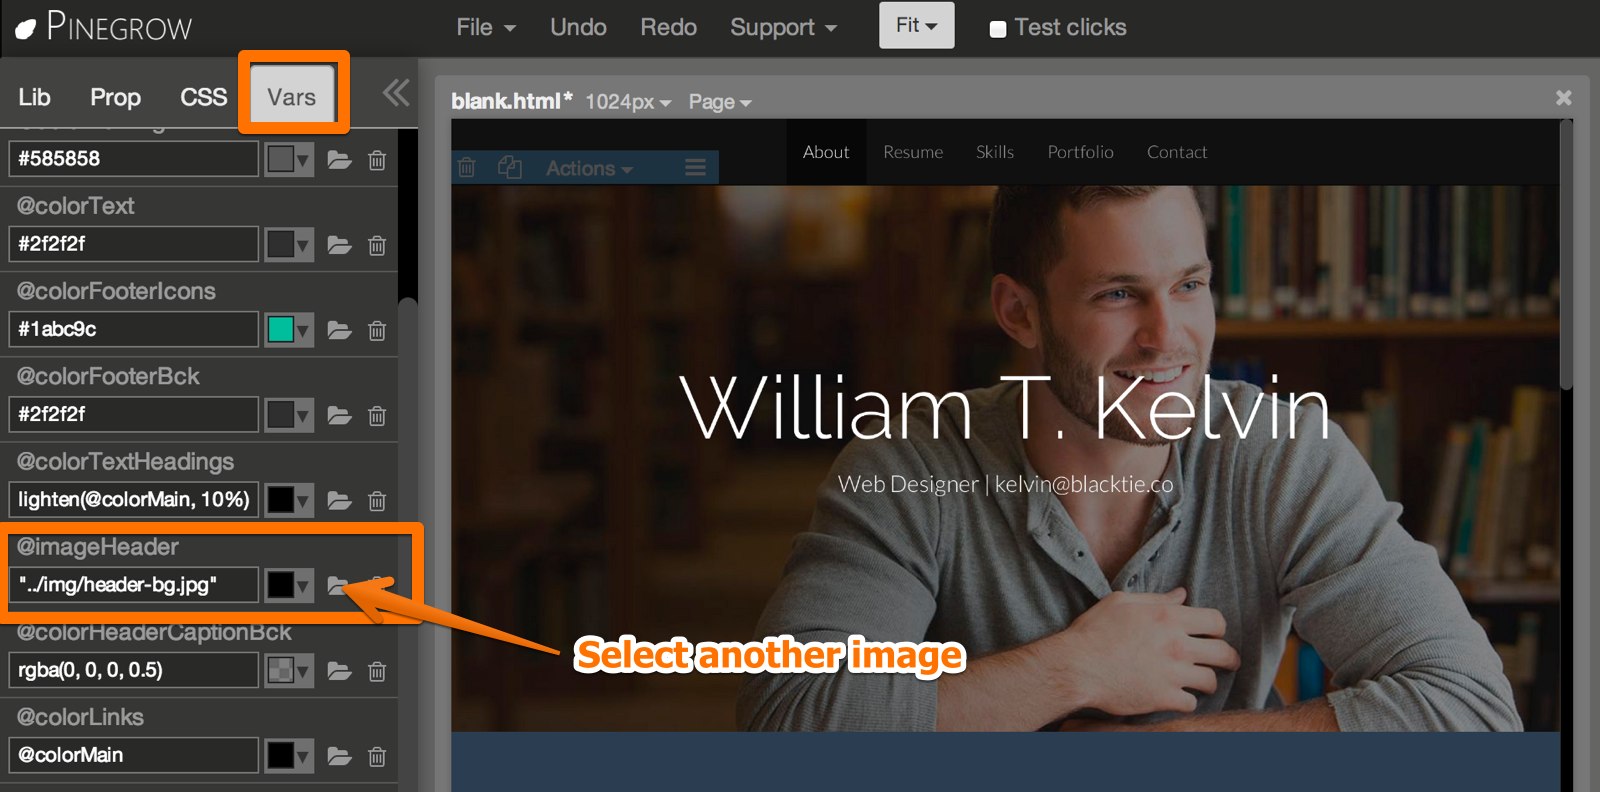
Changing the header picture
Find the image that you want use and copy it into Theme/assets/img folder.
Then go to Vars panel, find the variable @imageHeader and click on the folder icon to select your picture.
Double-click on the text in the header to change it. Use Actions -> Edit code on the selected element for precise control over the content.
Select the Header picture element in the tree and go to Prop panel to set the header size and turn-on the background for captions to increase their readability. Use @colorHeaderCaptionBck variable in Vars panel to control the color and transparency of the background:
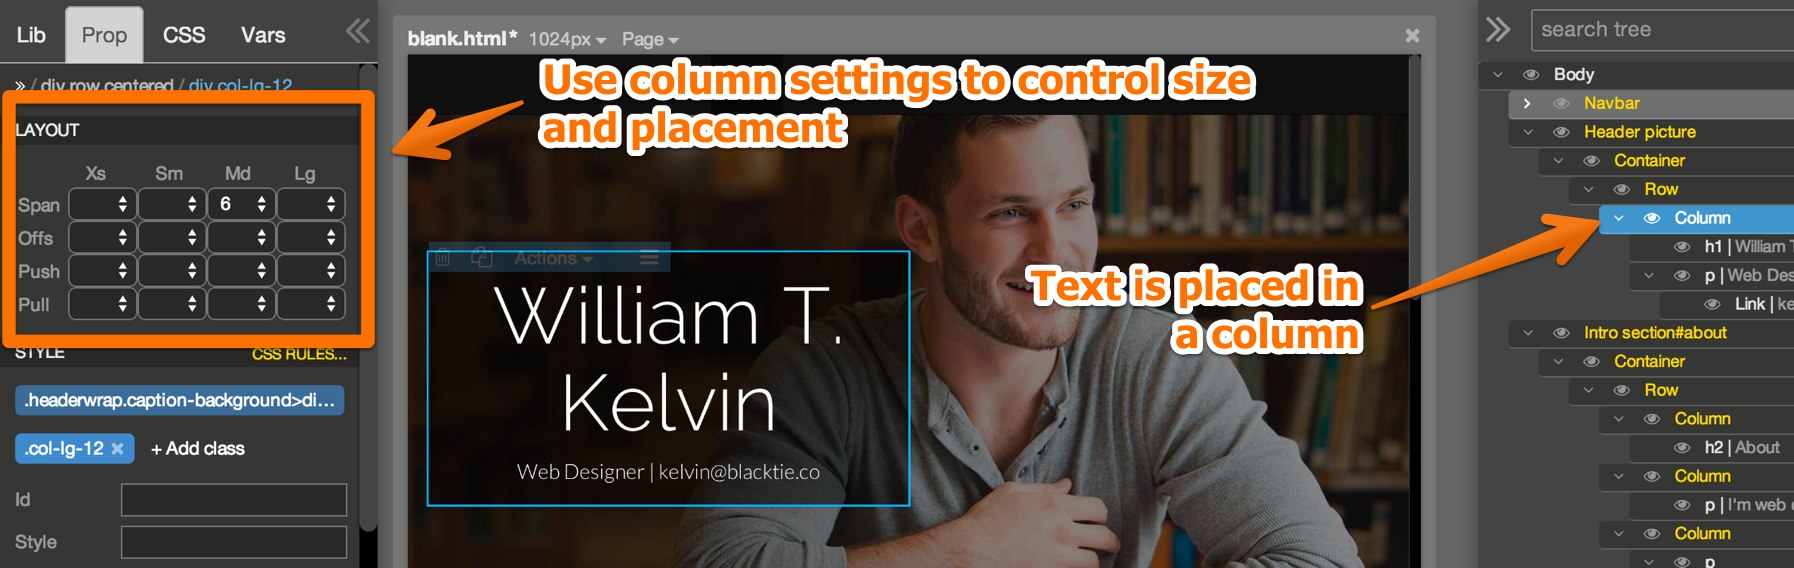
Header text is placed into a column. Select it and use Bootstrap column options to control size and placement of the text at various display sizes:
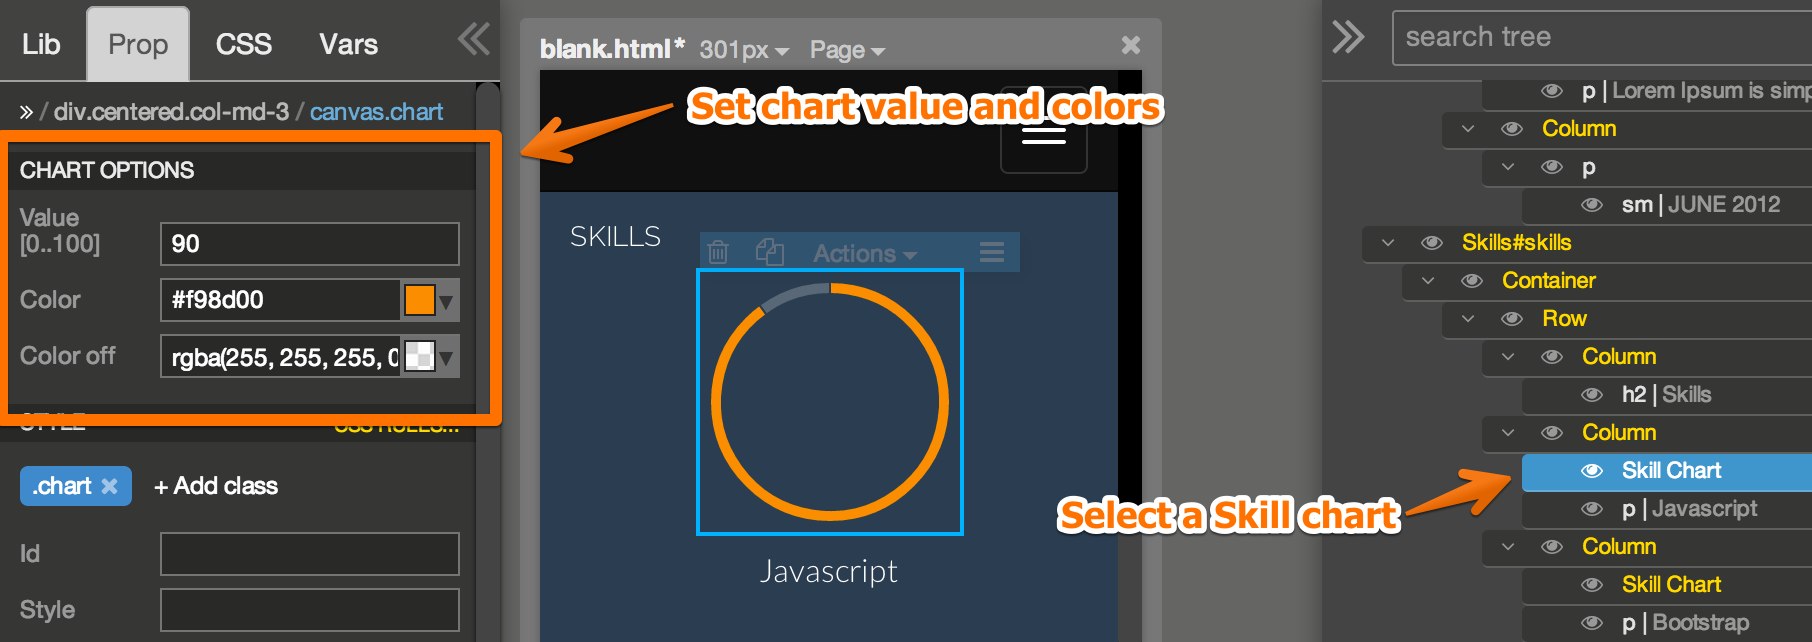
Skill charts
To set values for skill charts, select a Skill chart and set Chart properties in the Prop panel:
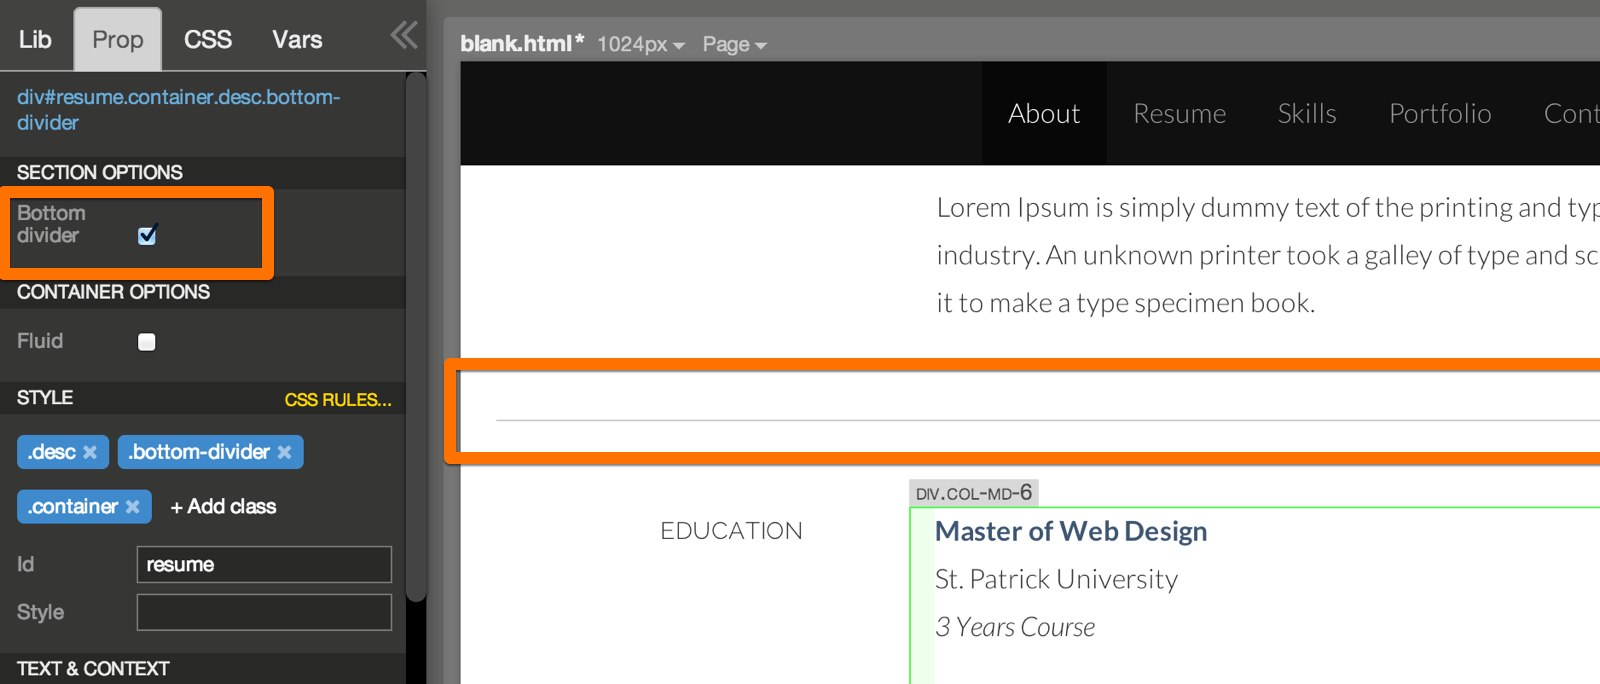
Sections
Resume sections have a property for controlling the bottom border:
Editing the content
Pinegrow lets you duplicate, remove and edit elements of the page. If you’re not familiar with Pinegrow check out the documentation.
Changing colors
Use @color variables in Vars panel to change the color palette of the page:
Using different fonts
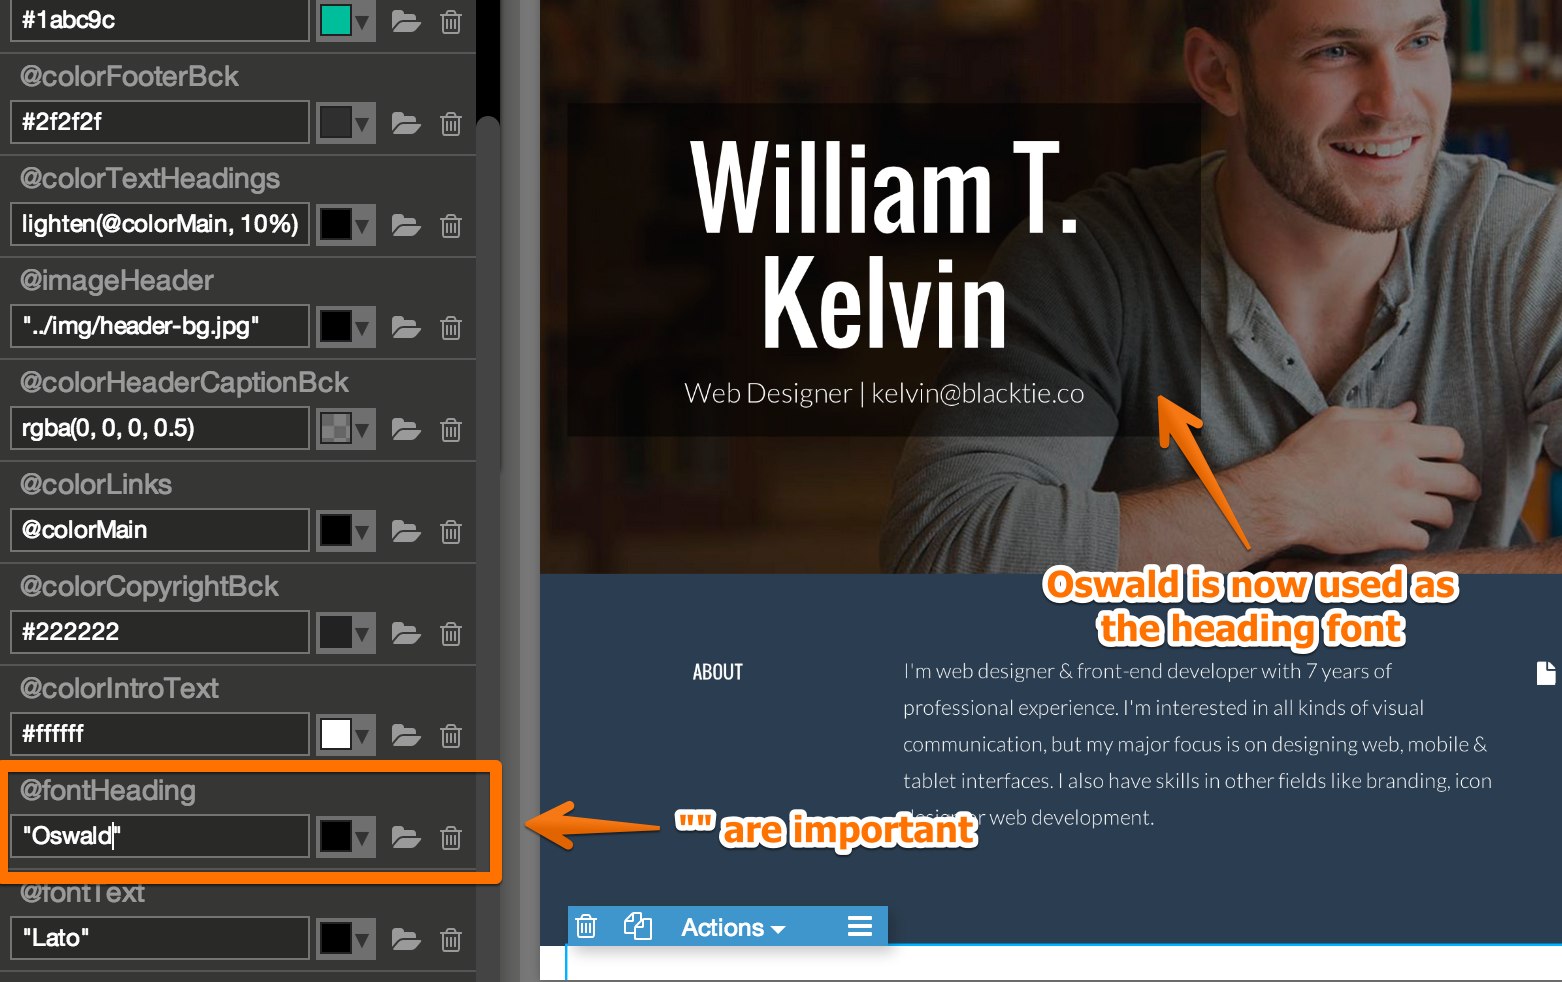
Fonts are controlled by @font variables in the Vars panel:
- @fontHeading is used for headings and
- @fontText for the text.
By default both use Google Fonts. You can type in any font combination you like.
Values of @font variables have to be enclosed in double quotes "…"
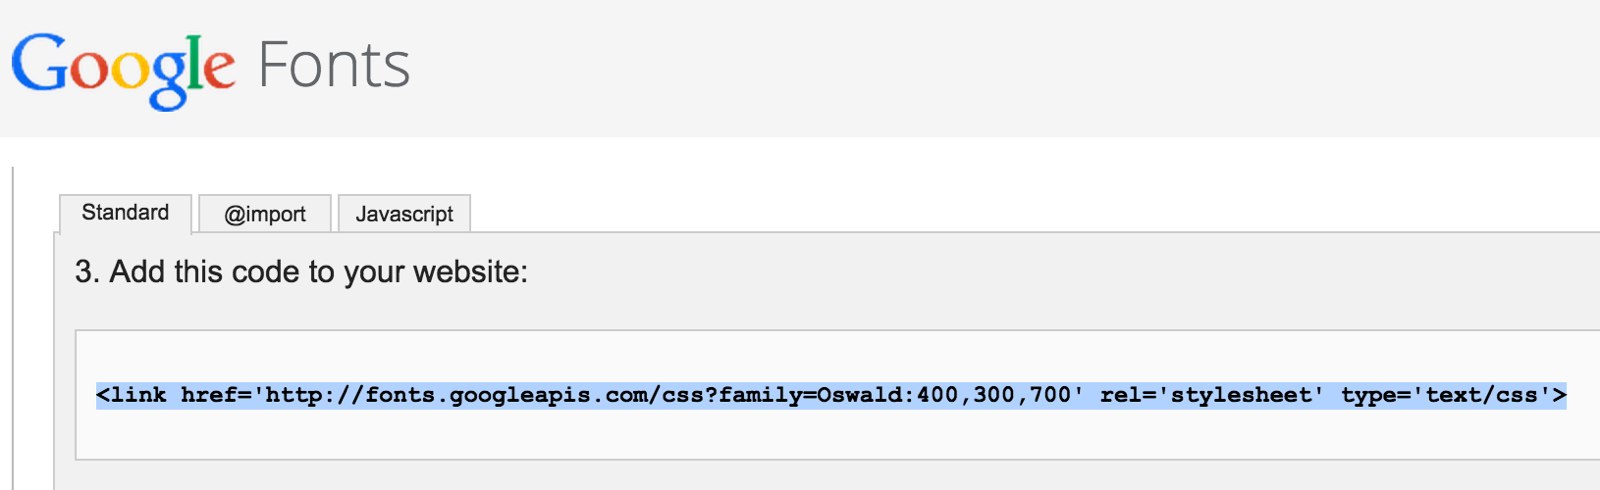
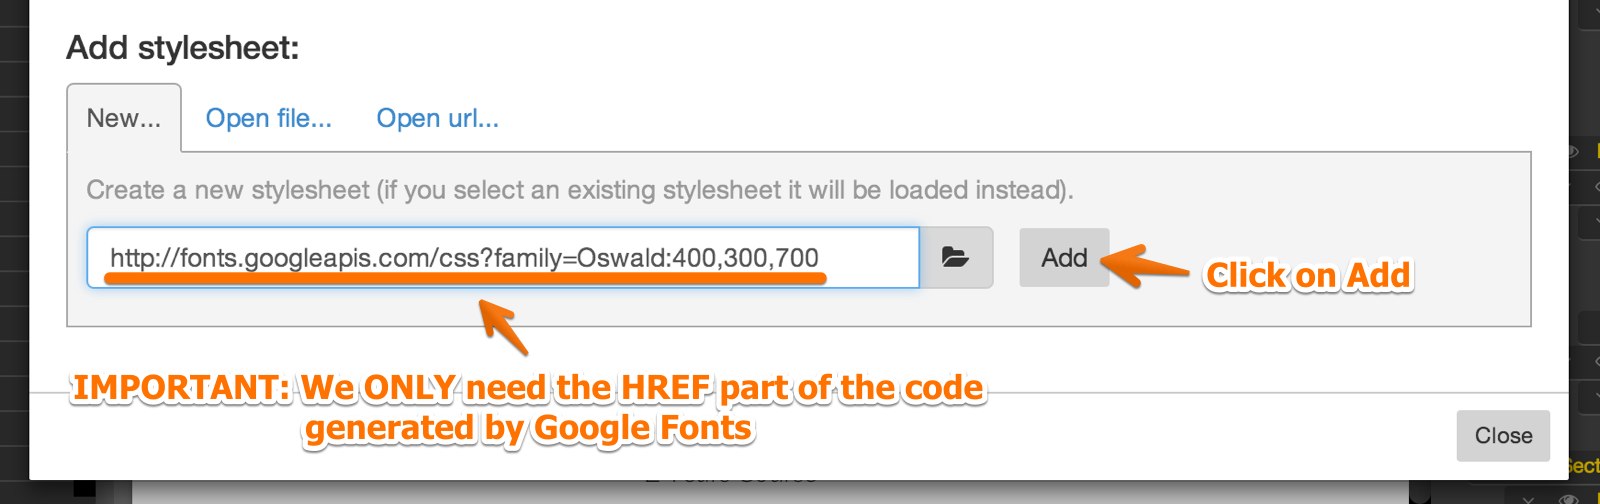
To use a different Google Font, get the font url from Google Fonts:
Open Manage stylesheets in CSS panel:
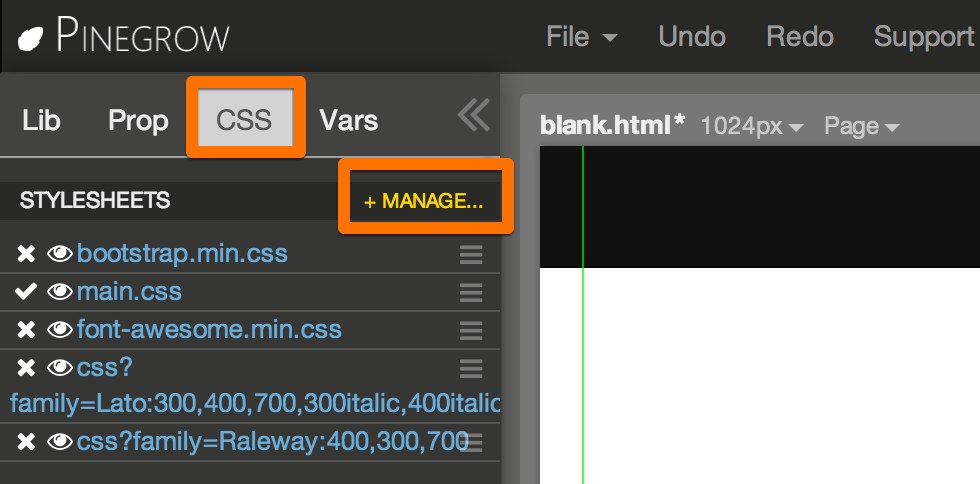
Use New stylesheet:
And attach the stylesheet to the page:
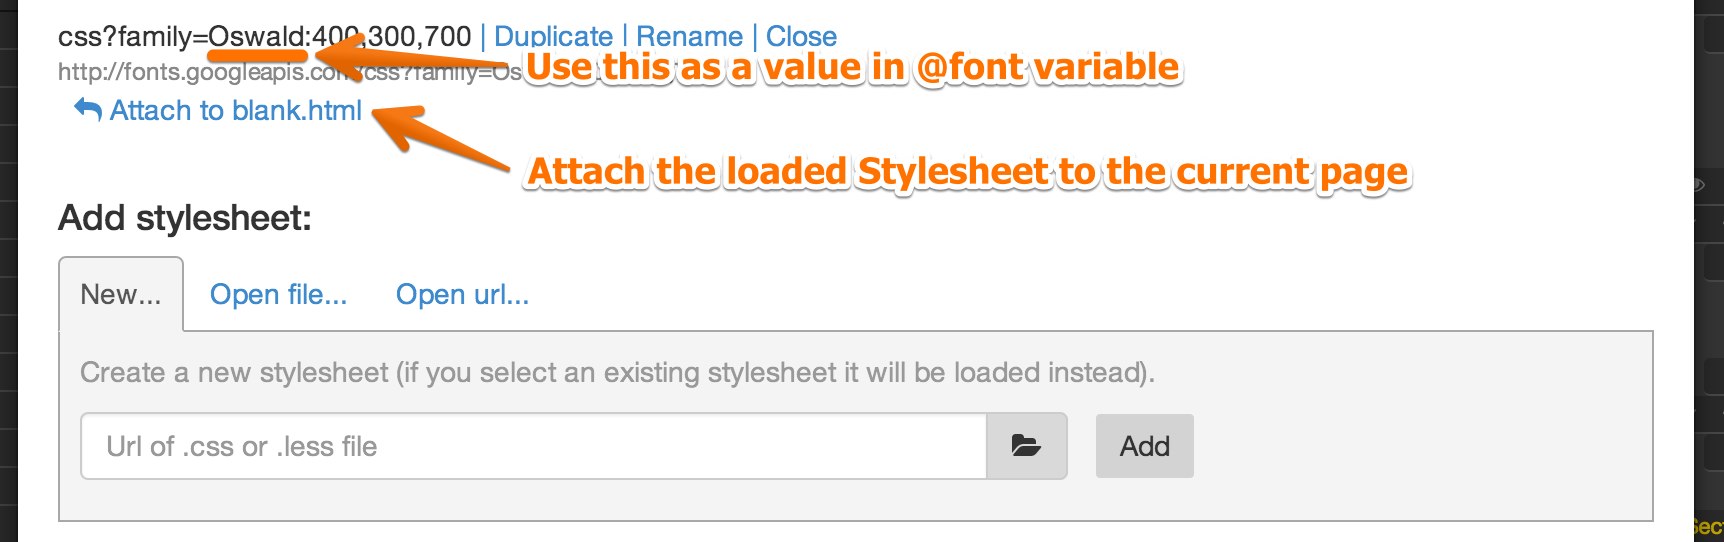
Then use the font name in @font variables:
Remember to detach unused fonts (with Manage stylesheets) from your page.
Another way to add Google Fonts is by going to Page -> Edit page and paste the Google fonts code to the head of the page.
Use Refresh page (CMD + R) to refresh the page after changing the head HTML.
Interested in developing Pinegrow plugins?
Take a look at KelvinPinegrowPlugin.js for inspiration.
License
The theme and it’s Pinegrow plugin are licensed under the Creative Commons Attribution 3.0 License. Please keep links to blacktie.co and pinegrow.com in Copyright section at the bottom of the page.