Use the timeline editor to create powerful custom animations.
Opening the timeline editor
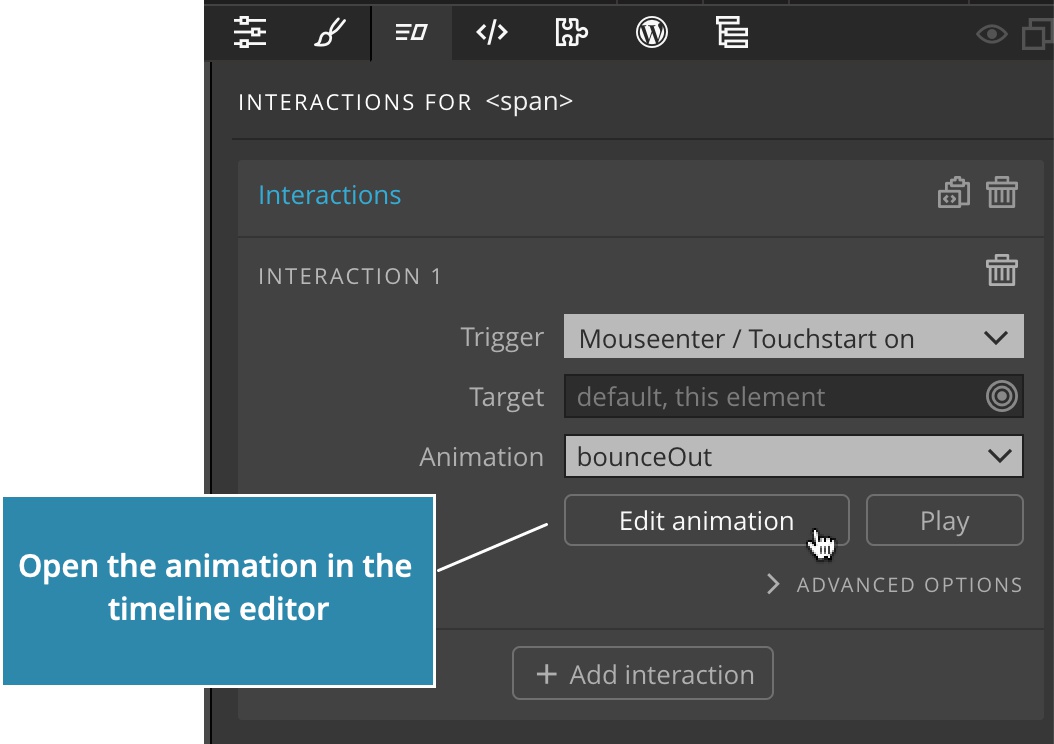
Click on the Edit animation button in the Interactions panel to open the animation in the timeline editor.
Timelines
Each custom animation consists of one or more timelines.
Each timeline involves one or more elements on the page and consists of transitions that animate their properties.
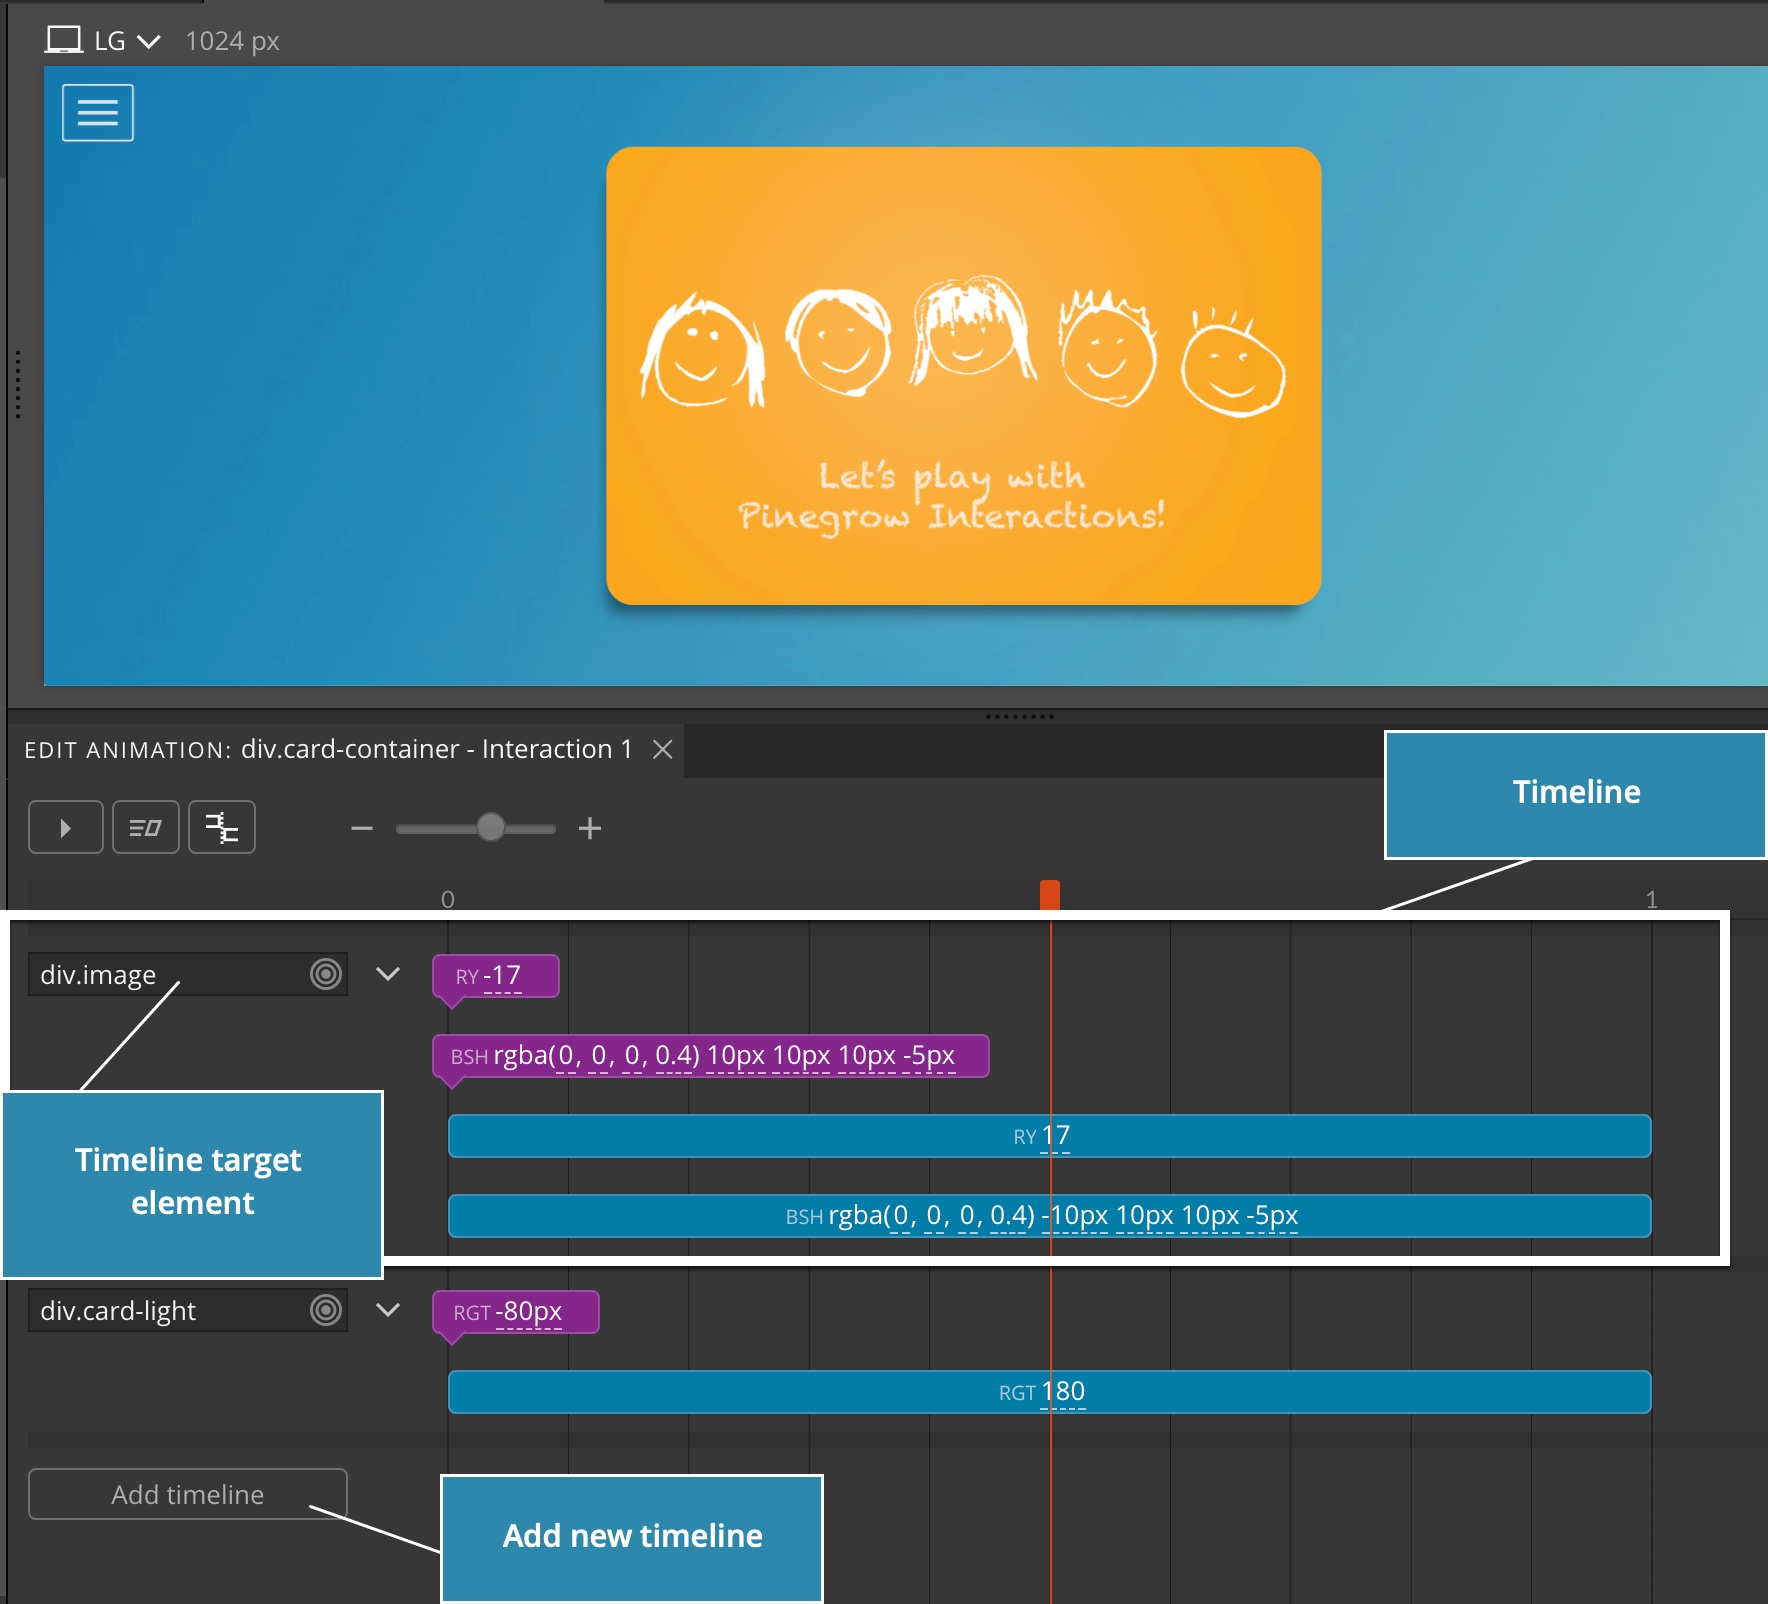
Target elements are selected with the element selector control.
Although animation can have multiple timelines that target the same elements, it is best practice to have one timeline for each set of target elements.
Use the Add timeline button to add a timeline to the animation.
Click on the timeline options dropdown to display a menu where you can:
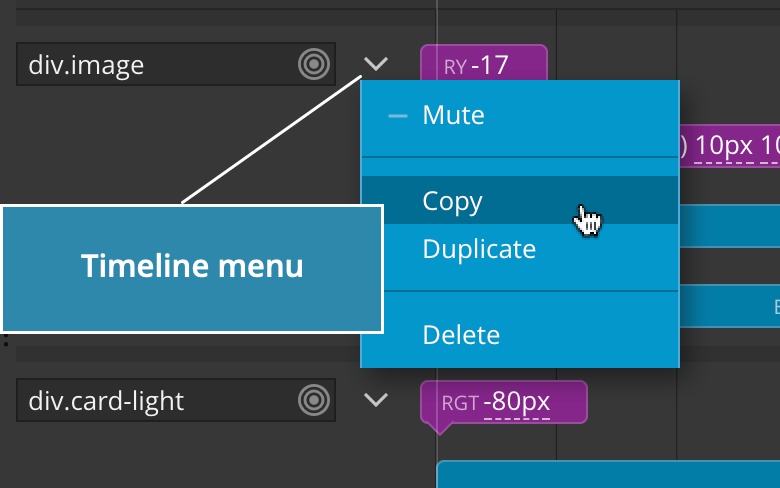
- Mute the timeline. All its transitions will be ignored.
- Copy the timeline to clipboard. Press CTRL + V (CMD on Mac) to paste the timeline into the current animation.
- Duplicate the timeline.
- Delete the timeline.
Transitions
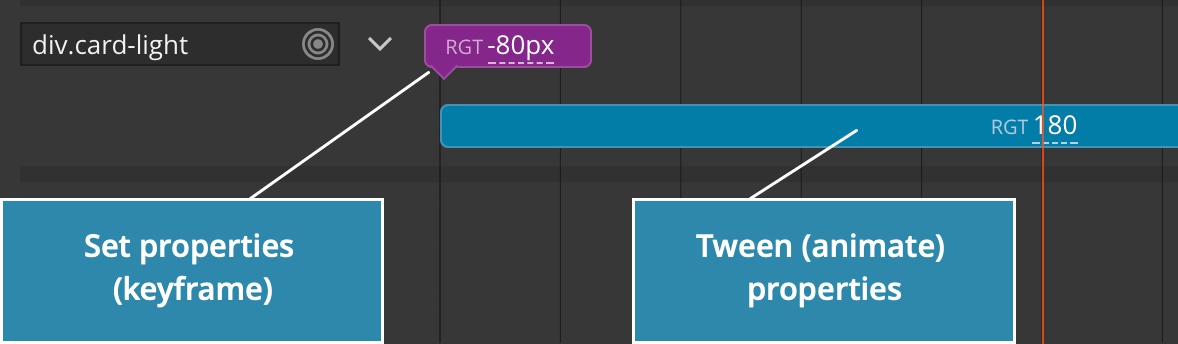
There are two types of transitions:
- Set sets the element properties without animating them
- Tween animates the properties from their current values to the specified values
Insert new transition
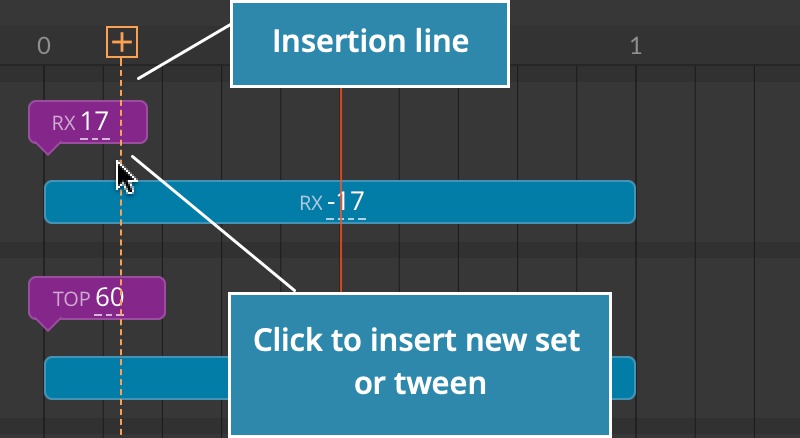
To insert new transition position the mouse cursor over the empty area of the timeline. Empty areas include space above and below any existing transitions.
The orange insertion line will indicate the position in the timeline.
Click on the left mouse button to insert a new transition at that position:
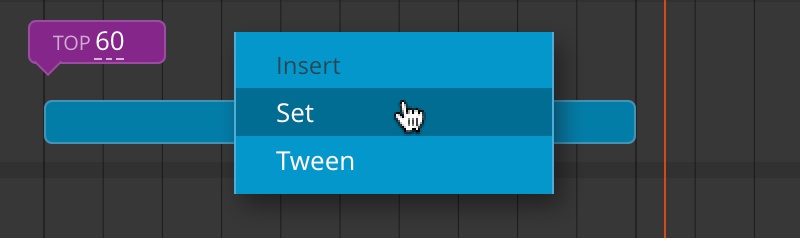
Or, right-click to display the menu that lets you select the transform type or paste a transform from the clipboard:
Editing transitions
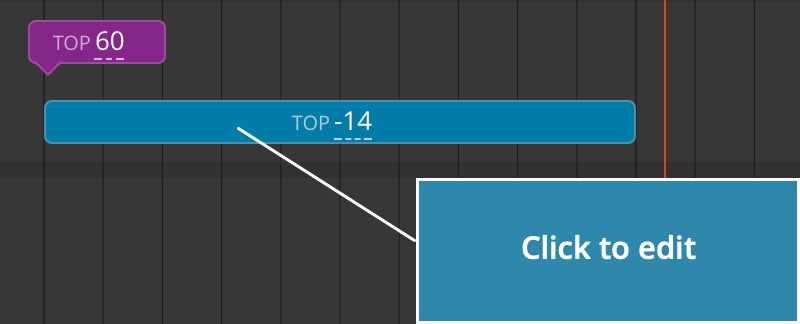
Click on the transition to open the Edit transition popup:
The edited transition is highlighted with the orange color:
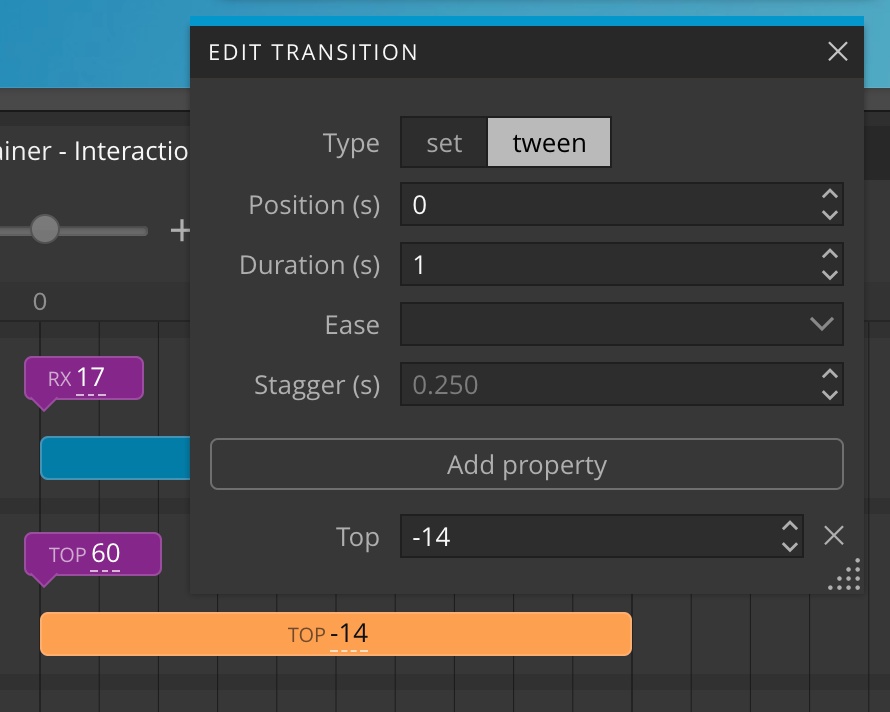
There you can select the transition type:
Set
Set simply sets the properties immediately, without animating them.
Tween
Tween animates element properties from their current values to their target values.
Position and duration
Position is the time the tween starts and duration is how long it takes for the animation to complete.
Easing
Ease determines the easing method for this transform.
Stagger
Stagger delays the animation for each subsequent target element. Obviously it only has the effect if the timeline targets more than one element. Stagger is a very simple way to accomplish impressive animations of multiple elements.
Properties
Click on Add property to add new property to the transform. See the Guide to Animation properties for detailed description of various properties.
Quickly edit transition properties
You can edit transition properties without opening the Edit popup.
Right-click on the transition to add or remove properties:
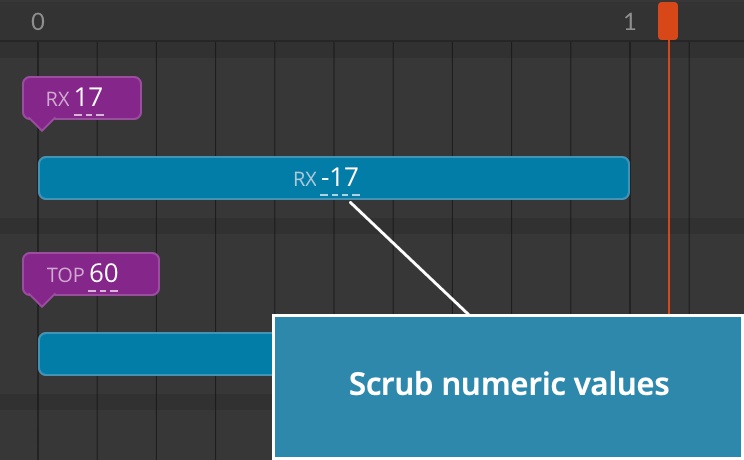
Scrub numeric values by pressing the mouse button over the underlined number and then adjust the value by moving the mouse up and down:
Click on color values to open the color picker.
Rearranging transitions
Transitions can be dragged to different positions within the same timeline.
Drag their beginning and end to change starting and ending time.
Transitions can freely overlap. Timeline display will be arranged so as to accommodate the display of all transitions without overlapping visually.
Note, at the moment, transition can’t be dragged to another timeline. Use copy paste (see below) to move a transition from one timeline to another.
Copy – paste transitions
To copy the transition to clipboard, either:
- Press CTRL + C (CMD on Mac) while the transition is selected (it is colored orange and its Edit transition popup is open).
- Right-click on the transition and select Copy.
To paste the transition:
Press CTRL + V (CMD on Mac) when the orange insertion cursor is shown to insert the transition from clipboard at the current insertion position.
Deleting transition
Right-click on the transition and select Delete, or press BACKSPACE when transition is selected.
Muting the transition
Mute the transition to ignore it in the animation.
Note that muting the timeline or transition will also have effect outside of Pinegrow editor.
Timeline editor settings and commands
The following commands and settings are located at the top of the timeline editor:
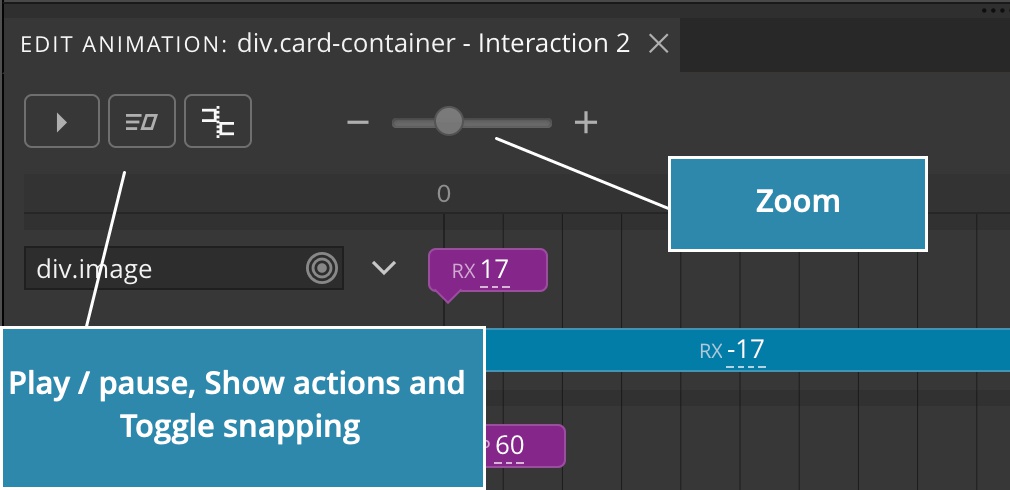
- Play / Pause the animation. Click this button or press SPACE to play or pause the animation.
- Show interaction actions associated with the animation. This will select the element and open the Interactions panel.
- Toggle snapping for timeline dragging.
- Zoom control.
- Playhead indicates the current animation position. You can drag it left and right to scrub the animation.
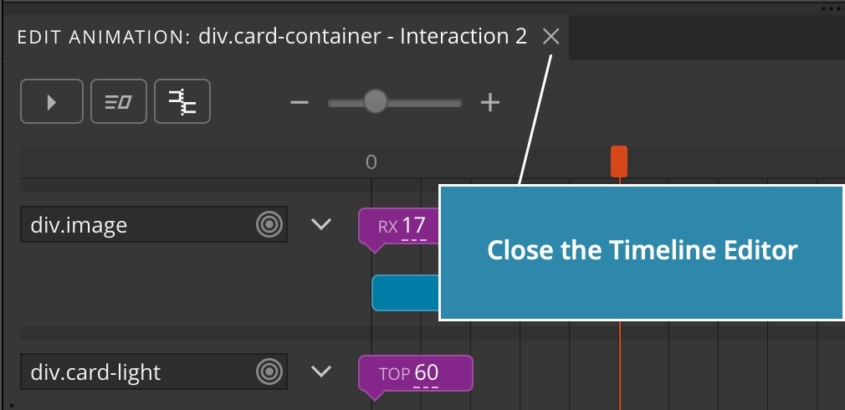
Closing the timeline editor
Click on the close icon in the timeline editor tab to close / hide the timeline editor.
You can always get it back by clicking in the Edit animation button in Interactions panel.