Meet your new web development assistant. It knows how to create and transform HTML code, how to manipulate content, come up with CSS styling, make the code accessible, give advice and much more.
New in AI Assistant update 11 on Nov 28, 2025
Creating beautiful web designs with Gemini 3 Pro
Learn how to use the latest Pinegrow AI Assistant to generate beautiful, production-ready Tailwind CSS websites. This tutorial covers setting up the project, generating custom images, and exploring three different workflows: direct prompting, using Design Boards for style options, and building a site inspired by a reference image.
Generating images with Pinegrow AI Assistant
Learn how to use the new AI image generation features in Pinegrow Web Editor. This tutorial covers generating new assets directly into your layout, creating consistent character art using reference images, and batch-editing team photos with AI prompts.
Annotate and sketch – Visual AI Prompting
This tutorial demonstrates how to use new annotation and sketching features to guide AI web development. Learn how to draw directly on page screenshots to resize elements or swap images, use the blank canvas sketch tool to draft entire layouts from scratch, and see a direct comparison of how Gemini 3 Pro, Claude 4.5 Opus, and GPT-5 interpret visual drawings.
New in Pinegrow 8.62 – AI Assistant updates
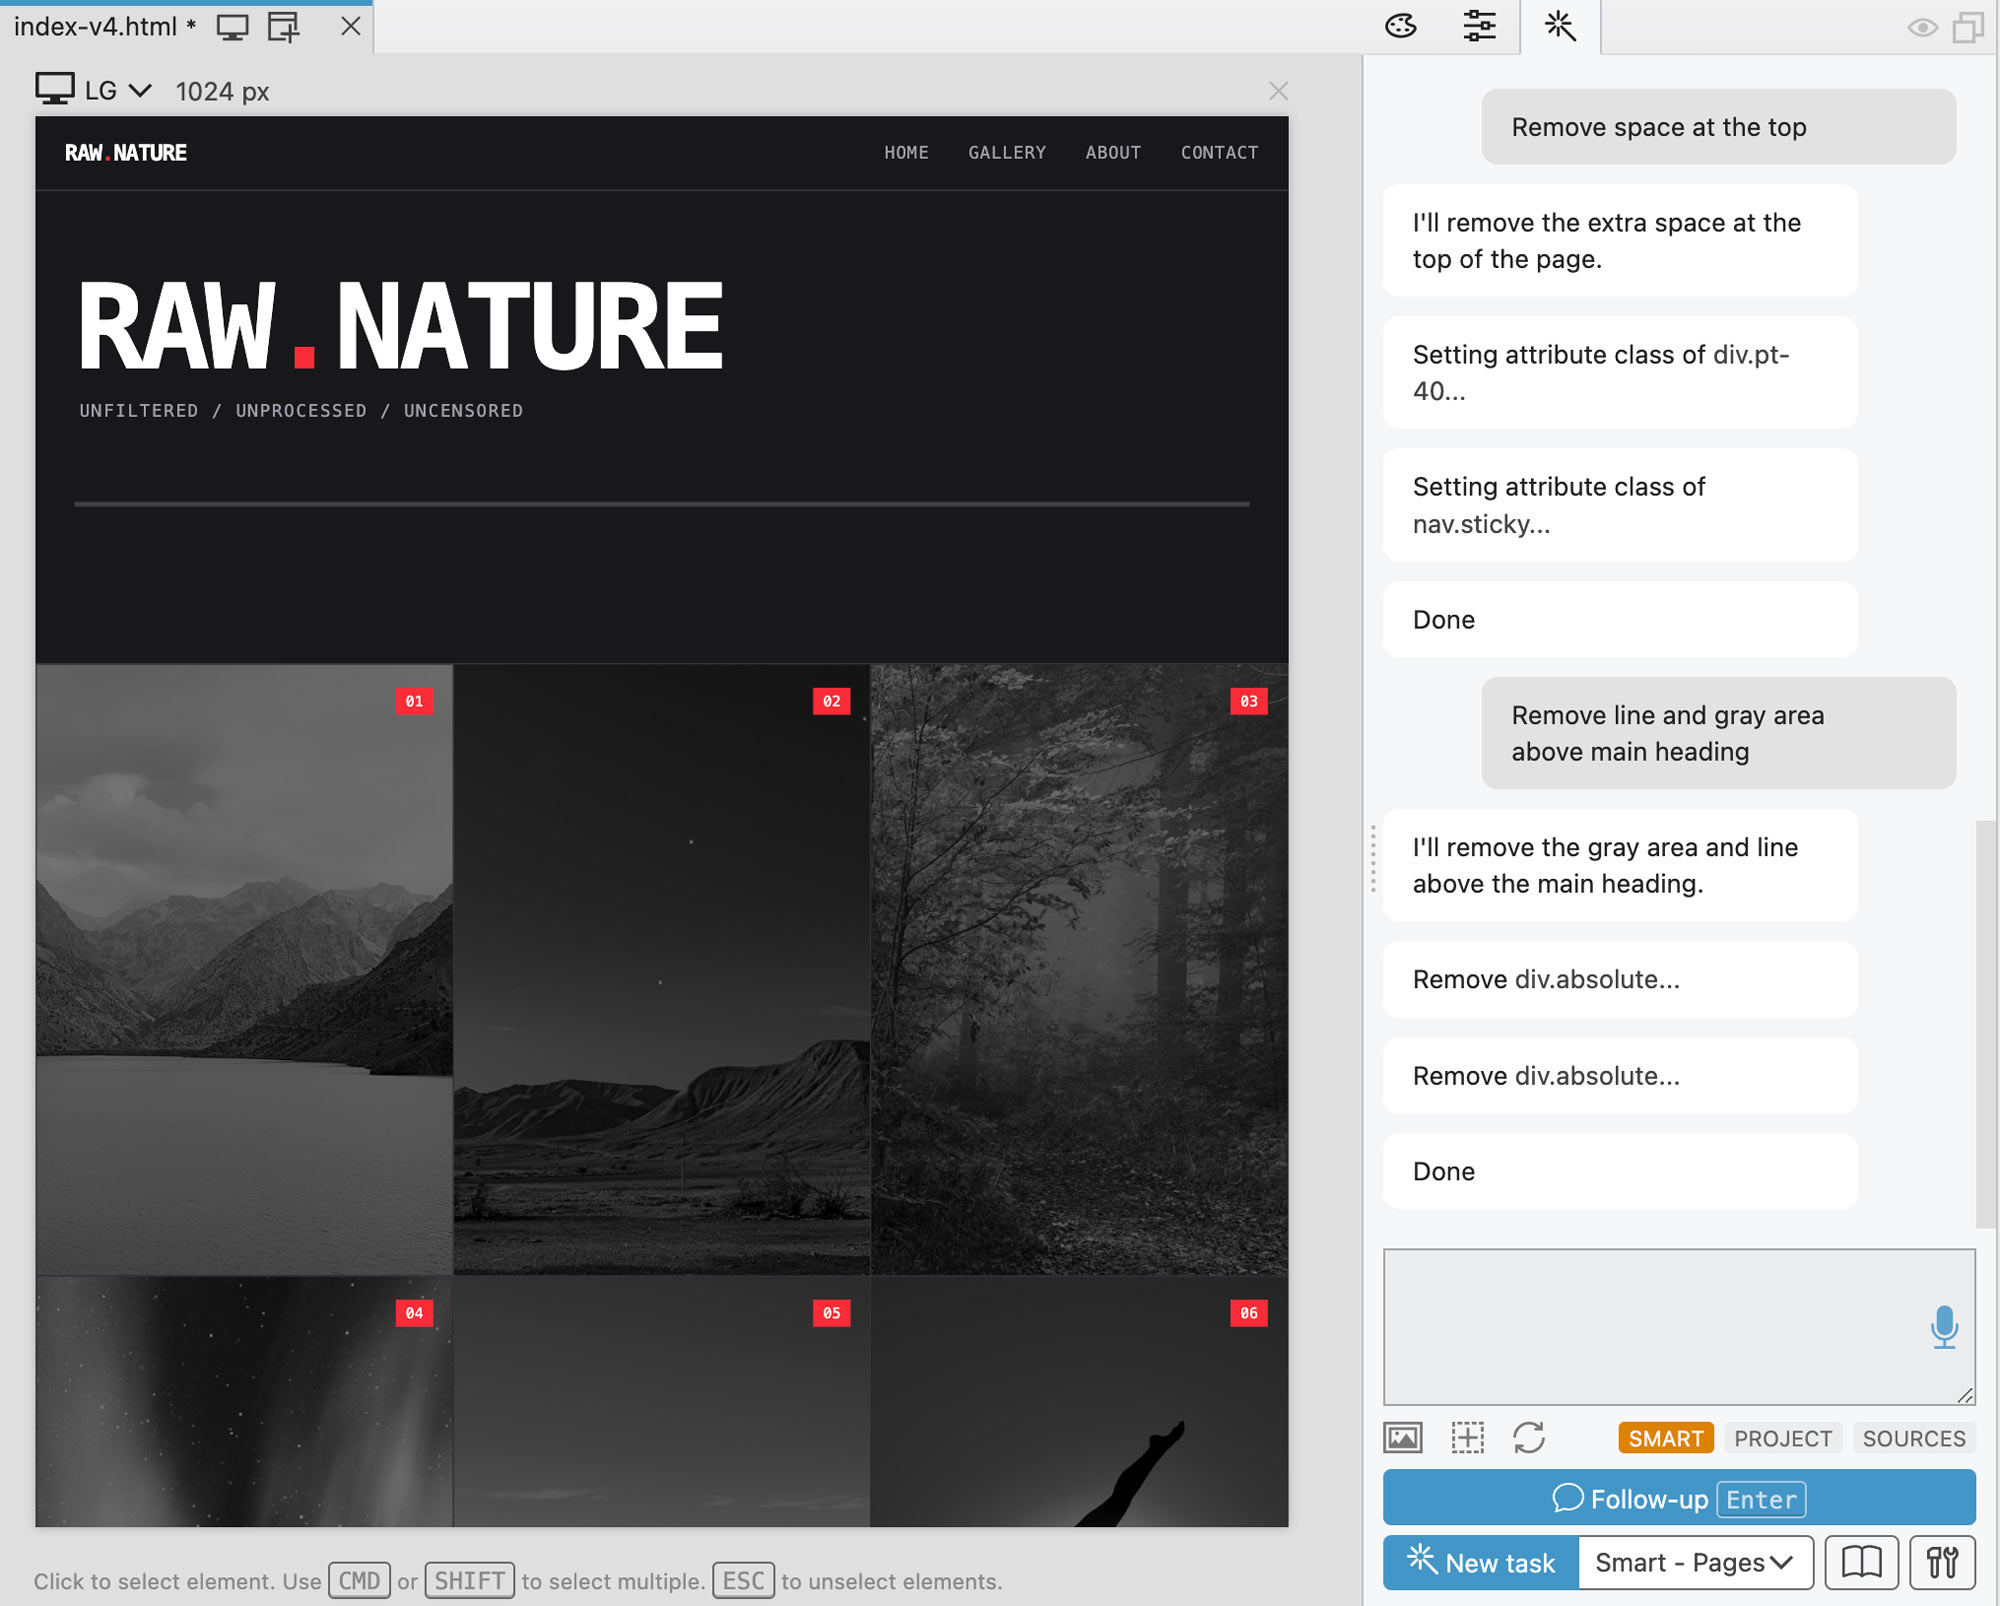
Smart HTML Editing
Smart HTML Editing is now out of beta and ready for everyday use. AI Assistant edits the HTML with efficient commands without having to output whole document each time, saving your time and money.
Smart insert
Smart Insert uses AI to adapt duplicated and newly inserted elements to the surrounding design. Duplicate buttons, repeaters, sections, or tables and get context-aware layouts, copy, and data that fit your page.
Continue my edits
Let the AI Assistant analyze your recent edits and finish the pattern for you. Change a few badges or text snippets, then use “Continue my edits” to apply the same logic across the rest of the page for fast, consistent updates.
You decide
See how “You decide!” can take a simple product landing page and automatically improve layout, content, and interactions—like turning a plain video into a modal overlay and applying targeted edits based on your current selection.
Accessibility preset commands
Use dedicated accessibility presets to audit and fix issues on your page. The AI Assistant generates a detailed report with links to each problem and can automatically apply fixes for missing labels, low-contrast text, and more.
New tutorials
Explore a set of short, interactive AI Assistant tutorials that walk you through Smart Insert, Smart HTML Editing, creativity tests, fix-it challenges, and full landing-page builds, plus the new “Continue my edits” and “You decide!” workflows.
New in Pinegrow 8.6 – Use Codex CLI and Claude Code from Pinegrow & more
Watch a quick overview of new features:
You can now use Codex CLI and Claude Code as AI providers in Pinegrow. Watch the video and learn more:
GPT-5 models are now fully supported with OpenAI provider, using the new Response API with effective input tokens caching. You can also use GPT-5 with OpenRouter provider.
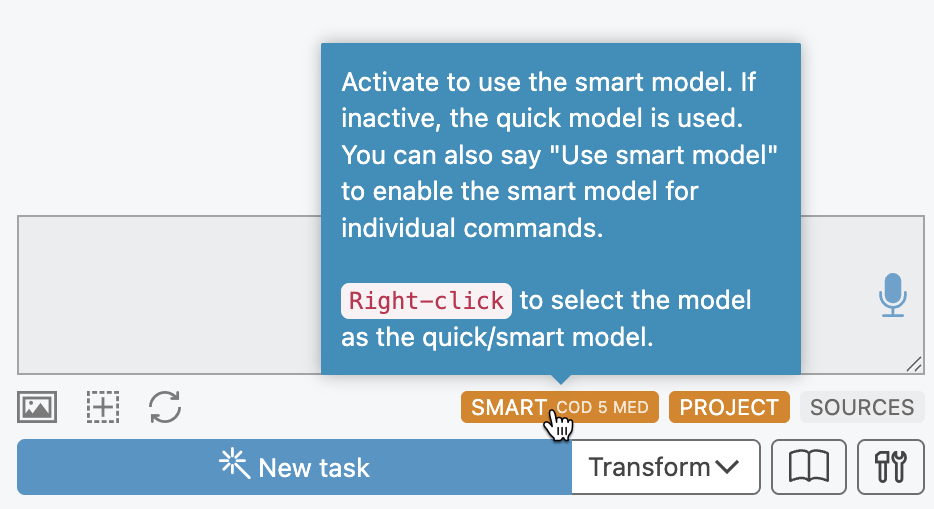
Right-click on the Smart / Quick toggle to quickly change the model:
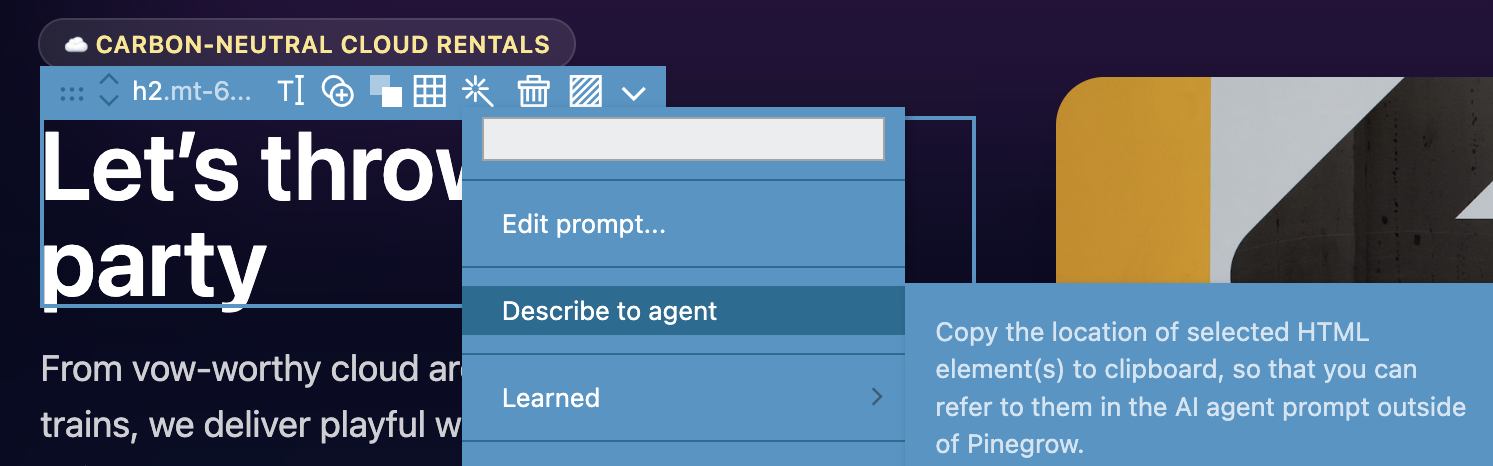
Describe to agent – Copy the location of selected HTML element(s) to clipboard, so that you can refer to them in the AI agent prompt outside of Pinegrow.
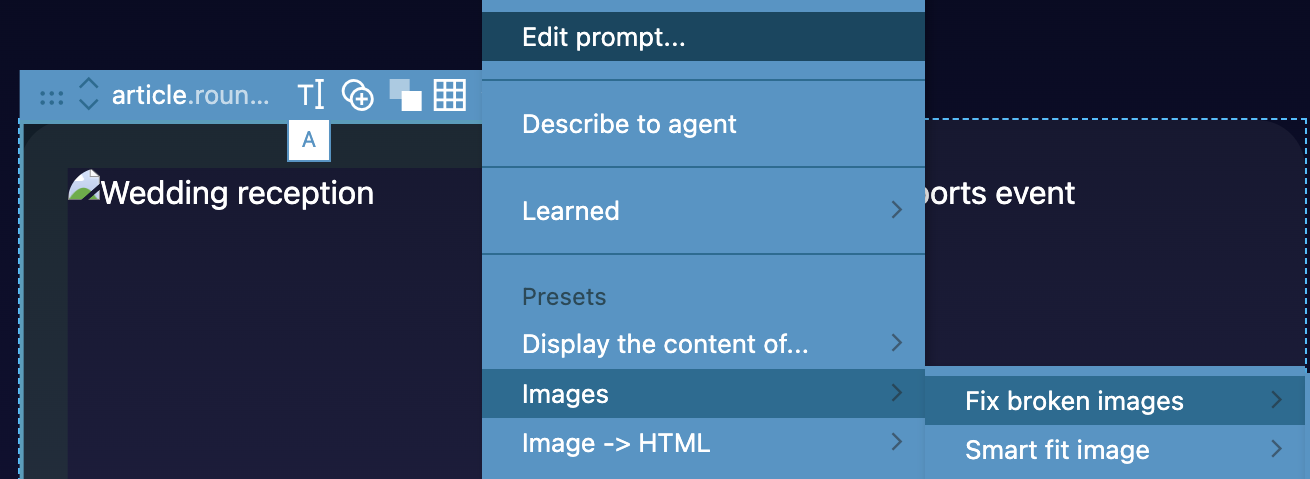
Fix broken images – Go through all images in selected elements and check if they exist. Broken images are replaced by images from the project or Unsplash.
New in Pinegrow 8.5 – Smart HTML Edit and custom models for all API providers
Smart HTML Edit lets you efficiently edit HTML documents without regenerating the whole document or whole sections. Learn more.
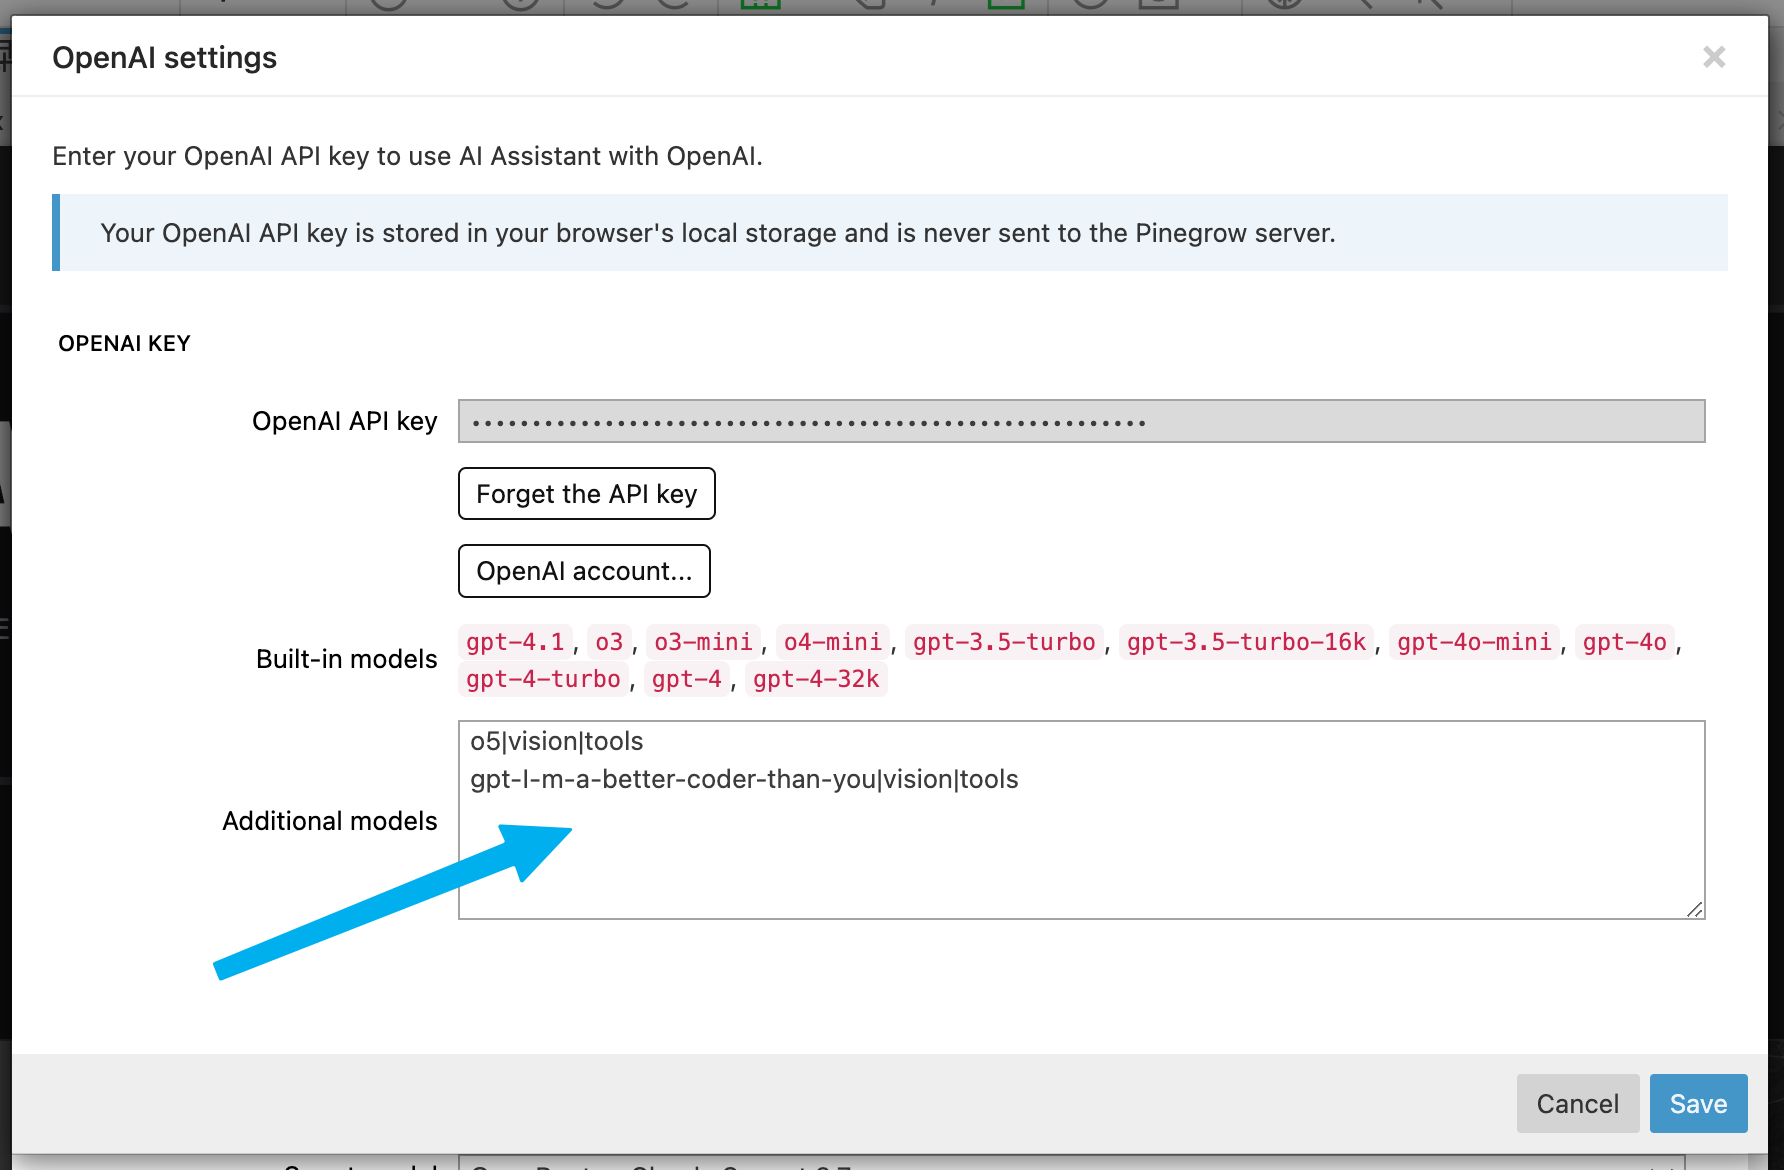
Additional models lets you manually add models to all API providers, so that you do not have to wait for us to update the provider.
New in Pinegrow 8 – Multiple AI API providers
AI Assistant now supports multiple API providers, including OpenAI, Anthropic and custom end-points compatible with OpenAI API. In our tests, Claude Sonnet 3.5 is a great, quick and affordable model for web development tasks.
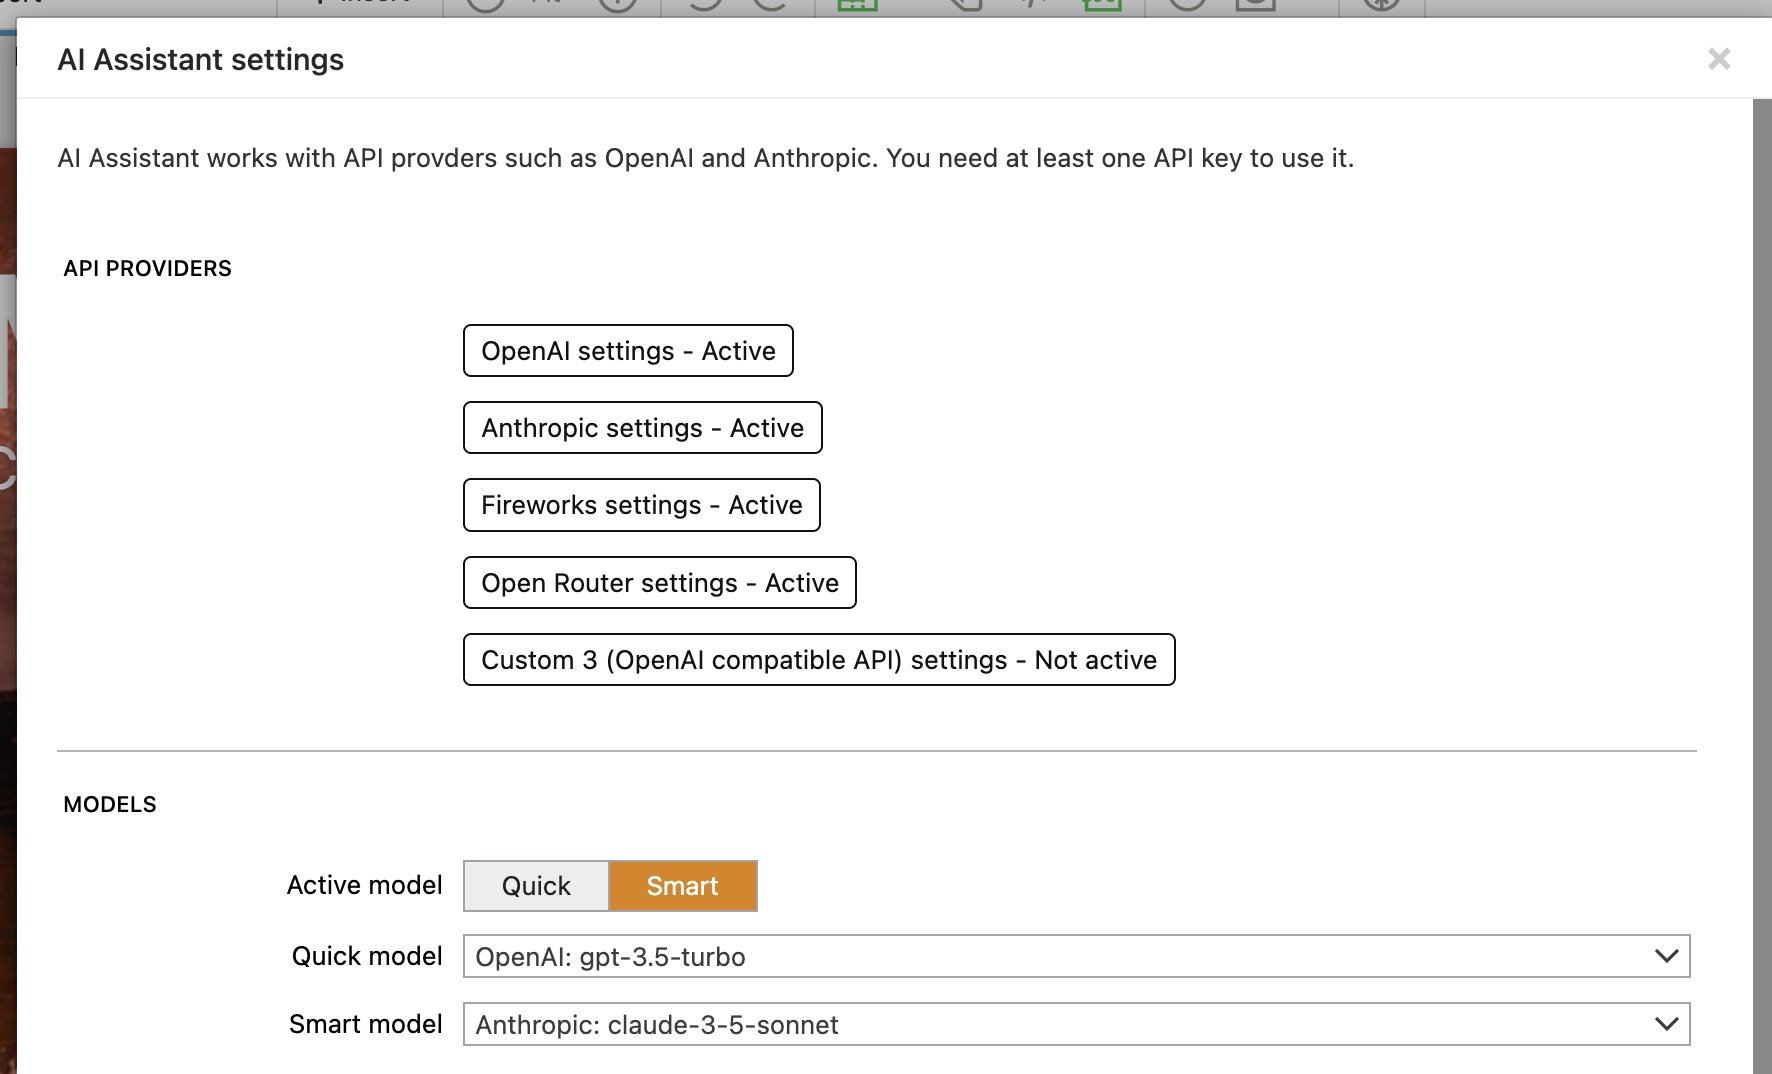
Note, Claude API is not available in the browser (Pinegrow Online and Pinegrow WordPress Plugin) because it is missing CORS support (contact Anthropic regarding that). You can still use Claude with a router such as openrouter.ai.
New in Pinegrow 7.9 – Meet Mr. Pine Cone, the improved AI Assistant for web professionals
A year ago, Pinegrow shipped one of the first AI Assistants integrated into a visual development tool.
Today we are raising the bar by introducing a powerful update that integrates generative AI into a suite of time-saving tools that can be used on real-world projects.
At this time, the updated Mr. Pine Cone is only available in desktop edition of Pinegrow Web Editor. We need a few more days to bring it to Pinegrow WordPress Plugin, Pinegrow Online and Vue Designer.
Learning tasks
You have better things to do than typing same prompts over and over. Show the assistant how to do a task once and then use the learned task on all your projects.
Learned tasks are easy to use, refine and share.
Merging content into templates
Select a template and customize its sections with custom content. This is the quickest way to build a website, while giving you full control over the result. Use the Design panel to give the website a unique look.
Looking at images
Mr. Pine Cone uses the vision model to see the content of images in your projects. It can find images that best suit any given content and do tasks based on what is shown in images.
Image to HTML
Convert images of websites and designs directly into HTML code. Generate whole pages, insert new sections or redesign existing elements.
Smart tools for efficiently using the AI features
Quickly toggle between GPT3.5 and GPT4 to save your time and money. Set which tasks require GPT4 and run the rest with the cheaper and quicker model.
Use markers to bring attention to specific elements inside the transformed element.
Bring your own API key and only pay for what you actually use. All tasks are stored on your device and API calls never go through our servers.
Next steps
There is more to the new AI Assistant – but these features deserve a proper introduction. An in-depth tutorial is coming out soon.
Soon, you will be able to mix and match models from different providers and even use local models.
Getting started
Watch the above videos to get a good overview of new and existing AI Assistant features. Then, start playing with it on your projects.
Like it or not – generative AI is now a part of web development, and will become even more so. Pinegrow helps you to take advantage of its full power, while keeping you fully in control.
NEW IN 7.3 – Talk with the AI Assistant:
The AI Assistant got updated in Pinegrow 7.3. Read the release guide to see what is new. If you are checking out the AI Assistant for the first time just continue to read this article.
You can start using the AI Assistant right now in:
- Pinegrow Web Editor desktop app
- Pinegrow WordPress Plugin self-hosted WordPress plugin
- Pinegrow Online in your browser (free, no account needed)
Read this guide to see how it works, which tasks it handles well, where are its limitations and how to get started using it in Pinegrow.
Not familiar with Pinegrow yet? Pinegrow Web Editor is a powerful desktop visual website editor that works with standard HTML & CSS files and includes support for Bootstrap, Tailwind CSS and WordPress, among other features. The editor is also available as a self-hosted plugin for WordPress.
The fact that Pinegrow works directly with HTML and CSS code make it a perfect companion for an AI powered assistant.
Why is AI Assistant a good fit for Pinegrow?
Large Language Models such as OpenAI GPT-4 are trained on large quantities of data sourced mainly from the web. This means that they understand HTML and CSS out of the box.
Pinegrow works with open frameworks in addition to just plain HTML & CSS. The model is already familiar with Bootstrap and Tailwind CSS and handles them surprisingly well, without further fine-tuning.
As you will soon discover, AI Assistant often doesn’t get things 100% right. Having Pinegrow’s powerful editing tools on hand is great for quickly touching up the results, without having to come up with the perfect prompt and re-running the AI requests over and over again.
Using AI for HTML manipulation avoids the pitfalls of hallucination: we are not asking the AI for the meaning of life. We are using it for what it does best – generating blobs of text based on the prompt input. If it returns useful HTML code, great. If not, we retry or do the task manually.
Calling up the AI Assistant
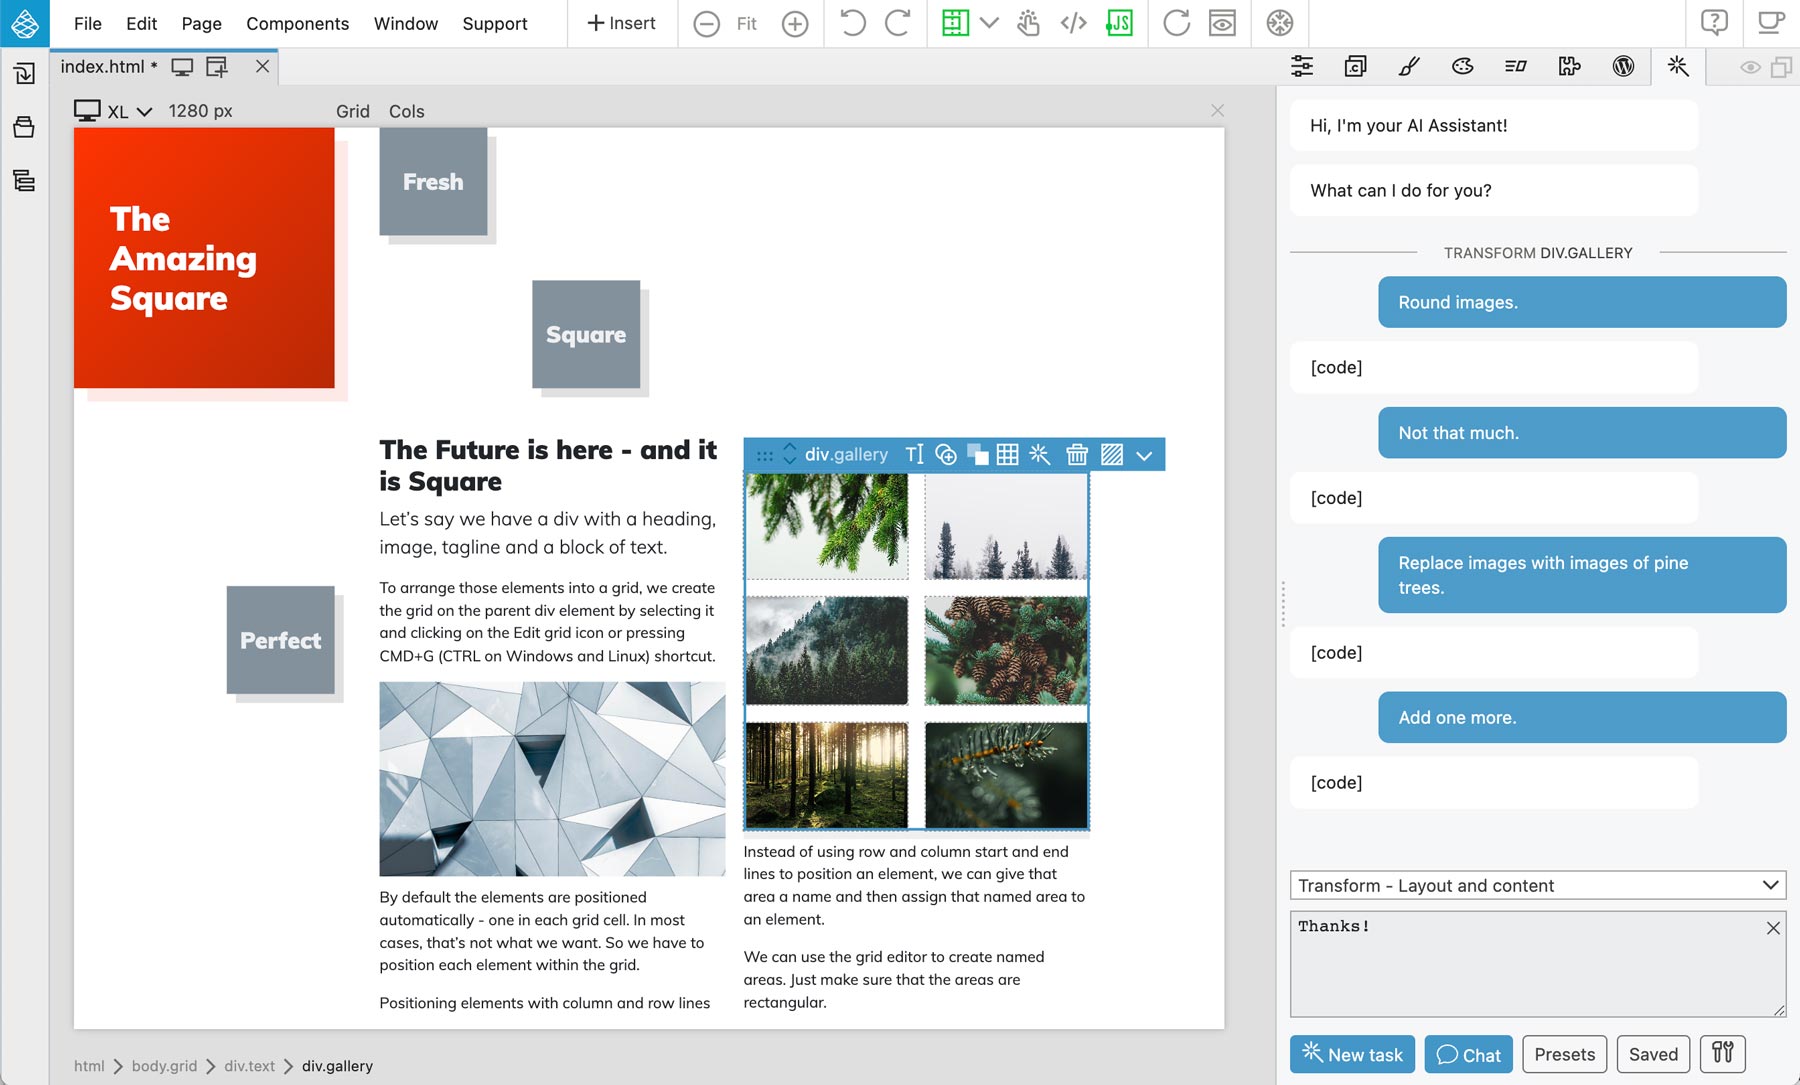
To open the assistant, click on the magic wand in the selected element menu or navigate to the AI Assistant panel in the UI.
Bring your own API key
AI Assistant uses OpenAI API to run completion commands.
To keep things simple – and your costs down – we implemented the “Bring your own key” approach where you configure the AI Assistant with your own OpenAI API key.
This means that you need an OpenAI account, either free with free usage credits or a pay-per-use account with higher usage limits. Go to API keys in your OpenAI account settings to generate a new key.
In AI Assistant, open the Settings and enter your OpenAI API key.
The key is stored in Pinegrow application profile on desktop and in WordPress options in the WordPress plugin version. In both cases, please exercise standard precautions for safe-guarding your data. Your key is never transmitted to our servers and Pinegrow calls OpenAI API directly.
Selecting the model
In Settings you can also select the model for API calls. ChatGPT-3.5 is the default model. If your OpenAI account has access to GPT-4 models you can use that instead.
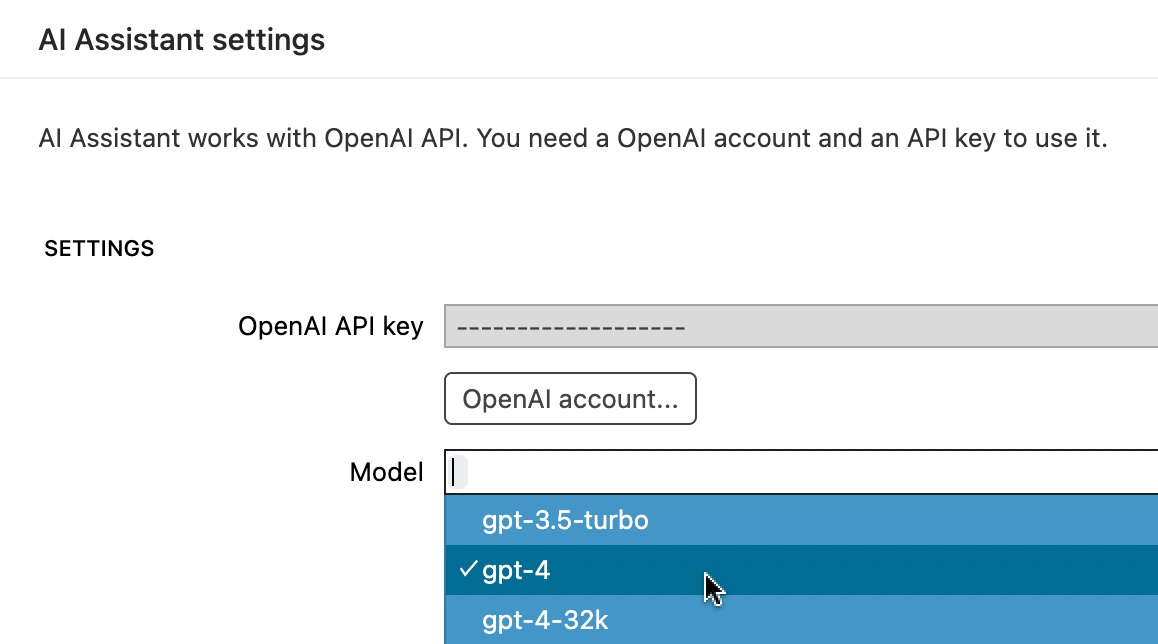
Note that the cost of using GPT-4 model is significantly higher.
The prompt – telling the AI Assistant what to do
The main part of the window is the text input field where we tell the assistant what to do.
For example, we select a website element and say:
Add a button for downloading the portfolio.The result is:

Being the scenes, Pinegrow constructs a prompt that includes the code of the selected element, our instructions and context such as frameworks used on the page.
When the response comes back from the API call, Pinegrow extracts the HTML code and uses it to replace the selected element.
Optimizations behind the scenes
The first thing you will notice when running a command is that it takes considerable time to execute. The longer the prompt (including the code of the selected element) and the response, the longer it takes. In fact, it is easy to go over the limit of 4000 tokens of combined maximum length of the prompt and the response.
That’s why Pinegrow sends optimized code with the prompt:
- URLs are shortened
- SVG elements are sent without their full content
All of this works seamlessly because the omitted information is filled back into the result.
AI Assistant let’s you optimize prompts even further.
Actions – Selecting what kind of editing operation we are doing
The action field above the prompt allow us to be more specific with what we are doing.
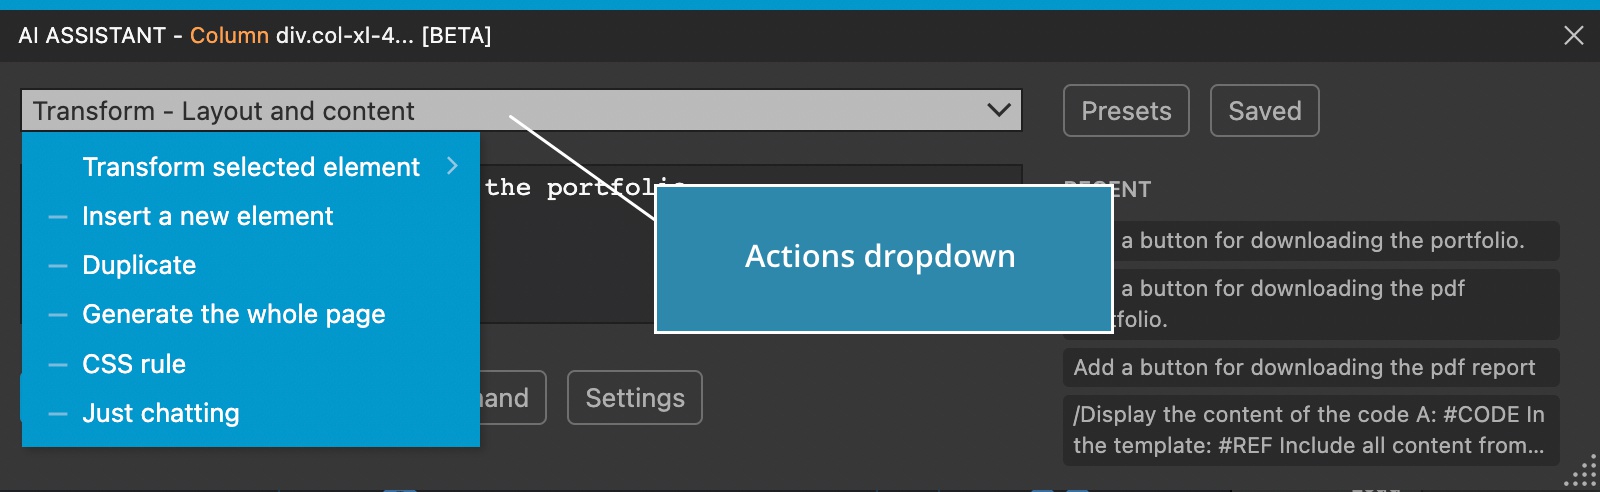
Choices are:
- Transforming the selected element
- Inserting new elements
- Duplicating the selected element
- Generating the whole page
- Transform the whole page
- Editing the selected CSS rule
- Just chatting
This helps the AI Assistant further optimize the prompt and to know how to handle the response without guessing your intentions.
Transforming the selected element
Transform selected element comes with four sub-options:
Layout and content sends the complete element (optimized as above), both its HTML layout and the content. This is the default option.
Layout sends only the HTML layout without the content. This is useful when transforming only the styling and structure of the element.
For example “Display 2 columns on MD and 4 on LD.” does not need to know about the textual content of the element. It only needs the HTML markup with classes and styles to do the job done.
Top layout sends only the top two levels of the HTML structure. This is useful for transforming the layout of the top levels of HTML without going into details.
For example, we can select the body element and say “Add horizontal lines between top sections.”
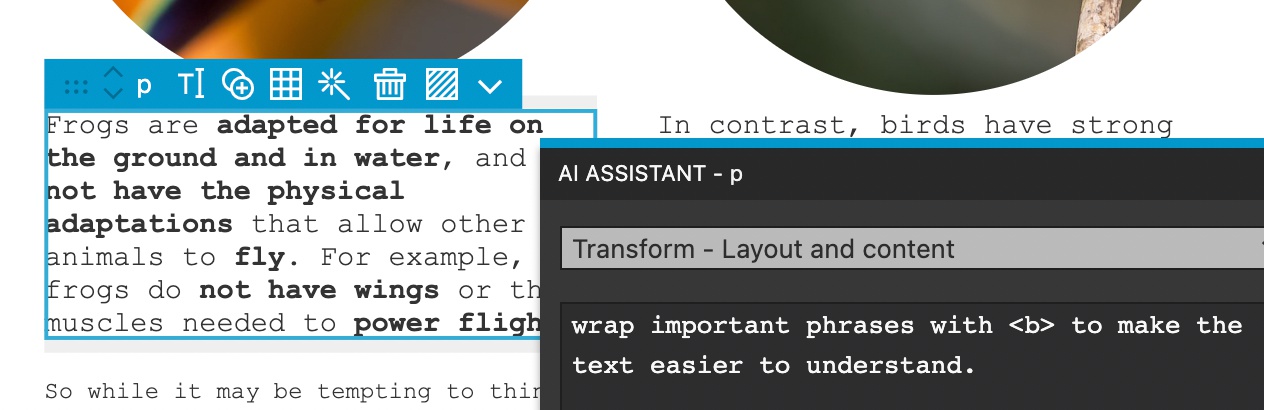
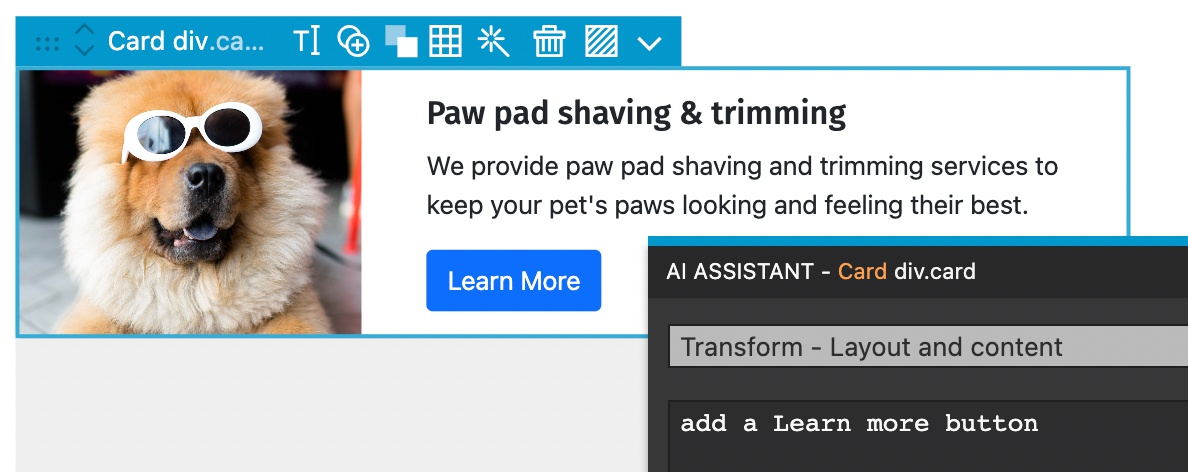
Content sends only the content of the element with a skeleton HTML structure where all attributes except image sources and links are removed. This is great when transforming the text or images.
For example, we fill in the placeholder text with “Replace placeholder text with explanation of the service based on the heading.”
The result is:
When in doubt just use Layout and content.
Insert a new element
The second action is used to insert new elements without having to reference the selected element.
The new elements are inserted after the selected element, unless body is selected in which case new elements are appended to the body.
When to use insert and when transform?
In one of the above examples we used Transform to insert a download button. Why didn’t we use Insert instead?
We used Transform because we wanted the new button to match the styling and context of the element (for example the style of any existing buttons).
Insert is used when we want to have the precise control over the insertion point and do not need to reference any existing elements.
In this example, we say “Insert a section with title Cute Puppies and 3 cards about cute puppies with images. Give names to puppies and describe each one.”

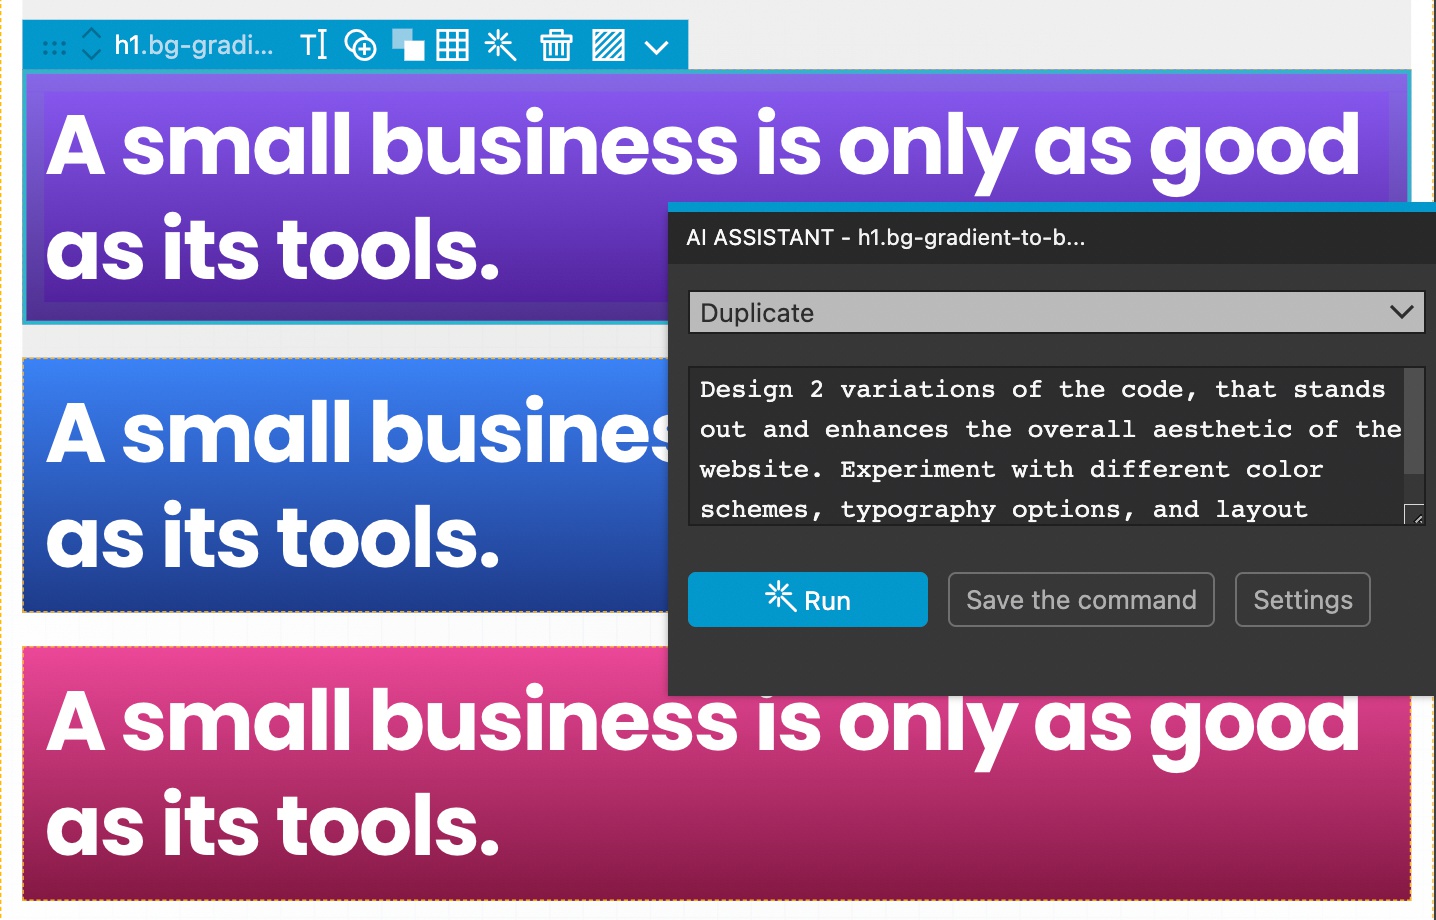
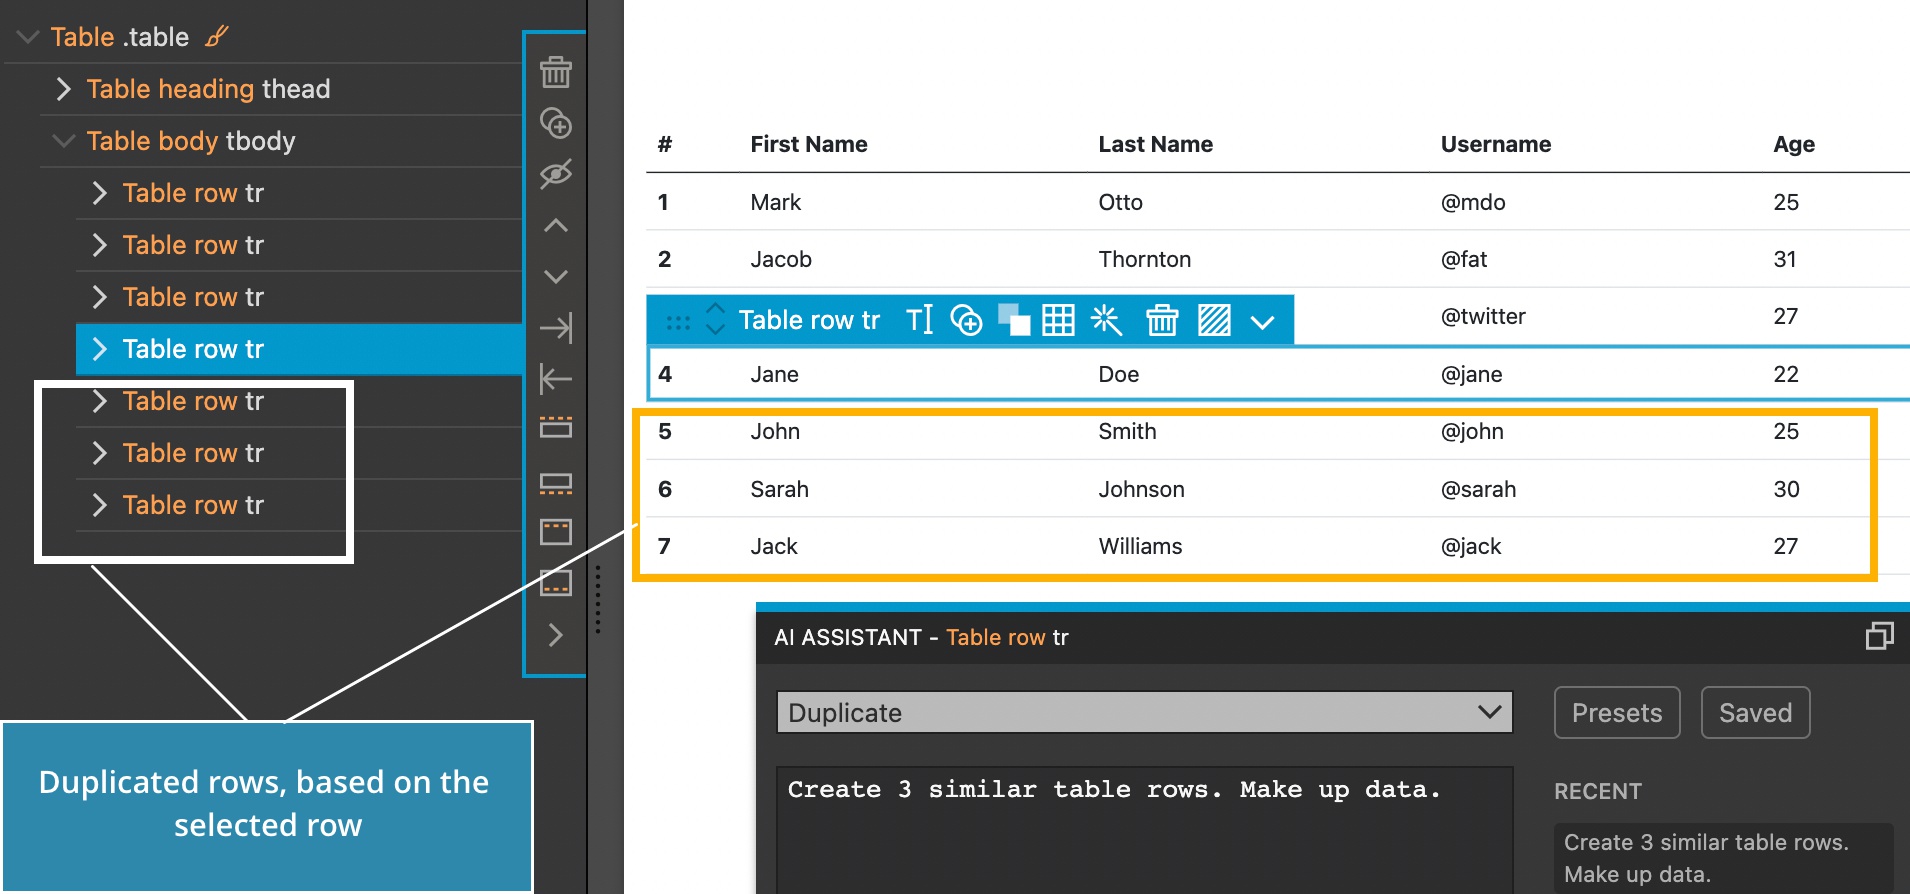
Duplicate the selected element
Duplicate includes the selected element in the prompt and inserts returned elements after the selected element.
For example, say “Design 2 variations of the code, that stands out and enhance the overall aesthetic of the website...”
Another example: select the table row and say “Insert 3 more rows. Make up data.”
Generate the whole page
This will replace the code of the whole page with the code returned by the command. Use it to generate whole webpages. The results are usually mixed and it is easy to run into the maximum token length issue if there is a lot of content on the generated page.
The best approach is to first ask the AI Assistant to help with constructing the prompt for building the website. Use the Just chatting action for that:
Create a detailed prompt for instructing AI Assistant to build a beautiful home page for the Smelly Pets website with Tailwind CSS. Smelly Pets offers pet grooming services and organic pet care products.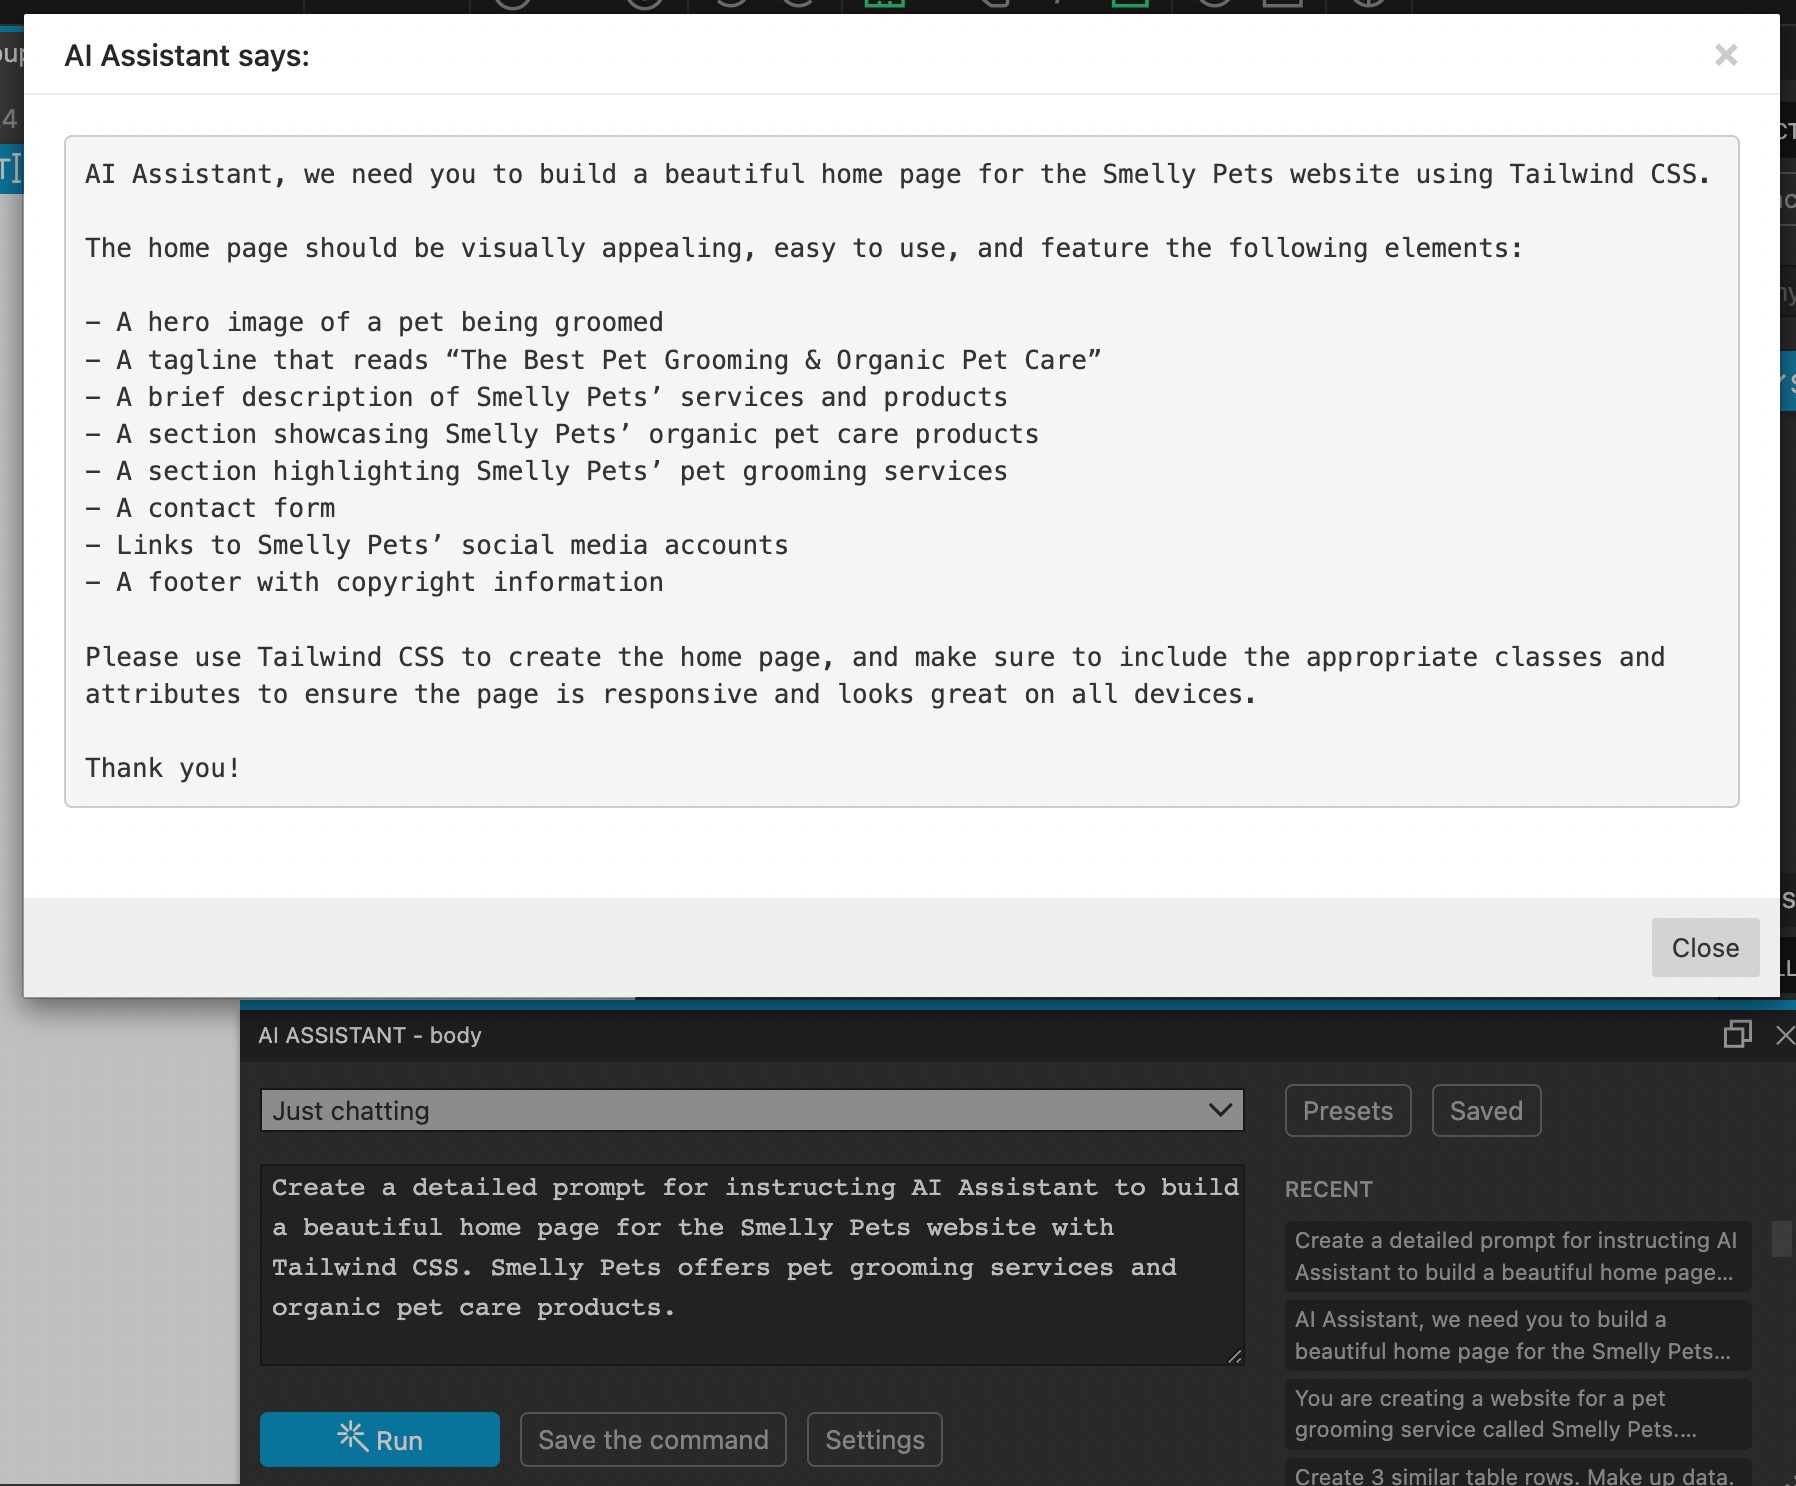
Then, copy the returned prompt and use it with the Generate the whole page action:
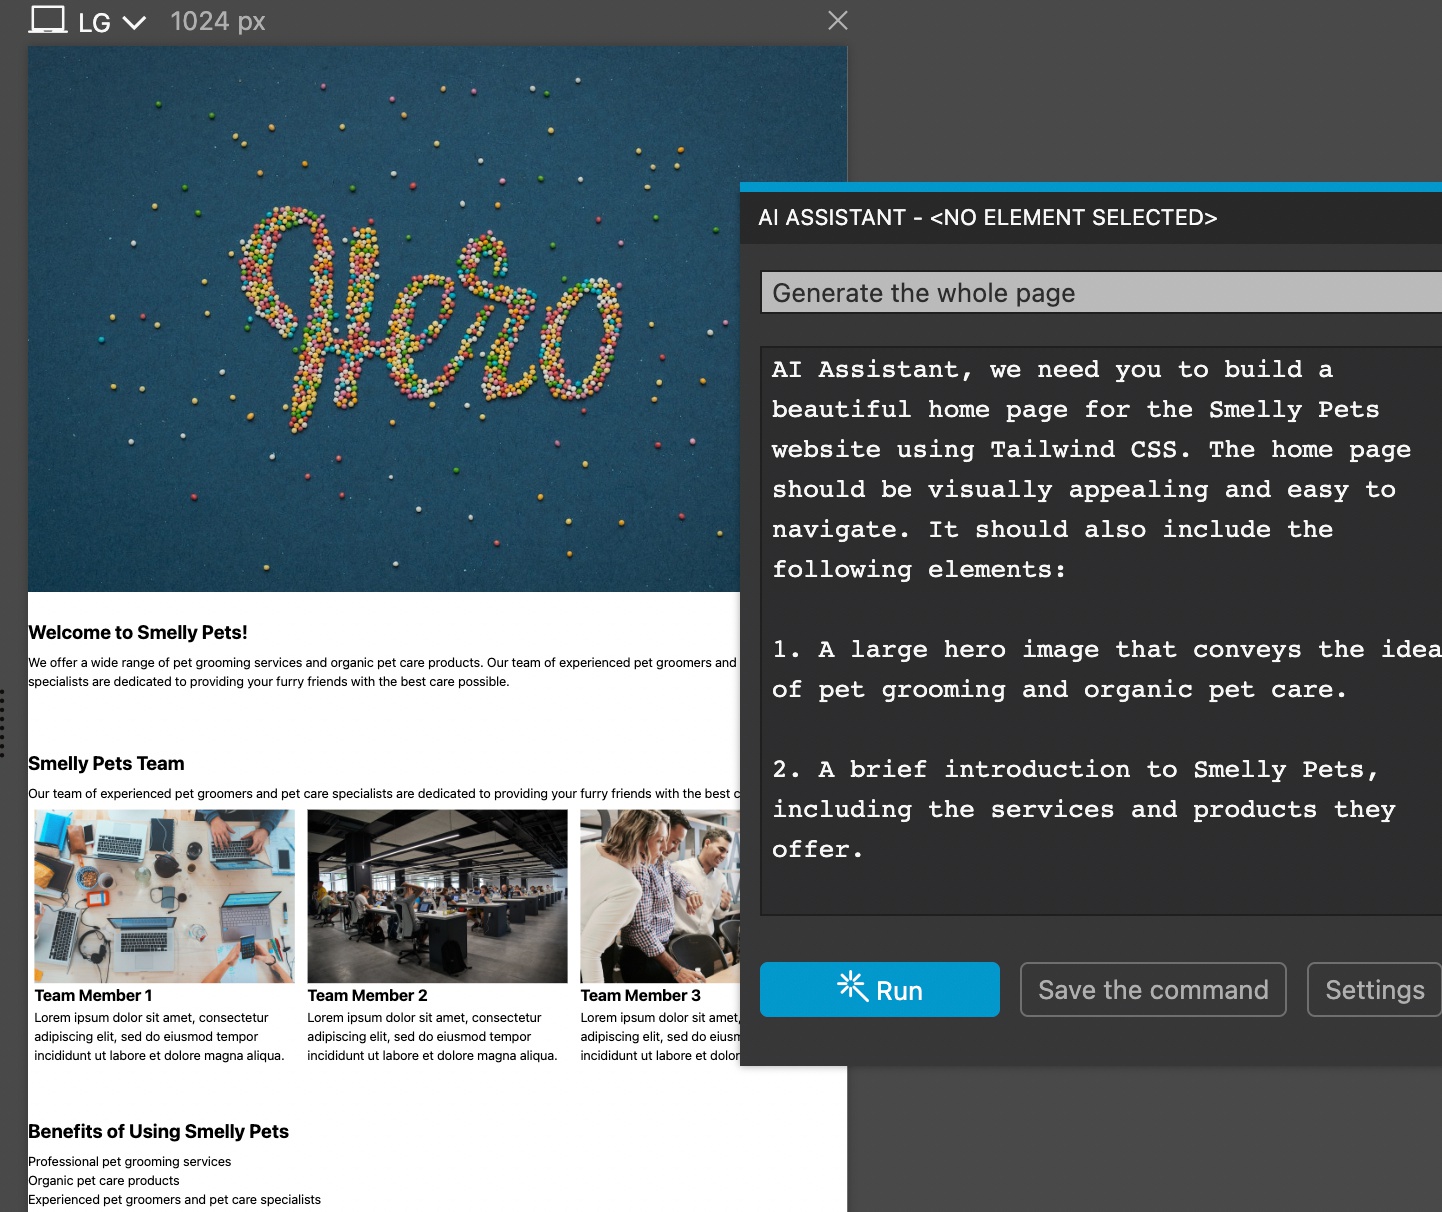
The result will not get any design awards, but it can serve as a starting point.
Note, there is an alternative way of generating whole pages, presented later in this guide.
Don’t expect much from the result. AI Assistant is good at wrangling content and HTML, but it lacks design skills.
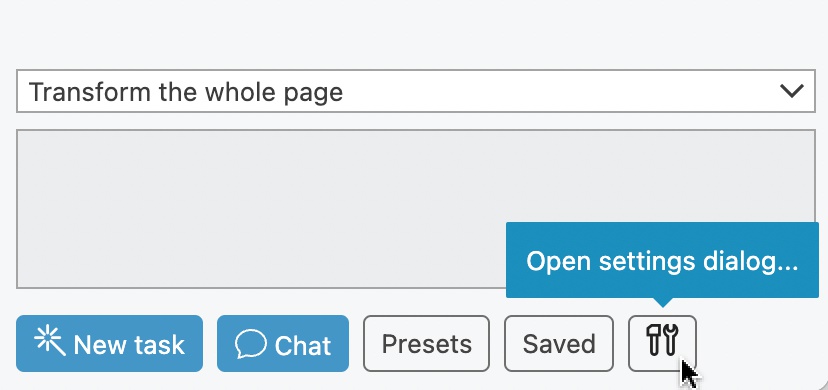
Transform the whole page
This action includes the complete HTML code of the selected page in the prompt and replaces the page with the generated code. The action is useful for editing the page as a whole and for editing component files.
Note, the whole page and the generated code must fit into the maximum token length. For GPT-4 this is 8k tokens.
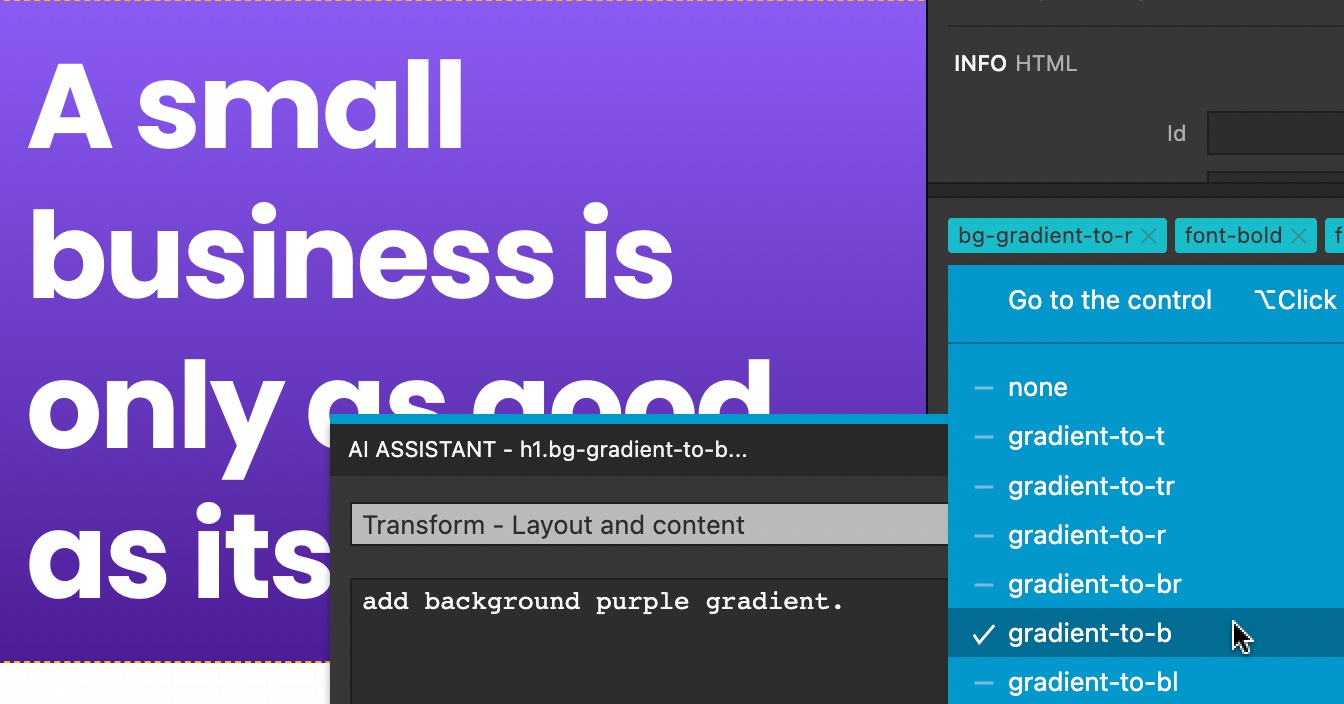
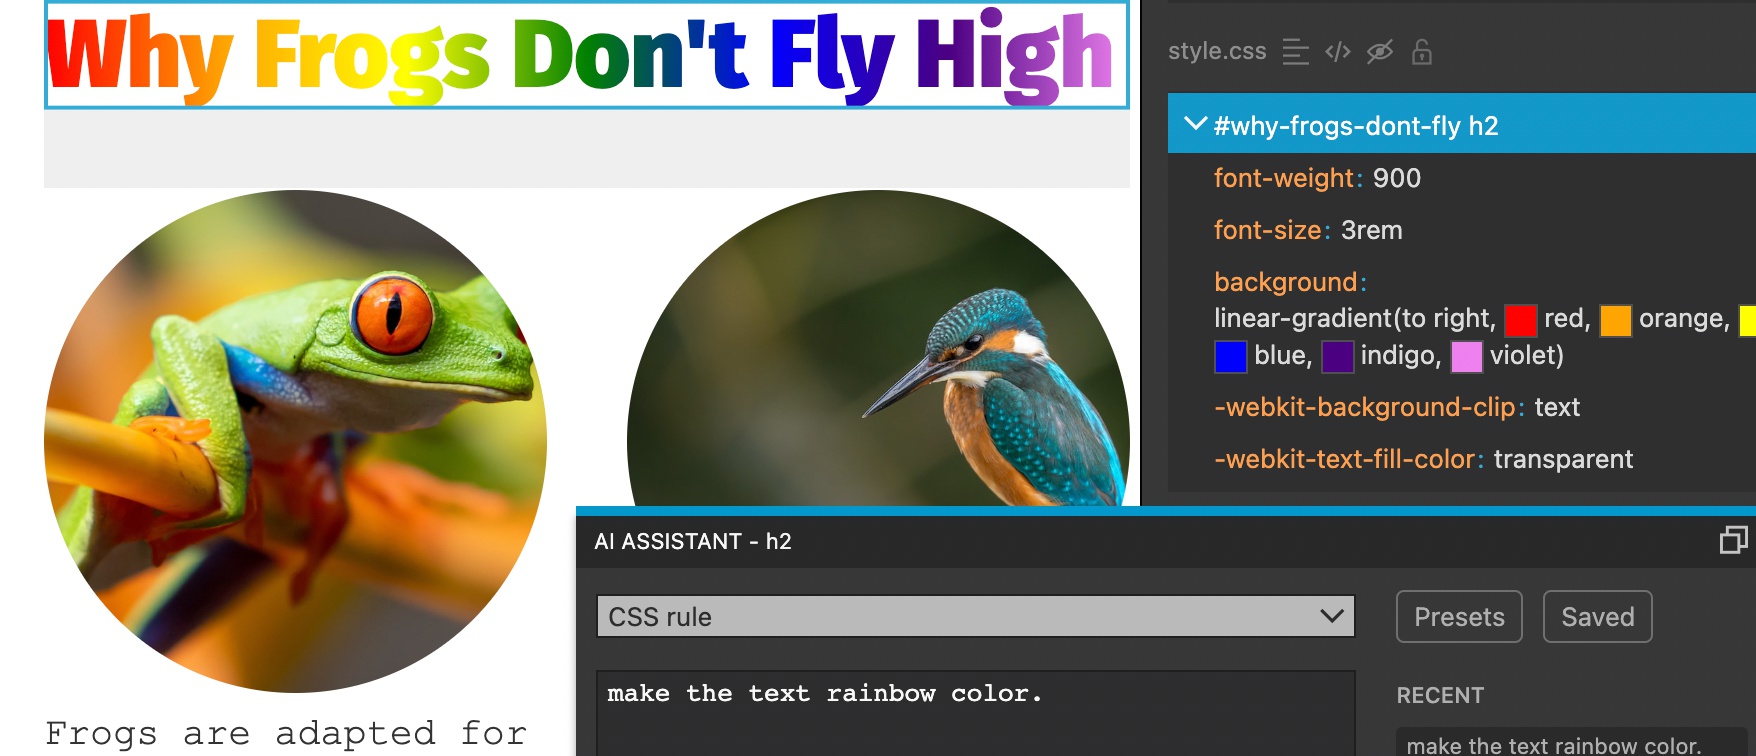
Transforming CSS Rules
CSS Rule transforms the CSS rule that is selected in the Style panel.
For example, select a rule and say “Make the text rainbow color.”
Just chatting
Use the Just chatting action to run commands and outputting their results without applying them to the page. We used this action above when we asked the AI Assistant to come up with a prompt for creating a website.
Use #CODE to include the code of the selected element.
For example, you can say:
Explain the code

#CODE
Chat about the current task
After starting a new task by telling the AI Assistant what to do, you can use the chat interface to follow up on the task, until the assistant gets it right.

Clicking on the New task button (or pressing CMD+Enter) starts a fresh new task. Only your instruction and any relevant code are included in the prompt. This is the most cost effective way to run commands.
Once the result of the task comes back you can use the Chat button (or pressing the Enter key) to follow up and instruct the assistant on how to fine tune the current task. Chat prompts includes all previous requests and responses and therefore spends more tokens, making the API call more expensive.
That said, at least with the ChatGPT-3.5 model the costs are tiny and chatting about a task is an effective way to get the assistant do precisely what you want.
The Chat button is enabled only if the same element and action are selected. If you select another element you can not chat about the previous task. Reselecting the original element brings the chat option back.
When to use New task and when to Chat?
The general guideline is to use New task when doing an action that does not require the context of the previous task, and to use Chat when telling the assistant how to do the current task right.
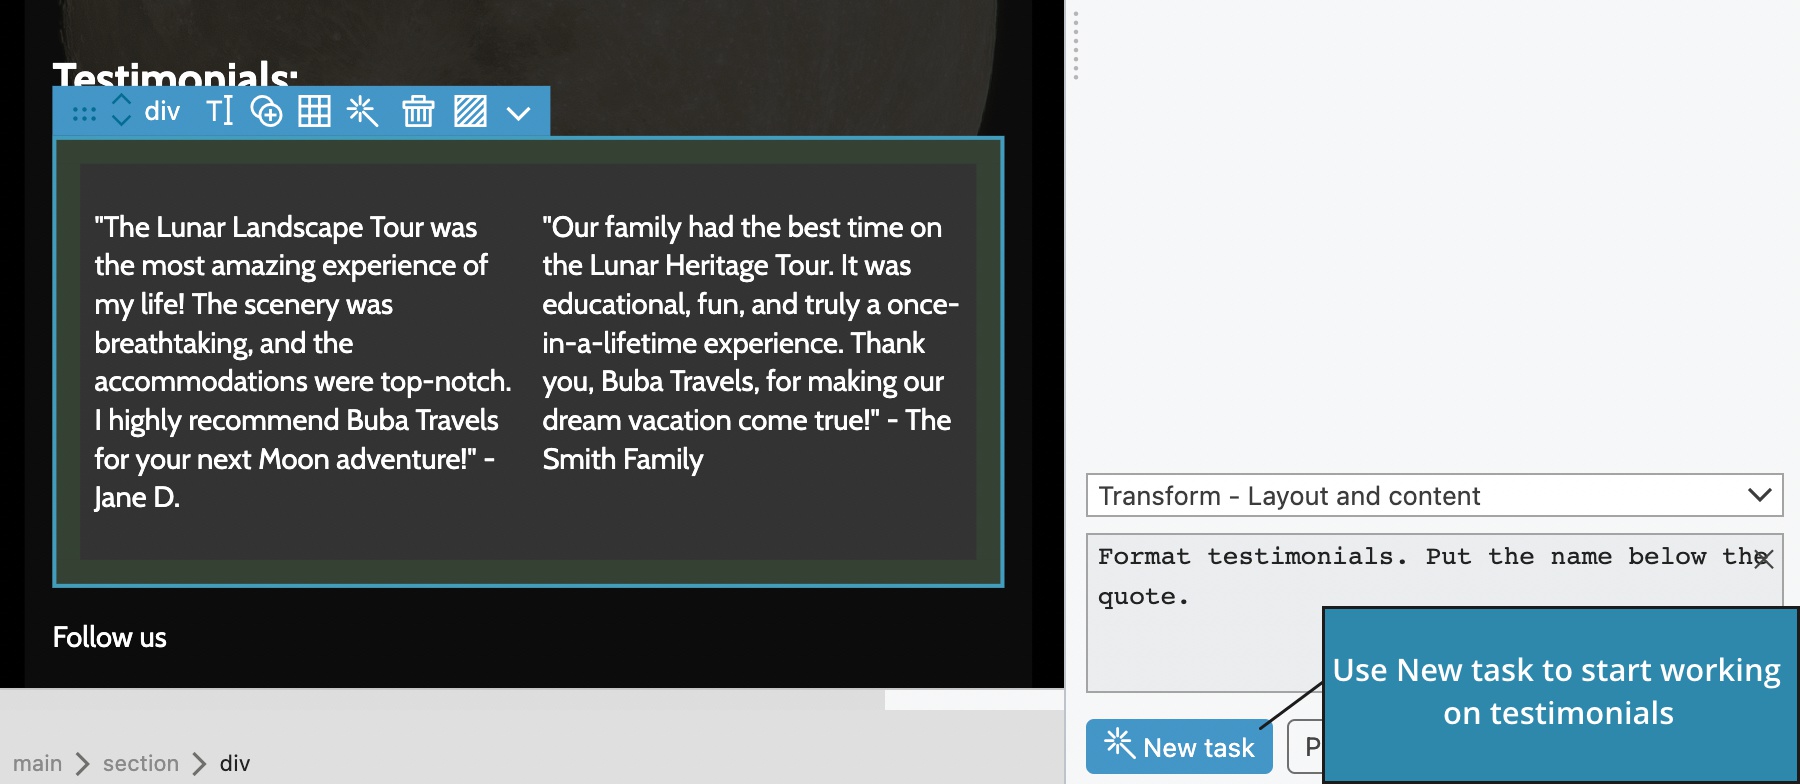
Here is an example. We want to add Testimonials section to the page.
We first select the whole main element because we want the assistant to be aware of the styling and structure of the website. The action is Transform element layout and content. The prompt is “Add testimonials of happy customers.”

The assistant adds the testimonials section.
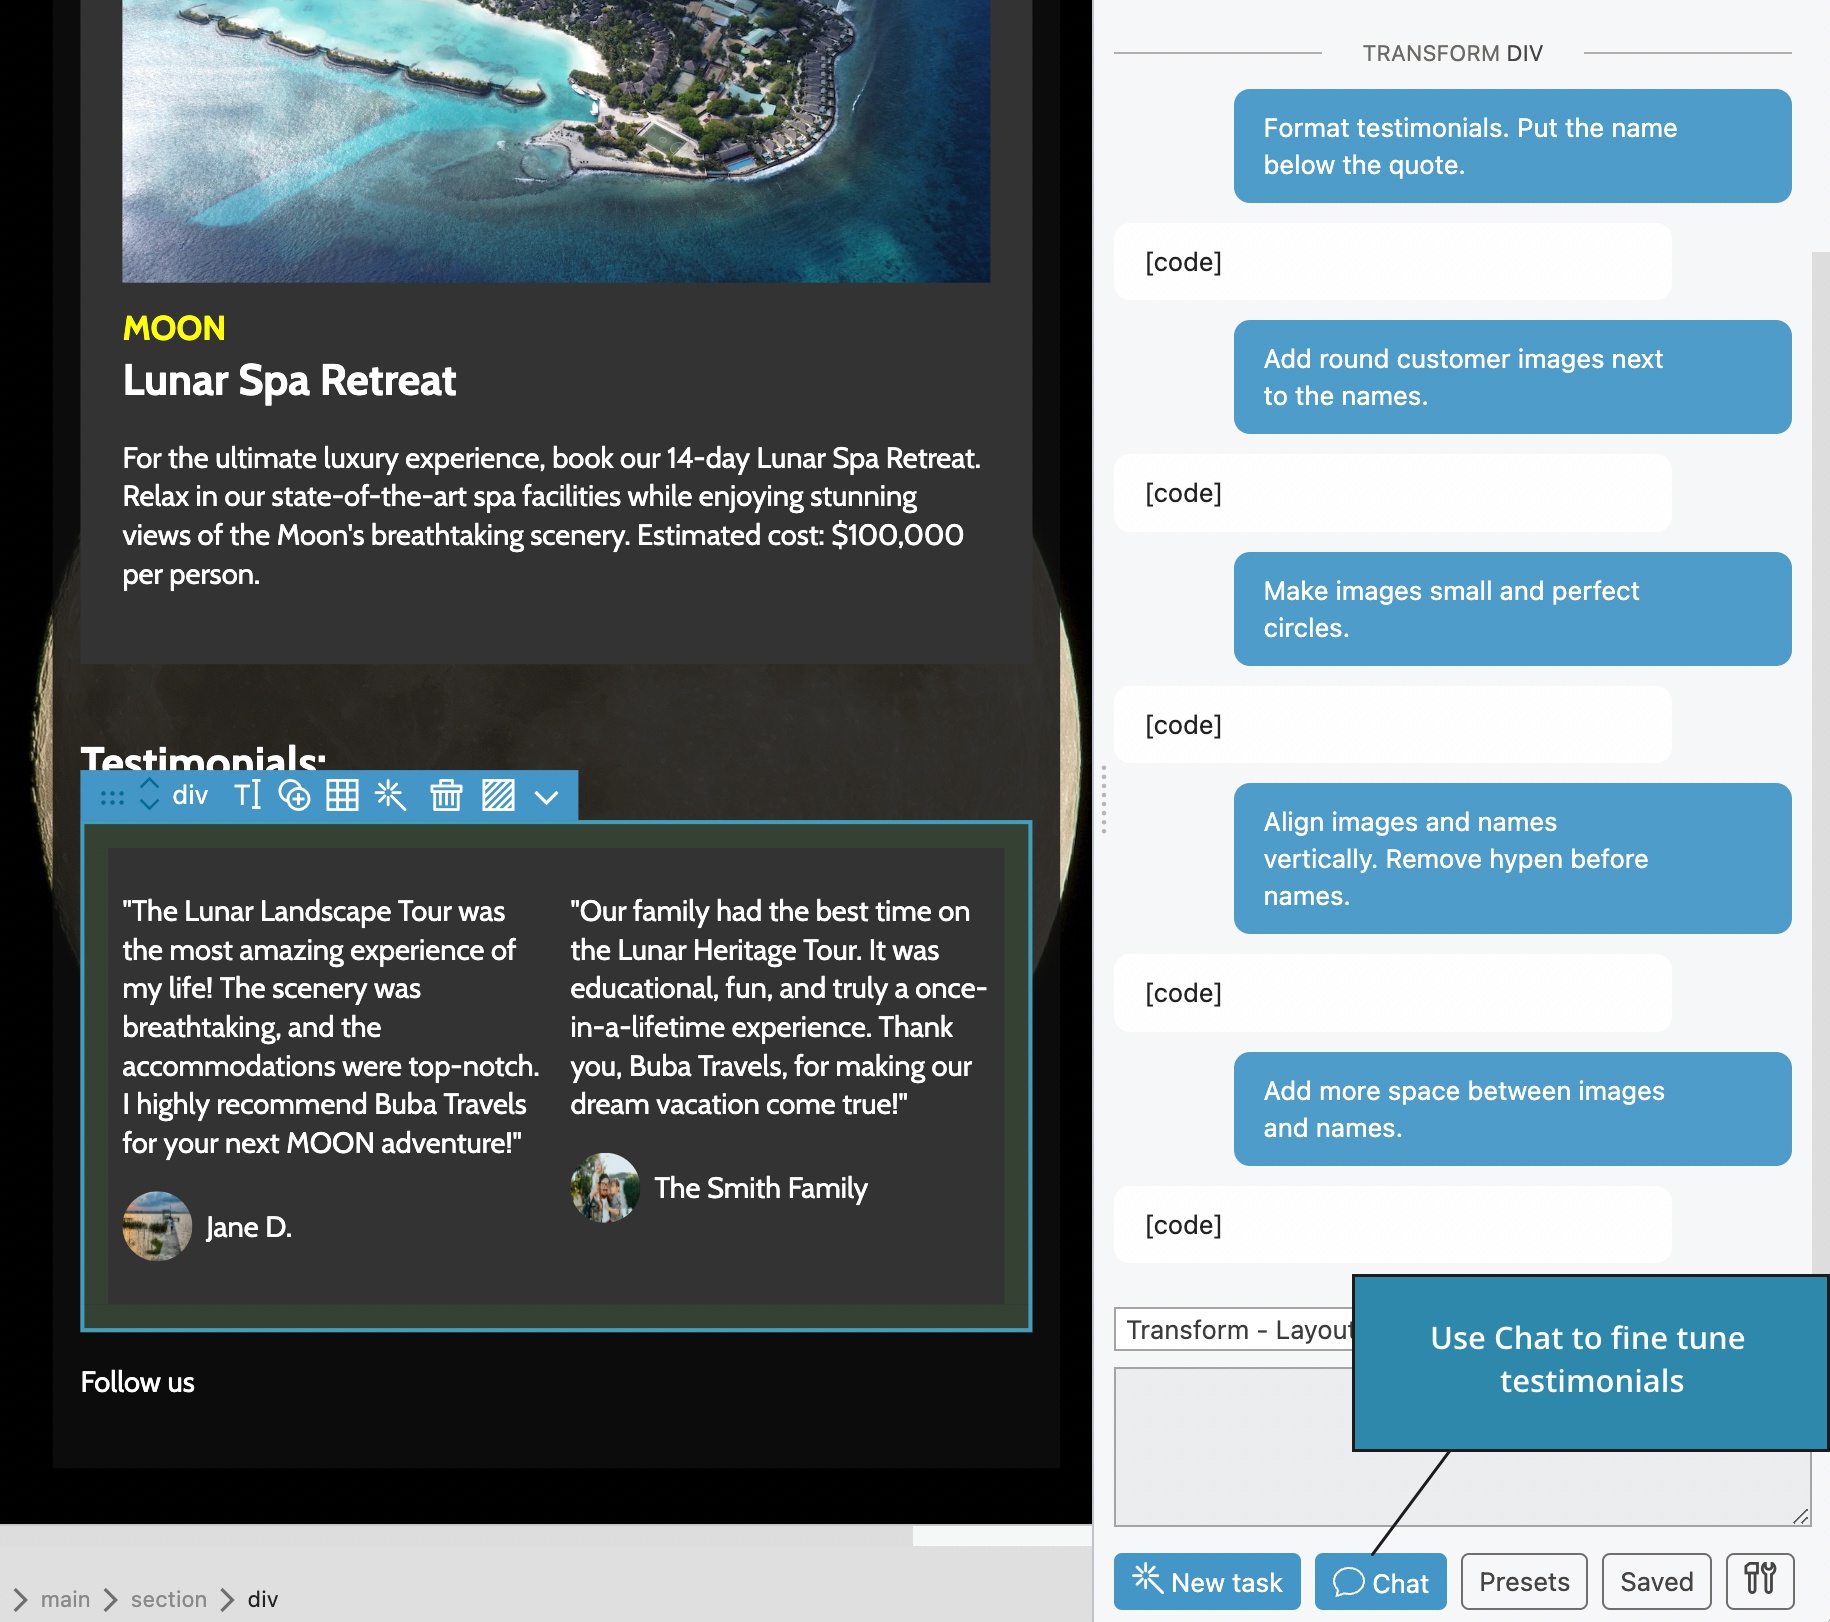
Instead of using Chat to fine tune the testimonials (and include the whole main section in every prompt and result) we select the section with testimonials and start a new task with the prompt “Format testimonials. Put name below the quote.”
In the followup steps we use the Chat button to fine tune the testimonials:
Talk with the AI Assistant
Switch to the Talk mode and tell the assistant what to do. To record the instruction, either:
- Click on the record button to start and click again to stop, or
- Hold down the SPACE key and talk
Watch a quick demo:
Using Unsplash images in responses
GPT model happily returns images when requested. But these images do not exist, their URLs are totally made up. AI Assistant uses free Unsplash service to replace missing images. It uses clues in the URL names and alt attributes to search images by keywords.
Project brief
The project brief field in Settings lets you include a project description and any relevant instructions into every prompt performed on the current project. Keep it concise because the brief gets included into every prompt.
Idea: you can ask the assistant to help you write the project brief using the Just chatting action.
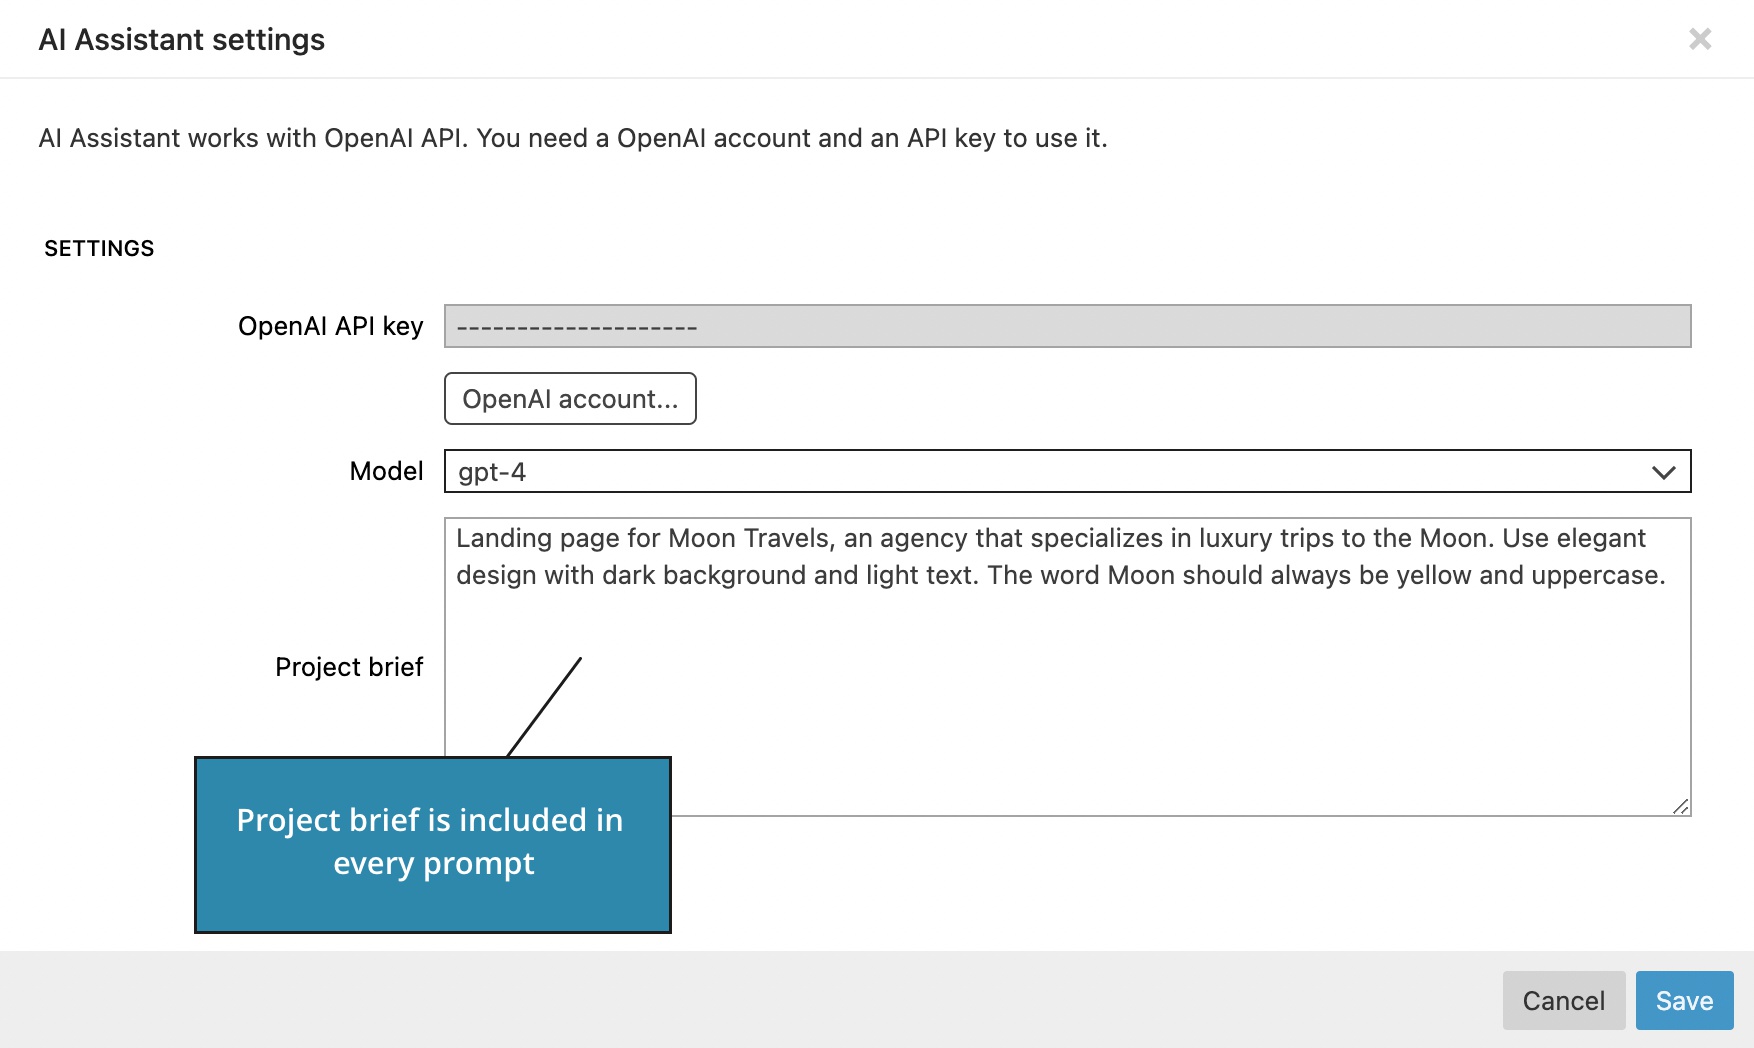
The project brief is stored in project settings, so that every project can have its own brief.
Presets – a library of handy commands
AI Assistant comes with a library of ready-to-use commands for transforming the layout, adding elements, translating text and so on.
Click on the Presets button and select the command from the dropdown:
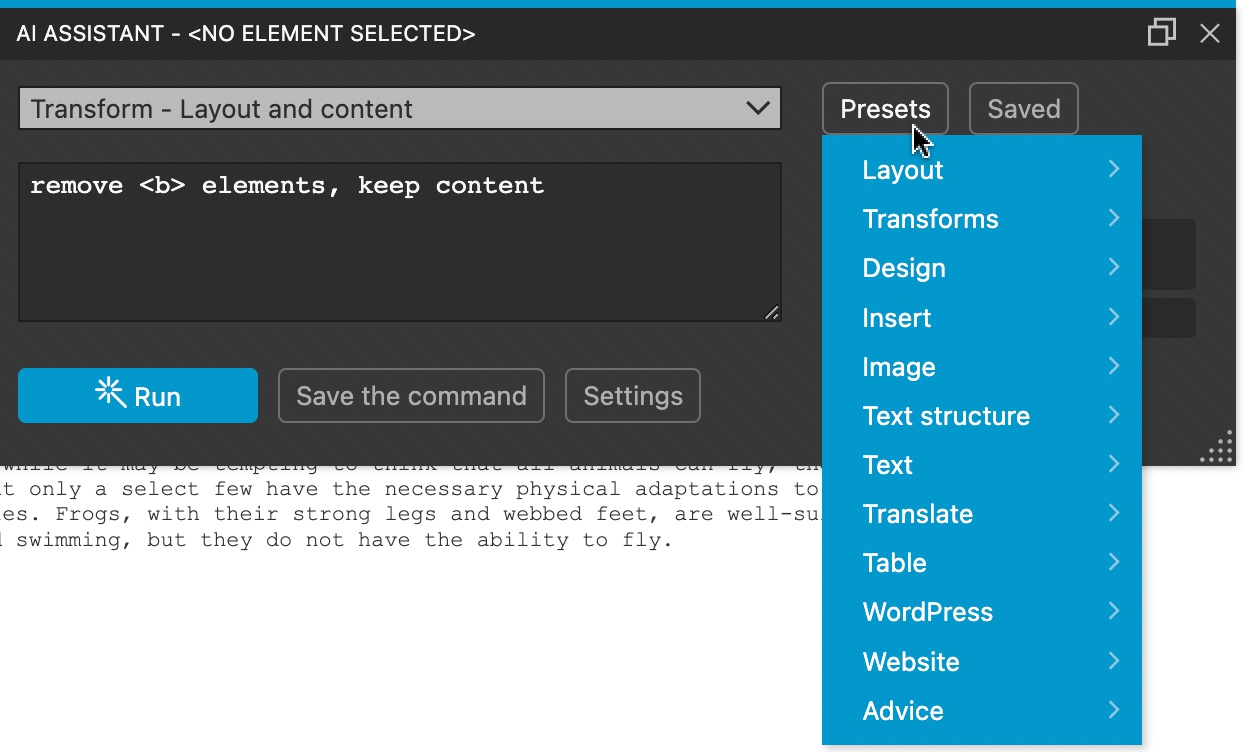
Some commands require additional input before they can be run. Take a look at the prompt and replace #ASK with the requested information.
Presets are also a good place to get ideas for your prompts.
Let’s take a look at the couple of useful presets.
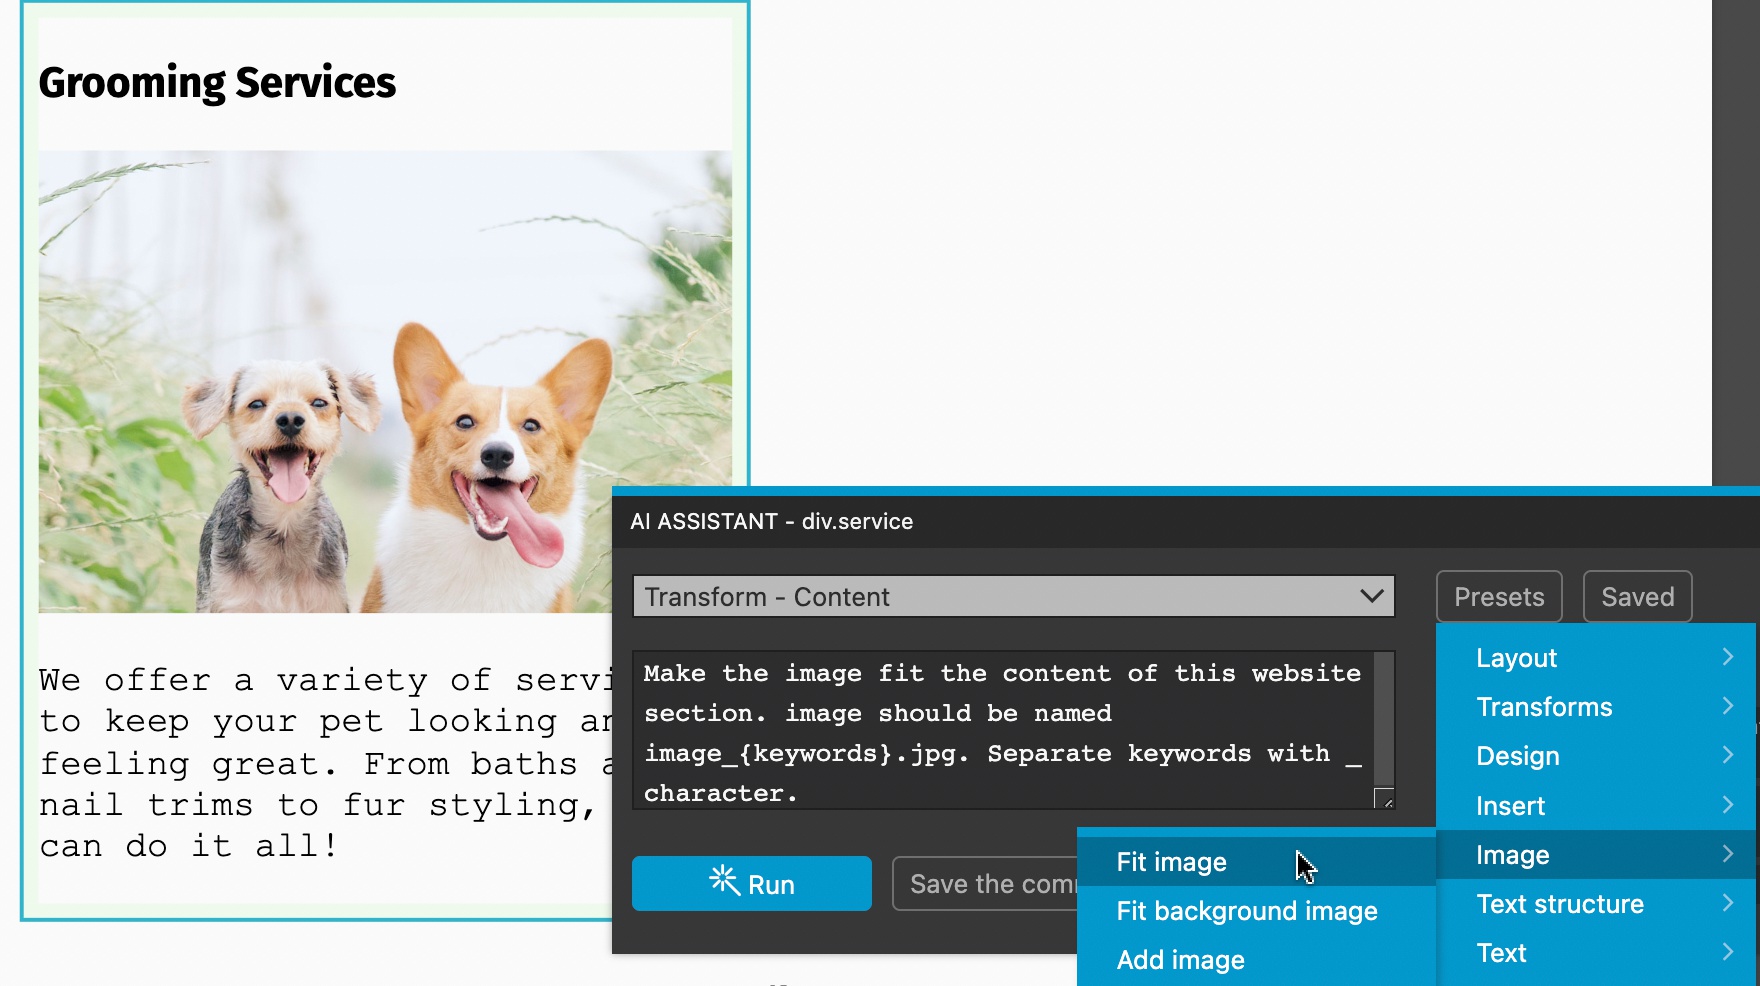
Fit image
Fit image finds the image that fits the content of the selected element. Run it on the image parent element that contains enough information to figure out what kind of image should be shown, not directly on the image. The command also works with multiple images.
The prompt is:
Make the image fit the content of this website section. image should be named image_{keywords}.jpg. Separate keywords with _ character.Notice that we tell it how the image name should be structured so that AI Assistant can extract keywords and search for Unsplash images.
The action is Transform – Content, because we need to match the image to the content. Experiments show that sending the layout as well easily distracts the model and leads to sub-optimal images.
If image does not exist, it is inserted. So far I didn’t find a way to write the prompt in a way that it would not insert new images and only transform existing ones. Let me know if you manage to do that.
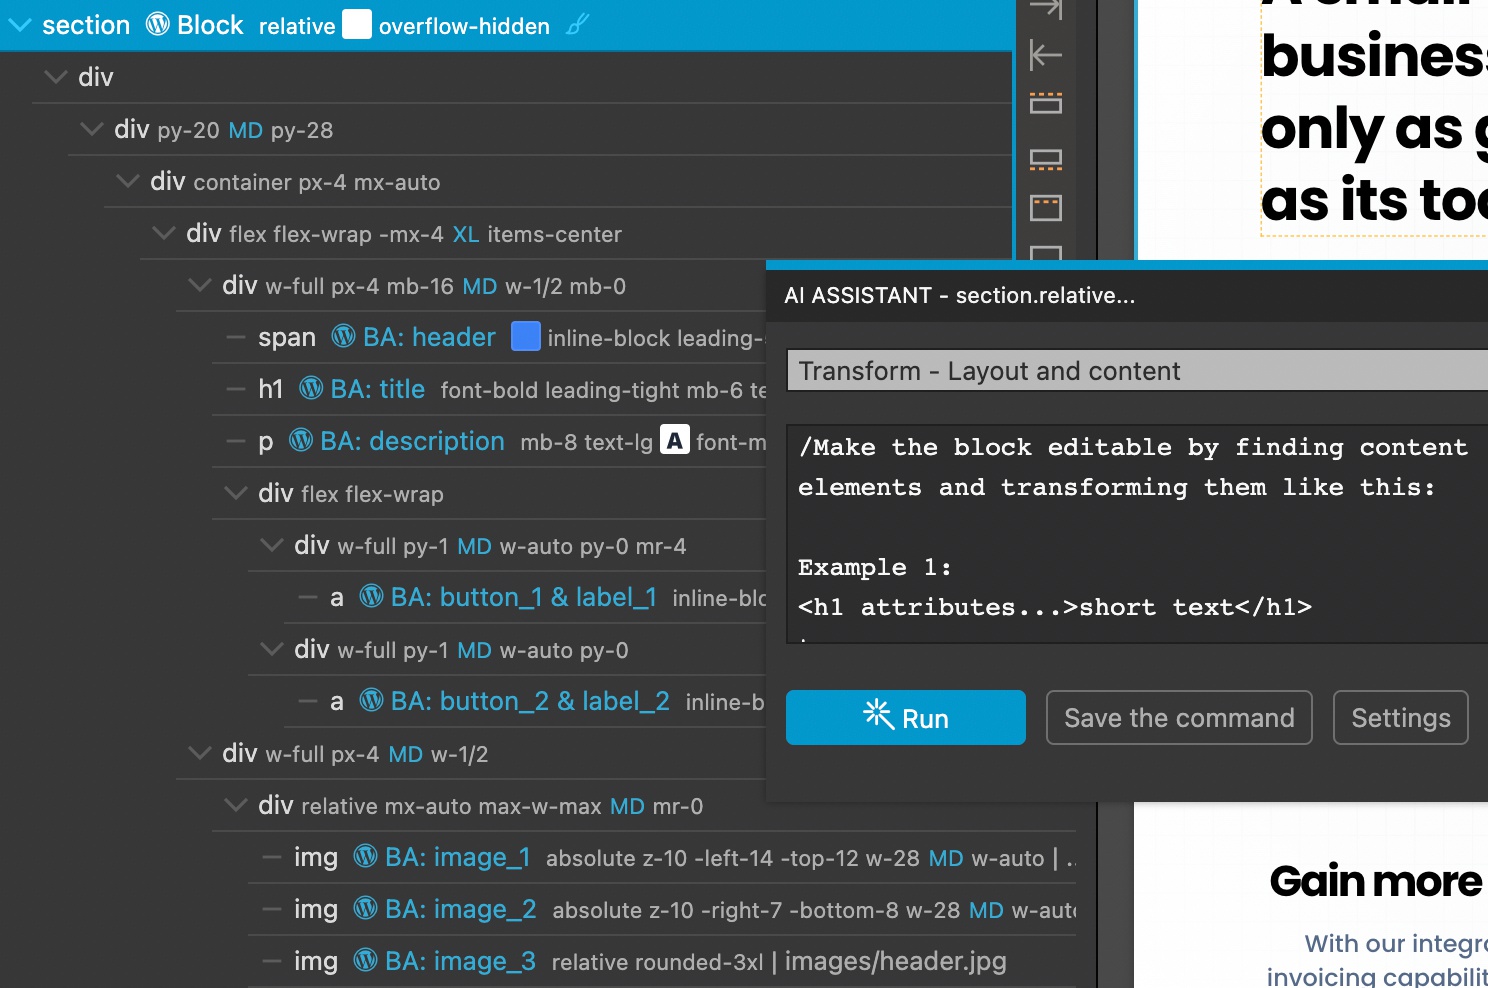
WordPress – Define block and Make block editable
These are experimental commands that add Pinegrow WordPress Block and Block attributes actions to the selected element. In many cases they work out-of-the box, but sometimes they use non-unique or even invalid attribute ids, or create invalid nested Block attributes.

These two prompts first provides examples and then asks the model to do the task on the provided code.
Website – Generate sections and Use content as prompts
When talking about generating the whole page above, I mentioned an alternative way to do that. The process has two steps:
First, select the body element of an empty page (make sure any framework is already included) and then run the command Generate website sections, after replacing the #ASK in the prompt with the project brief (hint, you can ask the AI Assistant to create a project brief).
This command will create a bunch of header, section and footer elements, each containing a prompt with instructions for creating the section.

Next, go through each of these sections one by one. Select the section and run the Use content as prompt command.
The command takes the content of the element and uses it as the prompt for creating the section.
It’s quite amazing that this actually works.
This approach gives the best results when using it with Bootstrap or Tailwind CSS because the framework provides a unified looks and feel of the page. For plain CSS projects, generating sections one by one does transfer any sense of unified design from one section to the next.
Follow up steps could involve using Content aware replace (see below) to replace sections with block layouts (or your own custom reusable components loaded in the Library panel).
Using a reference element – commands that work with two elements
Sometimes it is useful to use the second HTML element in the command. We call such element a reference element.
First, use multi-select (CMD or CTLR + Click) to select two elements on the page. The first element is the reference element and the second element (the one with the blue menu) is the element that will be transformed.
In the prompt, use #REF to include the code of the reference element.
Example 1 – Make two elements similar
Let’s say we have a group of elements with different styling and we want to make all of them look the same.
First, select the reference element that will be used as a template for other elements.
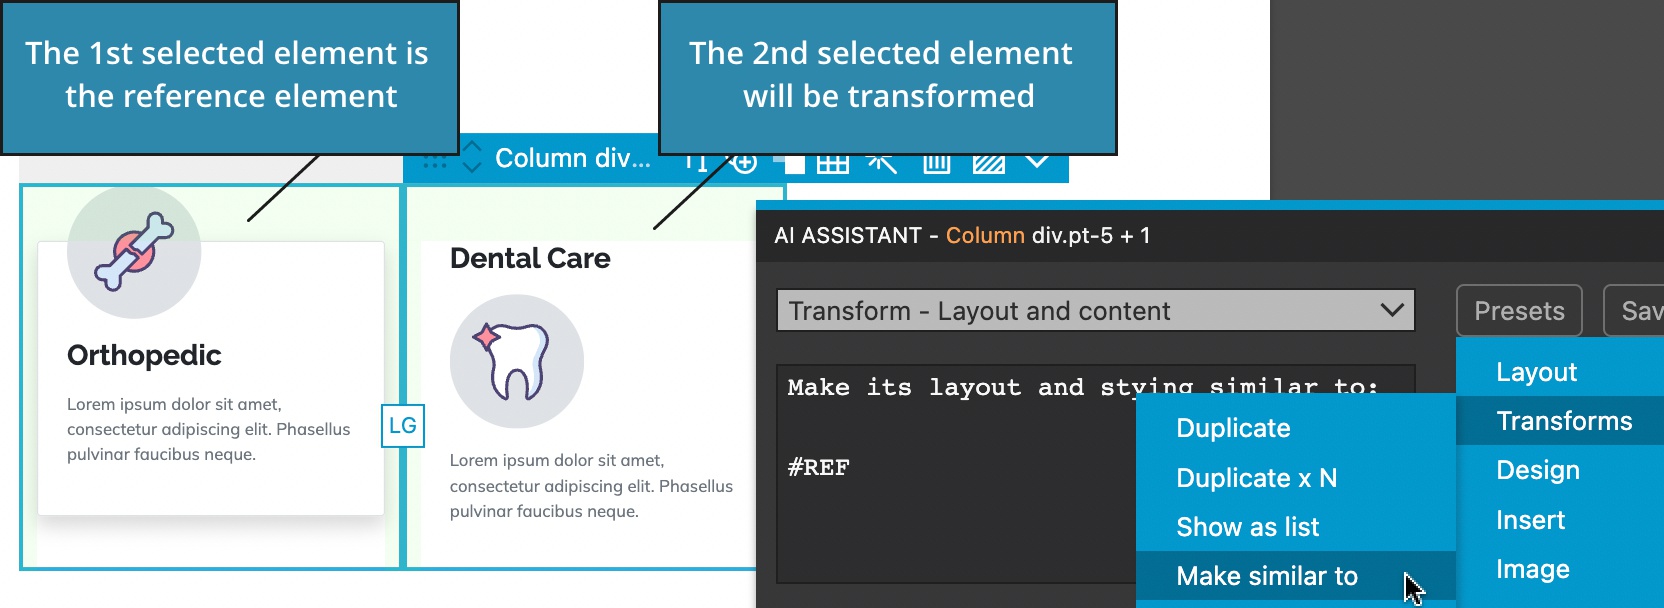
Then, select the element that will be transformed and say:
Make its layout and styling similar to

#REF
The result is:
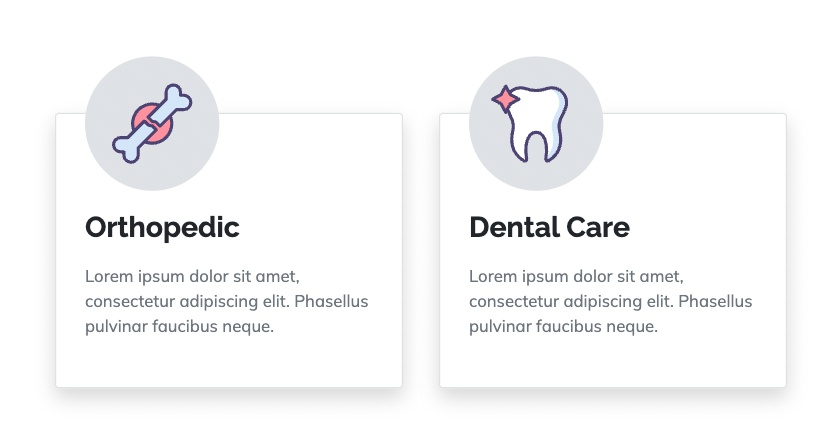
Repeat the process for each element in the group, until all elements share the same design.
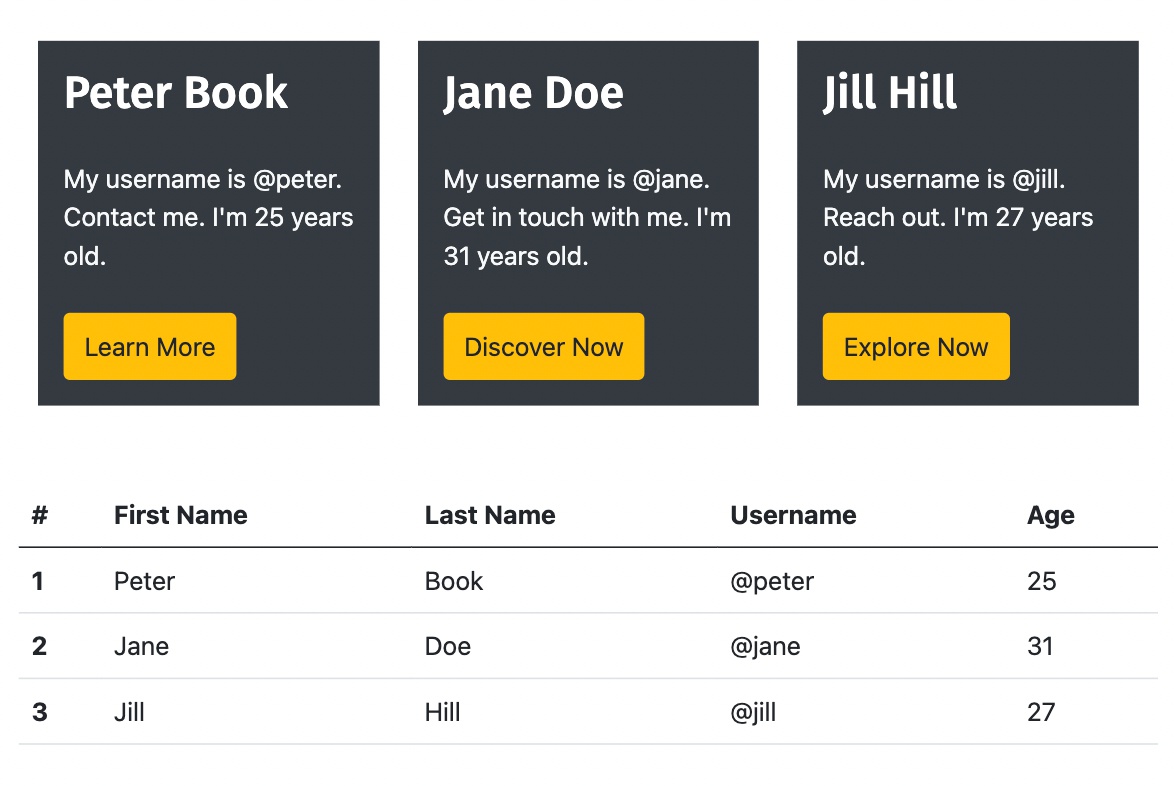
Example 2 – Merging table data into elements
This is a fun and slightly advanced example. We want to use the table data to display each row as a box.
First, select a table, then the CMD/CTRL-click select the element with a card:
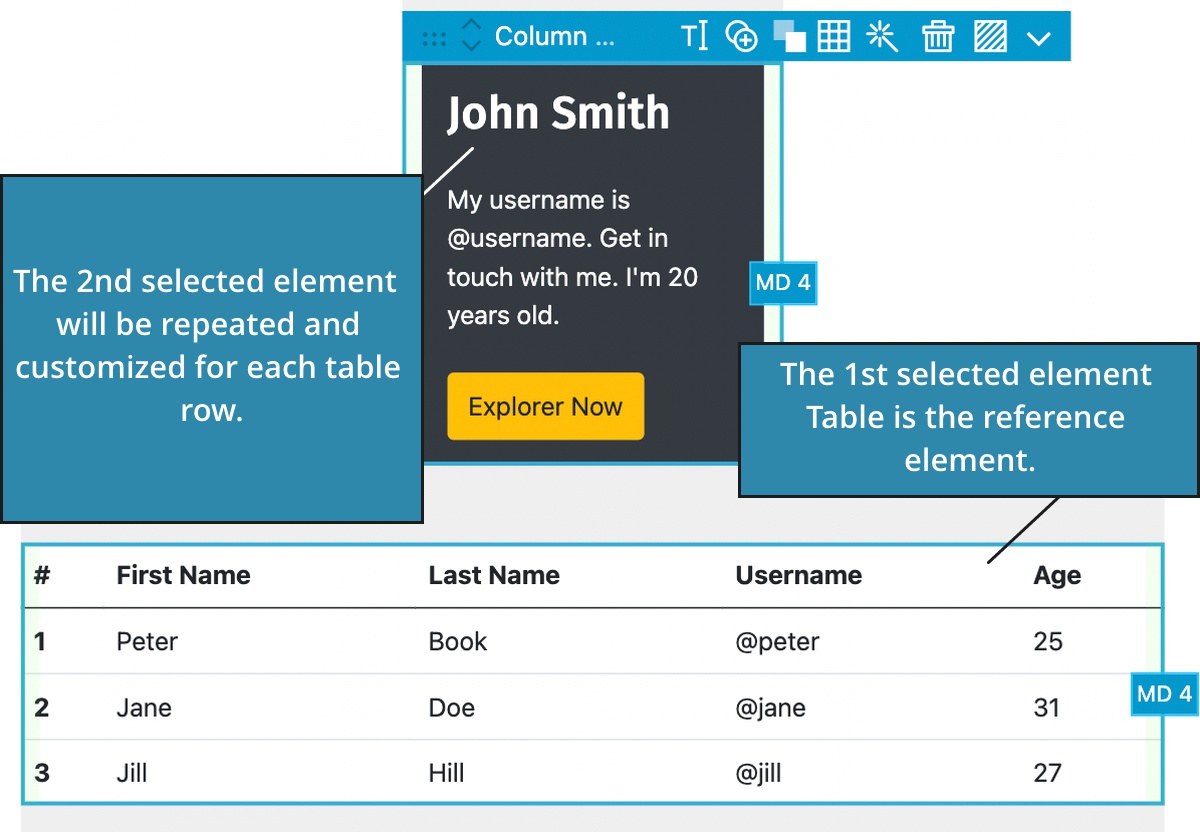
Instruct the AI Assistant to:
/Extract the content from the table:

#REF

And create a HTML element for every row of the table using the template:

#CODE

Say things differently for each item. Return just the code.
We are prepending / to the prompt in order to control the whole prompt, without AI Assistant prepending the code and base instructions automatically. For complex tasks, the structure of the prompt matters a lot. The simpler the instruction is formed, the better chance the model will understand it. It’s like talking to humans.
The result is:
Content aware replace
The Content aware replace is a feature of the Library panel. It replaces the selected element with a page library element while keeping the content of the selected element. The command uses the reference element under the hood.
Access the feature by clicking on the Actions button in the Library panel:
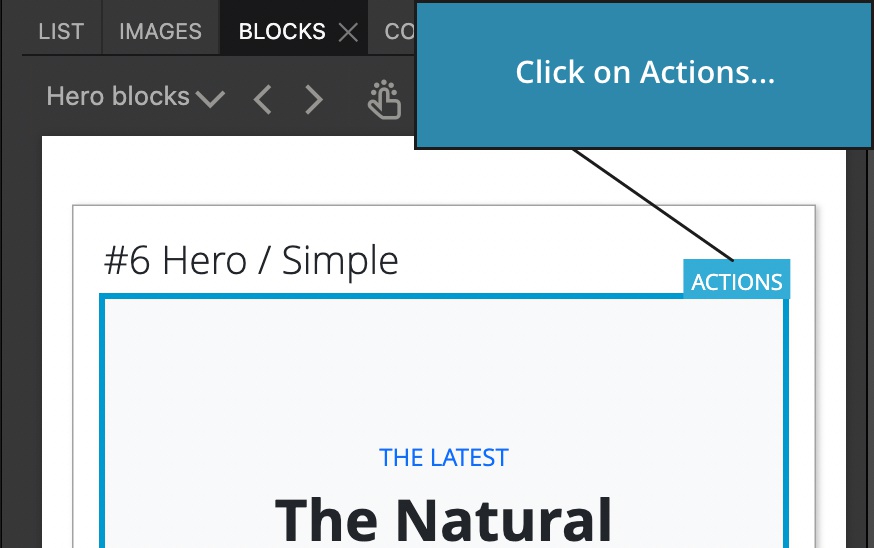
Example 1 – Replacing the hero section
To replace the AI generated hero section with one of the library blocks, select the hero section on the page, navigate to the hero block in the Library panel, click on its Actions and select Content aware replace:
The result is:
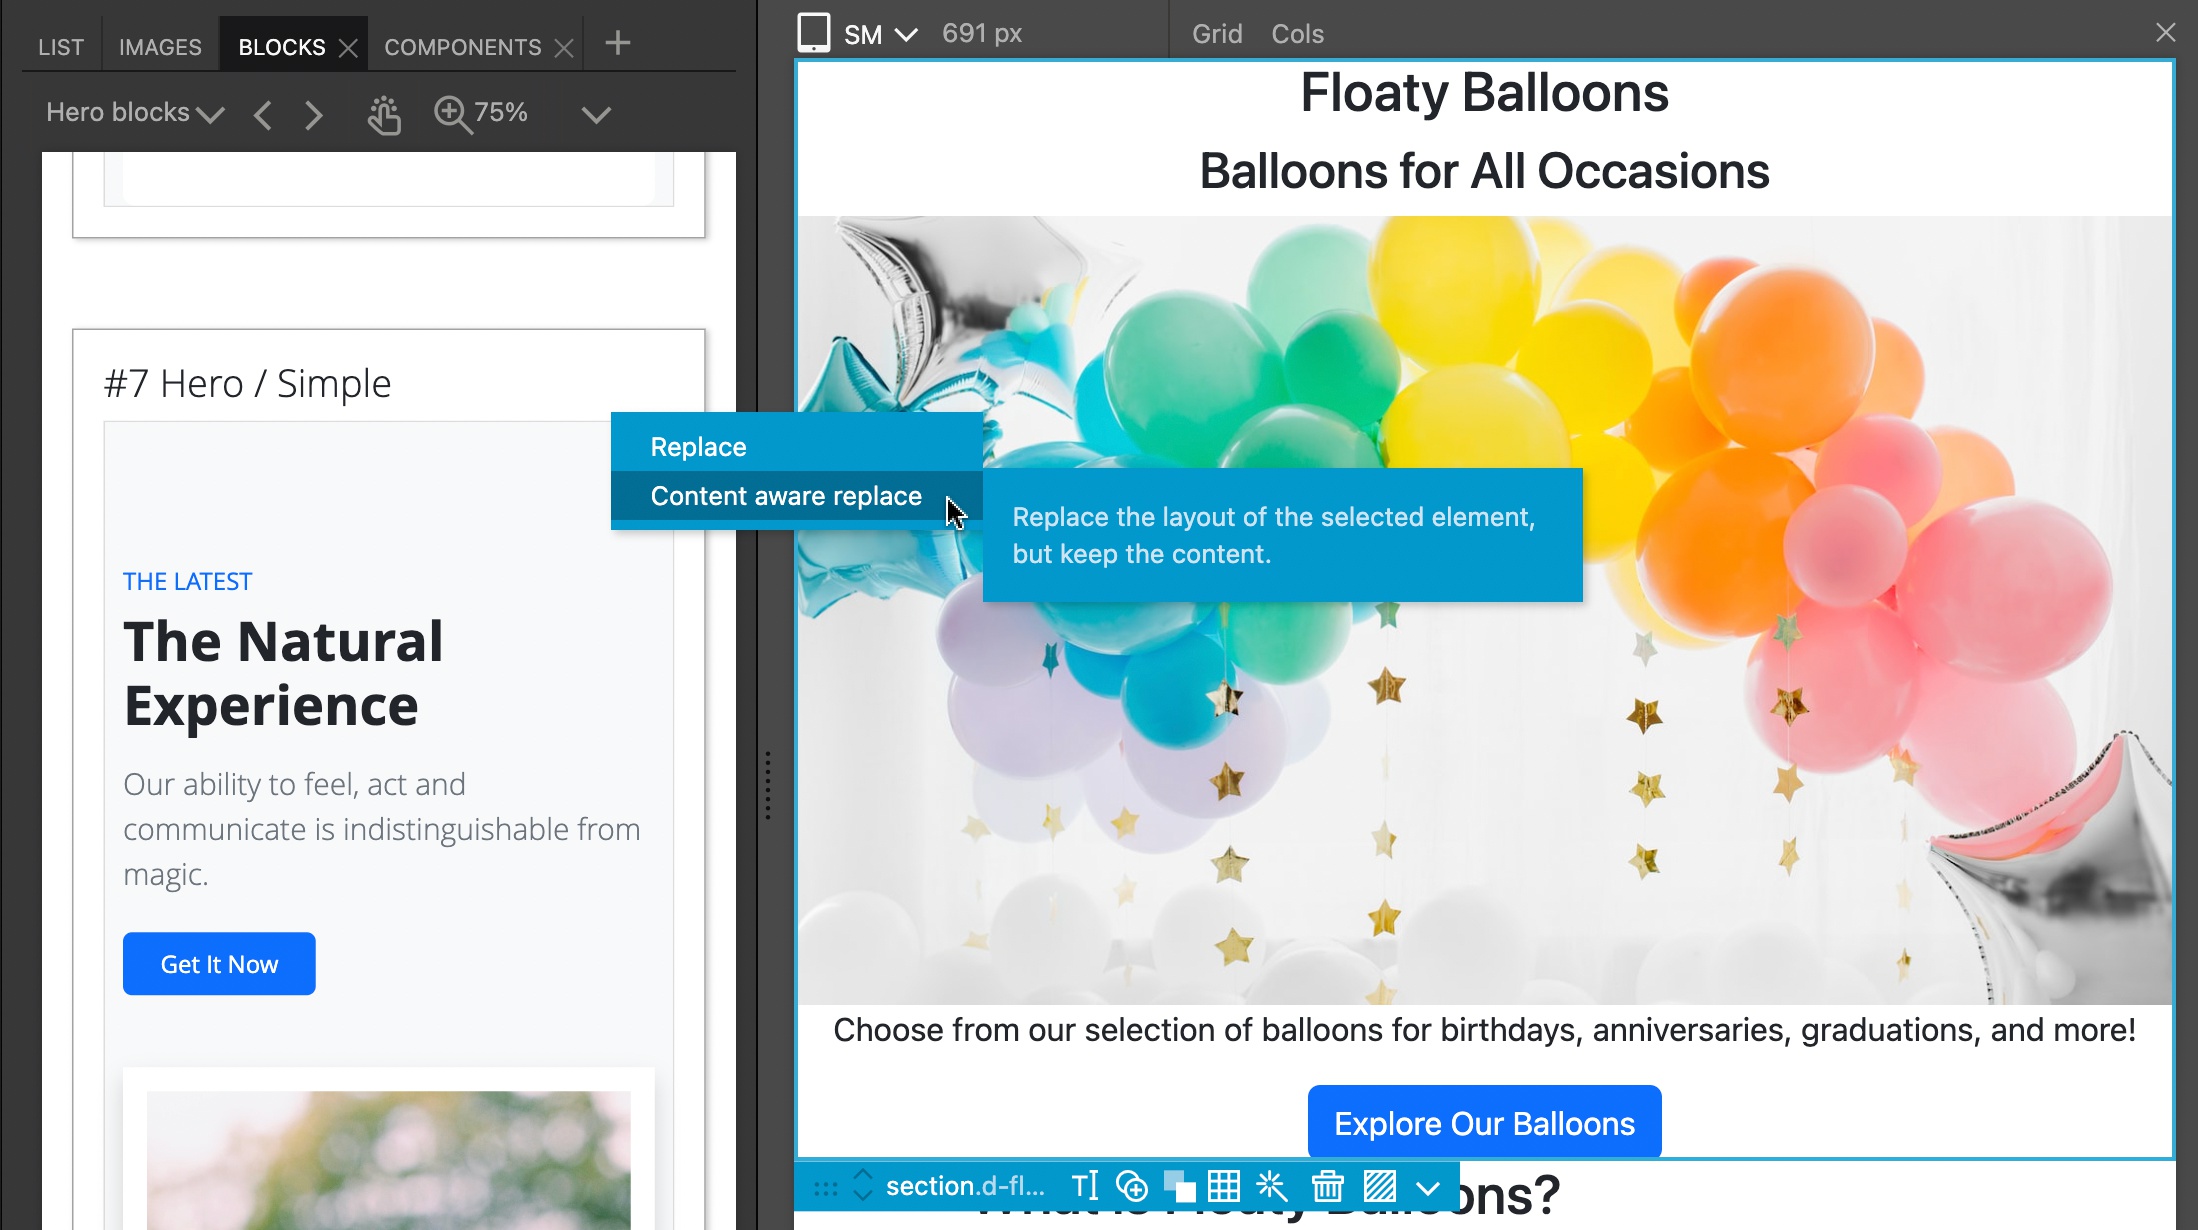
Example 2 – Using a Features & Services block
Here, we are using the Content aware replace to transform a section with the textual description of the company and its products into an attractive design based on one of the Features block:
The result is:
We could now ask the AI Assistant to create descriptions for balloon products and to find suitable images.
Saving favorite commands
Use the Save the command button to save favorite commands and recall them using the Saved button.
Advanced custom prompts
To create a fully custom prompt prefix it with /. In this case AI Assistant will not add any other information to the prompt, including the code of the selected element.
Use #CODE and #REF keywords to include the code of the selected element and the code of the reference element.
See the Merging table data example above.
Re-running the command until you get what you want (or give up)
Every time you run a command the result will be slightly different. If you are not happy with the result of a command, you have two options:
- Re-run the same command and hope for better result
- Tweak the prompt and run the command
In both cases use UNDO (CMD/CTRL + Z) to get back to the original state of the page then run the command again.
In some cases the AI Assistant simply can’t get the job done correctly. It is perfectly fine to give up and do the task the old fashioned way.
How much it costs?
AI Assistant is a core feature of Pinegrow and we don’t charge anything extra for it. It even works in the trial version of Pinegrow Web Editor and in the free version of Pinegrow WordPress Plugin.
That said, you need to bring your own OpenAI key. You can create an OpenAI account for free and get $18 worth of free usage credits (at the time of writing). Free accounts are rate limited and you might run into the limit if you run multiple commands per minute.
Upgrading to a paid OpenAI account removes these limits. There are no recurring costs. The API calls are charged based on how long prompts and responses are ($0.02 per 1000 tokens).
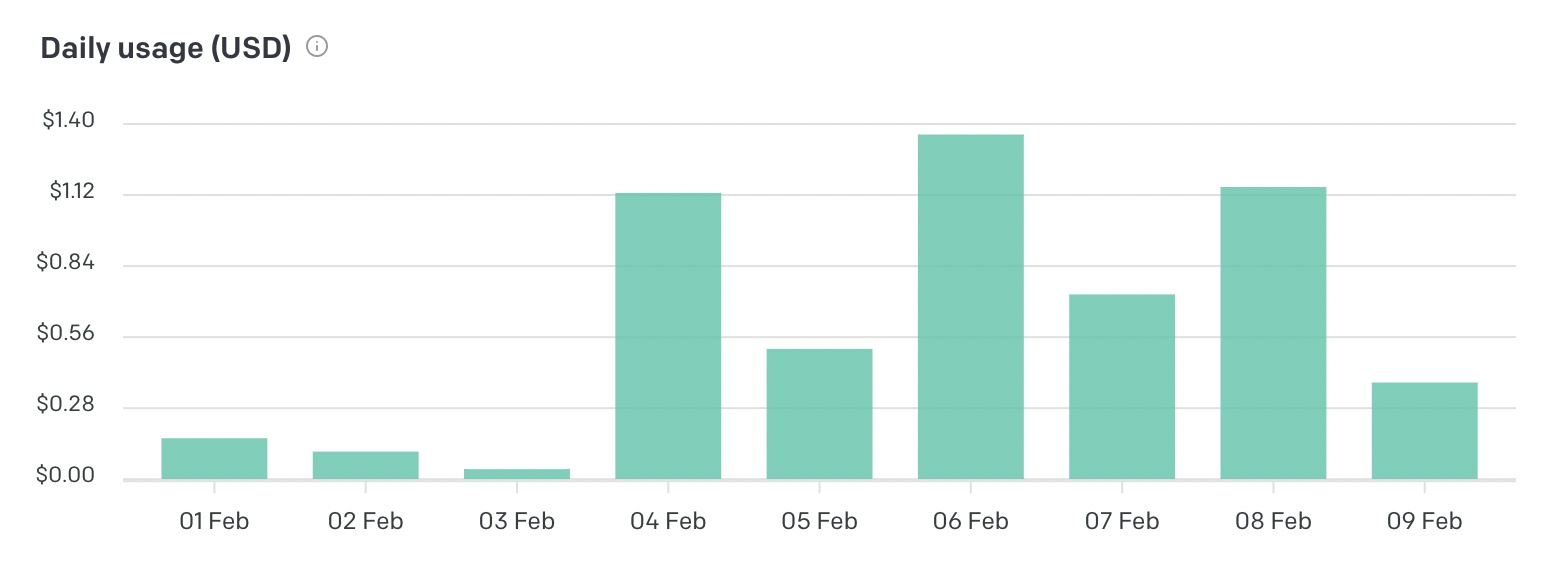
In practice I rarely spend more than $1 per day, even with the heavy usage during the AI Assistant development. Pinegrow helps to bring the cost down by optimizing the code that is sent in prompts and results.
Limitations
At the moment the biggest limitations are unreliability and variable speed of OpenAI API.
Sometimes the API calls fail for no apparent reason or take a long time to complete. The workaround is to retry the command.
Getting started
The AI Assistant is available in the desktop application Pinegrow Web Editor 7.2, in Pinegrow WordPress Plugin 1.0.8 and on Pinegrow Online.
Download Pinegrow Web Editor on your Mac, Windows or Linux desktop, create and enter your OpenAI key and you are ready to go.
Or, install Pinegrow WordPress Plugin to your WordPress site and get a powerful self-hosted online web editor with AI Assistant.
Or, try the AI Assistant in Pinegrow Online right in your browser. It is free and no account is needed.
Tips and tricks
Follow these points to use the tool effectively:
- Select the narrowest element possible. Instead of selecting the whole hero section when adding a button, select just the DIV with the content (title, tagline…) where the button should be displayed.
- Use Action dropdown to let Pinegrow optimize the amount of the information that is included in the prompt.
- Keep prompts simple, with operations explained step by step.
- Use
#REFelements as templates for complex tasks.
Next steps
At the moment, AI Assistant skills are on the level of an enthusiastic intern. It gets some tasks right, and many not. It needs supervision of everything it does.
Based on the rapid progress in the AI field we can expect that this is just the start and that the advancements will continue to translate into better, more powerful developer tools. We will continue to introduce these in Pinegrow.
Like it or not, AI assisted tools are here to stay and it makes sense to start getting familiar with them now.
Share your discoveries with the community
The commands you can run in AI Assistant are open ended. There is a lot of space for fresh ideas and creative problem solving. Let us know if you come up with any useful commands.
Tutorials
Create Engaging HTML Presentations with Pinegrow’s AI Assistant
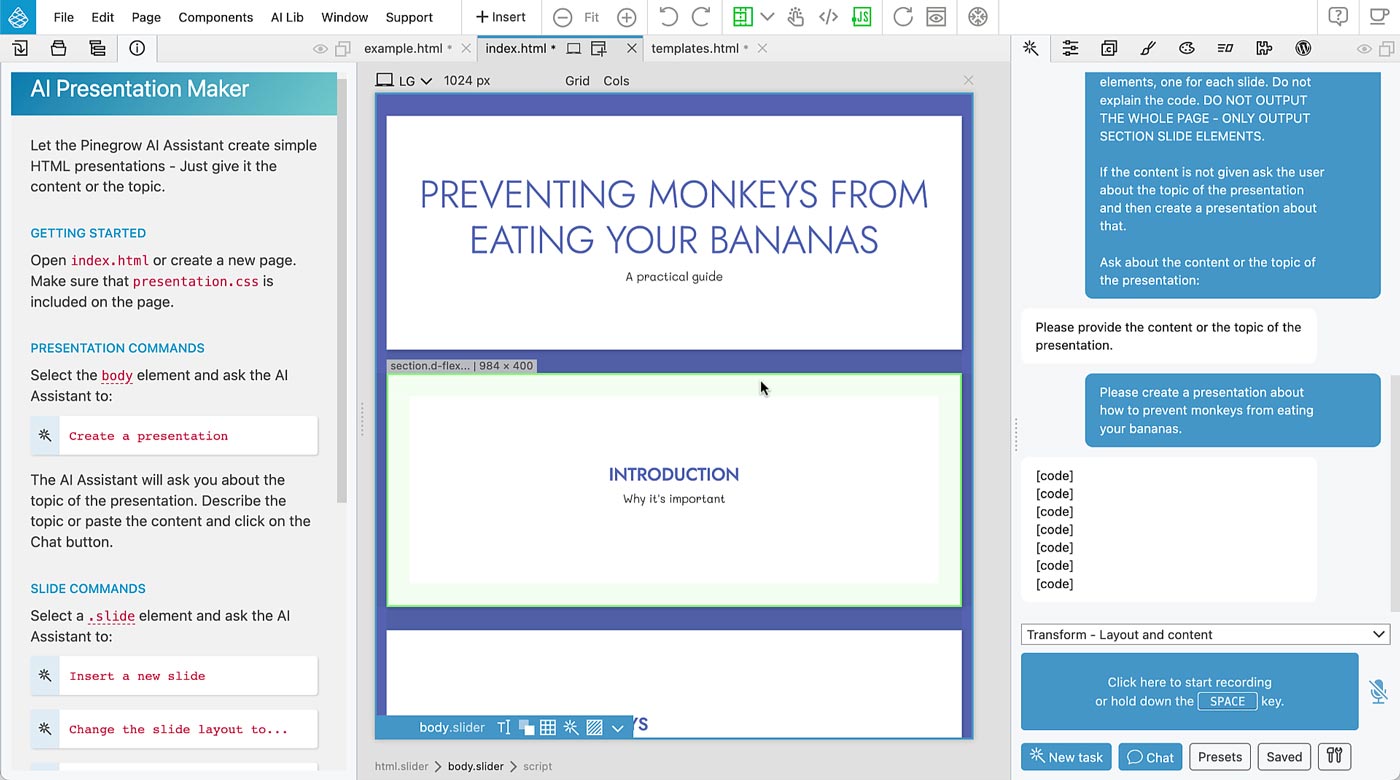
Learn how to create customizable HTML presentations using Pinegrow’s AI Assistant and extend the tool with your own custom features.Based on the AI Assistant documentation, here’s a comprehensive disclaimer that matches the style and tone of the existing documentation:
Important Notice
Before using the AI Assistant, please read our disclaimer. The AI Assistant is a powerful tool that can significantly enhance your web development workflow, but like all AI-powered features, it has inherent limitations and variability that are important to understand for effective use.