Lottie are super small animation files that are scalable and can be targeted for manipulation. They are a great way to add movement and micro-interactions to your pages. They can be created by a number of programs including Adobe After Effects and Figma.
In this tutorial I’ll first show you how to get Lottie files working on any Pinegrow page, as well as highlighting the LottieFiles resource for downloading pre-made animations. Then I’ll show you how to use Pinegrow Interactions to make our Lottie animations respond to page scrolling and user interaction.
Download the project
Here is a link to a project file with both the page without animations or interactions added that you can use to follow along and the finished product.
Let’s get started!
Prefer to read? Scroll past the videos.
This tutorial is available in video and textual form. Watch the videos, or continue reading if you prefer to read. Of course, you can also do both!
Video One – Adding Lottie animation to a Pinegrow page
This video covers setting up your Pinegrow page to display Lottie animation, downloading free animation JSON files, and how to add them to your pages.
Video Two – Adding Pinegrow Interactions to Lottie animations
This video covers animation on scroll, adding mouse-over animation at 11:26, and apply to many at 16:00.
Video Three – More Interactions with Lottie animation
This video shows how you can play Lottie animations with a simple button click.
Adding the Lottie renderer to the page
There are a number of different libraries for rendering Lottie files, including versions for iOS, android, Windows. For our pages we will be using the web player. This library can be loaded onto any HTML page and we will be using a simple Bootstrap 4 page that already has some elements from the Block library loaded onto the page. This library can be obtained from a number of sources, but we will use the version hosted by cdnjs.com.
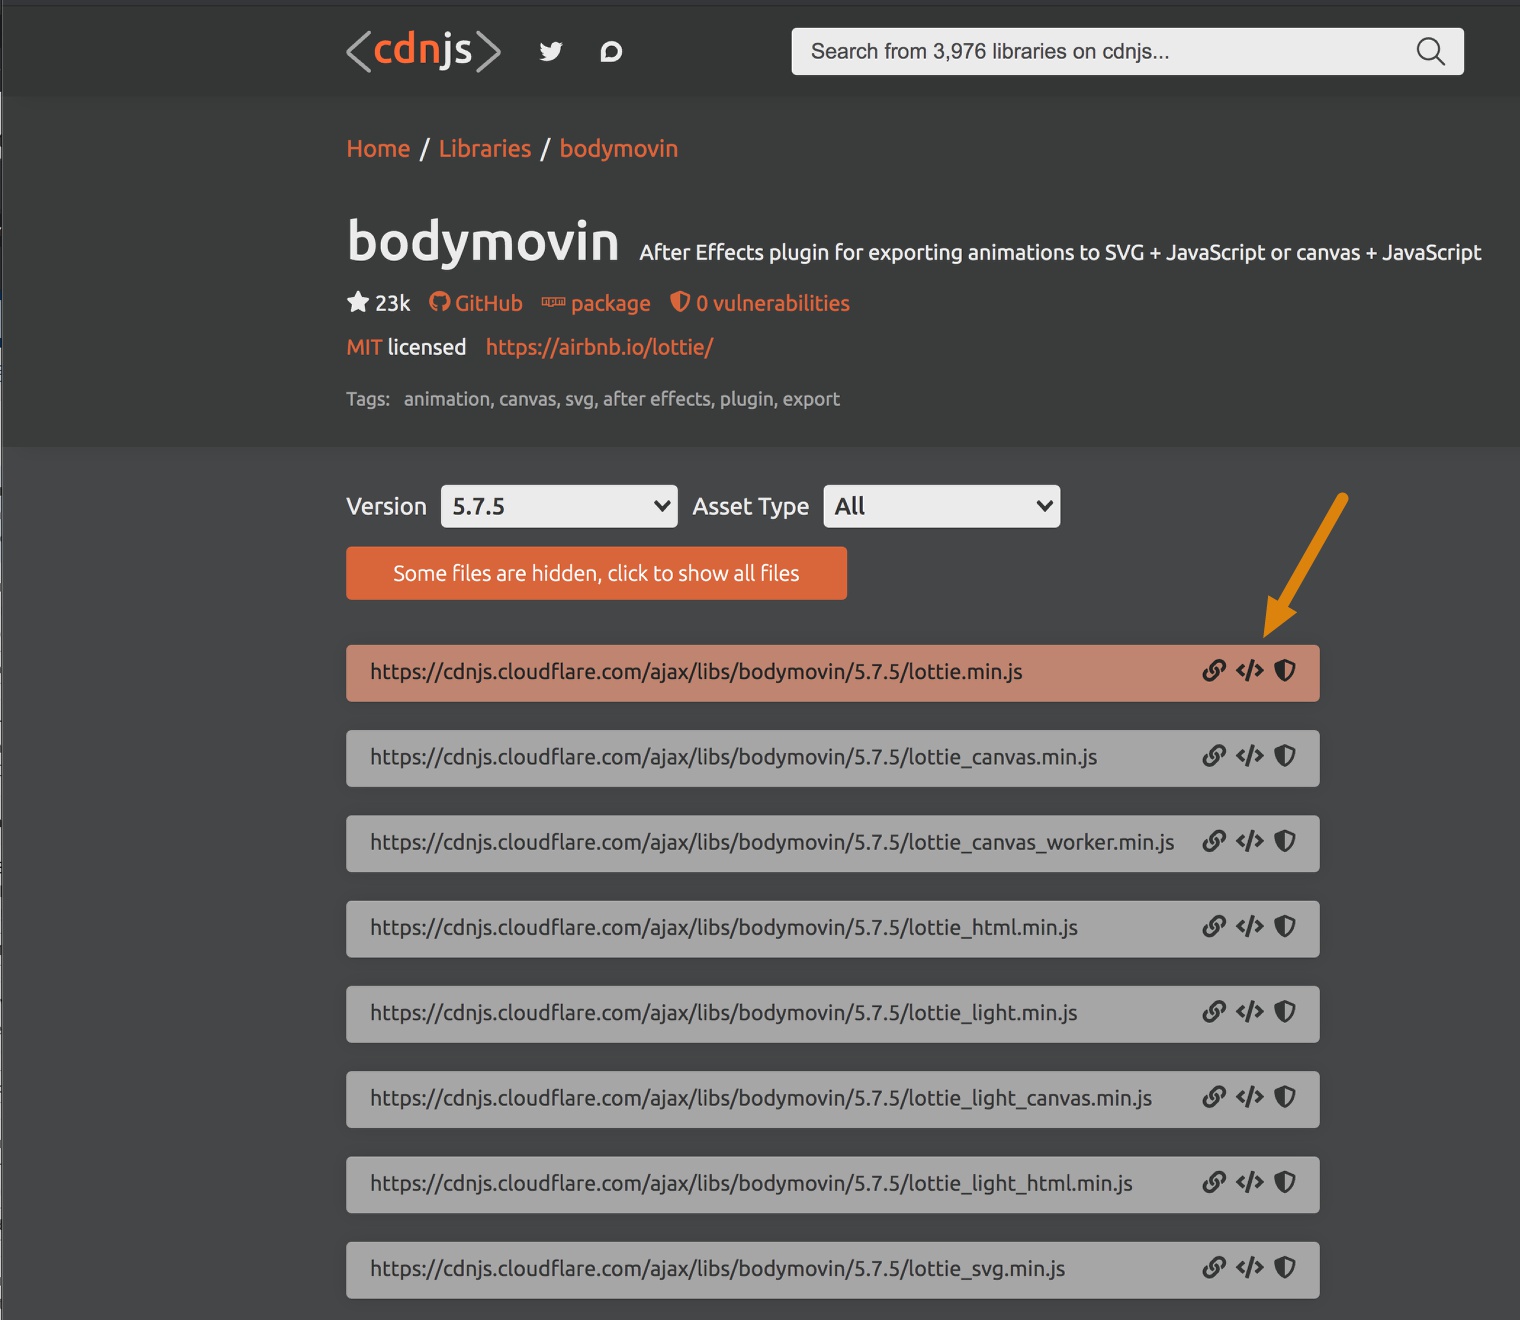
After navigating to the page, click the center icon to the right of the script. This will copy a script tag to our clipboard. Navigating back to Pinegrow, paste this into the code box in the Library panel and then drag the resulting element to the page.
Downloading Lottie Files
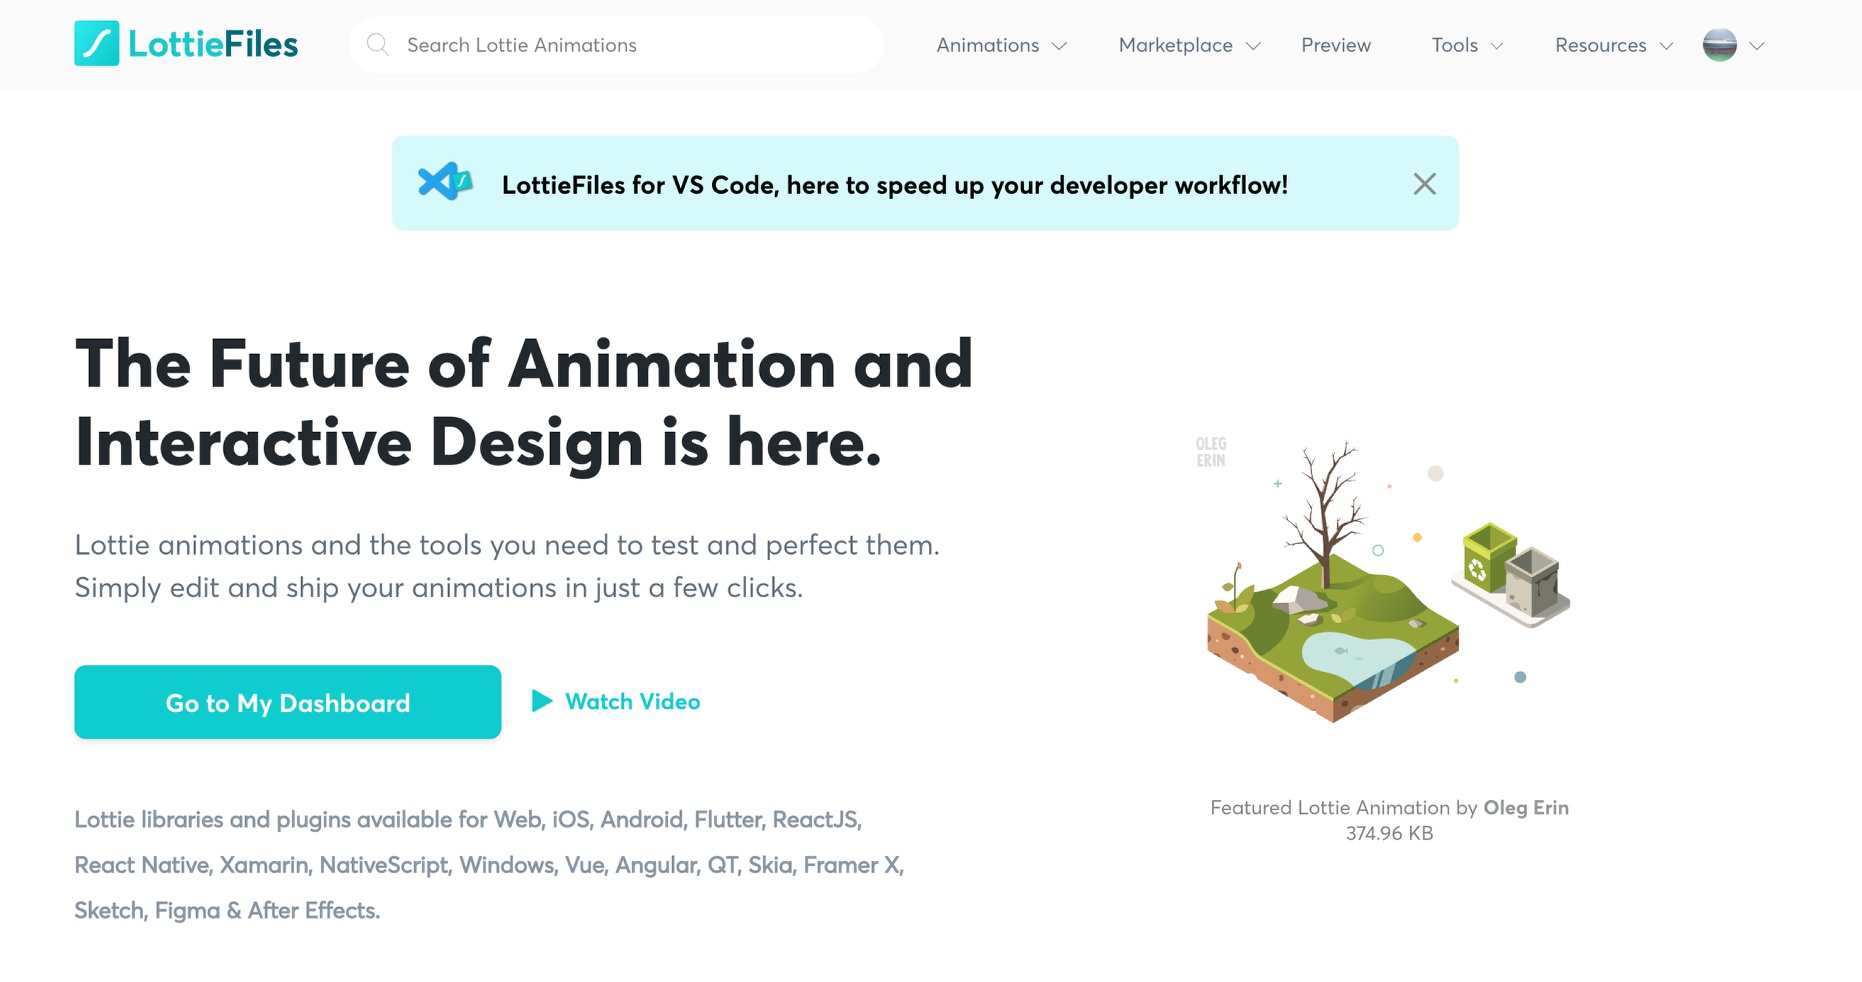
We could create our own custom animations, but there are a also wealth of free Lottie files available on the internet. One great site is LottieFiles.com. In addition to free files, you can also purchase premium files and get in contact with Lottie creators for custom animation. Downloading any of the files requires that you sign-up. Once logged in the Animations dropdown at the top will allow you to access recent or popular animations. Clicking on an animation brings up a modal with a number of options. From this modal you can change the background a layer colors. You can also choose to export some code to easily place the animation into your page – if you don’t intend on using Pinegrow Interactions with your animation you can elect to use this method. In this case however, we are going to download the JSON file containing the animation by clicking on the link at the top.

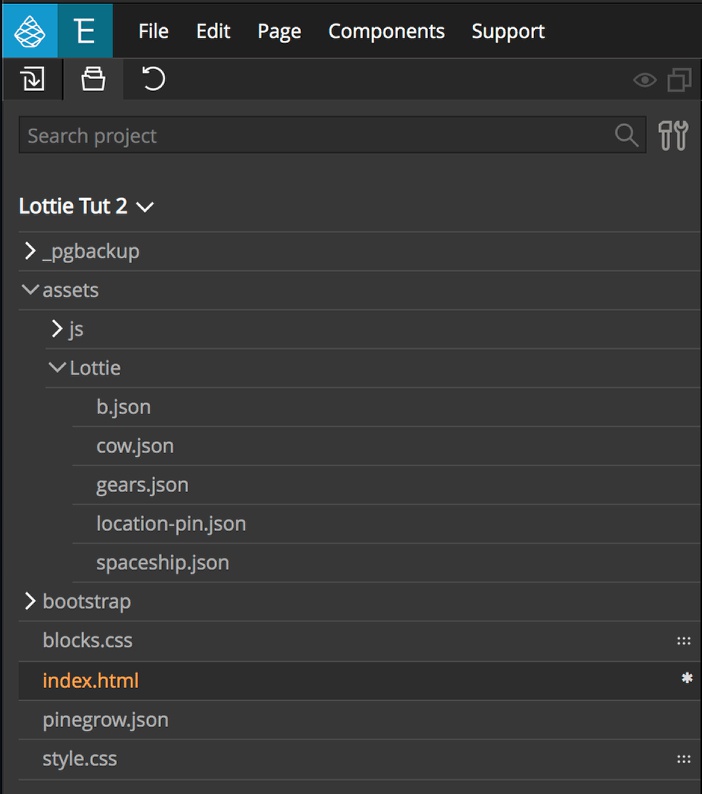
Clicking the download allows for several different options depending on the animation. We want to download the JSON file into our project folder. If we also download the GIF file of this animation we can see one of the advantages of Lottie files. The GIF is 10x the size at 1.1mb versus 100kb!
Adding the Lottie animation to our page
We are going to replace the image in our Hero section with our Lottie file. To do this, first delete out the image, but leave the div containing the image on our page. Next, with the div selected open the Properties panel and enter a unique id. I’m using ‘lottie-one’.
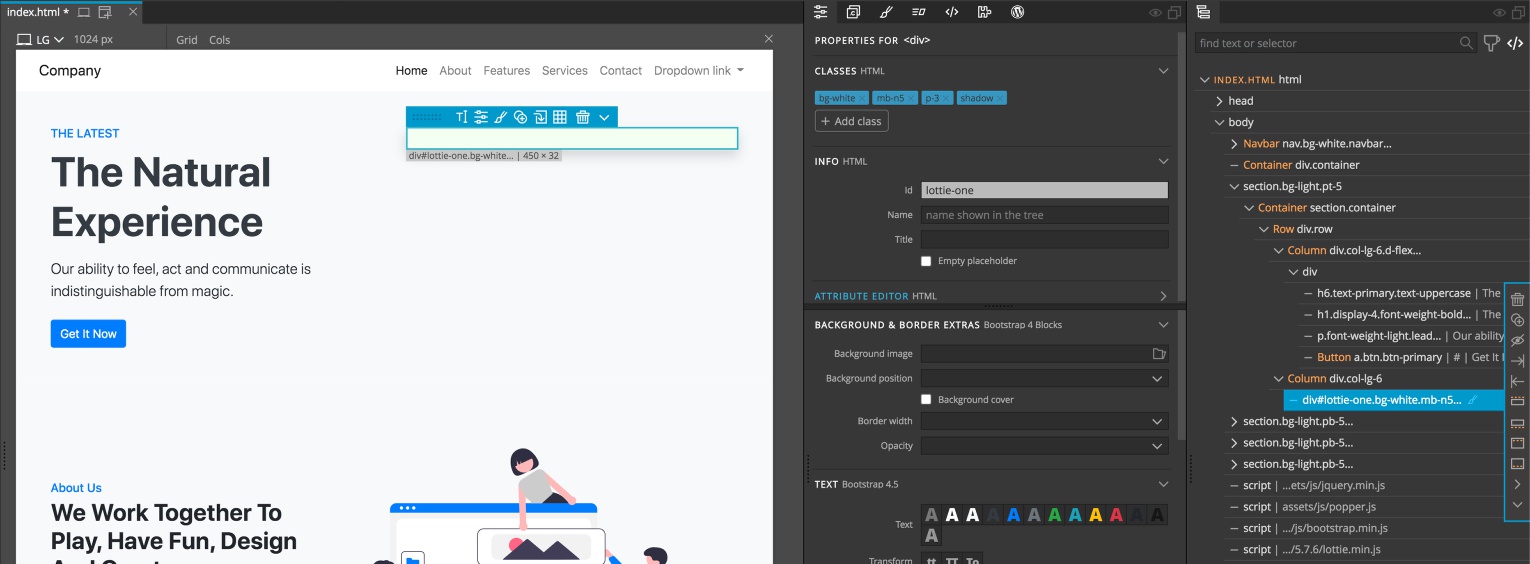
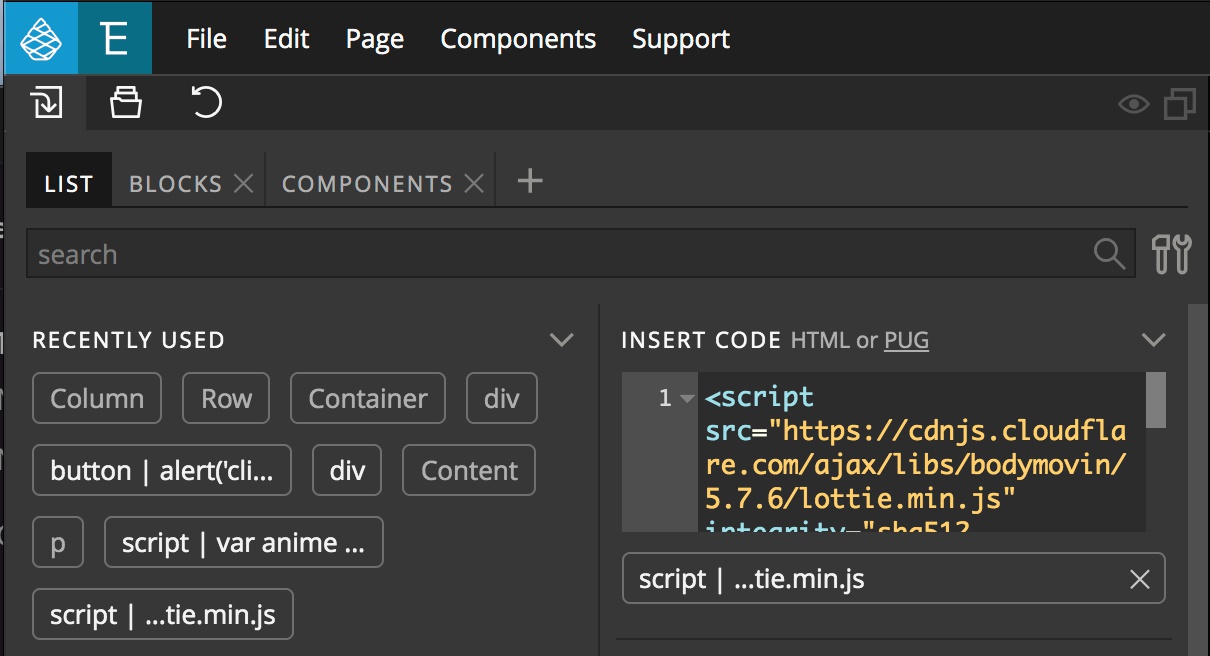
To get our animation to display we have to write a small script. There are several ways to accomplish this in Pinegrow. You can use an external editor like Visual Studio Code, or use the internal whole page code editor by clicking the code icon in the Toolbar at the top of the screen. You can also type your script directly into the Insert Code box in the Library panel. While I mostly use an external editor, there is another choice. First, from the Library panel place a set of <script></script> tags into the code box and then drag it to the end of the DOM tree in the Page View or Tree panel. Now with the new script element selected, click on the code icon at the top of the panels view.
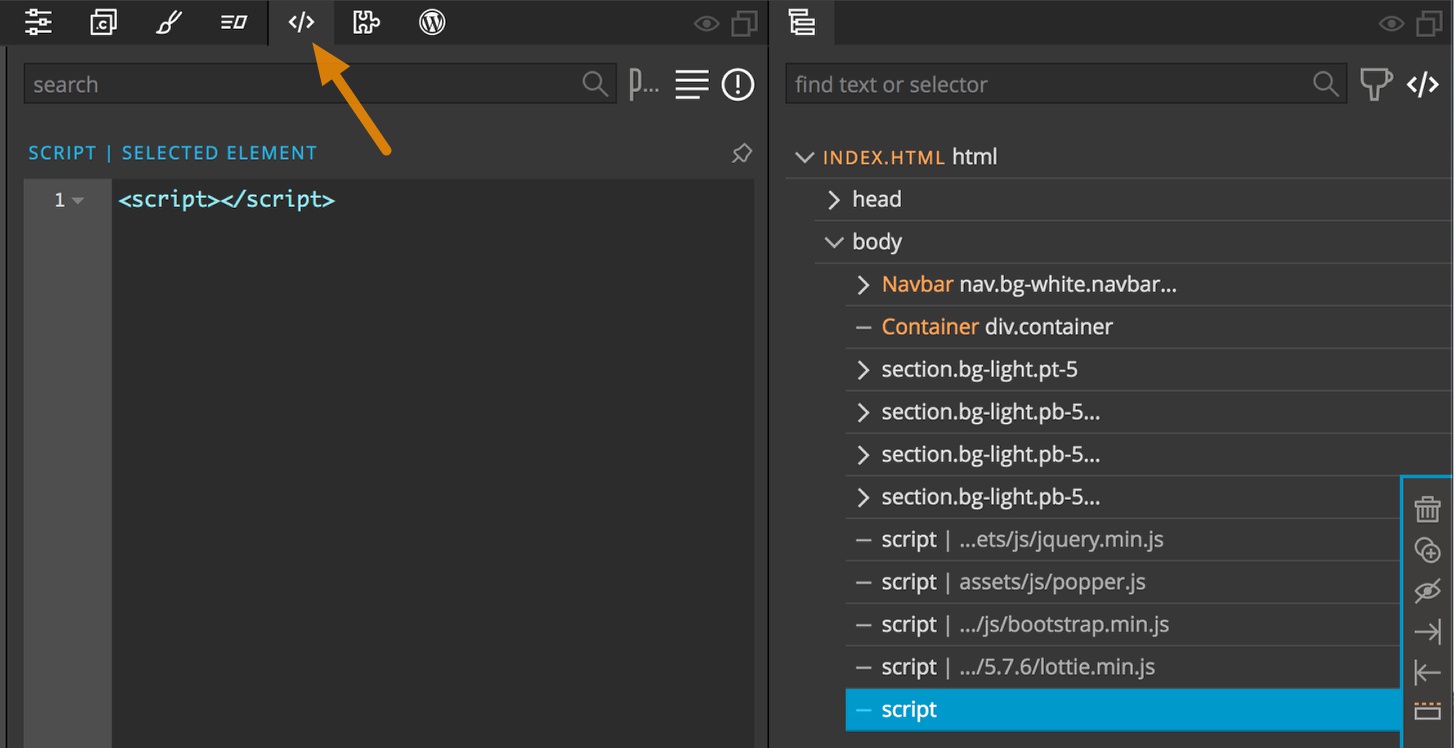
This provides a larger space to type than the insert code box without the HTML of all the other elements to distract.
To insert our animation, enter the following code:
lottie.loadAnimation({
    container: document.getElementById('lottie-one'),
    renderer: 'svg',
    loop: true,
    autoplay: true,
    path: './assets/Lottie/cow.json'
});
Let’s look at what this little script is doing line-by-line. lottie.loadAnimation
This line is calling the Lottie library function to load in our animation. If we are going to do further manipulation of the animation by JavaScript elsewhere on our page, we could also assign this function to a variable by adding var animation = ... before this.
container: document.getElementById('lottie-one'),
This line assigns the location where we want the animation displayed. In this case, I’m passing in the id of the div that held our image previously, ‘lottie-one’. Make sure to change this if you used a different id.
renderer: 'svg',
This tells the library that we want our animation placed on the page as an SVG element. It could also be a ‘canvas’ element.
loop: true,
This will keep the animation playing endlessly. If set to ‘false’ it will only play the animation once. You can also set it to a number to have the animation loop a specific number of times.
autoplay: true,
This line will cause the animation to play automatically, otherwise it has to be started programmatically, for example from a button click event.
path: './assets/Lottie/cow.json'
This line gives the relative location of the Lottie file in your project. Again, in my case, I have a folder named ‘assets’ in the same directory as my HTML page. Within this folder I have another folder for all my animations, named ‘Lottie’.
Adding additional animations
To place additional animation files on our page, we just have to follow the same steps of downloading a JSON file to our project, giving an id to a section where we want the animation displayed, and then placing the same script with appropriate changes onto the page.
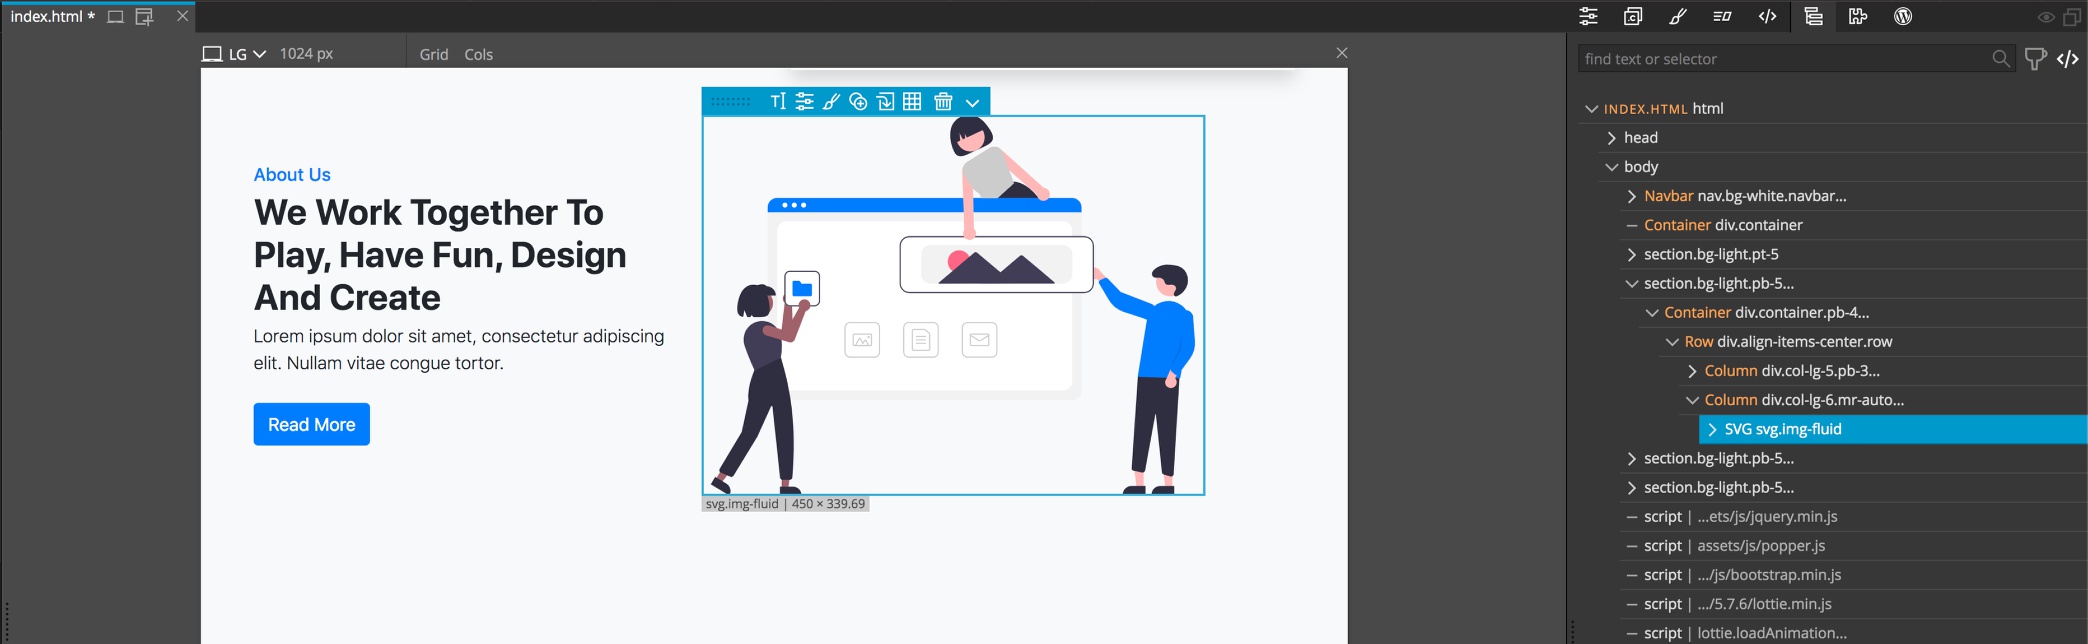
In the next section down we will select and delete the SVG image and then give an id of ‘lottie-two’ to the column. Again, to accomplish this, select the container from the Page View or the Tree panel and open the Properties panel.

This time, since we already have one script on the page, we will just duplicate it and then make our changes. With the script selected in the Tree panel, click on the duplicate icon.
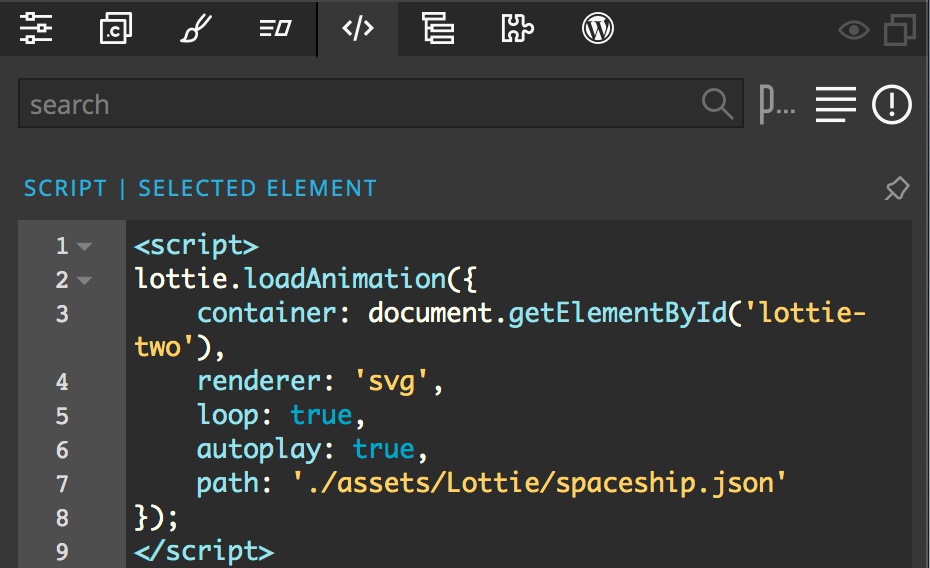
Open the script code by clicking the code icon at the top and then change the container to point to ‘lottie-two’ and the path to indicate our selected animation.
Adding Interactions
Scroll Scene animation
So far, we have just added autoplay to our script to have our animation play. We can also use Pinegrow Interactions to make the animations interactive. Let’s start by making the top animation play on scroll. The first step will be to edit our script to turn autoplay off.
Select the script in the Tree panel and click on the code icon to open the Code panel. Then change the value for autoplay to false. Make sure not to delete the comma.
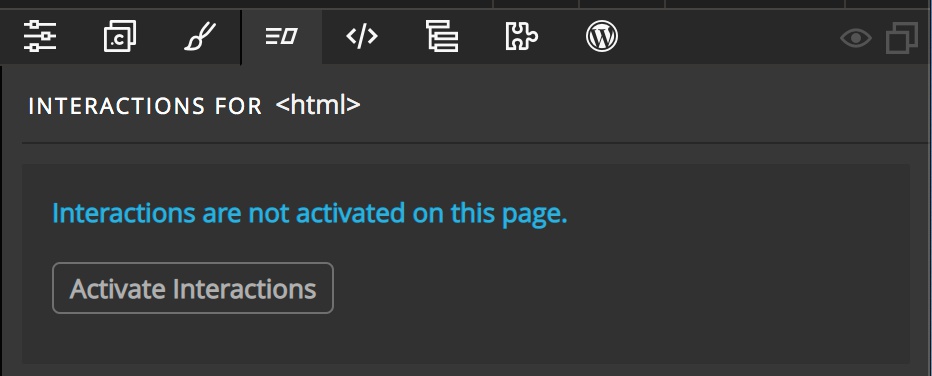
 Second, add interactions to the page by clicking on the HTML element in the DOM tree within the Tree panel. Then click on the interactions icon and activate interactions by clicking on the button.
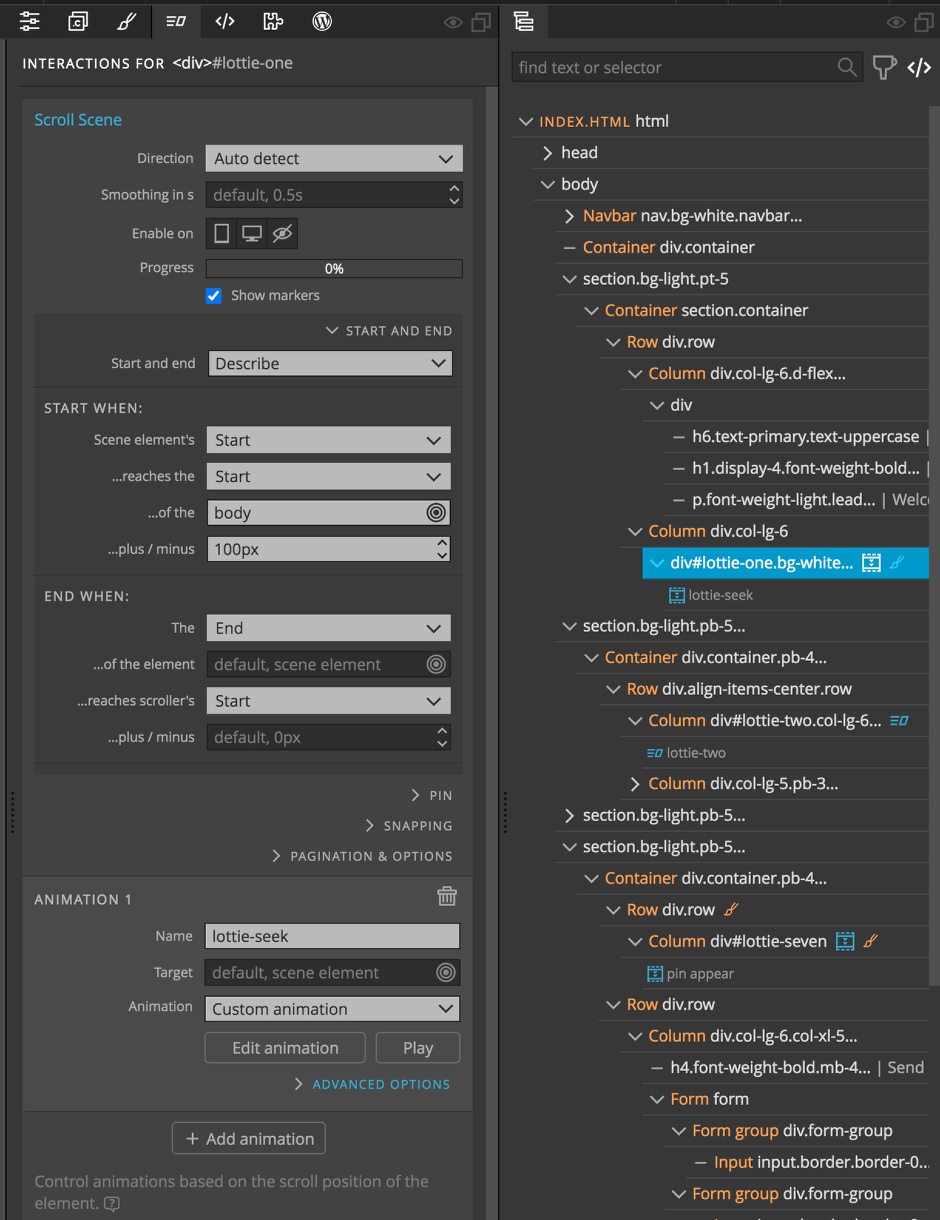
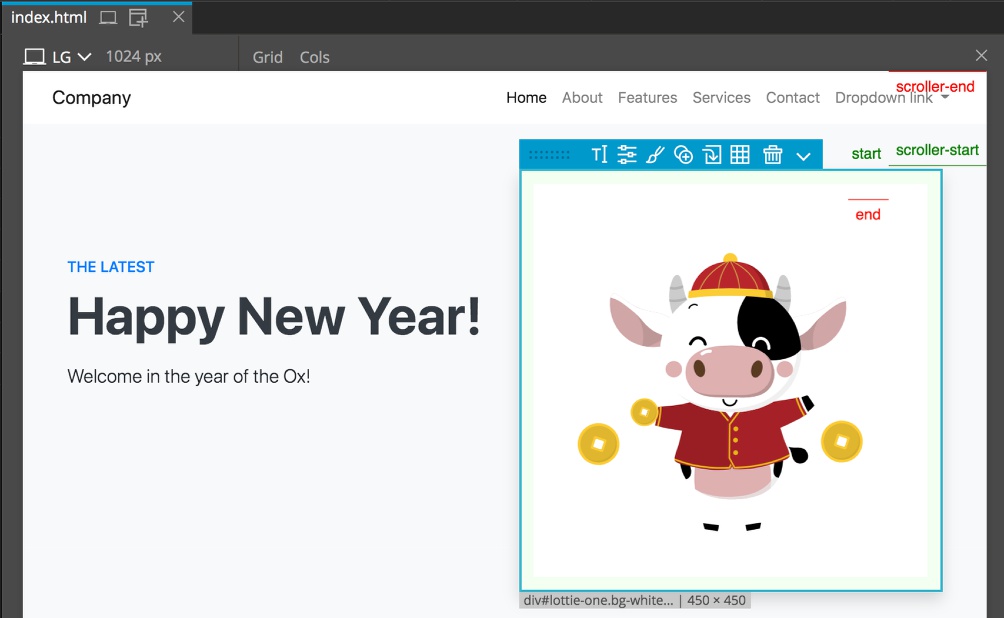
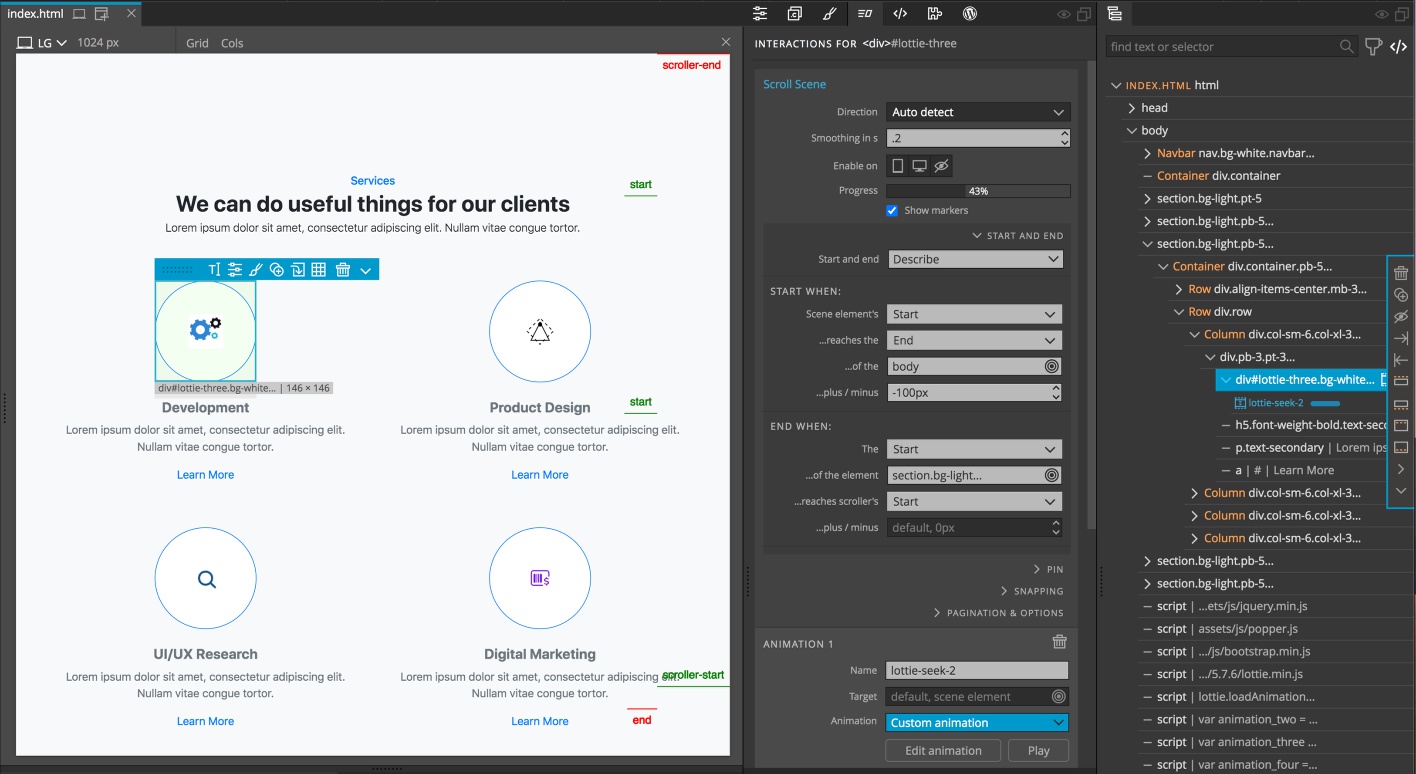
Third, select the div with the id of ‘lottie-one’ from the Page View or Tree panel. Then from the Interactions panel select ‘Scroll Scene’. We will add custom start and end points to make the animation start as soon as the view is scrolled. Click on the “START AND END” dropdown and the select “Describe”. For the start select when the screen element’s “Start” reaches the “Start” of the body plus/minus “100px”. To designate the body you need to proceed it with a ‘$’. Note: if the selector remains orange after you move focus to another input, it means that your selector is invalid. Adding the 100px will bring the scroller-start down almost to the top of the div so the animation starts as soon as the user scrolls.
For the end, choose the “End”, leave the target blank, and select the scroller’s “Start”. This will cause the animation to play until the div exits the body of the page.
If we turn on the “Show markers” near the top of the Scroll Scene input box we can see we have a problem. The “scroller-start” and “scroller-end” markers are where we want them, but the “end” animation marker is just below the “start”, not at the end of the Lottie animation. This is because the Lottie animation is loaded dynamically and the Interaction script is finding the size before the animation loads into the div. To fix this, we need to give the div a fixed height that is the size of the animation we are loading. As we can see, Pinegrow shows that the image div is 450px x 450px. So, we just need to add an inline style height of 450px to the div. Now if we refresh the page by clicking the icon at the top, or typing either CTRL + R or CMD + R, We can see the “end” marker is in the correct place.
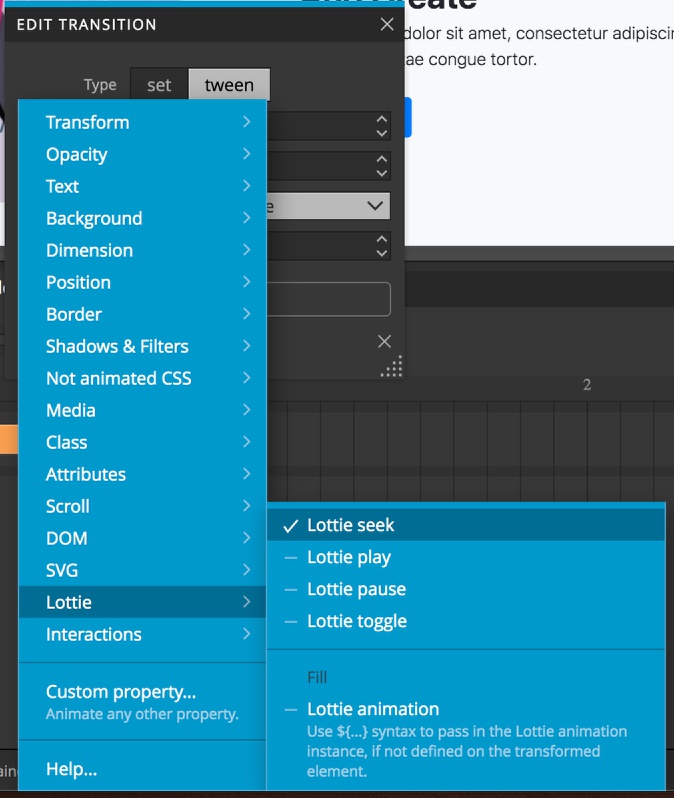
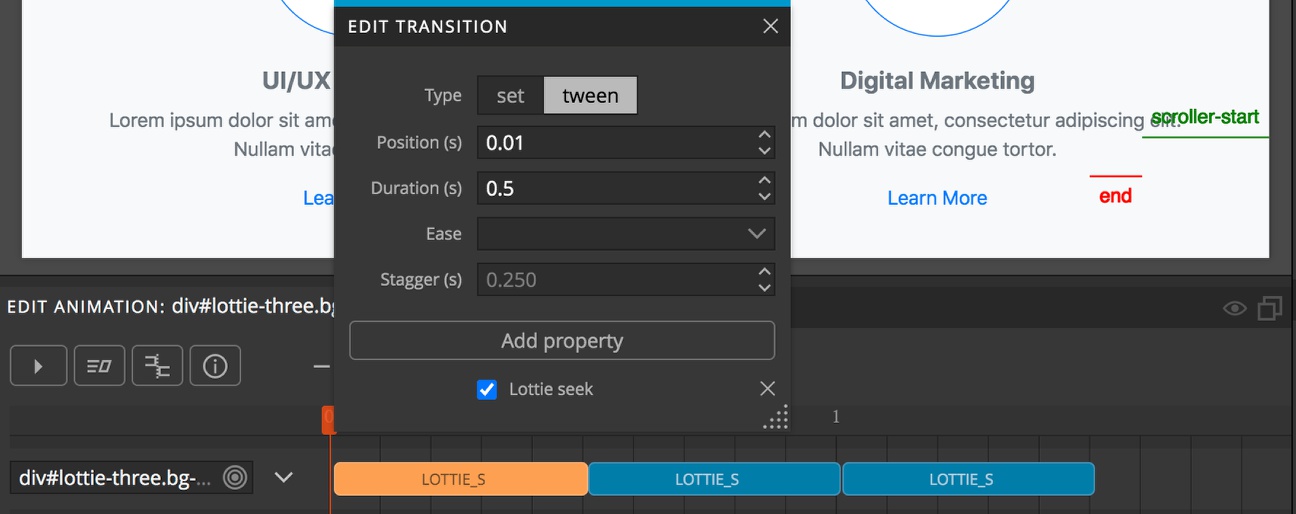
Going back to our interaction input, we need to add our animation. I chose to name mine “lottie-seek”, although this isn’t neccessary. Next,click on the “Edit animation” button. Click on the timeline to add a new transition. For “Type” it can be left as “tween”. Position should be “0” and duration can be any number since the animation will be controlled by the scroll – I used “1”. For “Ease” select “Linear.easeNone”. You can experiment with the different easing properties. Some work well with different animations. Finally, click the “Add property” button and select “Lottie” -> “Seek”. Now if we scroll the page we can see our animation. Pinegrow automatically makes the entirety of the animation run from the scroller-start to the scroller-end. If you want the animation to play more than once, just duplicate the transition on the same timeline.
Mouse Tracking animation
Adding other types of interactions follows the same steps as for the scroll scene. First, edit the script to turn autoplay off. Then, select the container for the animation and add the interaction.
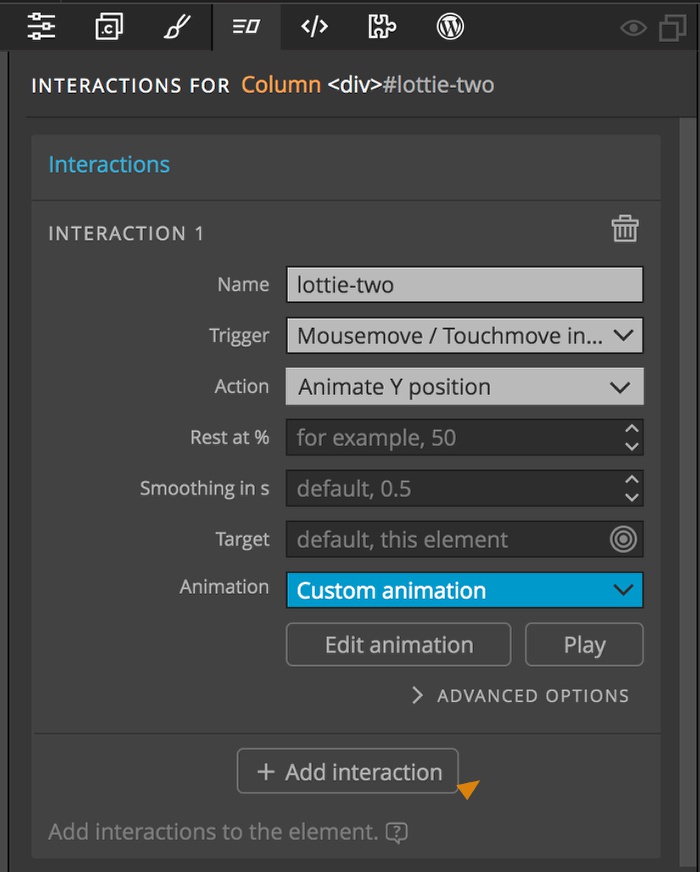
For our second animation, we will have it play when the user moves the mouse over it. After editing the script, select the div with an id of ‘lottie-two’. Add an interaction and give it a name – I used “lottie-two”. For trigger, select “Mouse & Touch” -> “Mousemove/Touchmove”. For action I’m going to select “Animate Y position”. This will cause the Lottie animation to play forwards as the mouse move down the image and backwards as it moves up. You could also choose to animate based on the left-to-right movement of the mouse, or distance from the center. Remember, that you can also target the entire container that the Lottie animation is within to make the area responsive to mouse movements larger. We can leave the rest of the boxes empty and then click on the “Edit animation” button. The timeline will be set-up just as we did for the first.
Click on the timeline to add a new transition. Leave the type as “tween”. Add a position of 0 and any duration – this won’t have an impact on the animation since it will be controlled by the mouse. Finally, click on “Add property” and select “Lottie” -> “Lottie seek”. Again, Pinegrow interactions will tailor the animation speed and duration to the full height of the div. If you want the animation to play multiple times you can add another transition to the timeline.
Apply to many
As with other interactions, “Apply to many” can also be used to trigger Lottie animations. In this case, I have replaced the icons in a service section with Lottie animations. I downloaded the files, added unique ids to each section, and then added four scripts to place the Lottie animations. The interaction can then be added to the first of the section. In this case, a scroll scene interaction will be added to the first of these sections.
We will set this interaction to start running when the first element enters the scene. With the first element selected, select “Scroll Scene” from the list of interactions. Next, open the “Start and end” dropdown and select “Describe”. For Start select the scene element’s “Start” when it reaches the “End” of the body, plus/minus “-100px”. This offset will take the heading of this section into account and start the animation when the elements are in view. For the body selector, make sure to prefix it with a ‘$’.
Set the end to the “Start” of the next section by selecting it on the page and picking for the end to be placed at the scroller’s “Start”. This will cause the animation to stop when it exits the page view.
Next, name the animation if desired and then click on the edit animation button. This will cause the timeline to appear. Click to add a new transition. Keep the type as “tween”. Set the position to 0 and the duration to any value since the timing will be governed by the page scroll. Next, add a property and select “Lottie” -> “Lottie seek”. I felt that the animation was playing through too slowly, so I right-clicked on the transition and selected “copy”. Next I hovered at the end of the existing transition, right-clicked again, and then selected “Paste here” twice to run the animation through three times.

Finally, back in the Interactions panel we will click on the “Apply To Many” action. For the target we will use the ids of each additional div containing our animation. To do this, click on the Target input and then select “Edit Selector”. Next type $#lottie-four, #lottie-five, #lottie-six. If you gave the sections different ids, change this accordingly. Now if you refresh and scroll the page you should see all four animations.
Animate on click
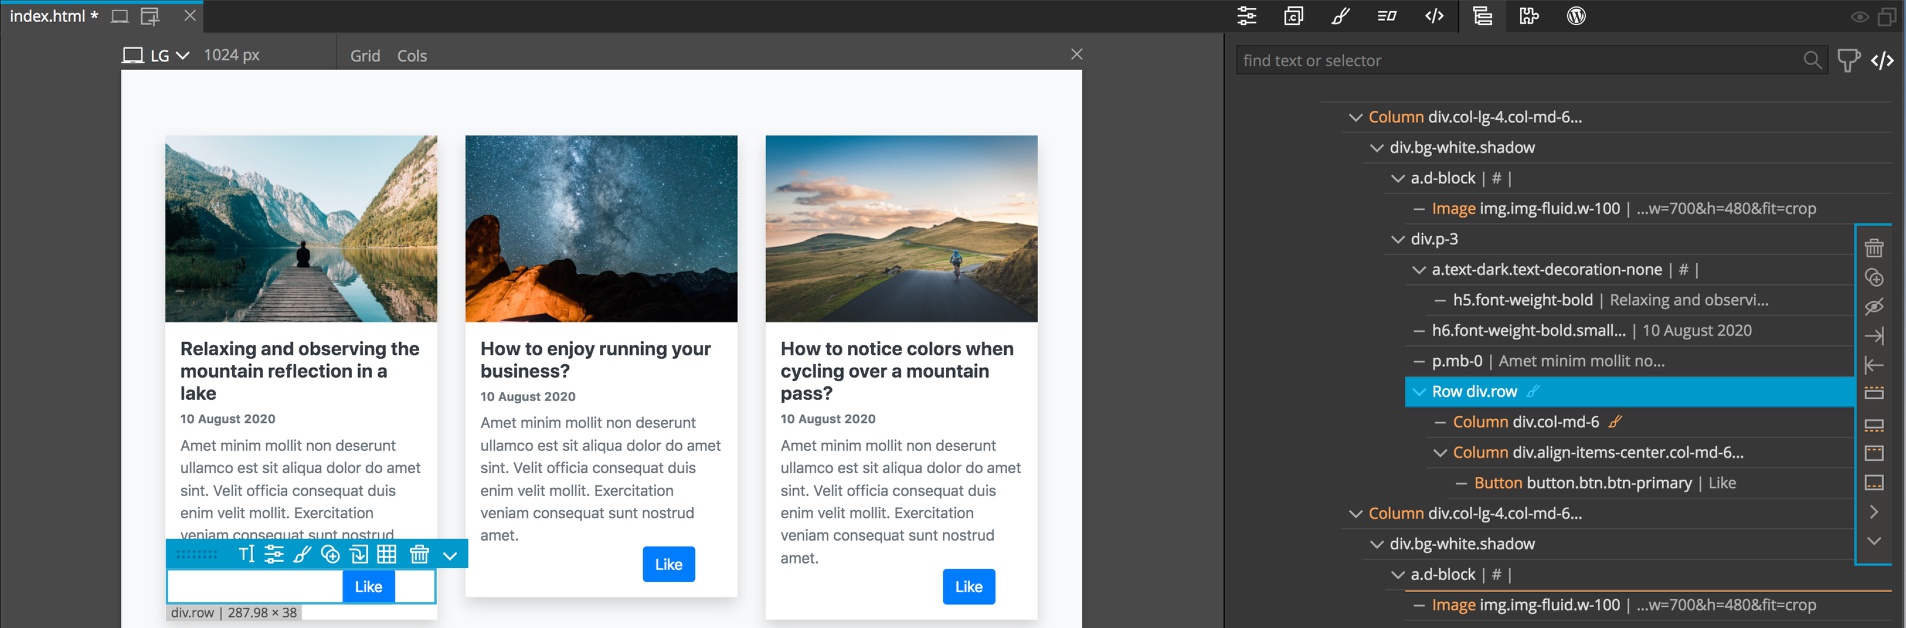
For a final animation, we will use interactions to run a Lottie animation when the user clicks a button. In this case, I’ve downloaded a heart animation that I want to run when someone clicks the like button on a blog post. First, we will add a row to the bottom of each blog post and split it into two columns – one for the animation, and one for the button. In the second column we will add the ‘Like’ button. I’m also going to add a fixed height as inline style to the first section to constrain the size of our animation.
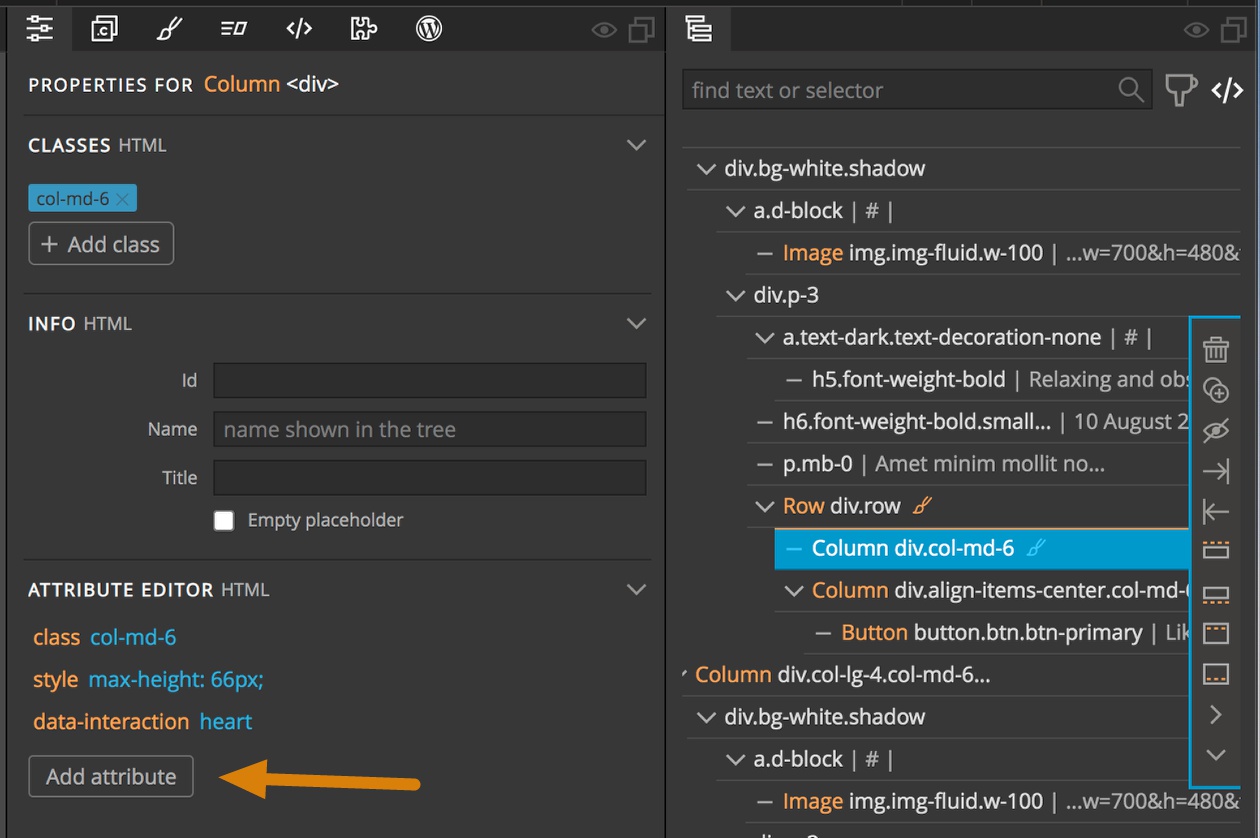
In order to load the animation, each animation section will get an attribute, ‘data-interaction’, set to ‘heart’. With the first section selected in either the Tree panel or Page View, open the Properties panel, click the “Add attribute” button. Repeat this step for the additional blog posts.
<script>
let heartAnimation = document.querySelectorAll('[data-interaction="heart"]');
heartAnimation.forEach((element) => {
    lottie.loadAnimation({
        container: element,
        renderer: 'svg',
        loop: true,
        autoplay: false,
        path: 'assets/Lottie/heart.json'
    });
});
</script>
The script for this Lottie animation is a little different from the others since we are loading the same animation into multiple areas.
let heartAnimation = document.querySelectorAll('[data-interaction="heart"]');
On the first line we define a variable and populate it with an array of all the elements with our attribute.
heartAnimation.forEach((element) => {...});
Next, we enclose our standard Lottie animation script within a forEach loop and pass in each of the page sections.
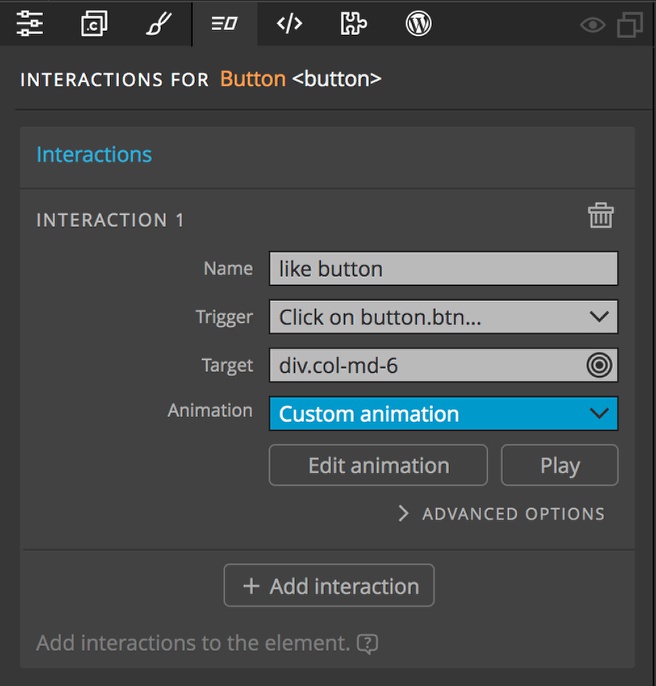
Now with the animation loaded, we need to add the interaction to our button. WIth the first button selected in the Tree panel or Page View, click on the Interactions panel and add a new interaction. You can name it if you would like – I named mine “like button”. For trigger, select “Click on”. For Target, click “Select on the page…”and then click on the section with our animation. Now if you now look at the Target selector you should see that it is too specific for using in the “Apply to many” interaction. If we used this as the target selector it would always select the animation in the first card, no matter which button was clicked. Instead, we will edit the selector to instead target first the parent row of the button that was clicked and then the first div containing the animation by changing the selector to ^.row | div:nth-of-type(1).
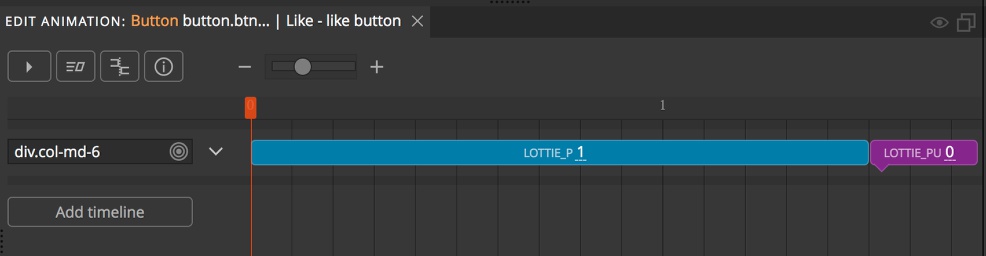
Click on the empty space to add a new transition.For “Type” leave it as “tween”. For “Position” set it to 0 and for “duration” select how long you would like for the animation to play for my animation I selected ‘1.5’. Next, click on the “Add property” button and select “Lottie” -> “Lottie Play”. We also have to stop the animation, so click directly after your first transition to create a new one. This time, change the “Type” to “set” and the “Property” to “Lottie” -> “Lottie pause”.
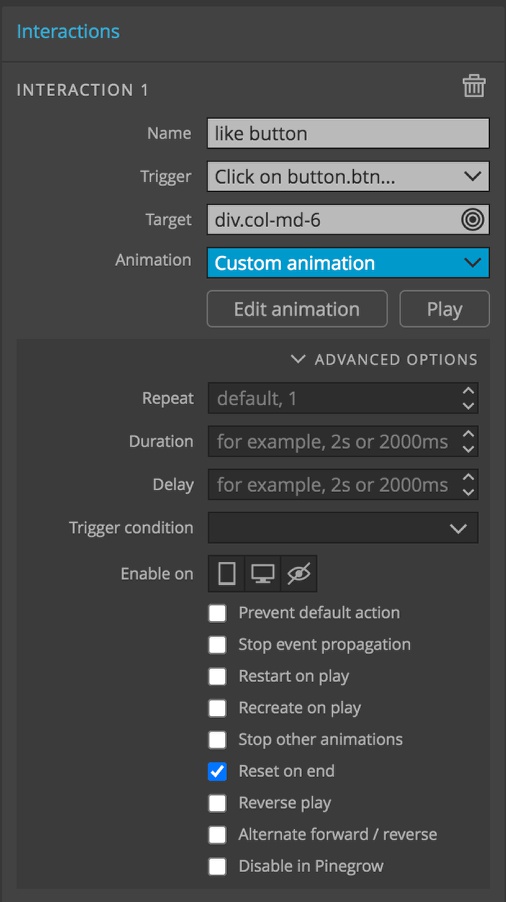
If we click the button, we will see the animation play for 1.5 seconds and then pause at some random point. To make the animation reset we need to do two things. First, set the ‘Lottie pause’ input at the bottom of the transition to 0. Otherwise, the animation won’t end. Next, under advanced options in the Interactions panel check the ‘Reset on end’ option. Now if we click on our like button (remember to hold down the alt key) we can see our heart animation run for 1.5 seconds and the reset back to the first frame.
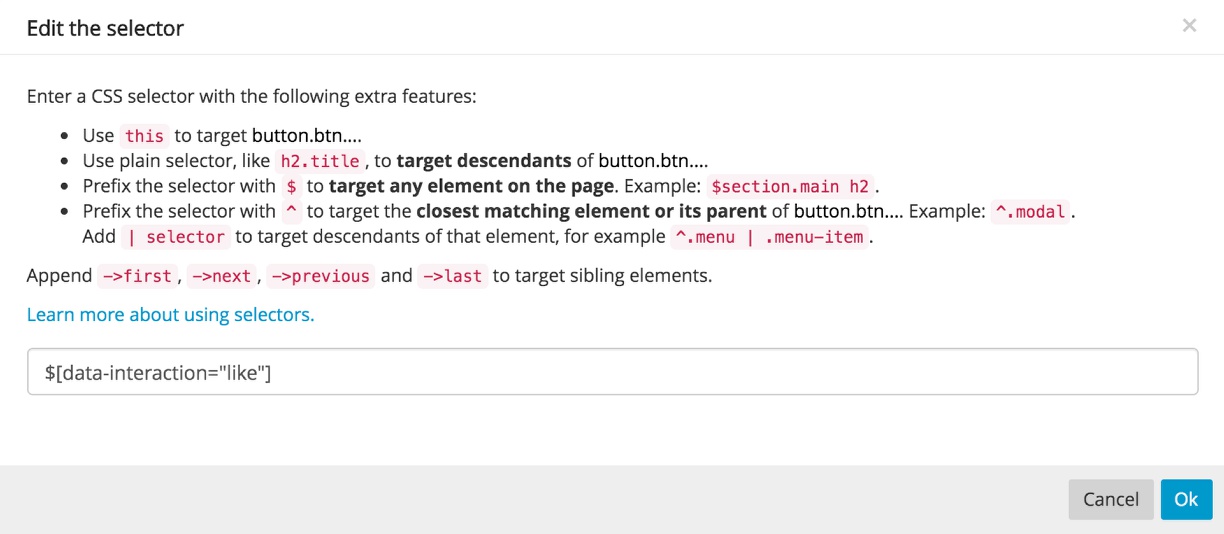
In order to add the interaction to the other button we will add an “Apply to Many” interaction. In order to select all of the other buttons, we will use the same technique we used for the animation and add an attribute. this time we will set the “data-interaction” element to “like”. Then for the target we will type in $[data-interaction="like"]. That’s it! All of our like buttons should now be functional.
On the final page, I also have a Lottie animation that appears and starts playing above the contact form. I’ll leave it up to you to add your own animation in with what you have learned through the tutorial.Hopefully this tutorial will help you start using Lottie animations when building pages with Pinegrow. While they take a little more effort than GIF or PNG, they consume much less bandwidth. Combined with Pinegrow Interactions they can really grab users attention.
Discuss this tutorial
Have questions or comments about this tutorial? Let’s talk about it on our forum.
Get in touch
Would you like to see your favorite theme or blocks library featured in the next tutorial? Let us know in the forum or by email!