Customizer Field displays customized texts and images, sets attributes, styles and more. Optionally, it also registers the customizer control.
WordPress customizer lets the user customize various elements of the theme by using the Customizer UI in the WordPress admin panel, for example section headings, background images and even global site styles.
Customizer Field action makes it very easy to create such editable areas.
We add the Customizer Field action to the element we wish to customize. We can use multiple fields on the same element, for example using “button_link” field to set the link address and “button_label” field to set the link label.
This is similar to Post Field action. The difference is that Post Field works with information associated with individual posts while Customizer Field works with global information.
Creating Customizer controls
By default, Customizer Field action will use the fields and create their customizer controls.
We have to give the field a human-friendly label.
Grouping controls in sections
Section will tell WordPress in which Customizer section to display the control. Fields should be grouped together in a sensible way, for example all controls for the header element should be located in the “Header options” customizer section.
In case the section setting is empty, if any of the element’s parents has the Customizer section, the control will be added to that section.
If none of the parents defines a section, the control will be added to the default section that will be automatically – if needed – created by Pinegrow. That’s not the recommended way – we should always take care that the control is displayed in the appropriate section.
Field settings
For each field we have the following options:
Field id selects the field we want to use.
Using the field value
Next, with Edit setting we decide how we want to use the field value:
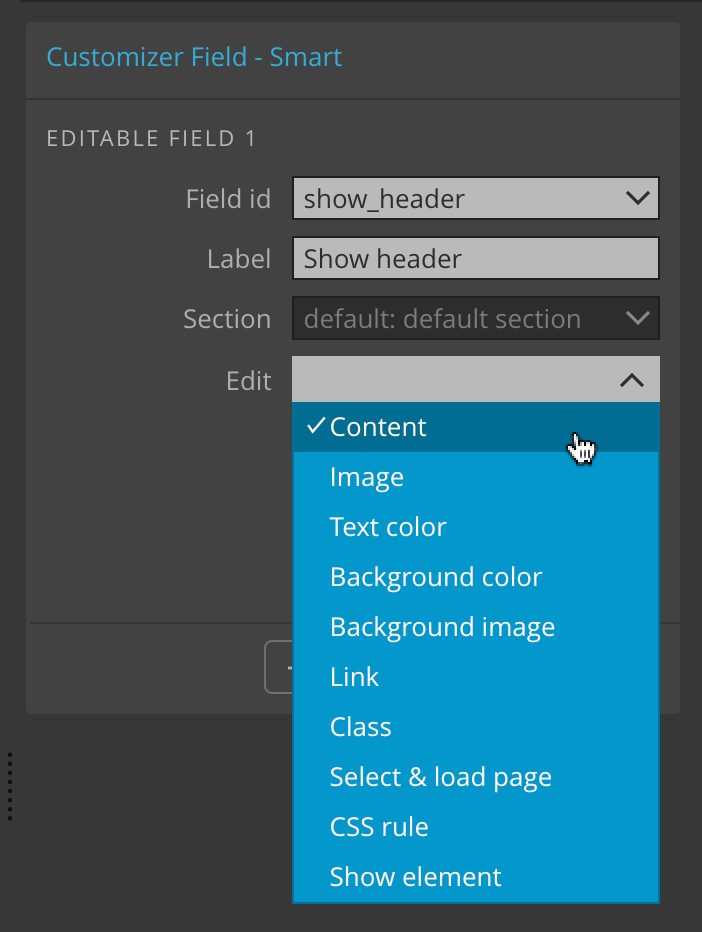
Edit can be one of:
- Content displays the field value in the content of the element.
- Image displays the image stored in the field on the element. <img> element is required.
- Text color sets the color of the text using inline style.
- Background color sets the color of the background, again with inline style.
- Background image shows the image as the background of the element, using inline style attribute. Note that we have to take care of the proper CSS styling (for example, setting background size, repeat and so on) to display the background image.
- Link will set the field value to the href attribute of the element. \<A> link element is required.
- Select & Load page creates the control for selecting one of the pages. The selected page is then loaded here using custom WP_Query and we can access its information using Post actions, for example Post content and so on.
- This is a powerful way of adding dynamic content to the page. We use pages as content blocks and then display them as needed.
- CSS rule will create a CSS rule in the header of the page. Note, that using this field only makes sense on a master page that actually exports its header.
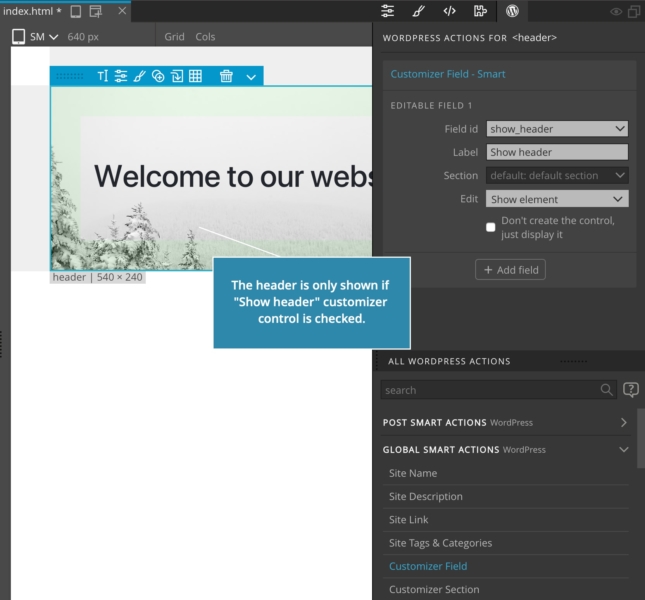
- Show element will show the element if the control value is set. A checkbox customizer control will be created. Requires PG 5.92 or TC 1.3
In case that the field we use is already registered elsewhere we check “Don’t create the control, just display it” checkbox.
By default, Customizer Field action will use and register a customizer control. Each customizer field can be used as often as needed, but it should be registered just once.
“Add if statement” will display the element only if the field value is set.
Examples
Let’s take a look at a couple of examples:
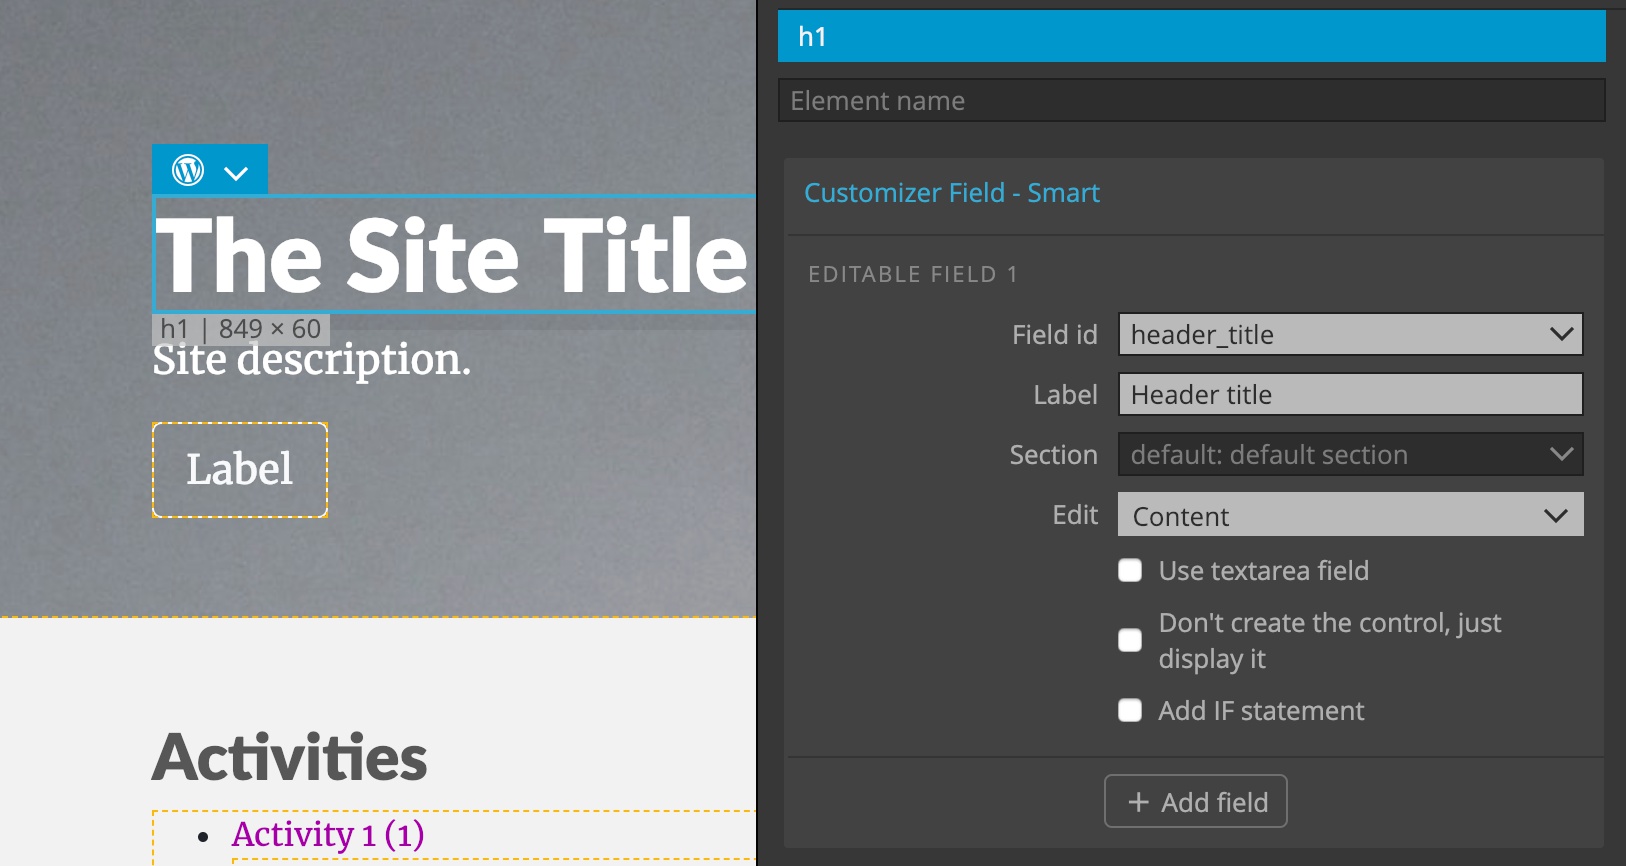
Site header
We’ll make the header text editable by adding Customizer Field action to it:
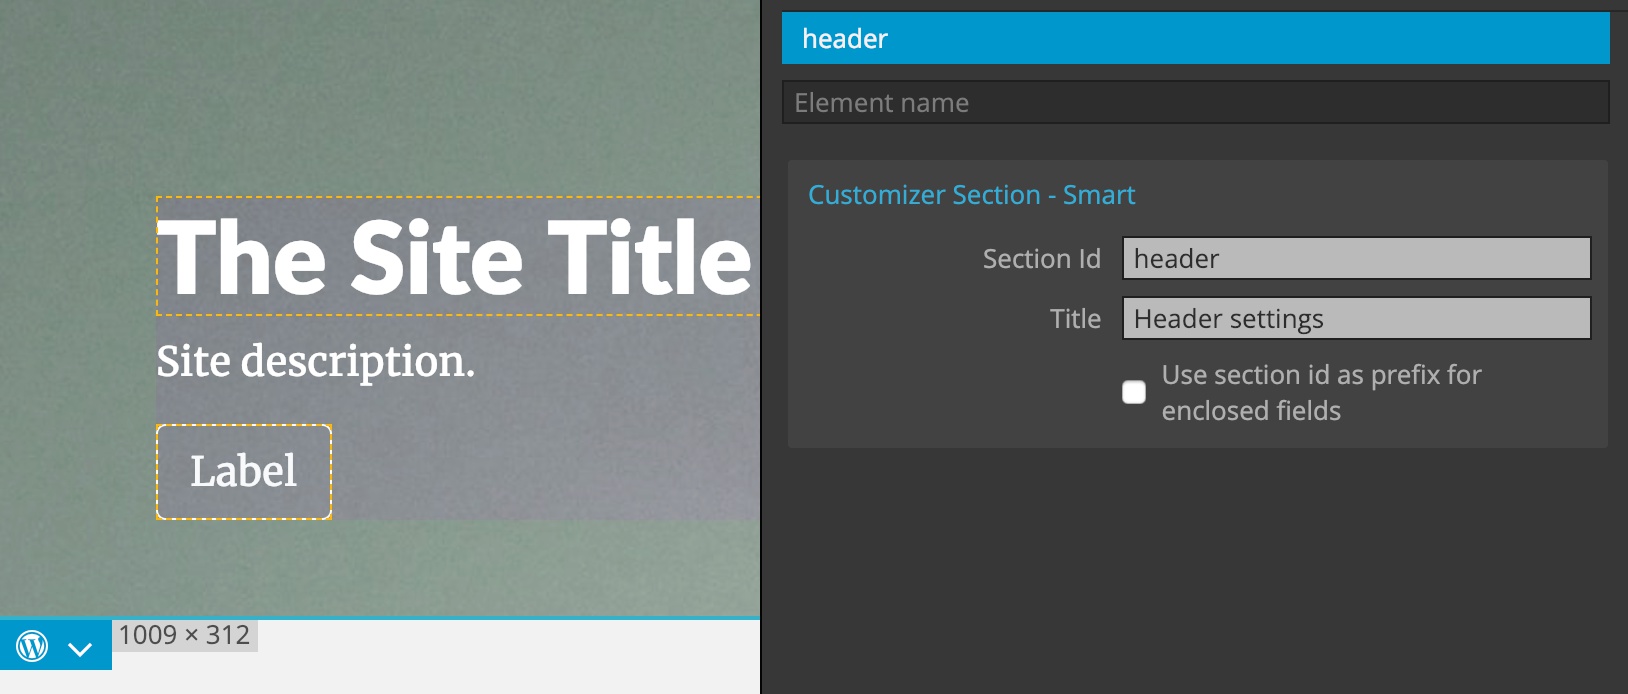
Also, we add Customizer Section action on the header itself, so that all Customizer fields in the header will be grouped together in the Customizer:
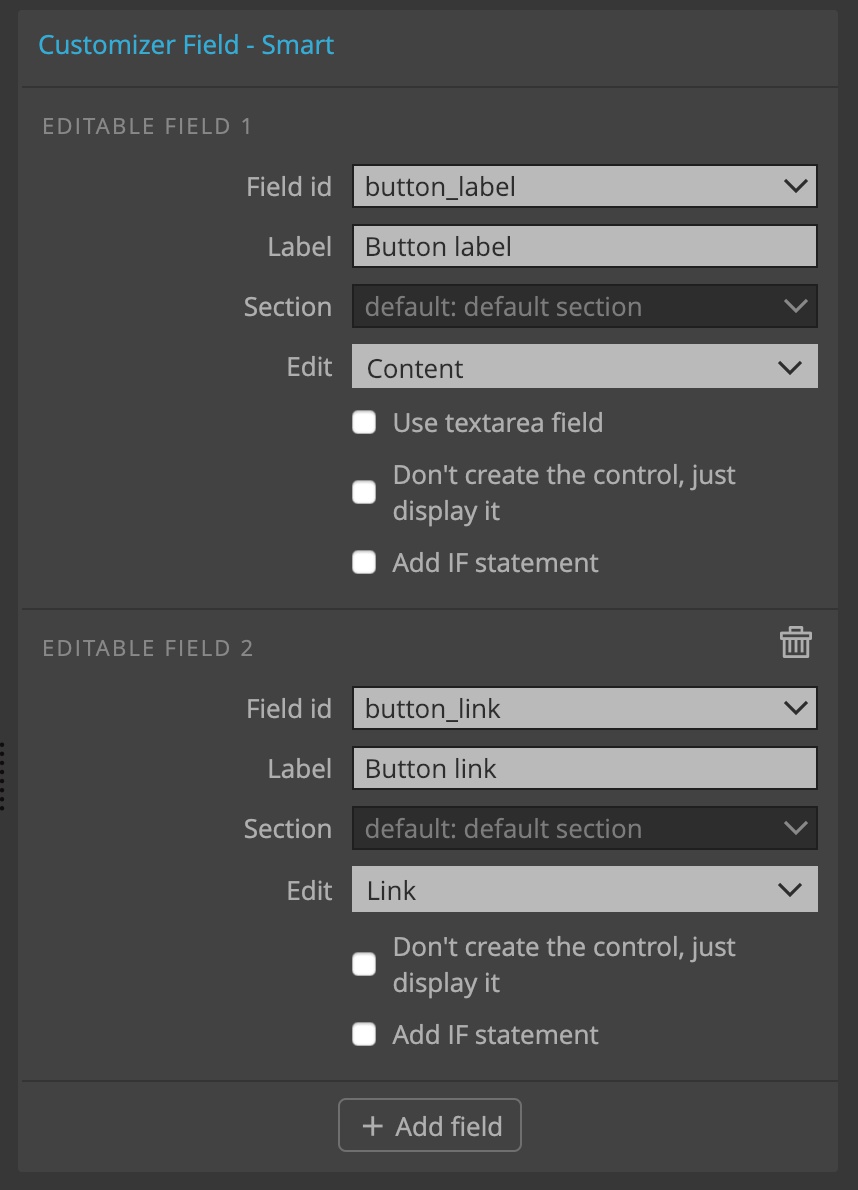
A simple button
Let’s do the similar for the button in the header.
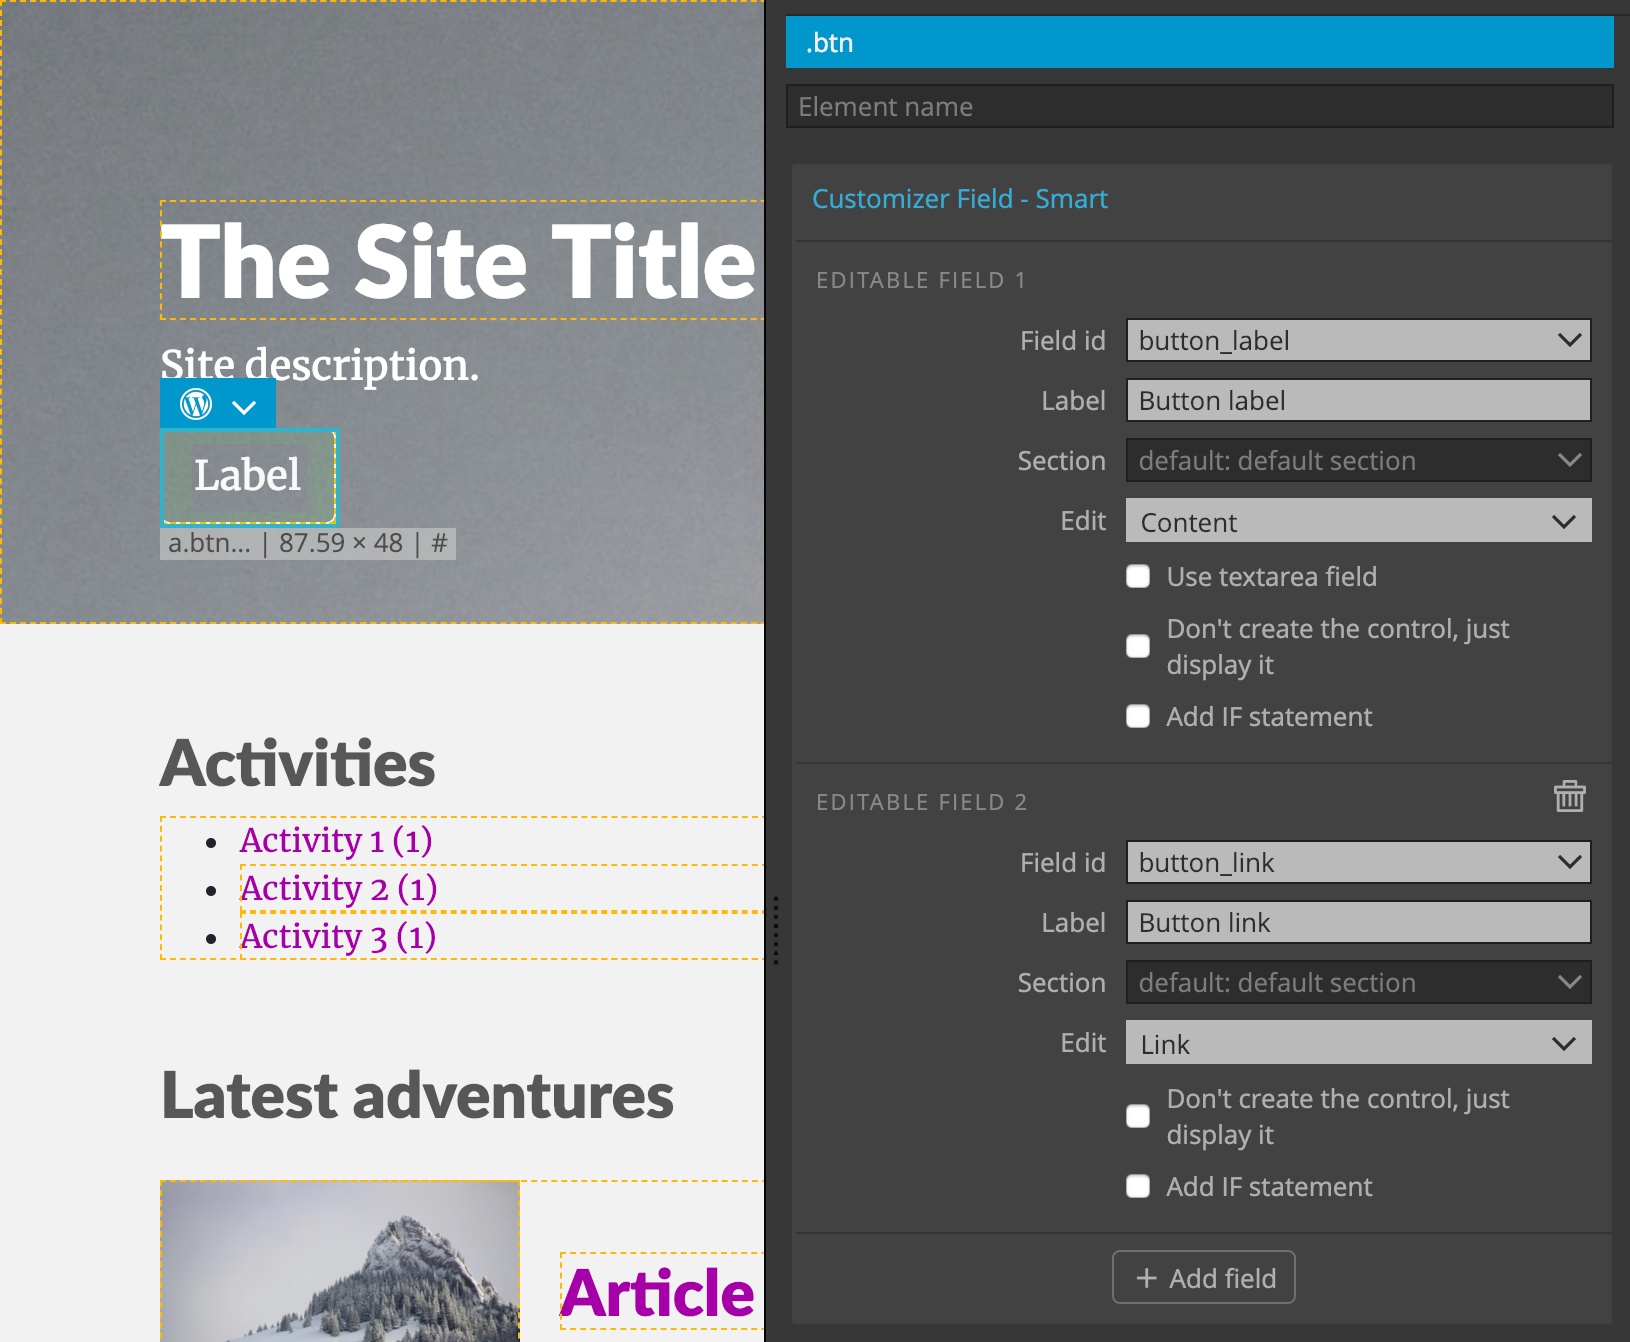
And we can now edit its label and link.
Background header image
And, to make the header background image editable, add Customizer Field on the header element:
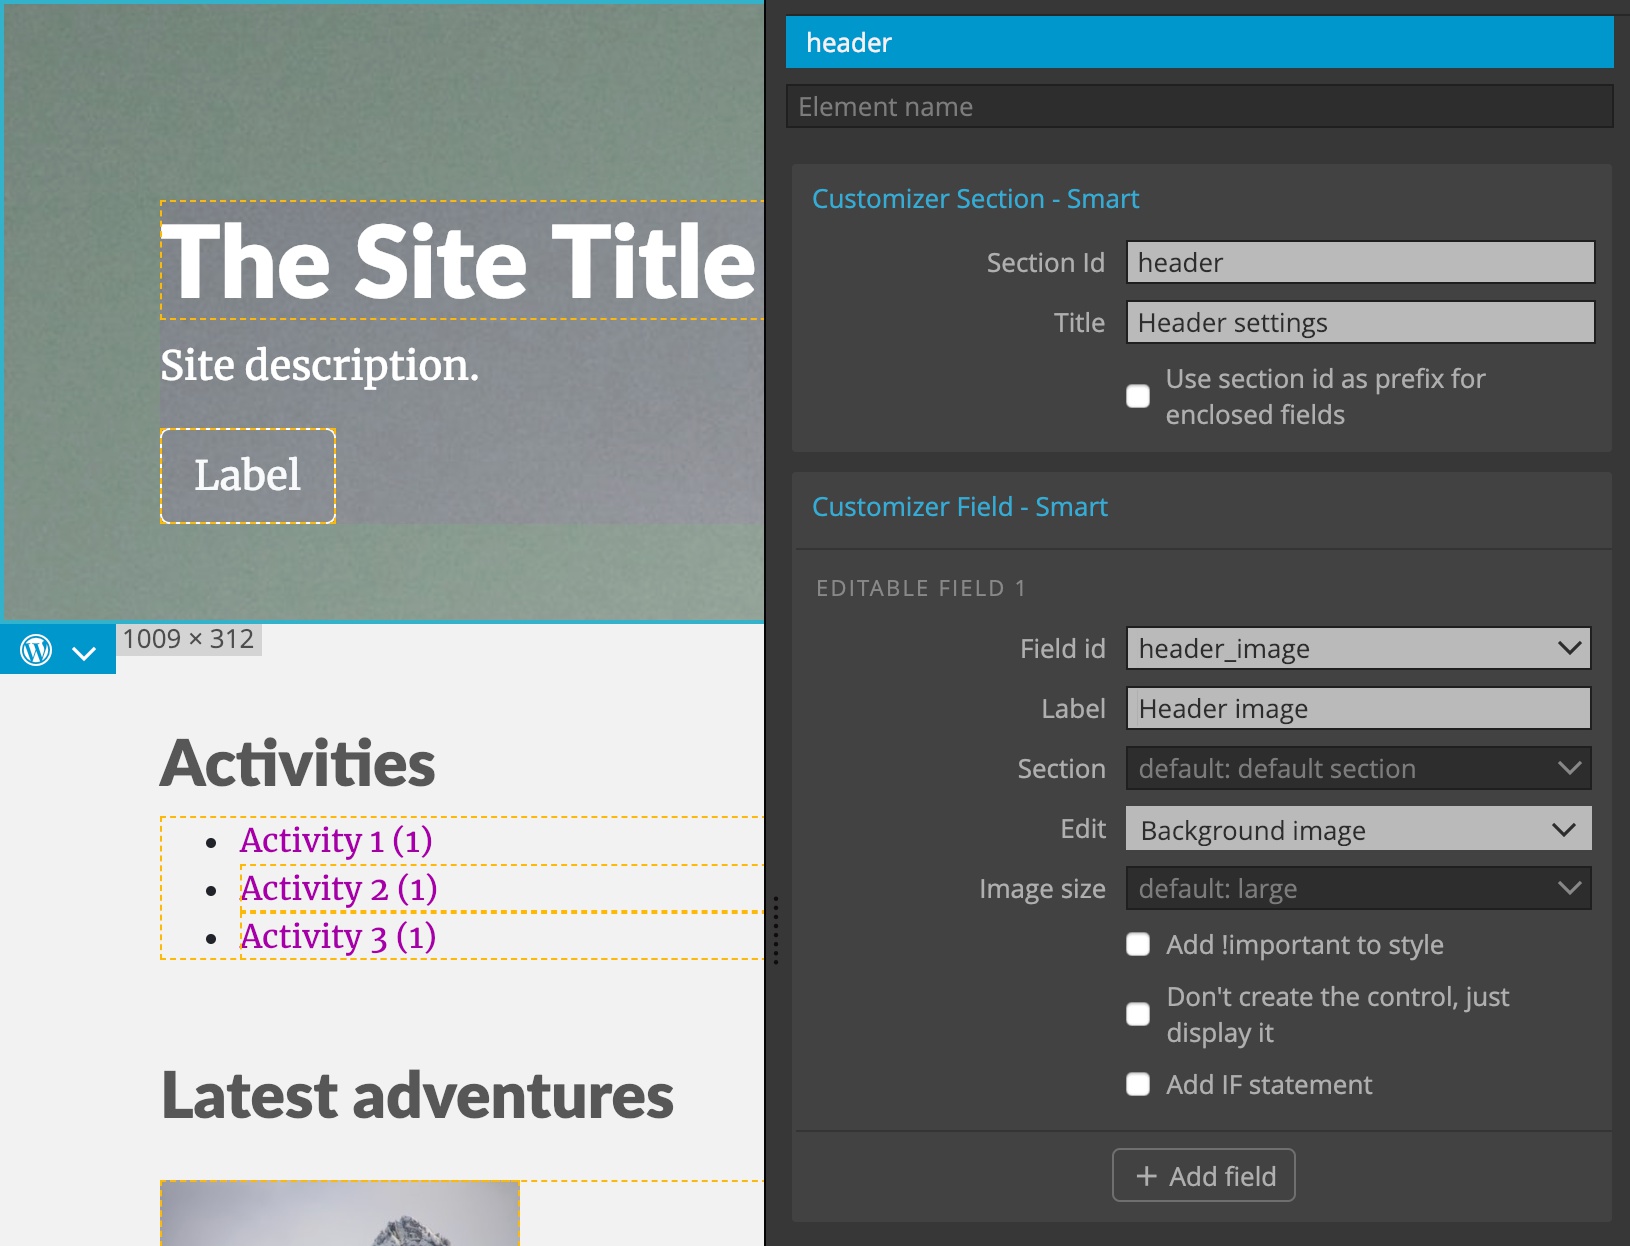
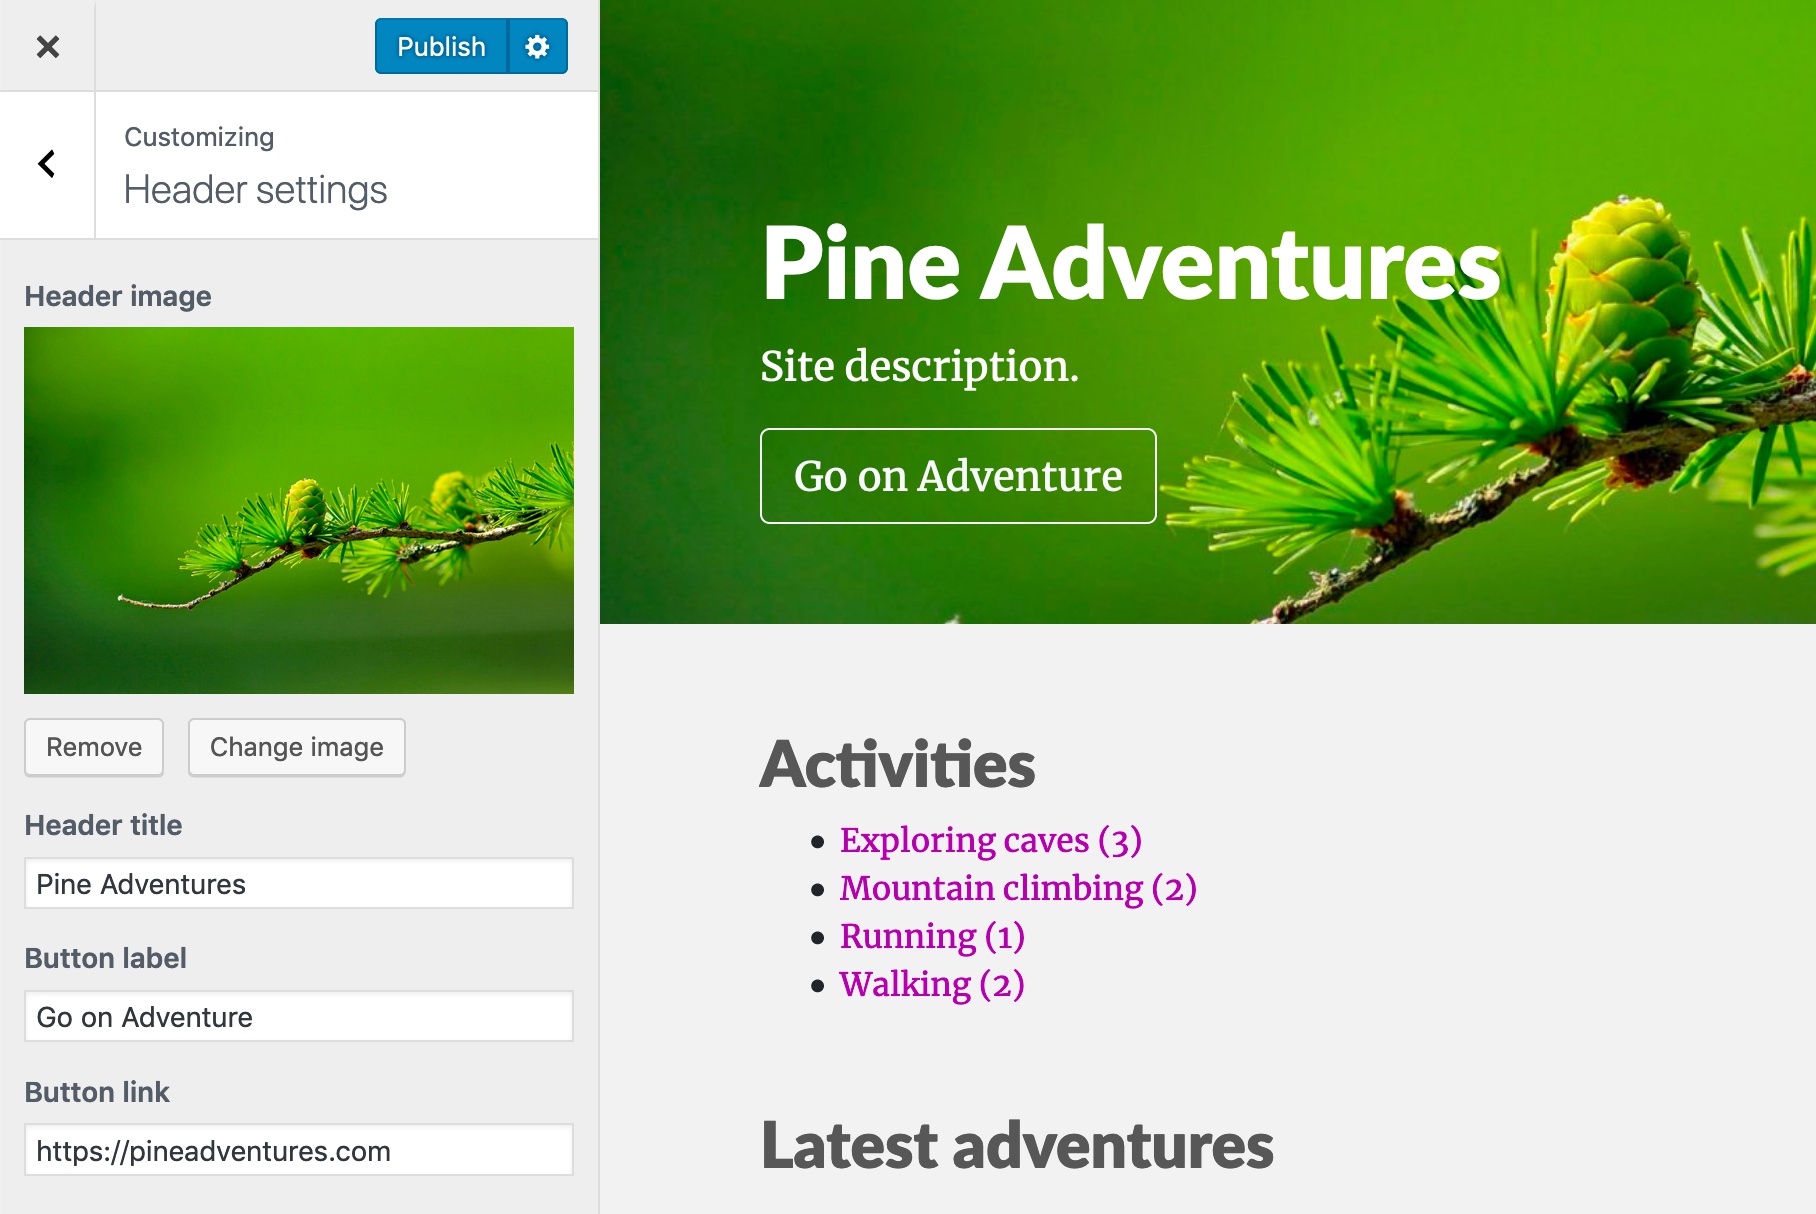
Now we can control the background image in the Customizer. Here, shown together with the rest of the header controls:
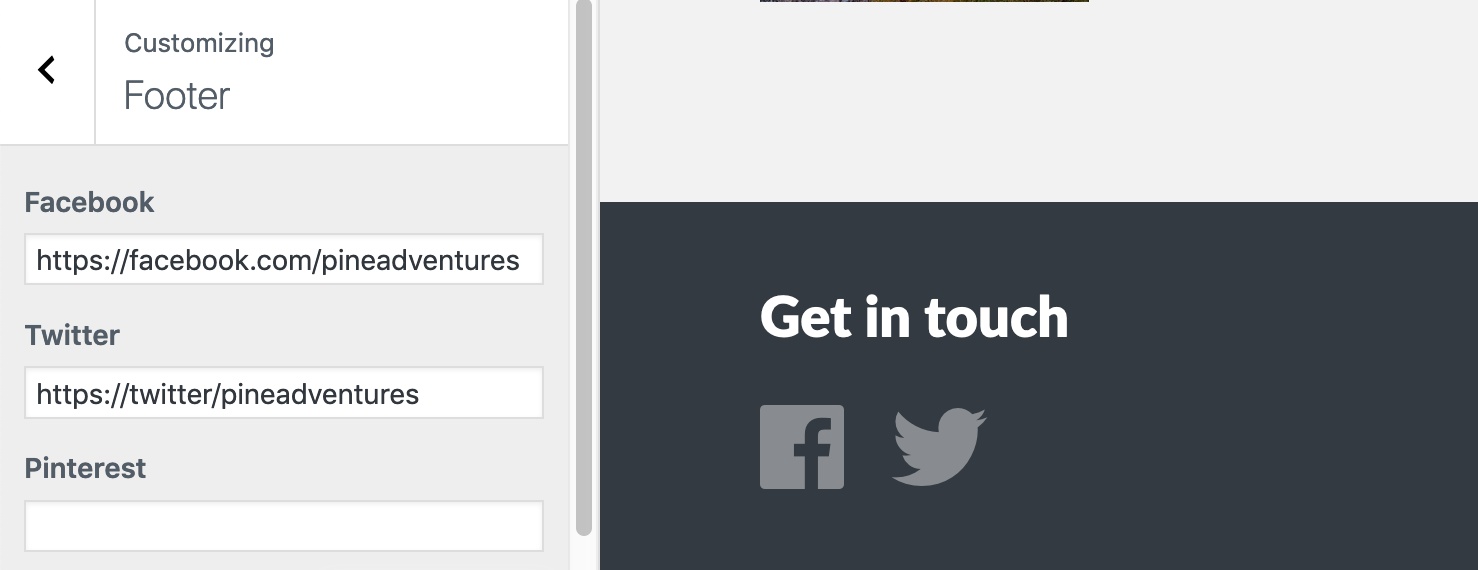
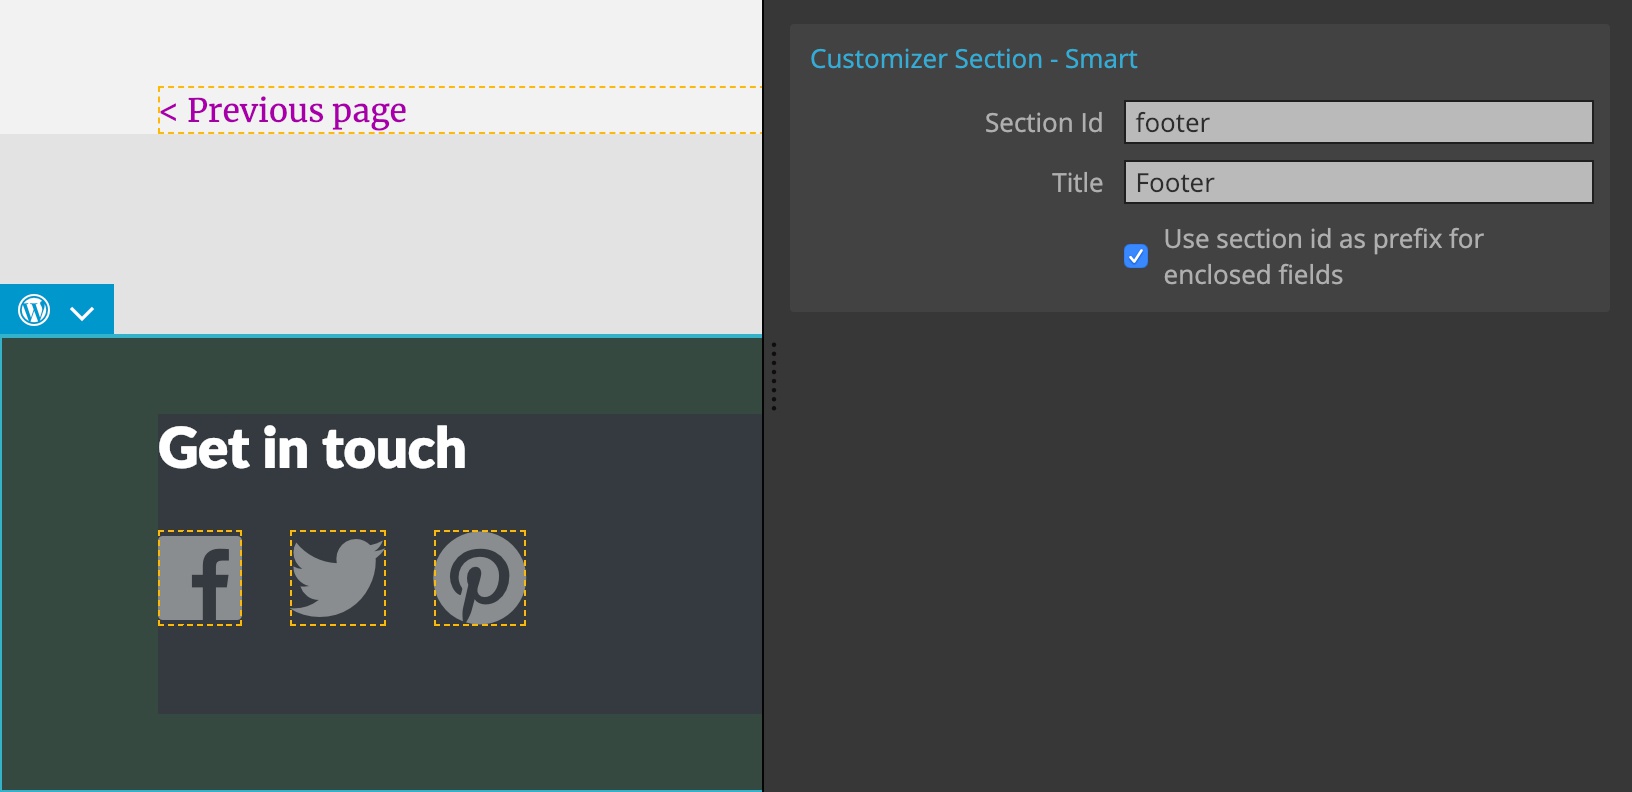
Social links
Let’s implement customizable social links in the footer:

The links have the following structure (each social link is an <a> element with its Font Awesome icon):

On the <footer> element we define the Customizer Section, so that all our fields are nicely grouped together. We also check “Use section id as prefix for enclosed fields” so that all Customizer fields on or within the <footer> will automatically get the “footer_” prefixed to their ids.
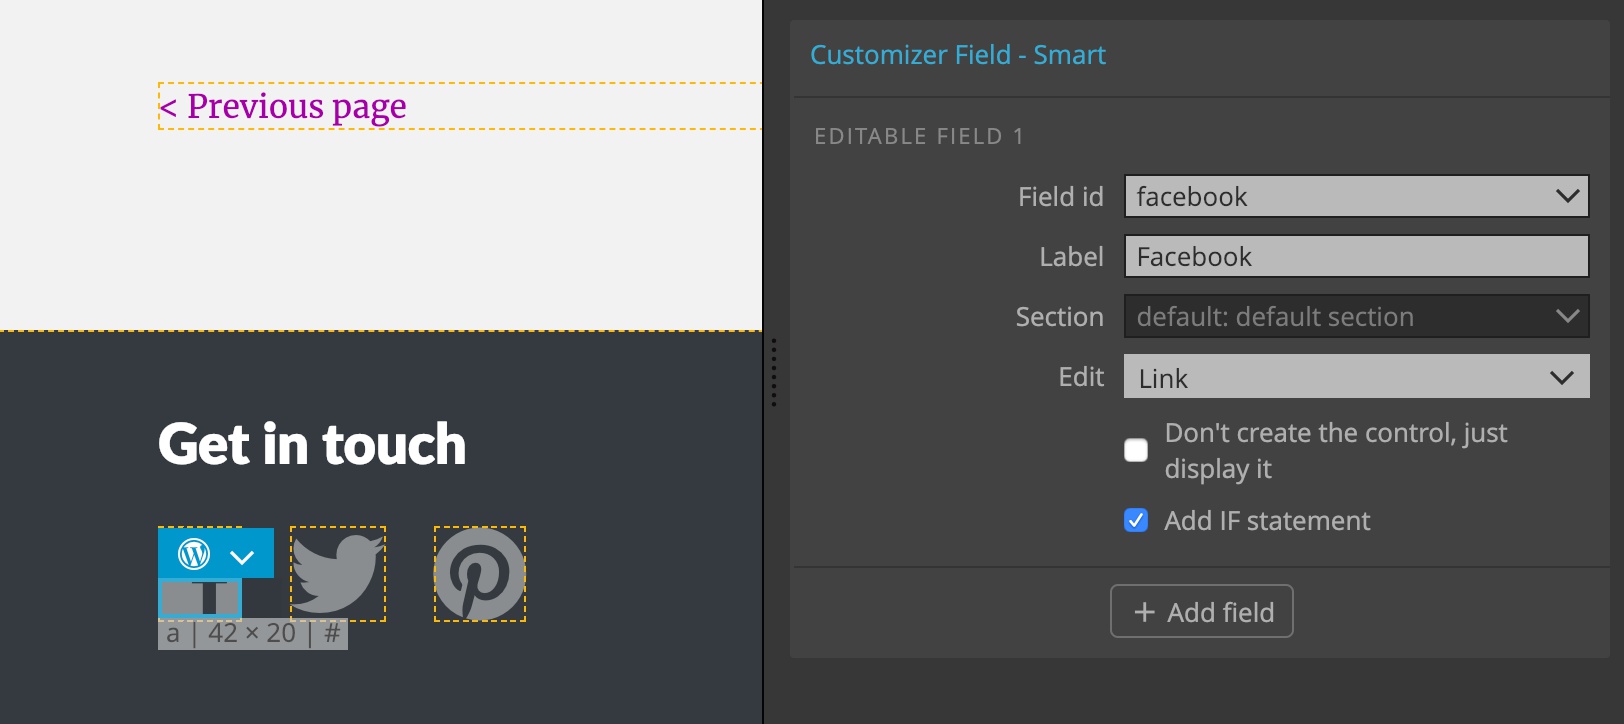
Next, we add Customizer Field action on each of the three social links – on <a> element, not on the icon.
When adding Customizer Field on a <a> link, Pinegrow will automatically show two fields, one for the link url and one for the link content. But in this case we don’t want to make the content editable, because that would overwrite the social icon. So, delete the second field and make sure that the “Edit” is set to “Link”.
Checking “Add IF statement” will display the social link only if the value is set. That’s great because some people don’t have accounts on all social networks.
Export the whole theme and that’s it! We have a set of editable social links that will only show up if the link value is set: